Icosahedron Ornament Balls Tutorial
This blog post contains Amazon affiliate links. As an Amazon Associate, I earn a small commission from qualifying purchases.
These icosahedron ornament balls are easy to create and will look fabulous hanging on your Christmas tree. These make a great Christmas craft project for students!
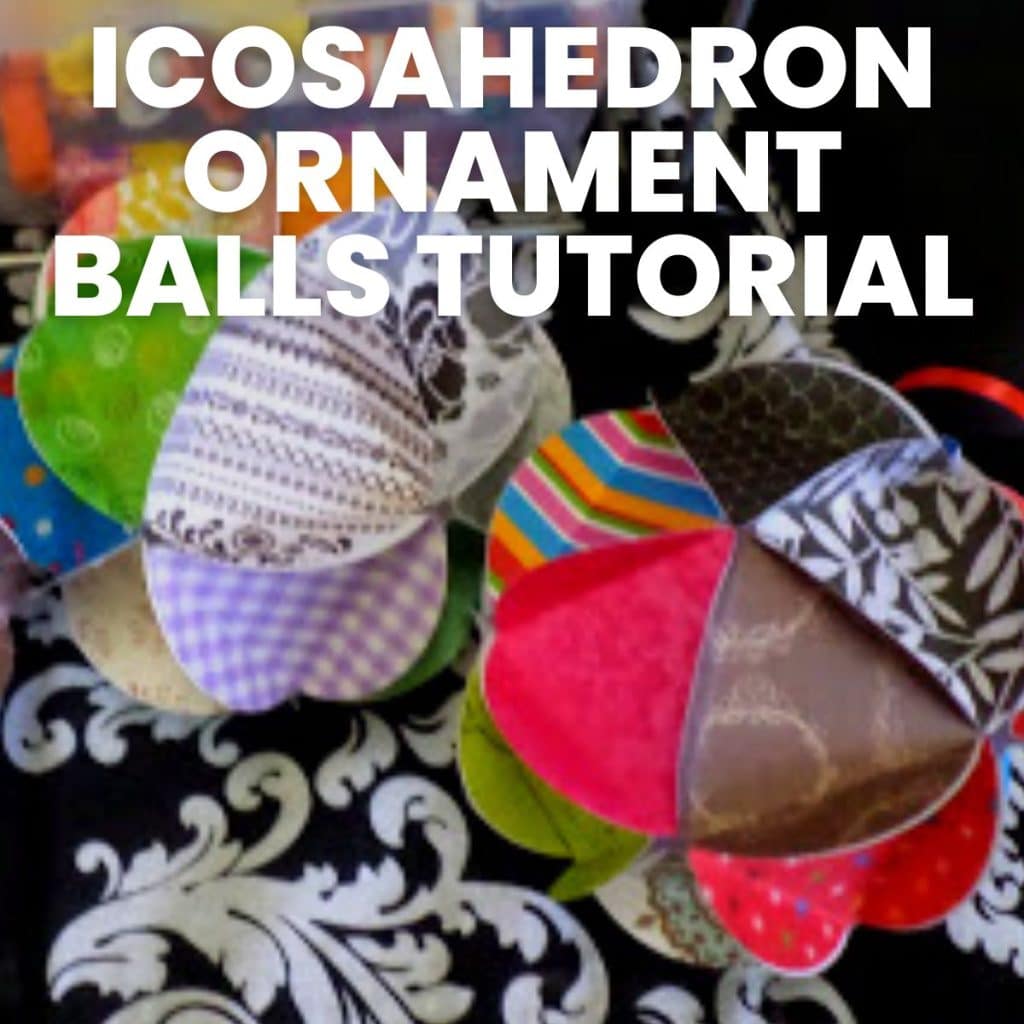
These ornaments are super easy and fun to build with just twenty circles, glue, and some ribbon. They can be made for Christmas or really any time of year!
I actually had the help of my sister to walk my students through building their own icosahedron ornaments.
Looking for more Christmas activities and puzzles for your classroom? Here’s just a few examples of the other holiday activities I have created.
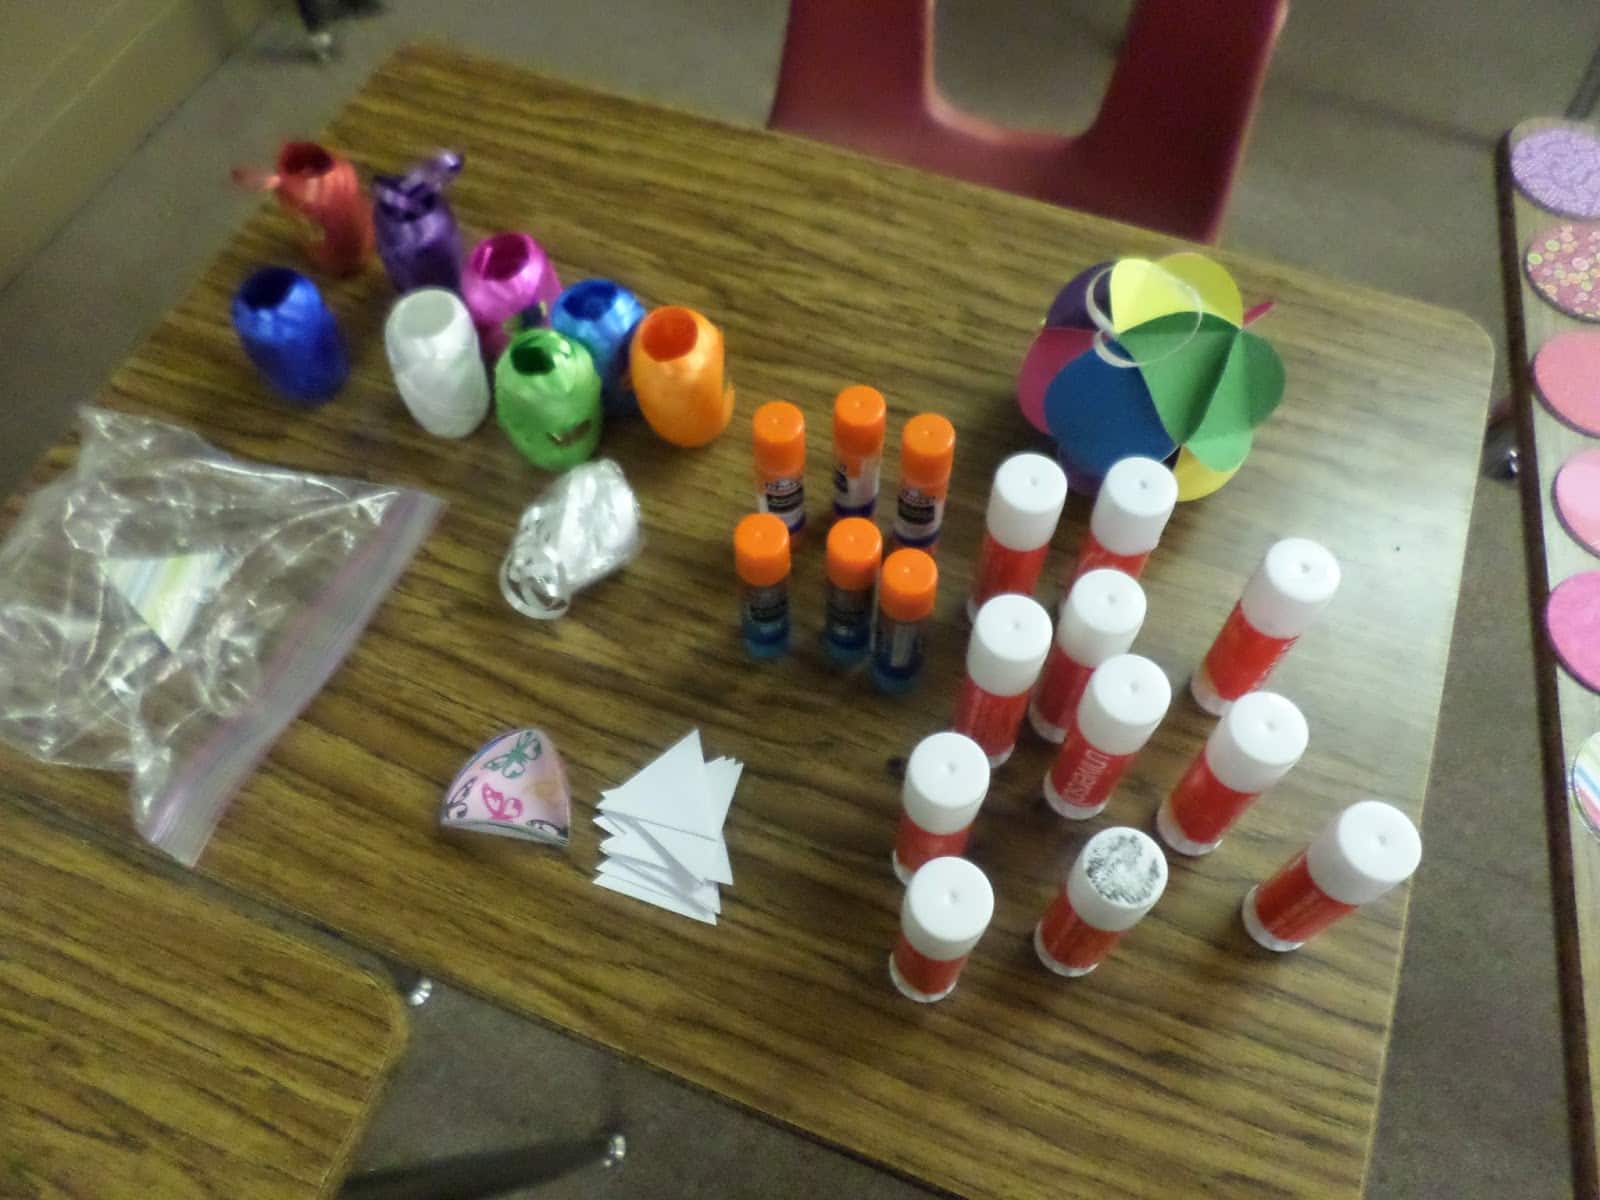
Supplies
To create these icosahedron ornament balls, you will need several different supplies: circle punch, colorful scrapbook paper or old Christmas cards, cardstock to create an equilateral triangle template, curling ribbon, and glue sticks.
Circle Punch
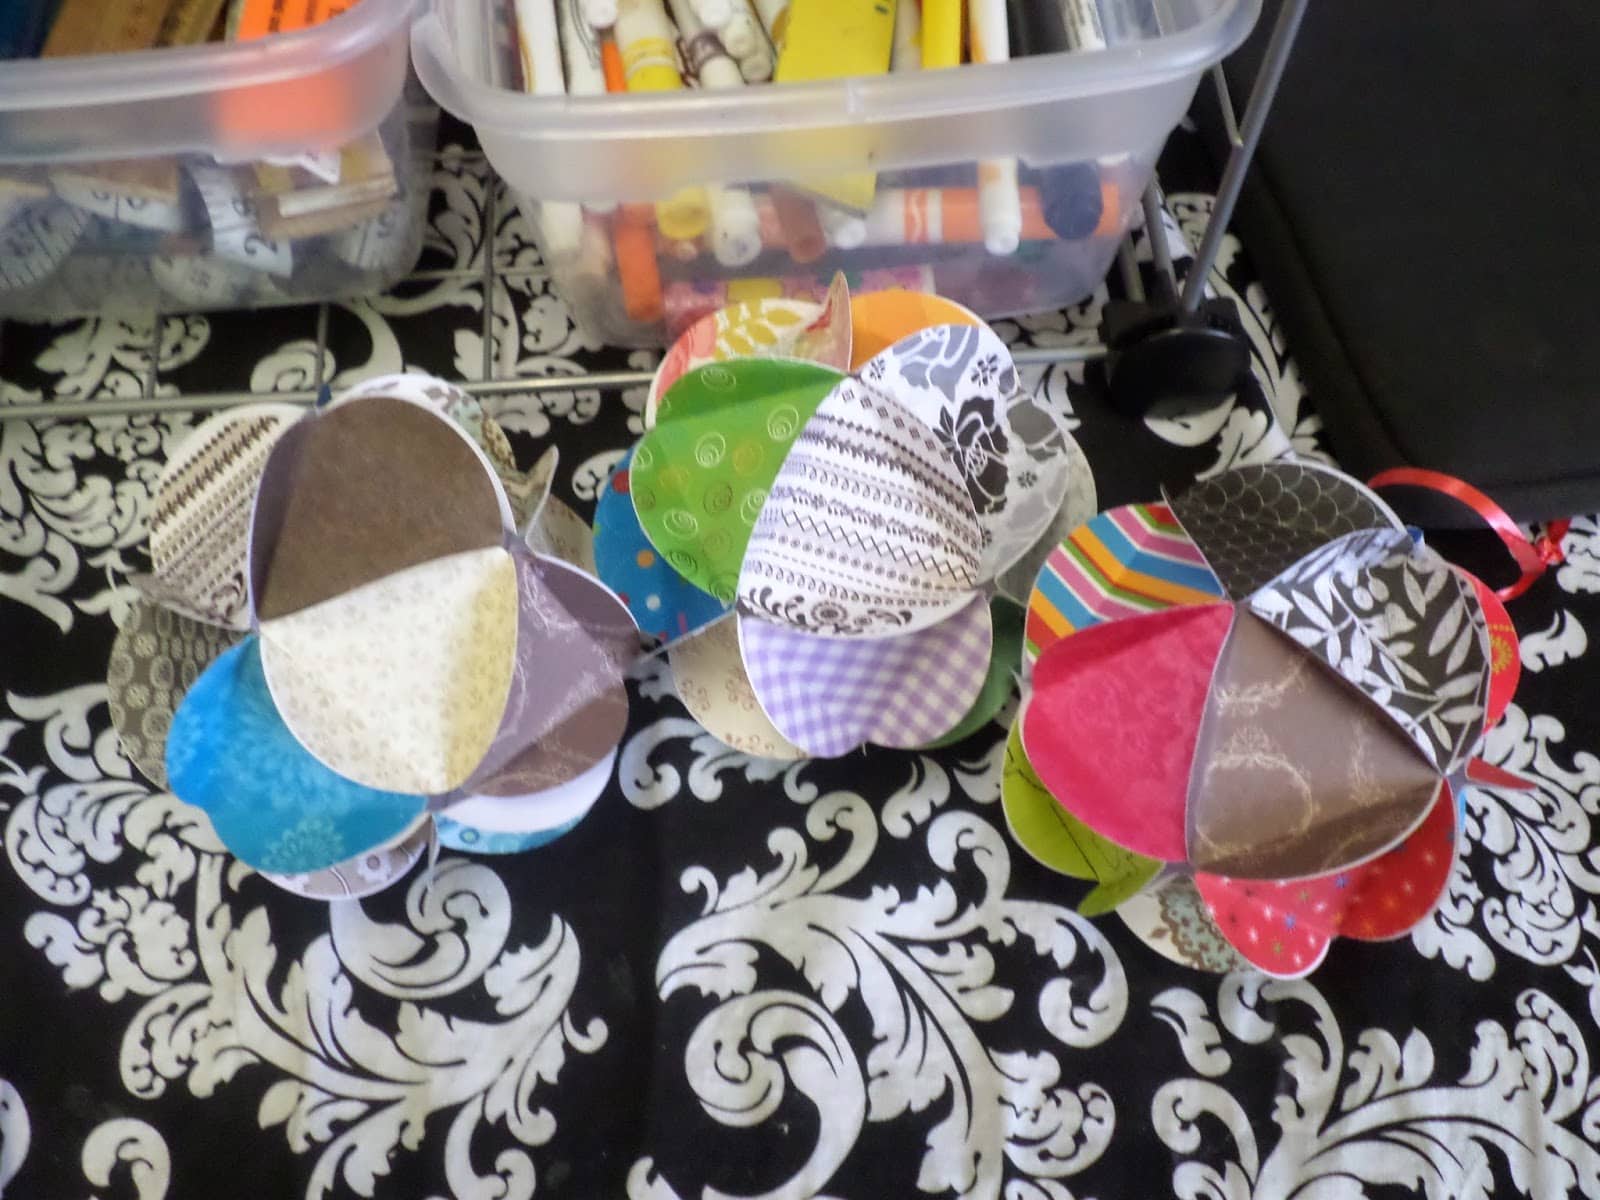
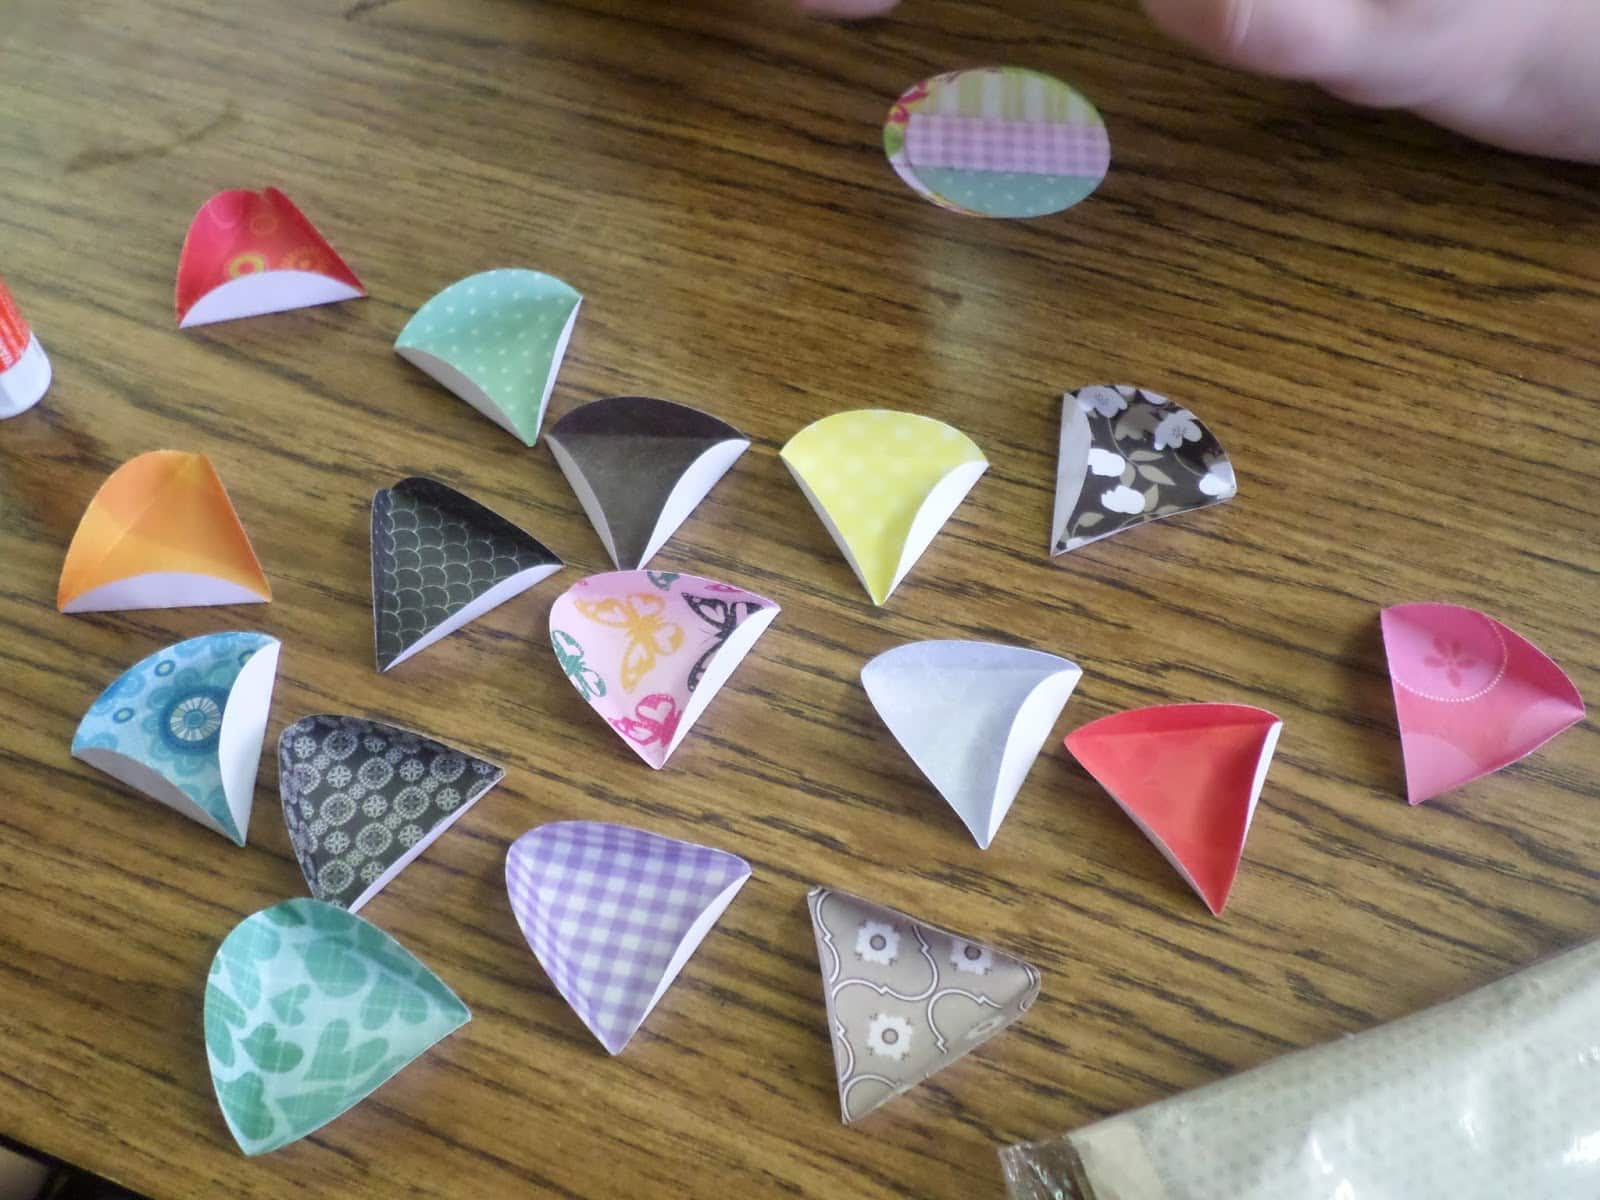
The main supply you will need is 20 circles per ornament that you want to create.
If you are only making a single icosahedron ornament ball, you could probably get away with cutting out your circles by hand. It will still be a tedious task, but it shouldn’t take you too long.
If you plan to do this ornament project with students, you will definitely want to invest in a circle punch. My sister used a 2-1/4″ circle punch to punch out the circles for our ornaments.

Any size circle punch will work, however. Larger circles will produce larger ornaments. Smaller circles will produce smaller ornaments.
Colorful Paper or Old Christmas Cards
My sister punched the circles we used for our ornaments out of random leftover scrapbook paper and photo mat booklets.
If you have scrapbook paper already lying around, that is probably going to be the cheapest option.
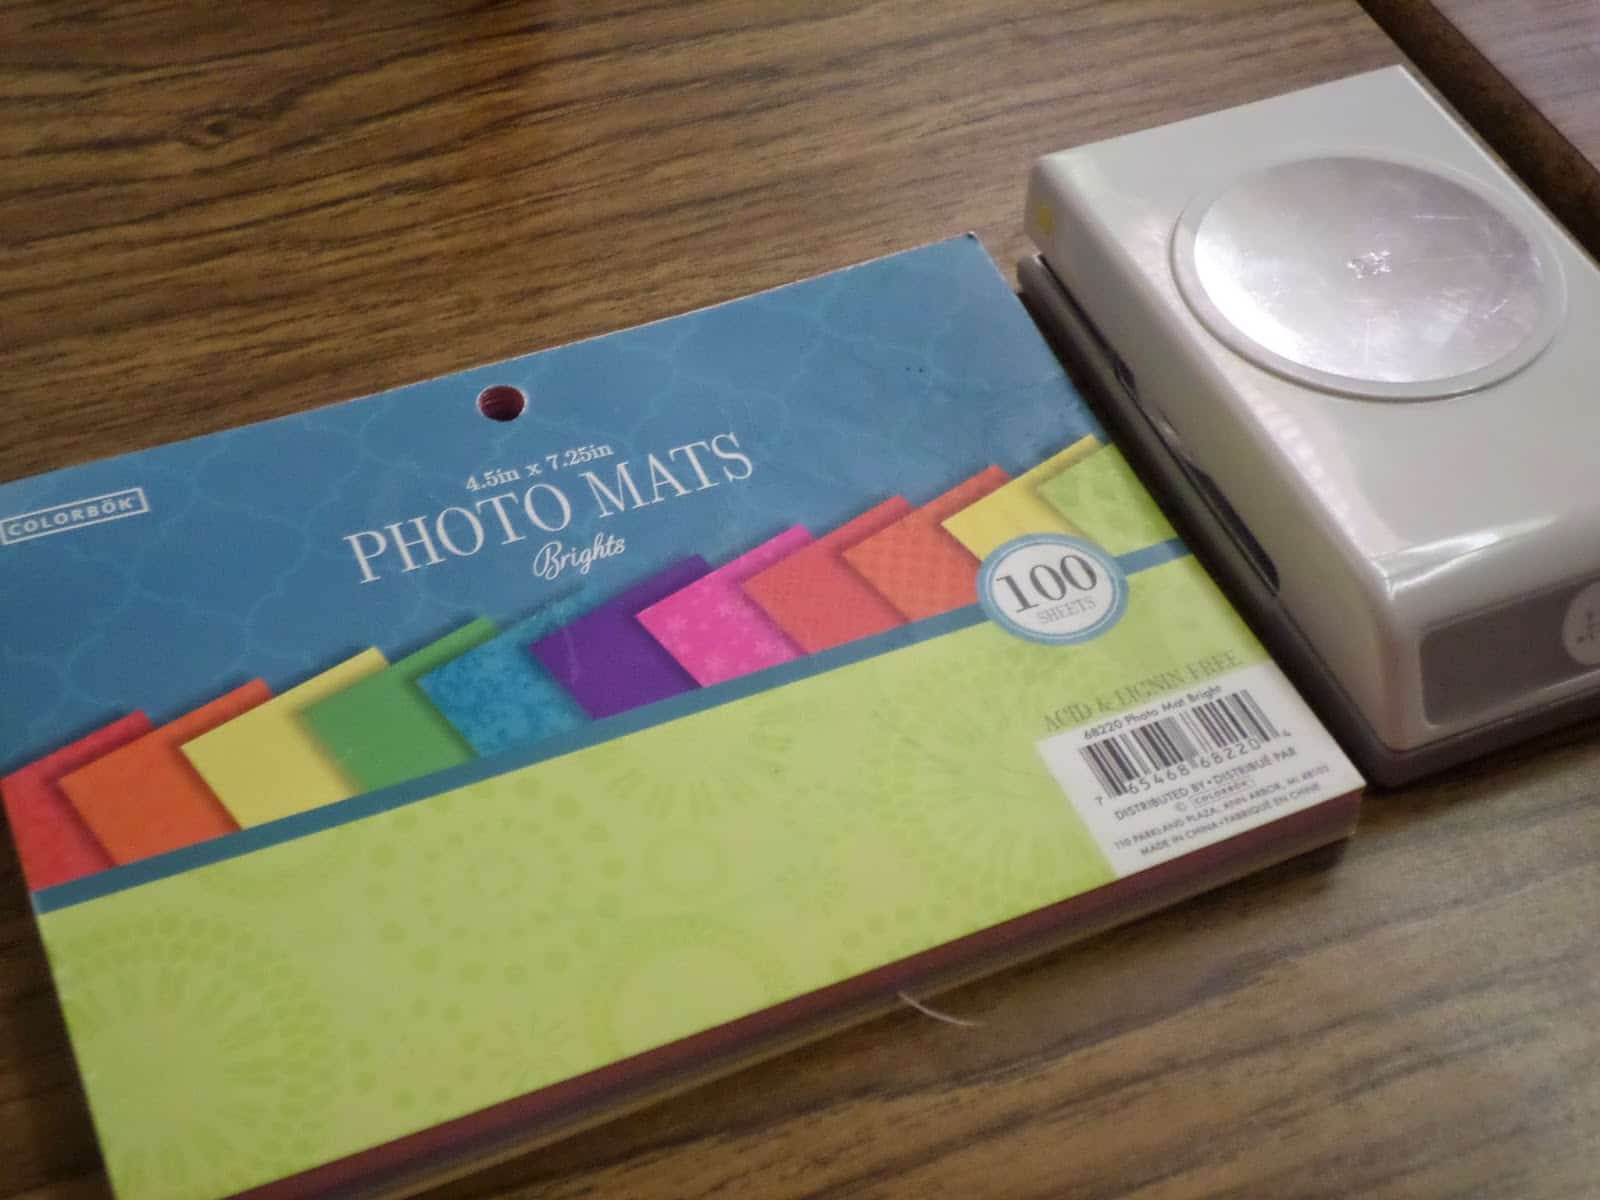
If you need to buy paper, my sister recommends these photo mat booklets that you can purchase at Walmart for around three dollars.
She prefers the photo mats to the scrapbook paper because the small size makes manipulating the circle punch much easier.
My sister and I originally learned to make these icosahedron ornaments in our 7th grade pre-algebra class. Mrs. Sellers would have her students bring in a stack of old Christmas cards each year.
We would cut out our circles from these old Christmas cards and turn them into Christmas ornaments to hang on our tree.
Cardstock to Create Equilateral Triangle Template
You will need some cardstock to create an equilateral triangle template to match the size of your circle punch. The points of the equilateral triangle should lie on the circumference of the paper circles.

Curling Ribbon
Each ornament will require a piece of curling ribbon to create a hanger at the top of the ornament.
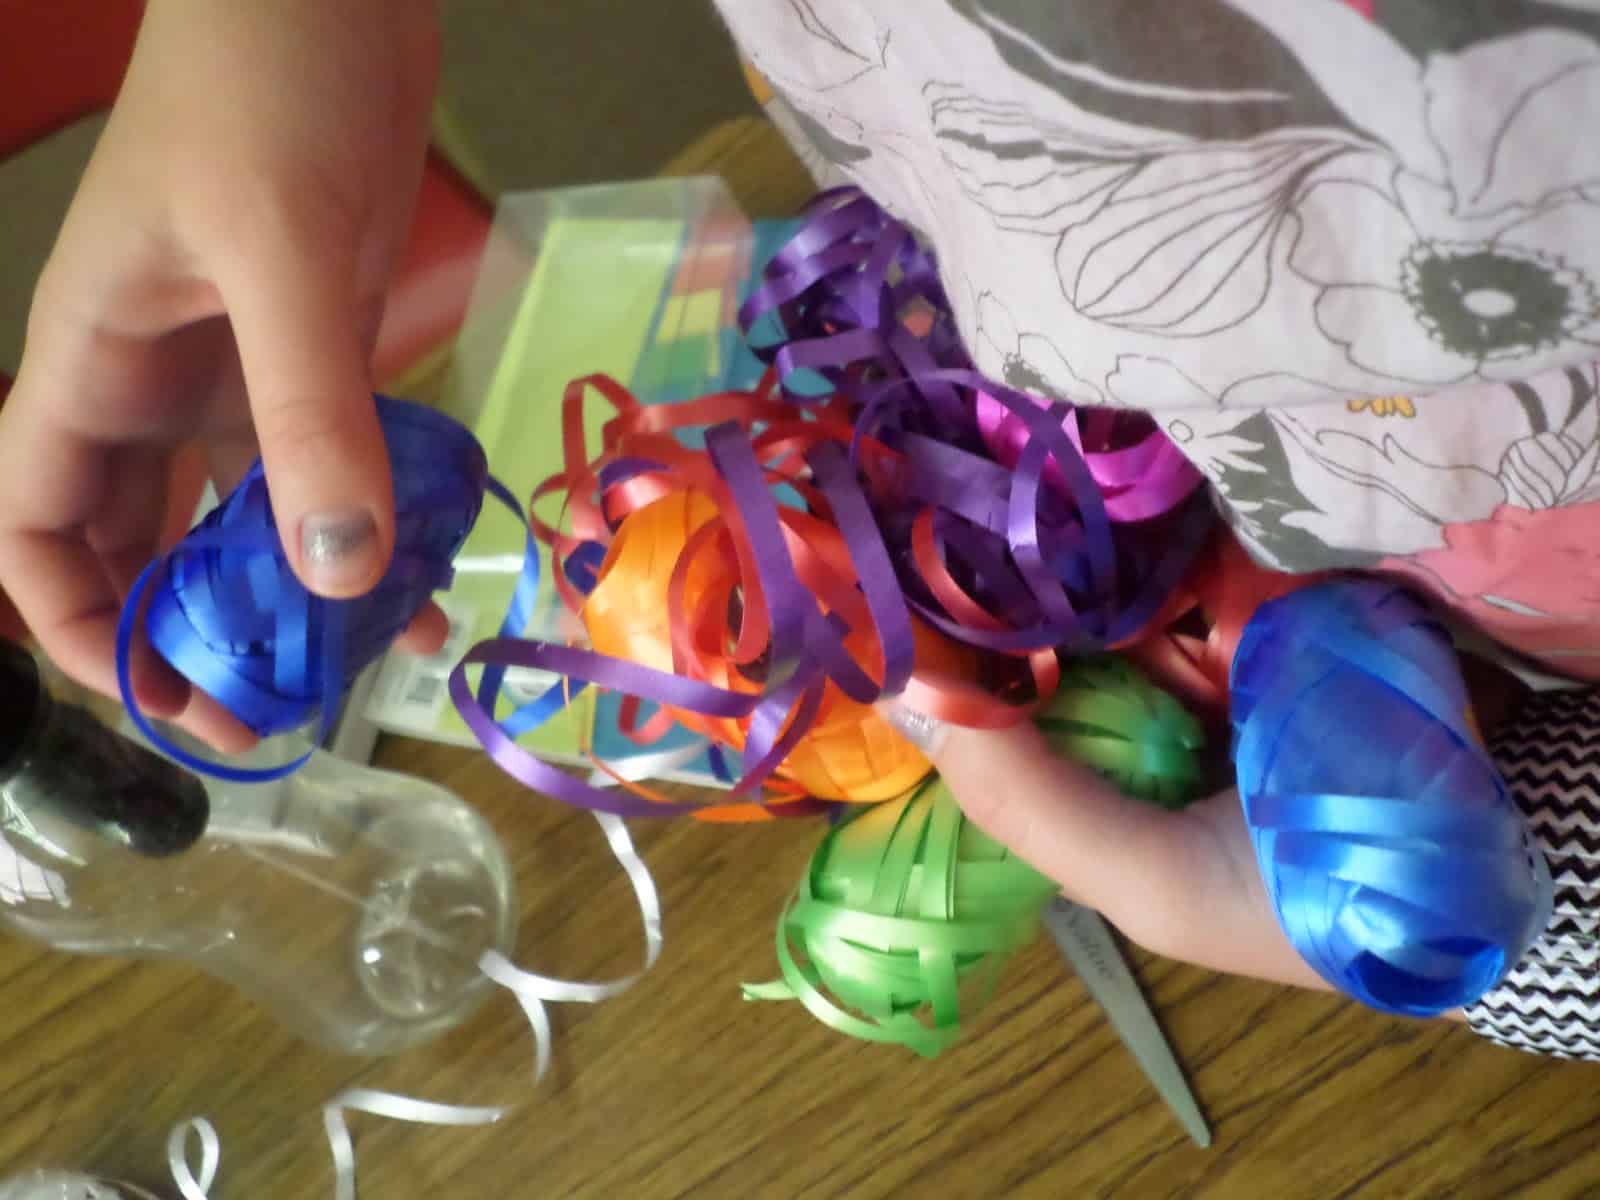
You can pick up a selection of different colors of curling ribbon at Dollar Tree. You could also use regular ribbon if you already have that on hand.
Glue Sticks
The last supply you will need to have on hand to create an icosahedron ornament ball is some glue sticks. I prefer glue sticks for this project instead of liquid glue due to the fact that it dries much faster.
Preparing Your Ornament Supplies
Make sure you have twenty circles punched for each ornament that you plan to create.
Next, prepare your equilateral triangle template. The size of this template depends on the size of your circles.
The points of the equilateral triangle must rest on the edge of your circles.
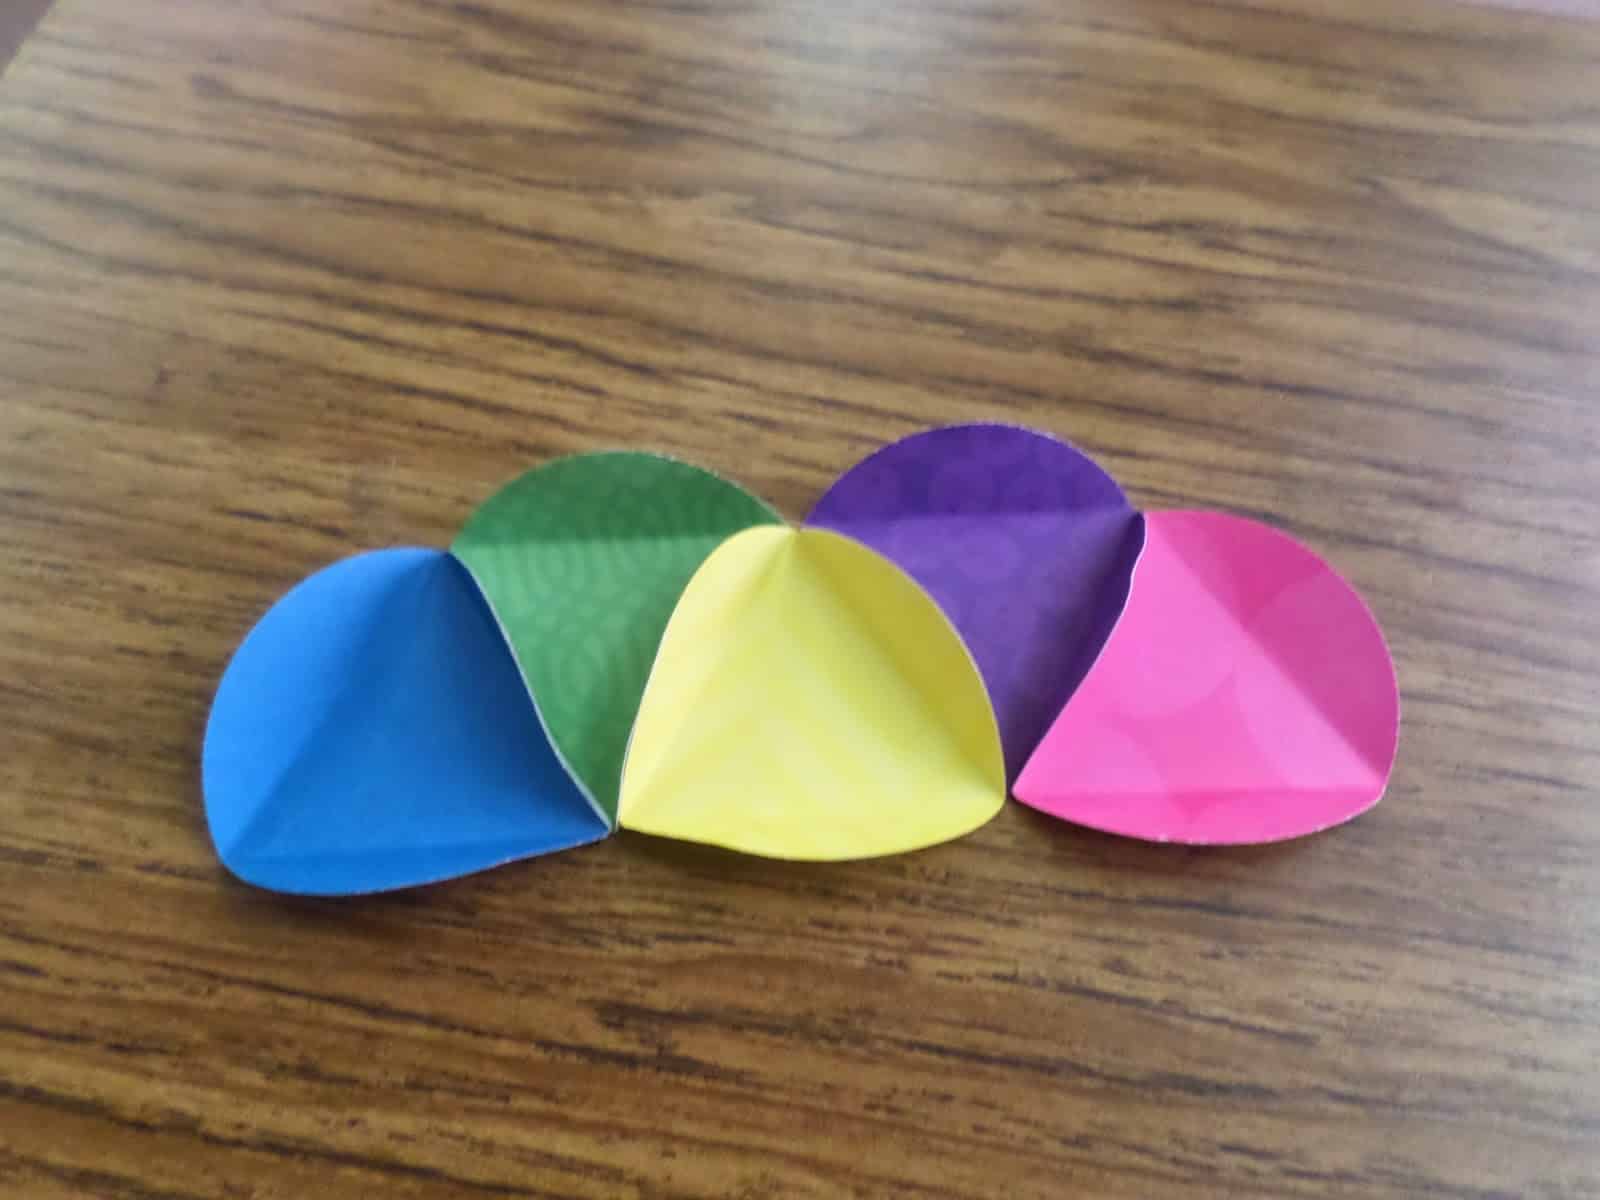
Lay the template on top of each circle (design facing up) and begin folding over the edges.
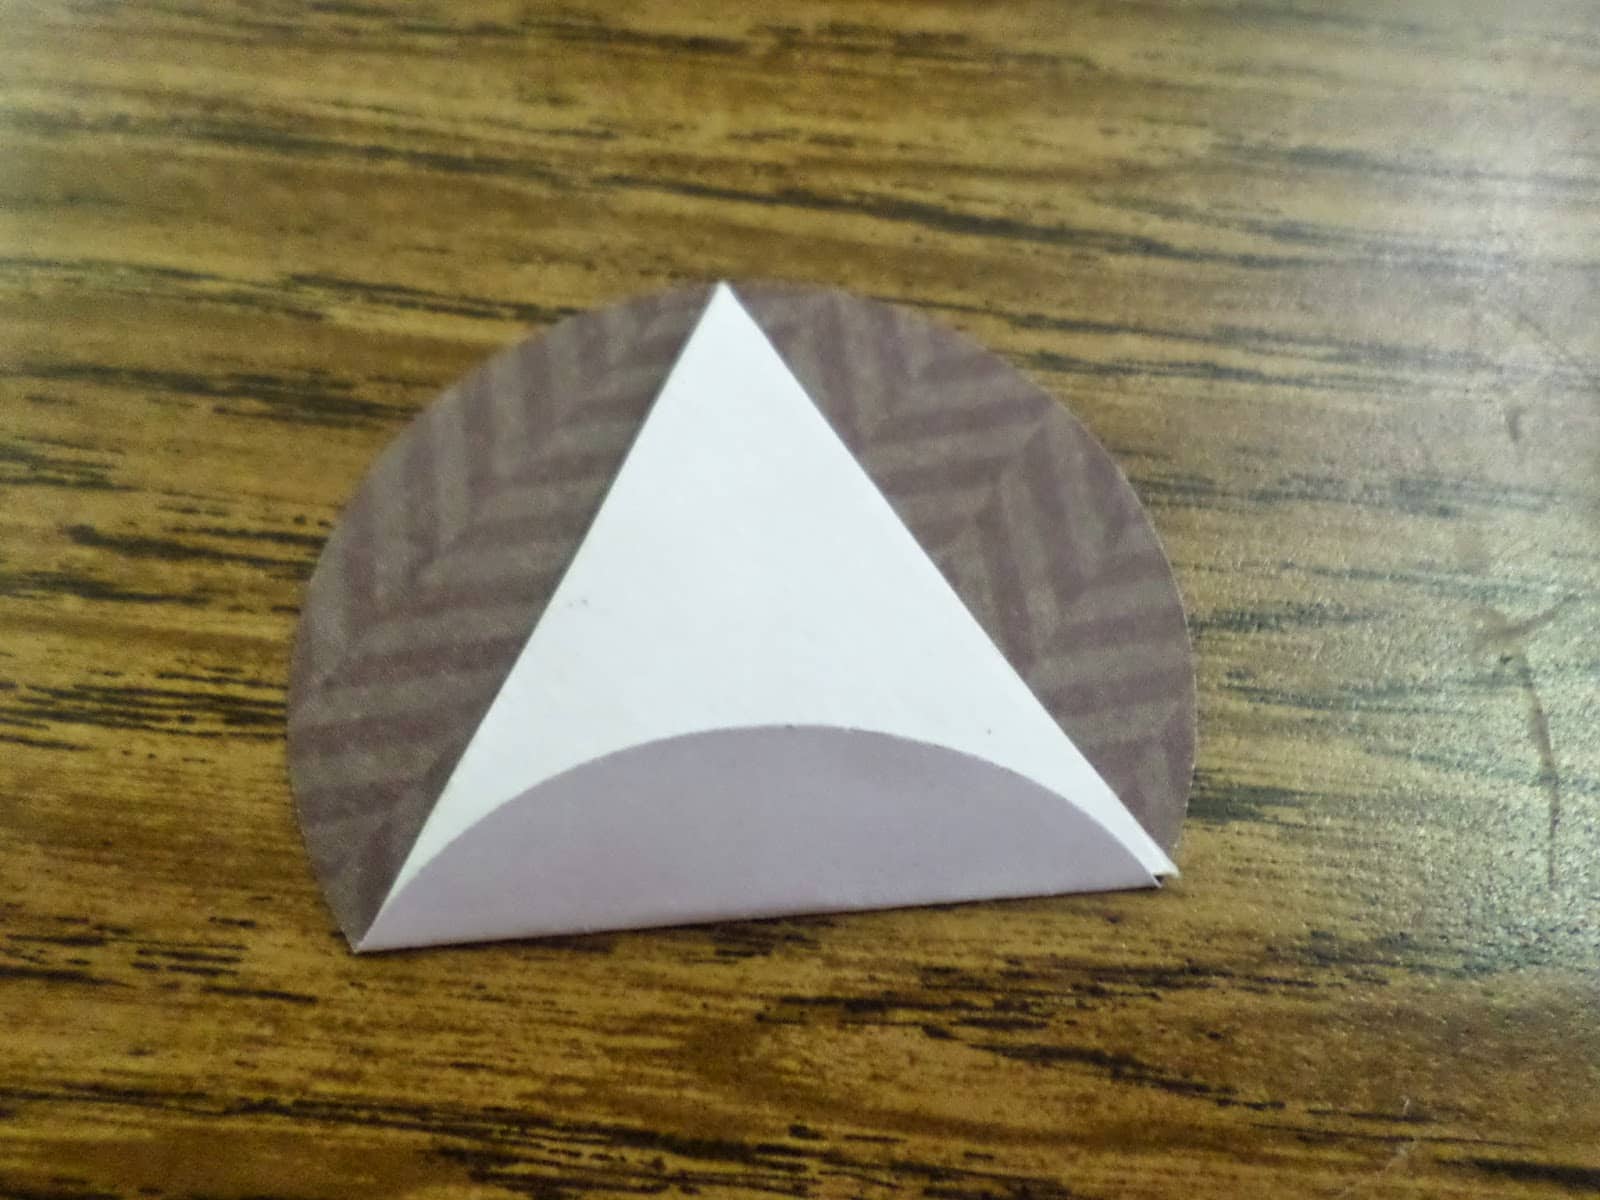
After folding over two of the edges, it is usually easiest to remove the template before folding over the final edge.
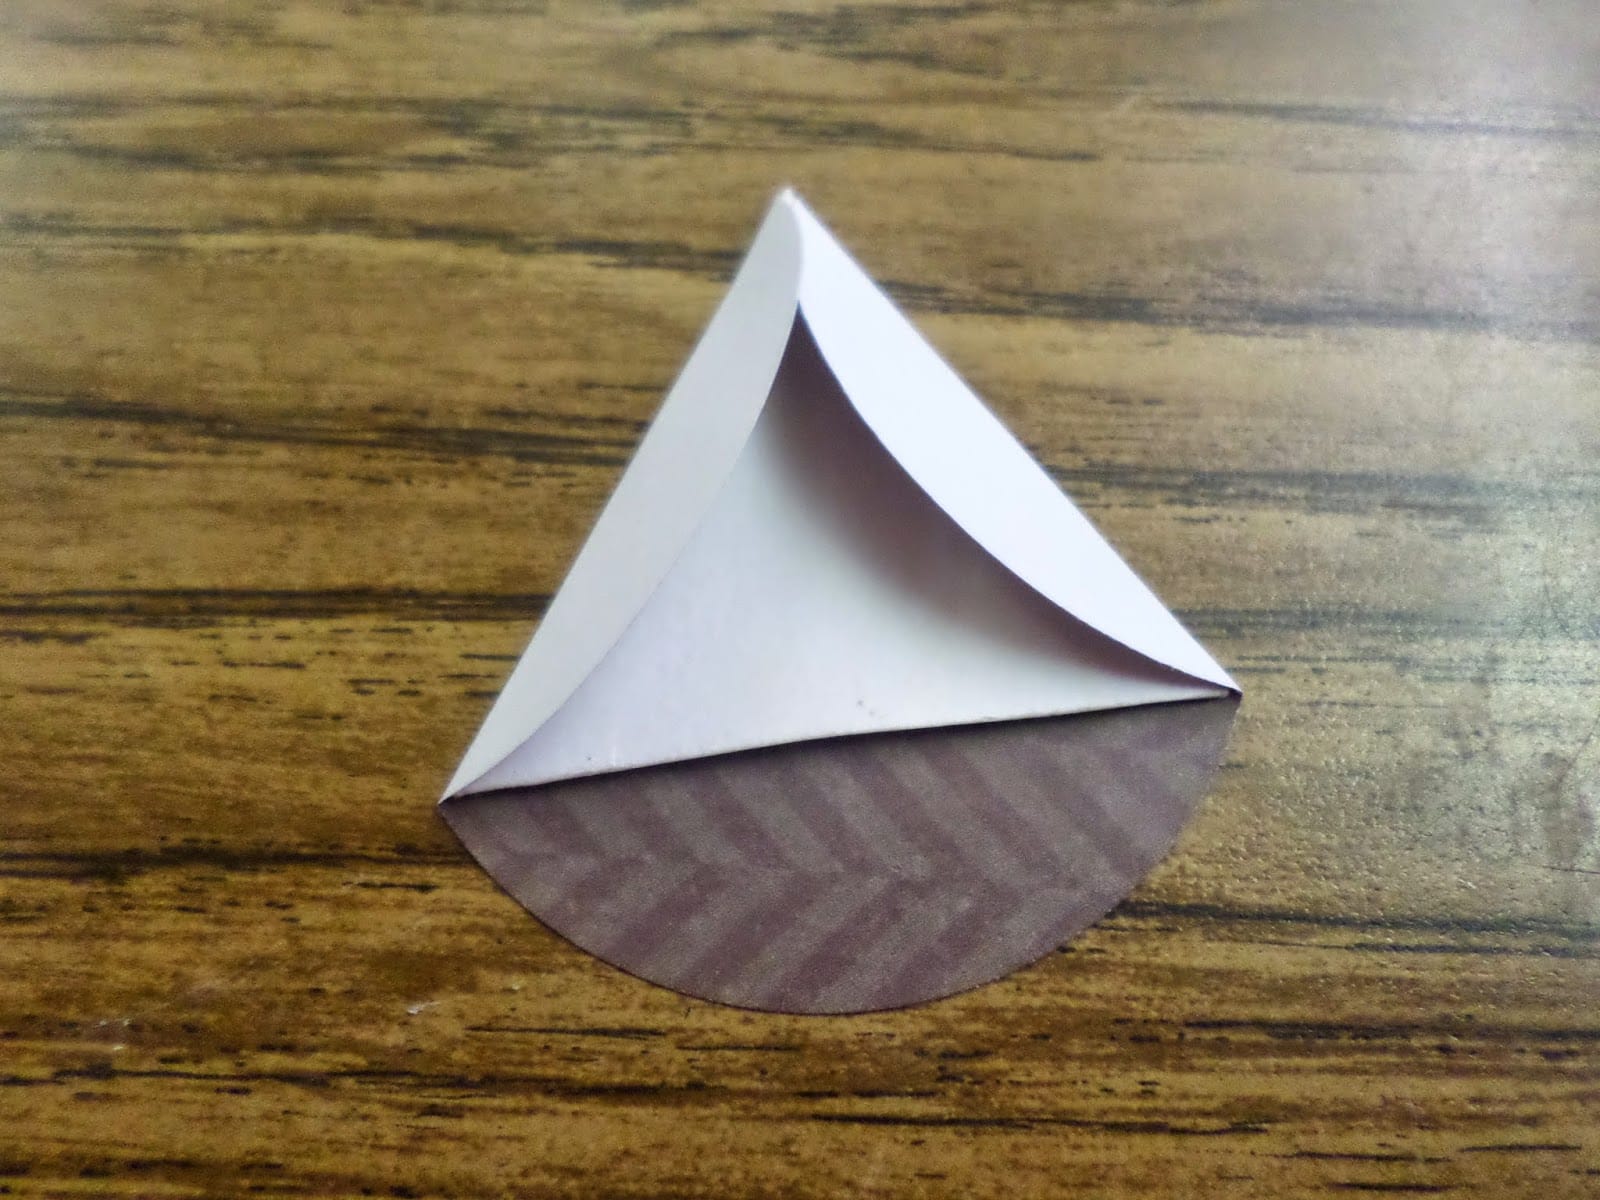
This small step reduces the chance that your triangles will not match up when gluing your icosahedron ornament ball together.
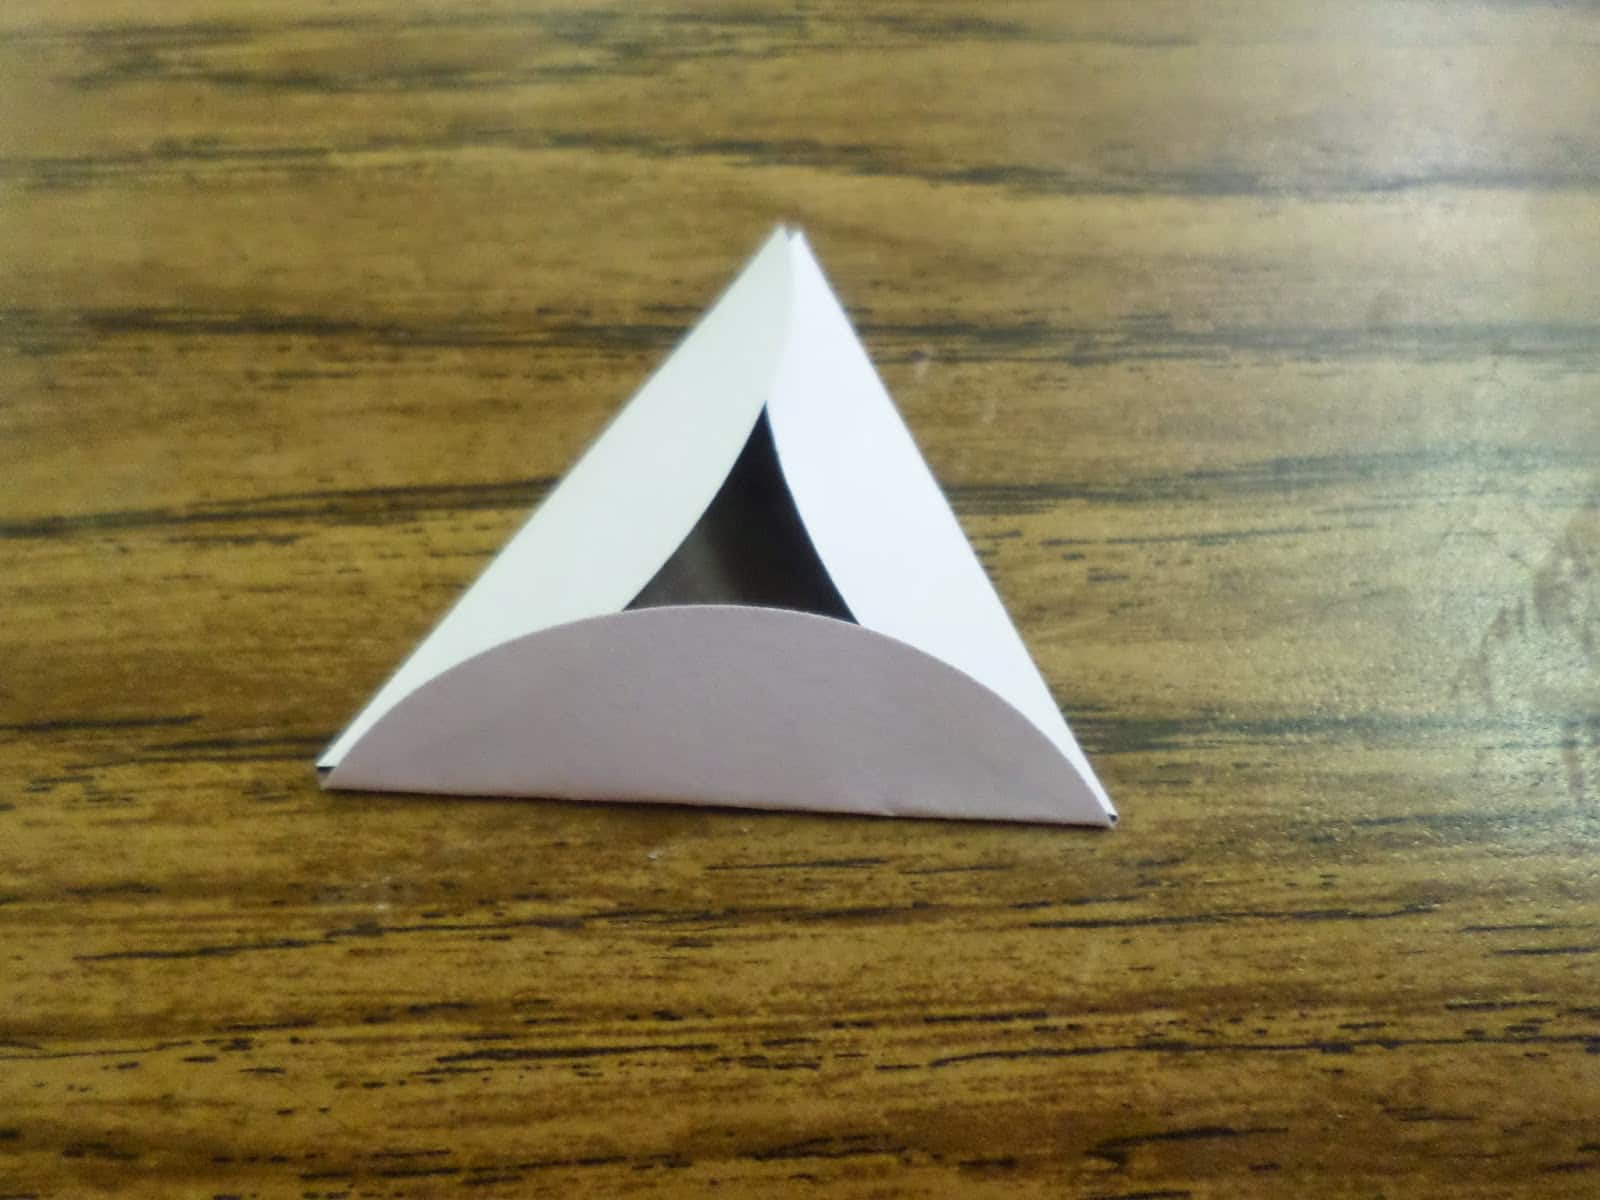
A small gap in the center of triangle is fine. Gaps on the vertices of the triangles are bad.
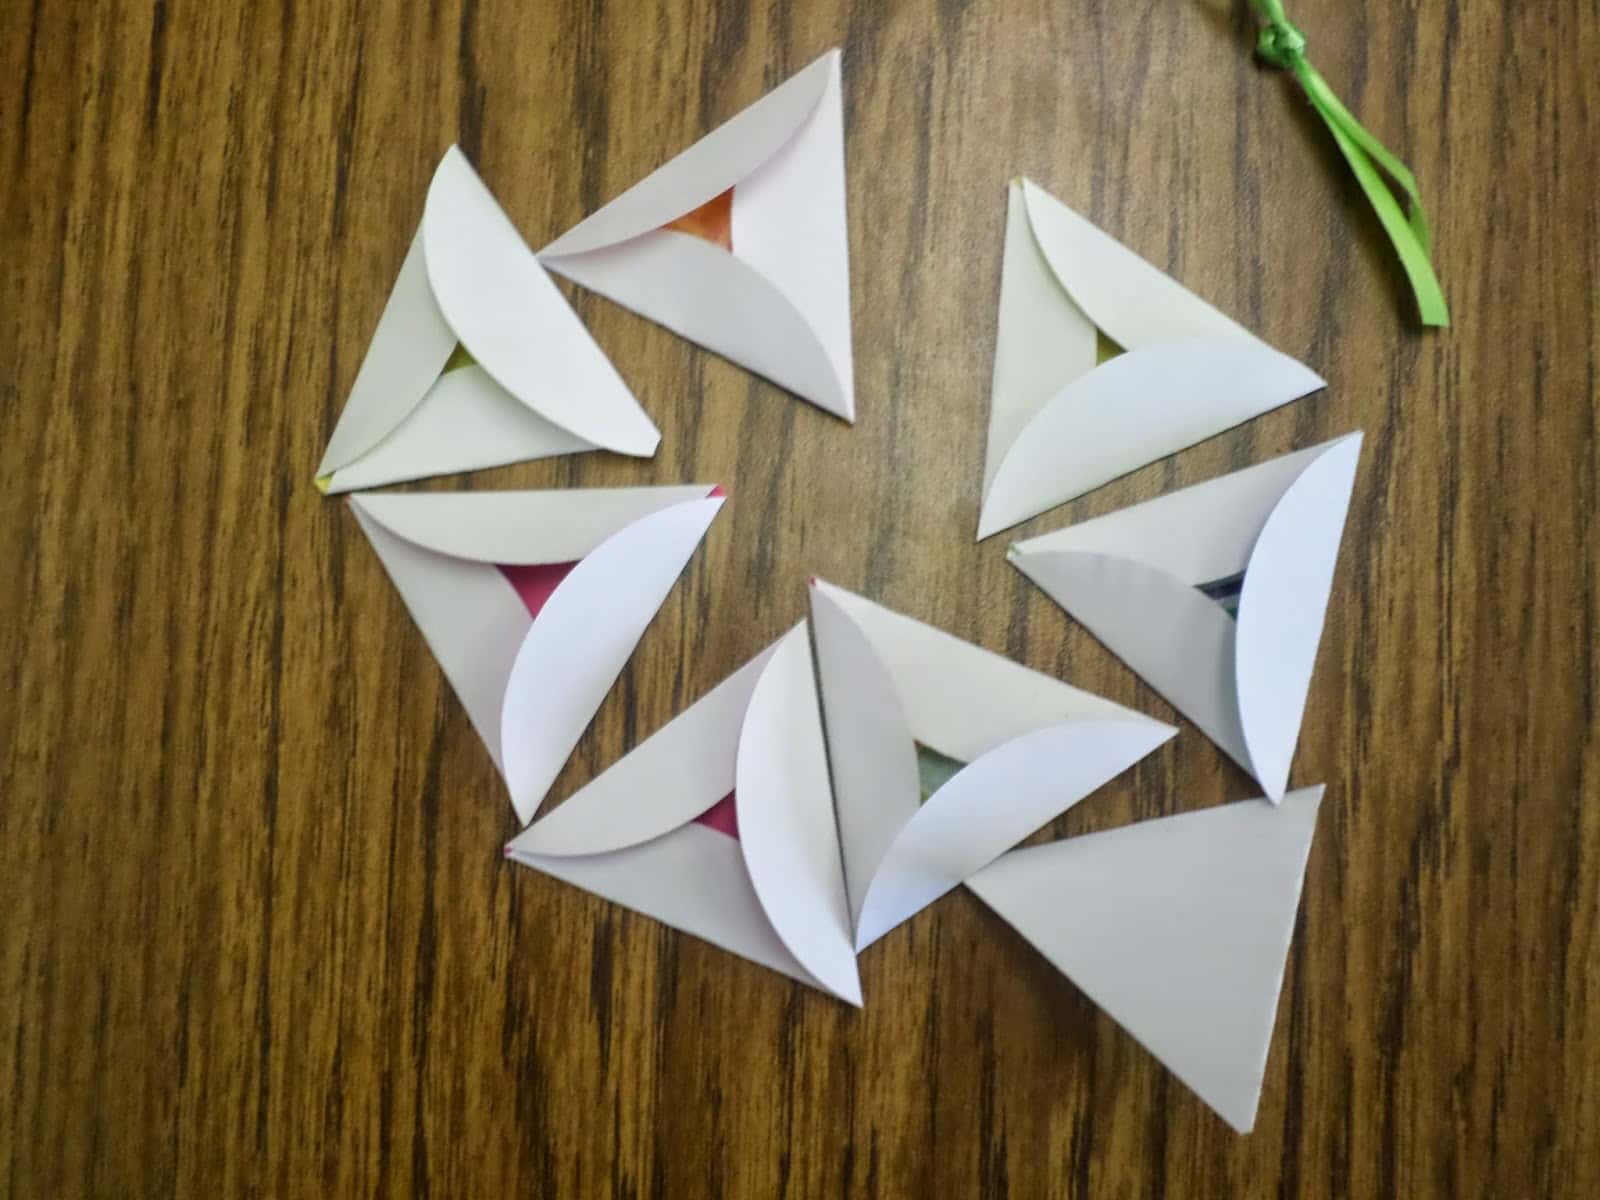
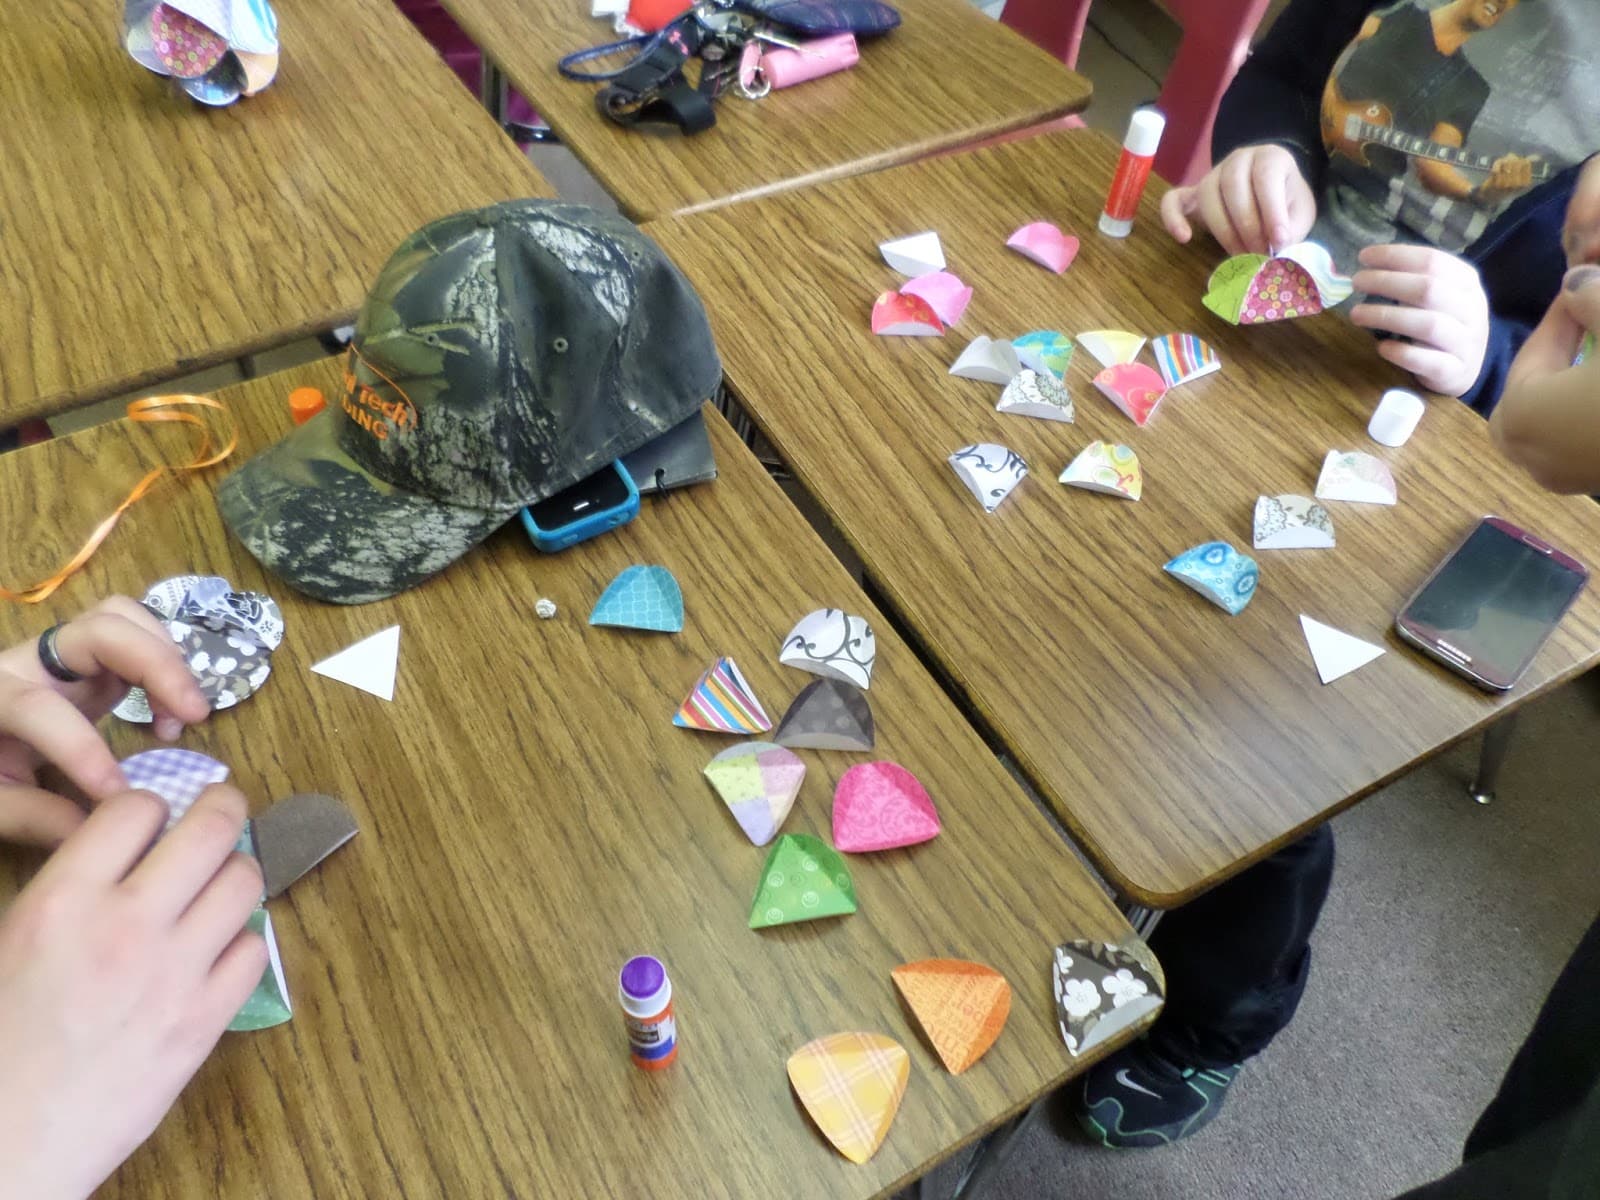
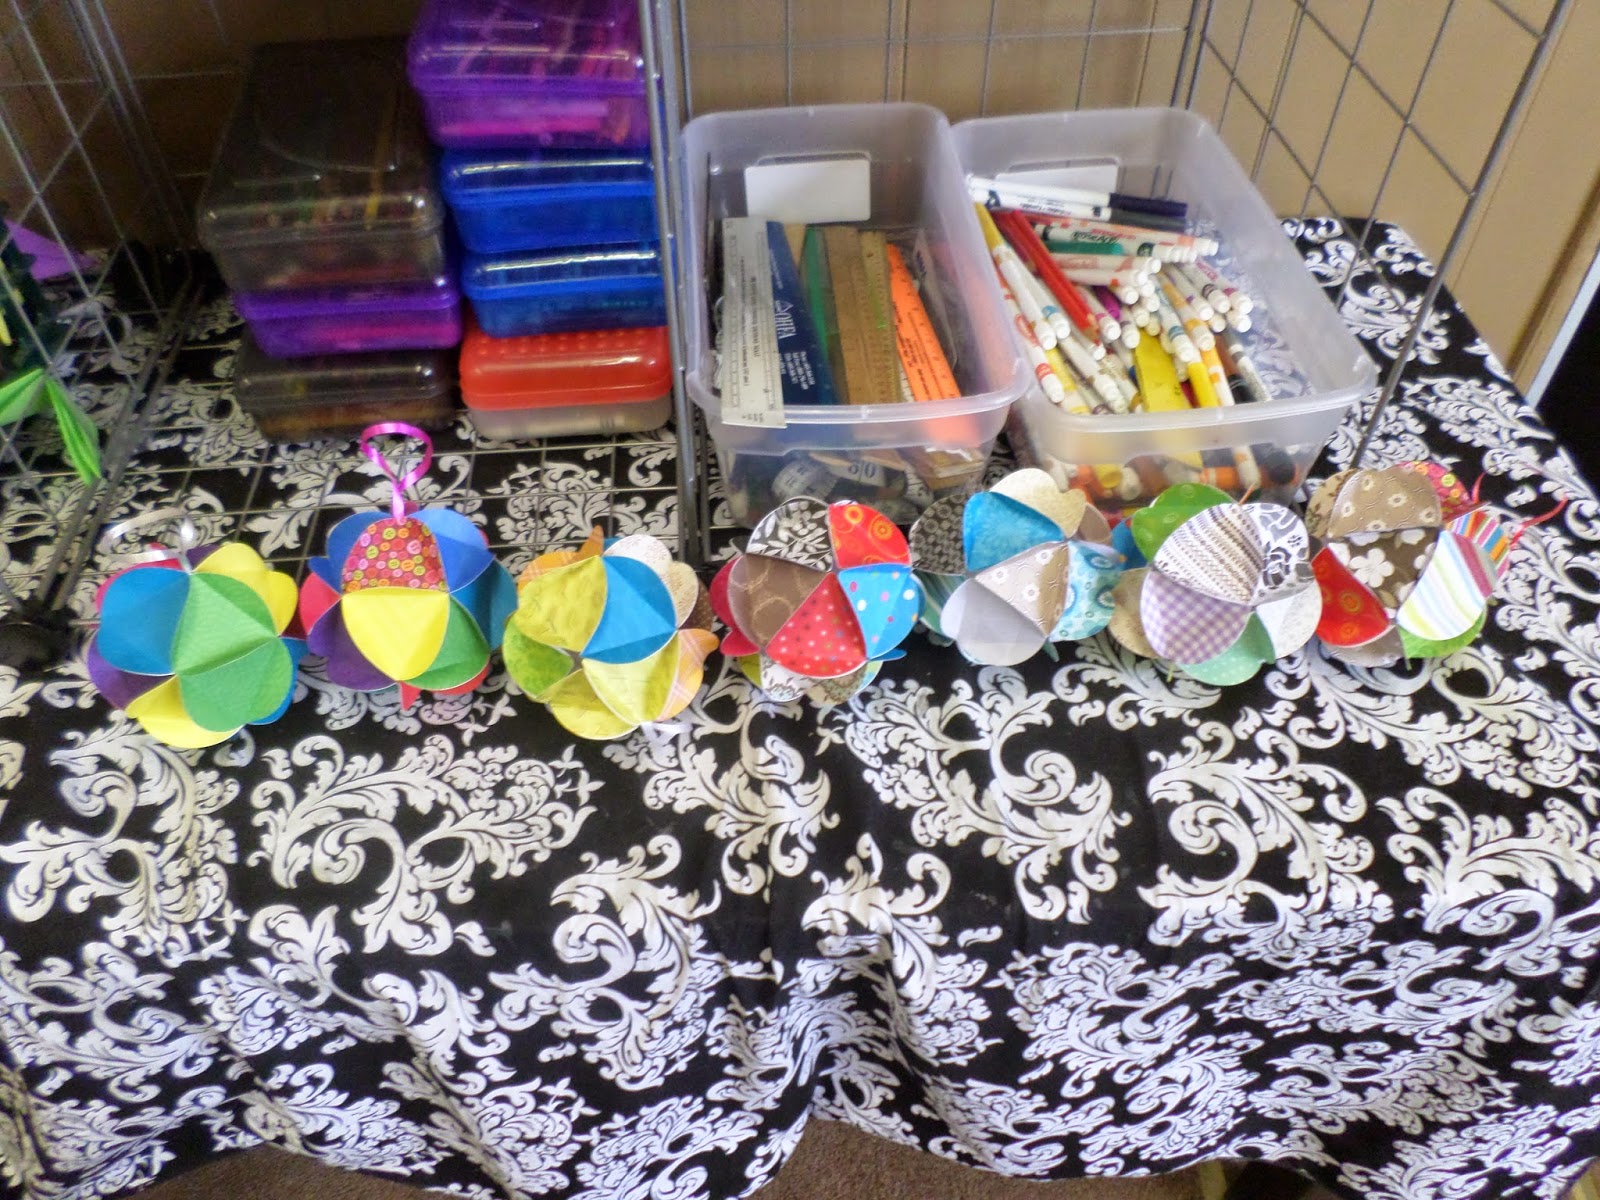
Pretty soon, you’ll have a pile of triangles. Remember, you need 20 of them!
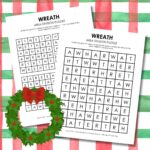
Assembling the Icosahedron Ornament Ball
After lots of cutting and folding, it’s finally time to assemble our icosahedrons!
My sister made two partial pieces to demonstrate the construction process to my students. I thought this was a brilliant idea.
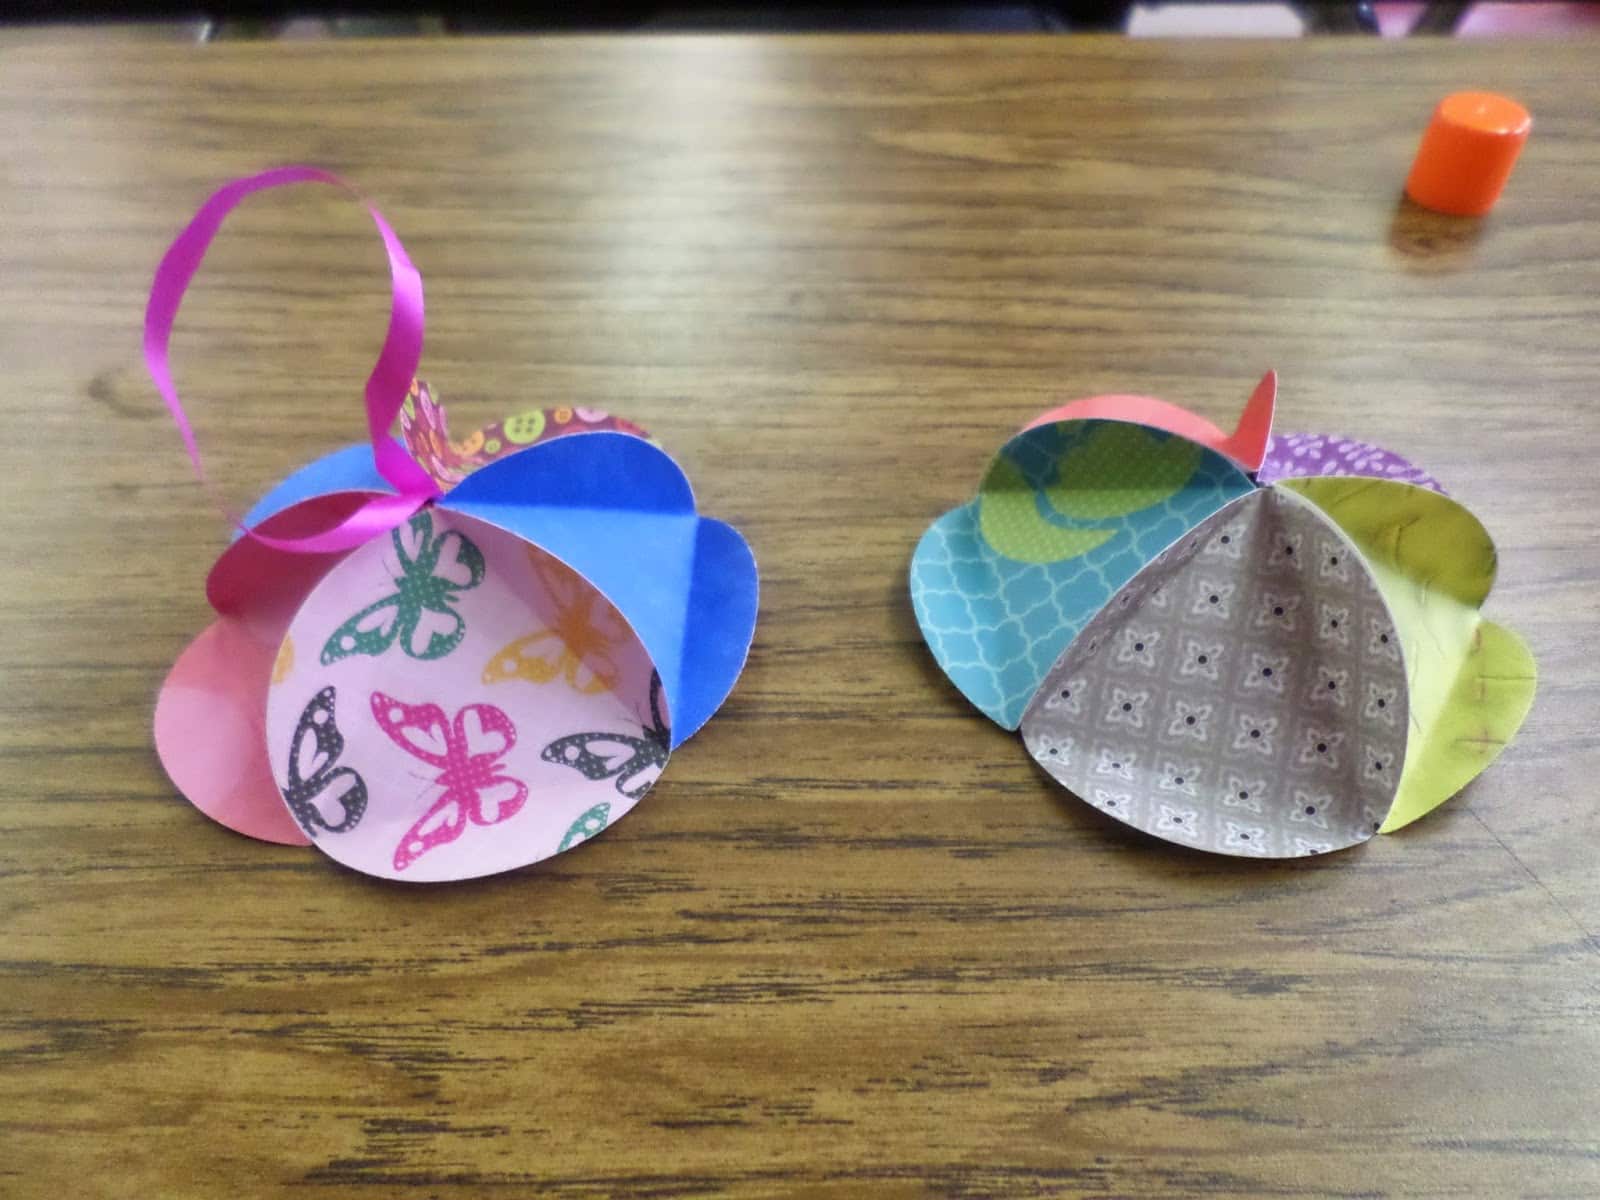
She’s going to definitely make a great art teacher!
First, take five of your circles and glue them together to form a dome.
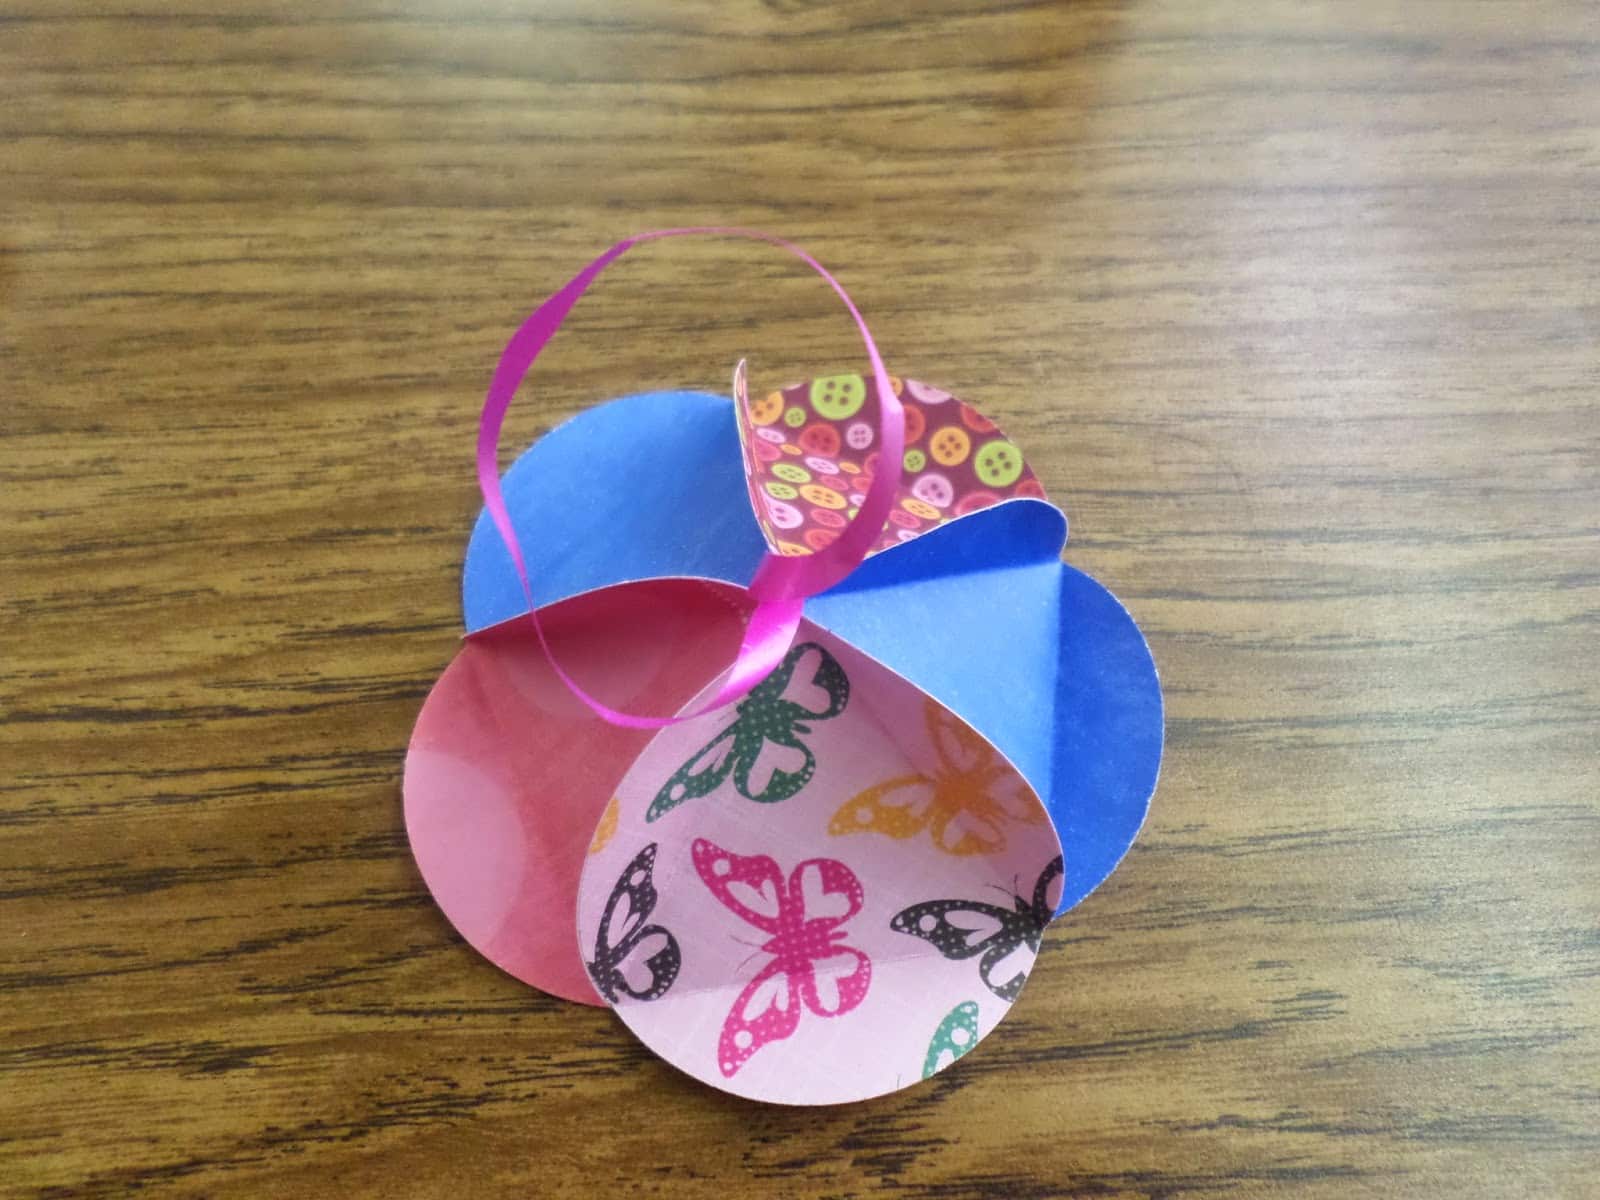
You are actually going to need to make a dome for the top of the ball and a dome for the bottom of the ball.
The top dome needs a curling ribbon hanger. Take a piece of curling ribbon, knot it, and place it in the center of the dome before gluing the last two triangles together.
Then, build a similar dome (without the hanger) for the bottom of the ornament.
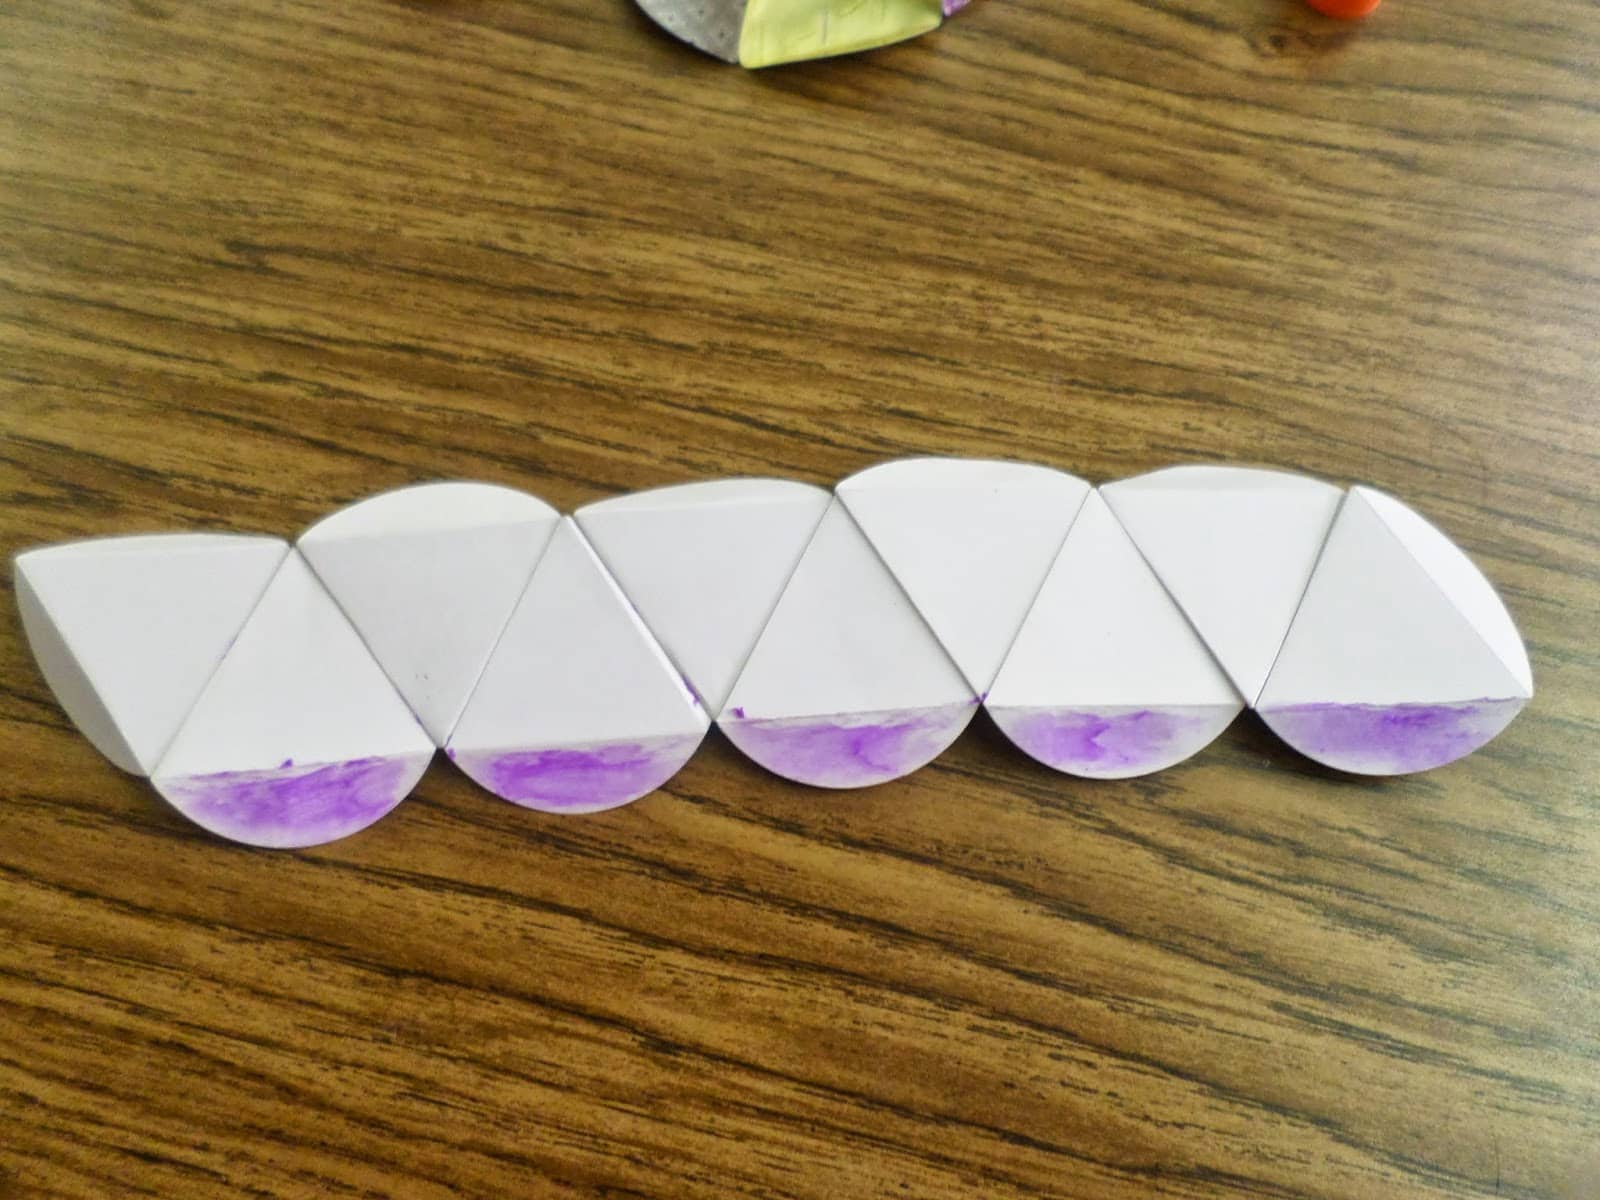
After using five pieces to make the top dome and five pieces to make the bottom dome, you should have ten pieces left.
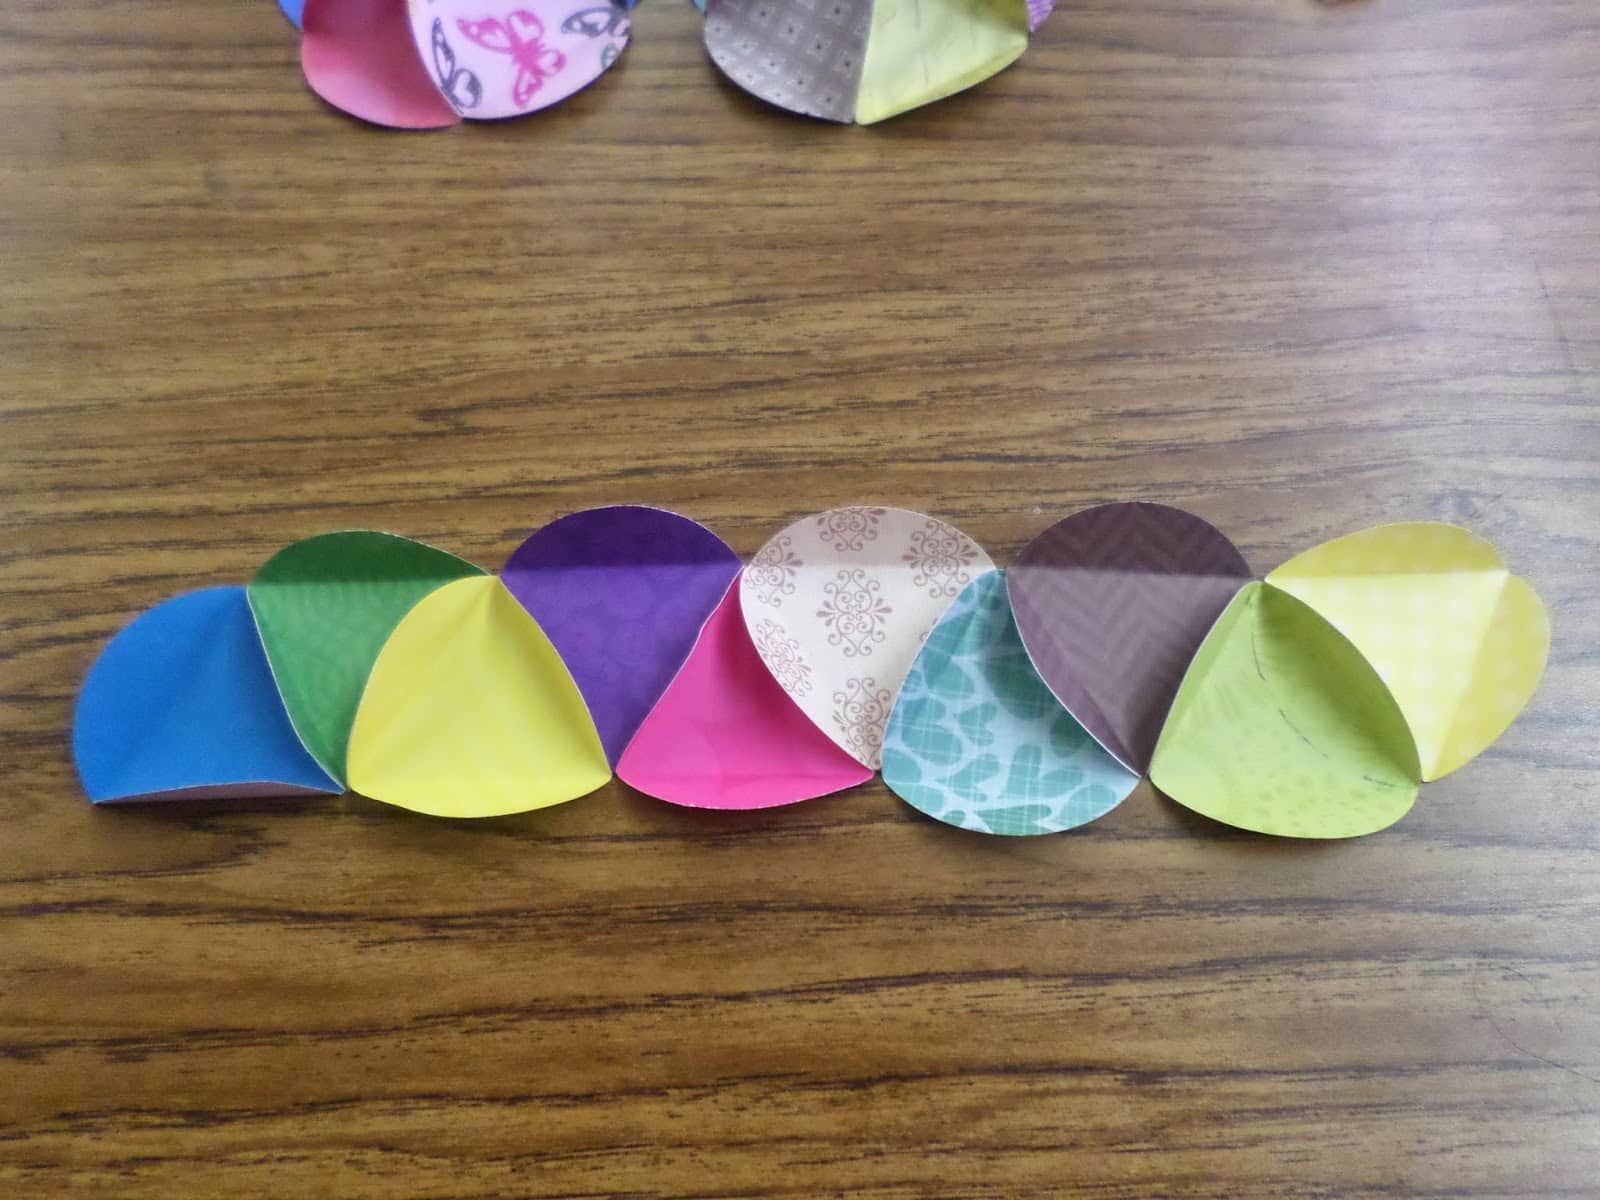
Glue these ten pieces together, inverting every other triangle, so that the pieces form a line with a flat top and flat bottom.
My sister glued five pieces together to demonstrate the process to the class.
The best way to go about this next step is to turn over your long strip of triangles and apply glue to the top or bottom of the strip.
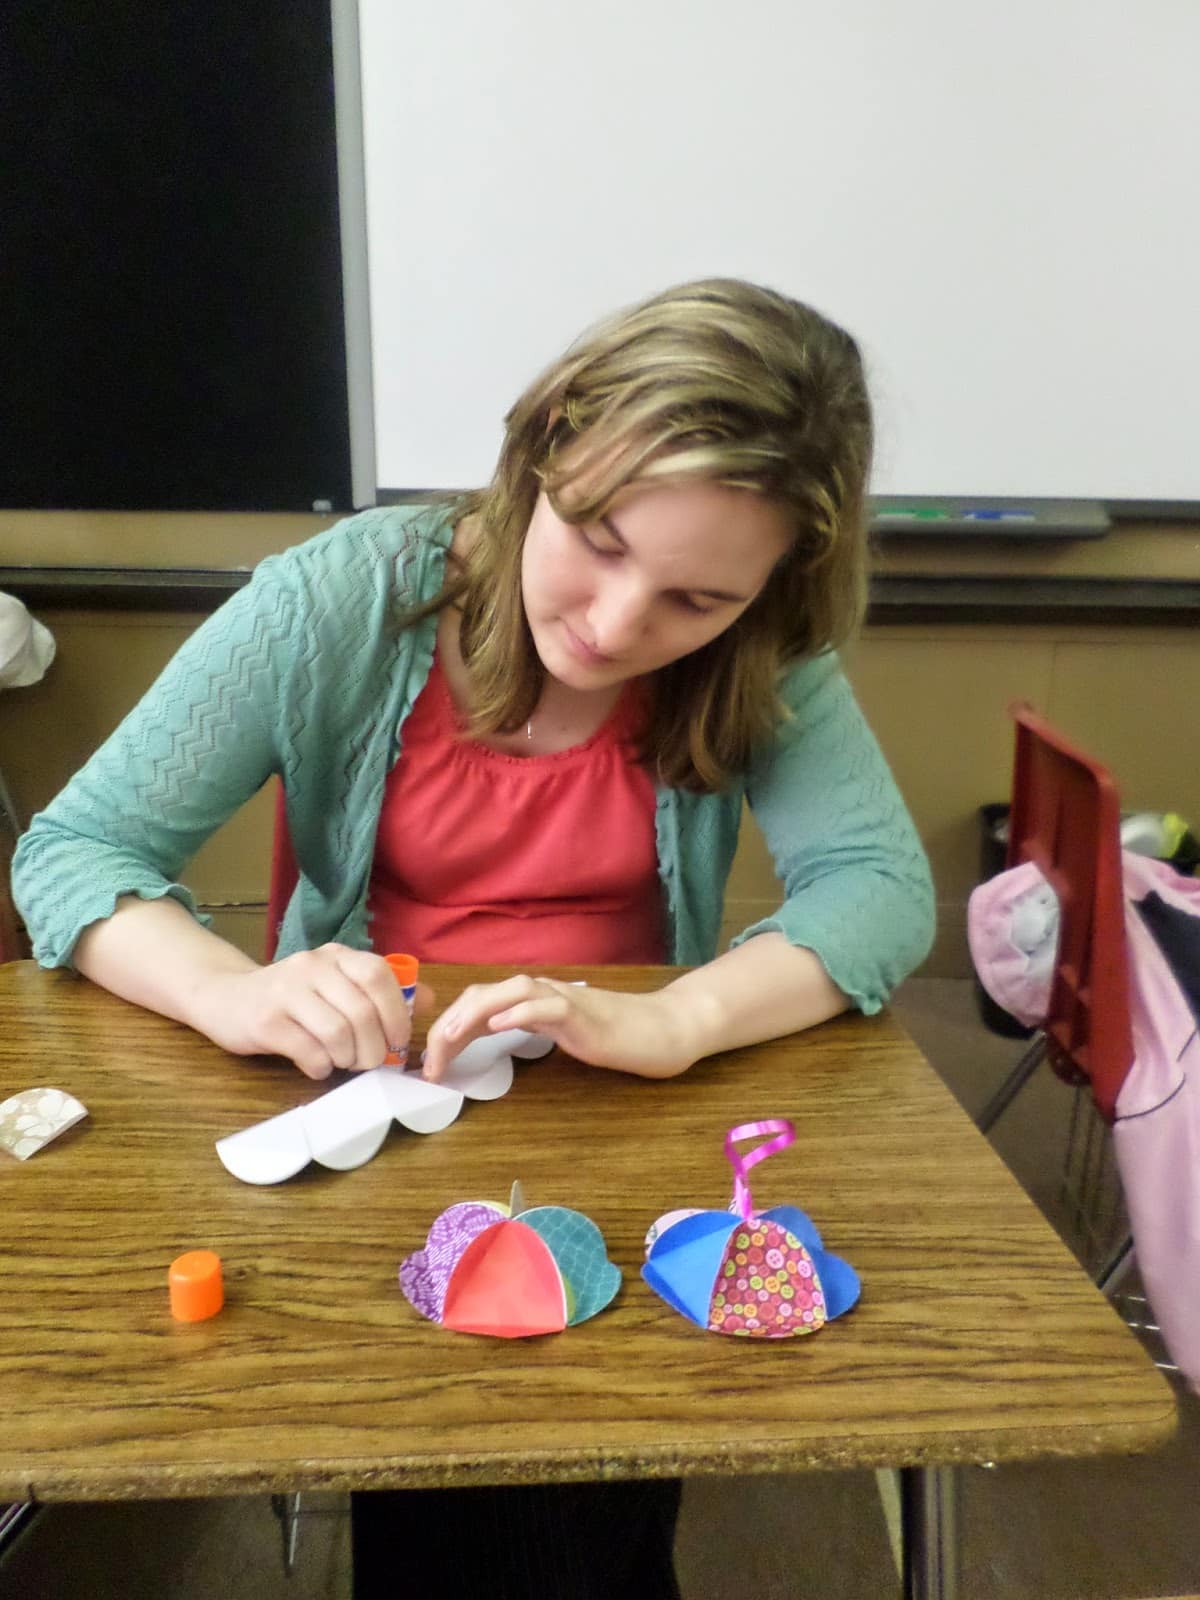
Then, begin attaching each piece with glue on it to a section of one of your domes.
Finally, add glue to the remaining pieces and attach the other dome.
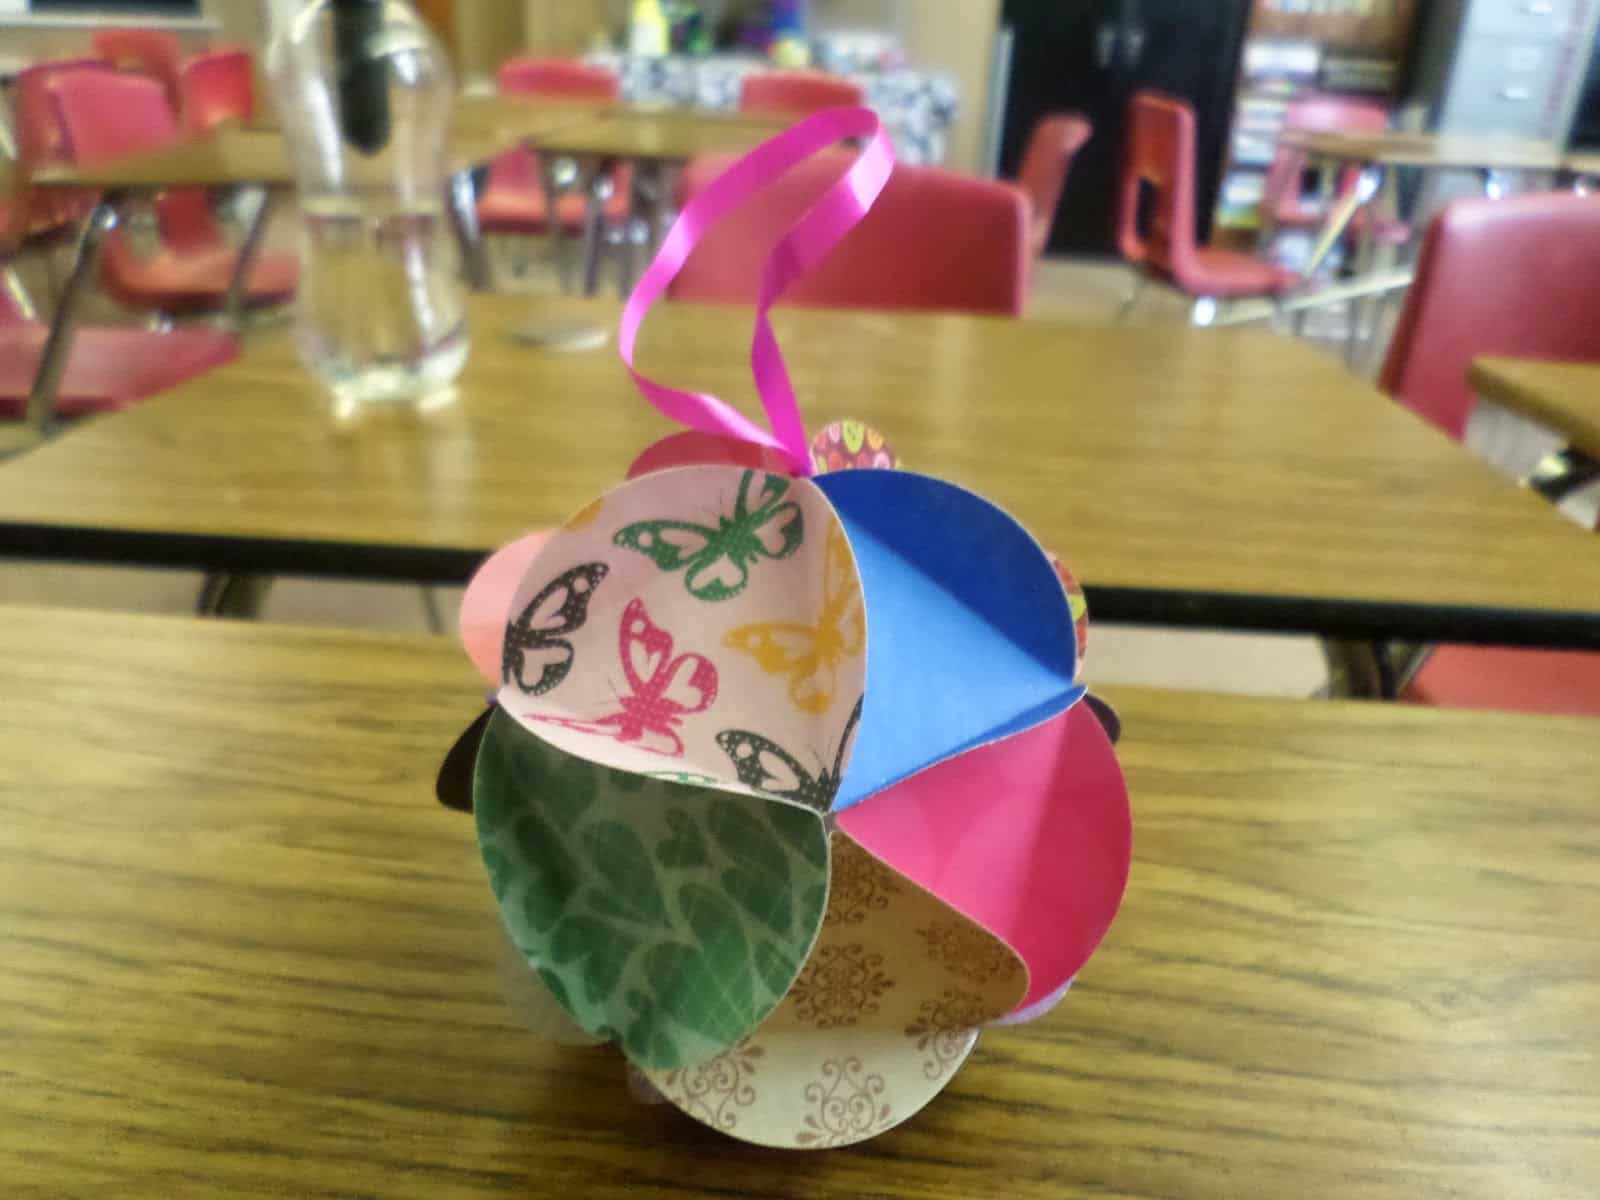
Final Product
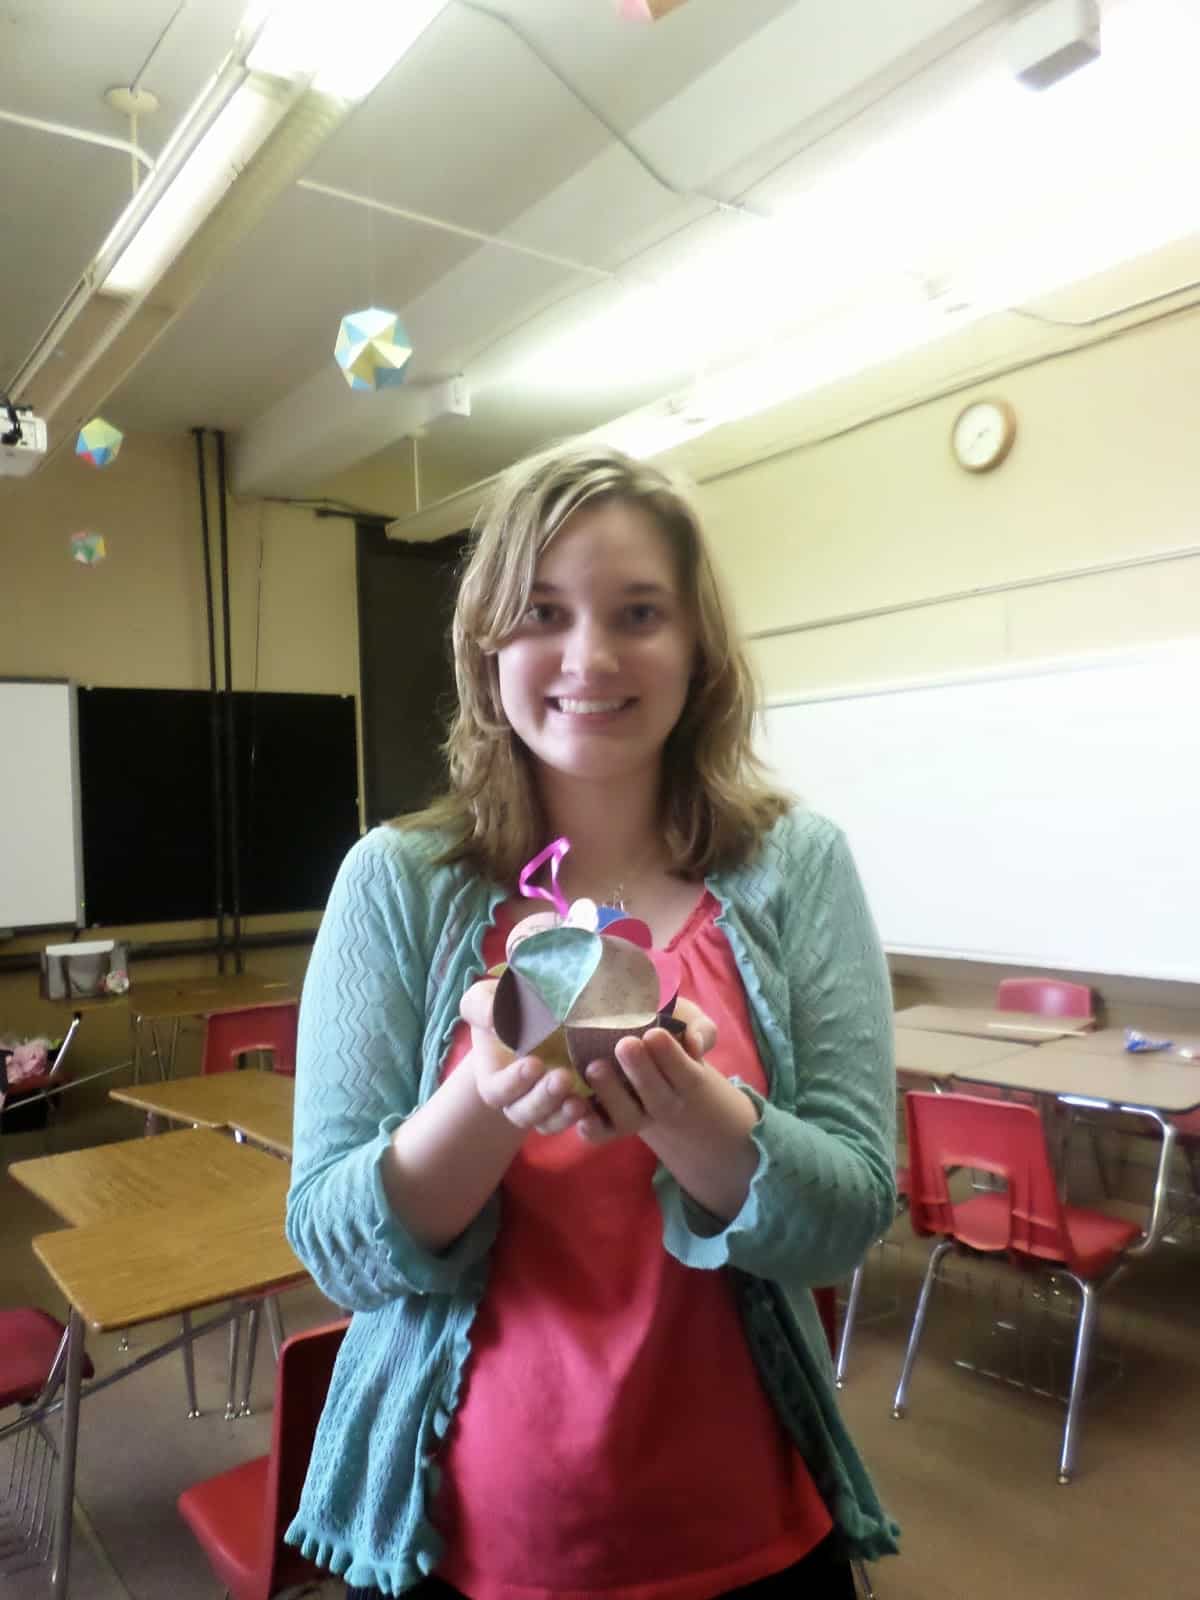
My students were so excited to proudly display their finished ornaments.
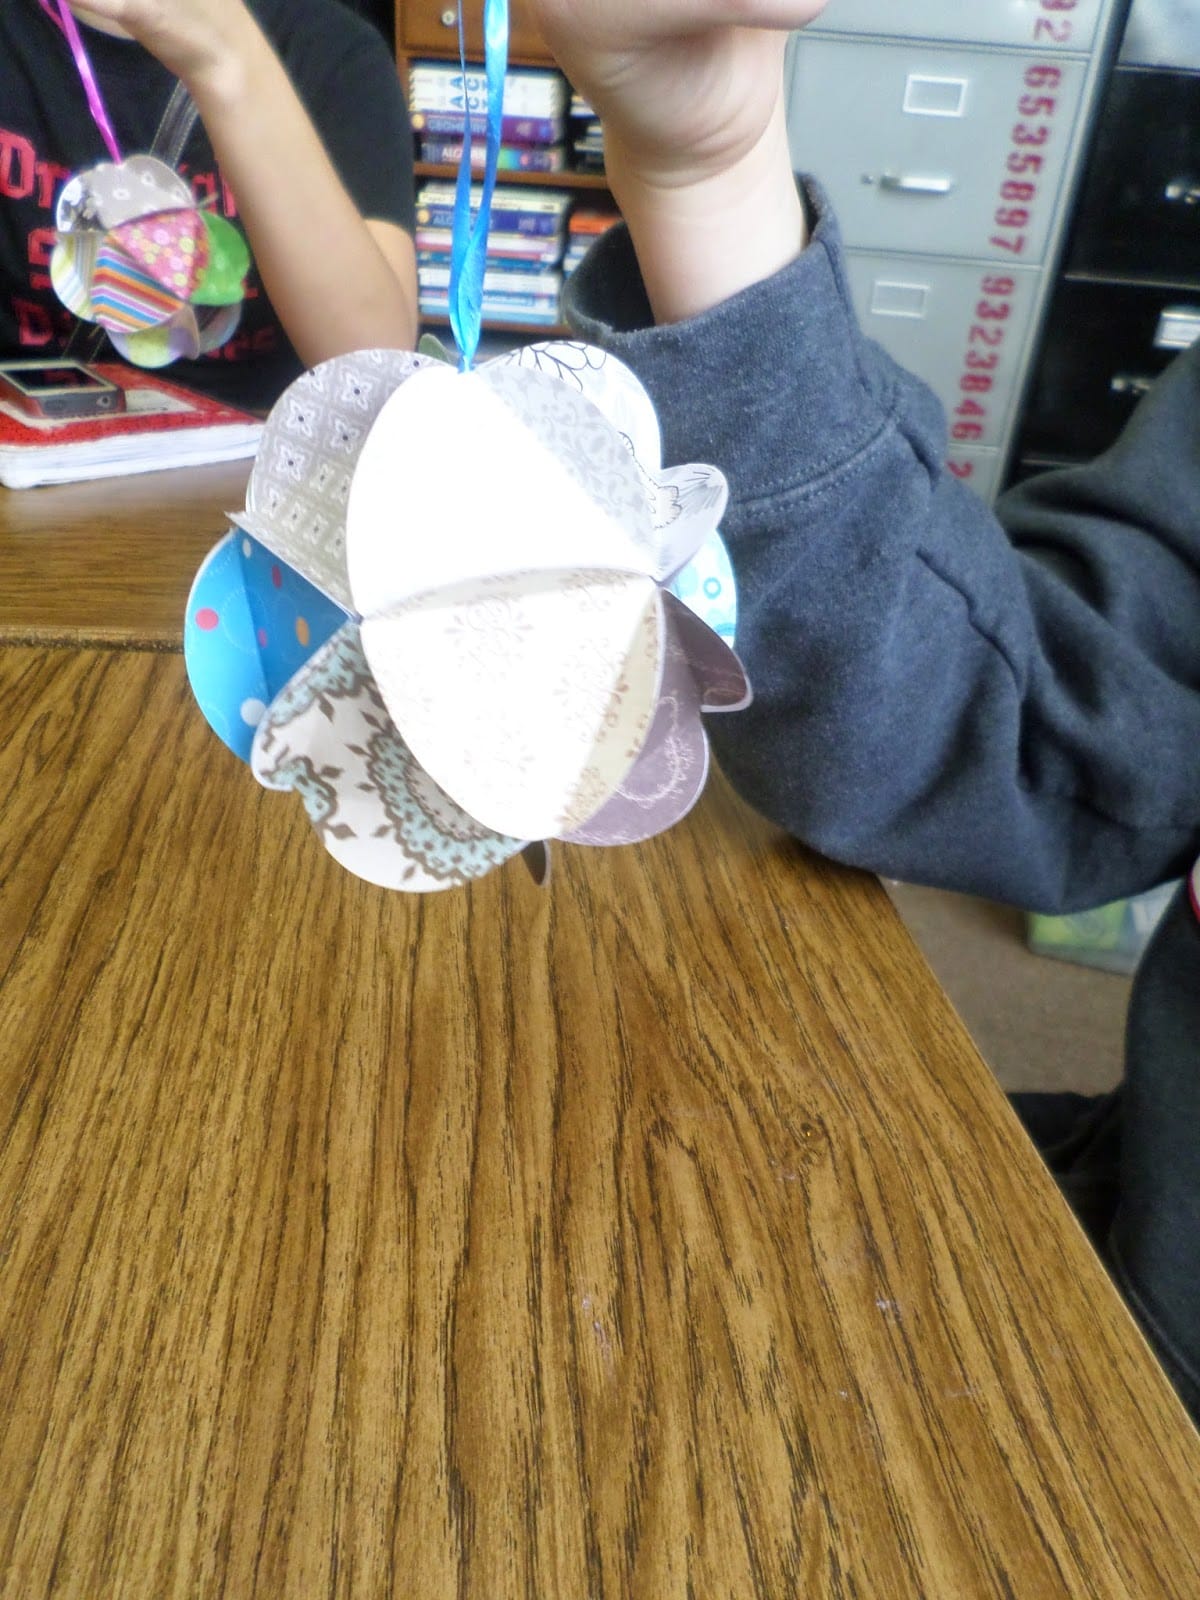
I had to join in on the fun and create my own icosahedron ornament ball. So fun!
Ideas for Adapting this Project
If you wanted to make this ornament project more math-related, you could have students cut their circles out of colored cardstock and decorate each circle to reflect something that they learned this year.
You could take Tina Cardone’s Fan Posters Project and turn it into Fan Icosahedron Ornament Balls. Pass out circle templates and have each student write affirming statements about their classmates on a circle.
Sort the circles by student. Then, have the students assemble their own ornament ball that is covered with words about them.
I could also see this as a culminating geometry project. Each triangle could be decorated with a different theorem? Or geometric vocabulary word and illustration?
Perhaps this could be turned into an activity of geometric construction? Use a ruler and compass to construct the necessary pieces without a template?
I have done these with 8 circles in the past and used it as an intro activity at the beginning of the year where the students answer 8 get to know you questions in the center triangle area. Great project!
I like this idea! And, only having 8 circles would make this a much less time consuming task! With 20 circles, I had students struggling to finish in our 50-minute class periods. Thanks for sharing!
This seems like a great way to introduce Euler's formula for 3D shapes: the number of faces and edges become obvious when they're the number of circles and the number of 'glued together curvey bits'. I've had students make Icosahedra (is that right?) out of nets before, but they're always a bit too fiddly and definitely don't look as good as yours!
Ooooh! I never thought of introducing Euler's formula this way. What a great idea!
I love that I see you replying to Shaun in this post. Weren’t you not yet married in 2014? 🙂
That was one of the first comments he ever left on my blog. Before this, I didn’t even know he existed! We got married in 2016.