Hands-On Archaeology Geometry Activity
I got to experience this hands-on archaelogy geometry activity during the 5 glorious days I spent last week at NSU-BA as part of the Oklahoma Geometry and Algebra Project (OGAP). So much fun! So much learning!
On the first day of the workshop, I walked in the room, and my eyes were immediately drawn to the table along the wall that held the supplies we would be using for the week. There were thermometers, bags of play sand, work gloves, protractors, compasses, rulers, and SO MUCH CANDY. I was incredibly curious about how play sand was going to find its way into a math lesson.
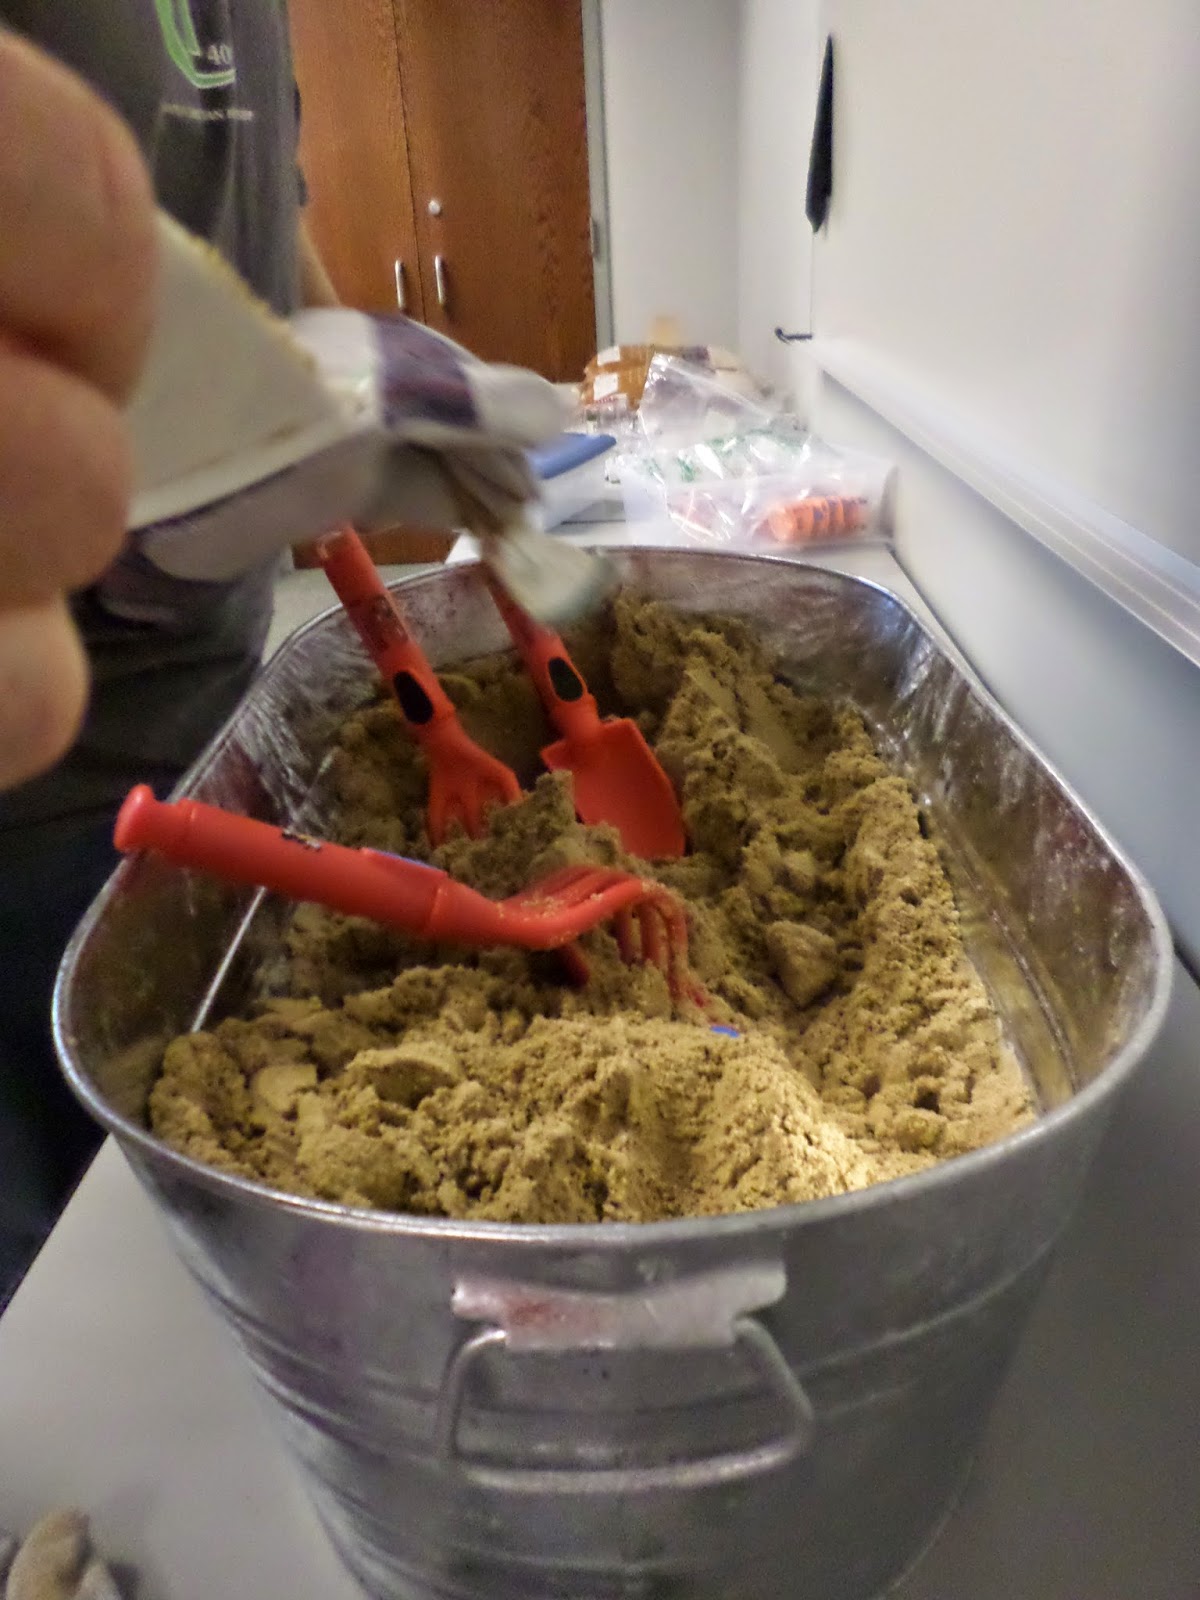
Monday passed, and the play sand remained on the table. Tuesday came and went without any activities involving sand. Surely we would get to play with the sand on Wednesday! Nope. Finally, on Thursday, we entered the classroom to see that a metal bucket had been filled with the sand.
I doubt you know this (unless of course you’re my sister – Hi sis!), but I’ve always thought it would be so much fun to be an archaeologist. I was that kid who used to wish for a metal detector. Okay, I still wish I owned a metal detector. My parents never did give into that request. I’m pretty sure my mom didn’t want the yard full of holes. I just think it would be so exhilarating to unearth ancient artifacts! But, I would not make a good archaeologist. I’d probably get fired for complaining too much. You see, I don’t handle dirt well. I don’t like getting dirty. So, having a job that involves digging in the dirt probably wouldn’t be the best fit. Plus, I hate, hate, hate hot weather. Oklahoma summers can be awful, and the air conditioner is my best friend.
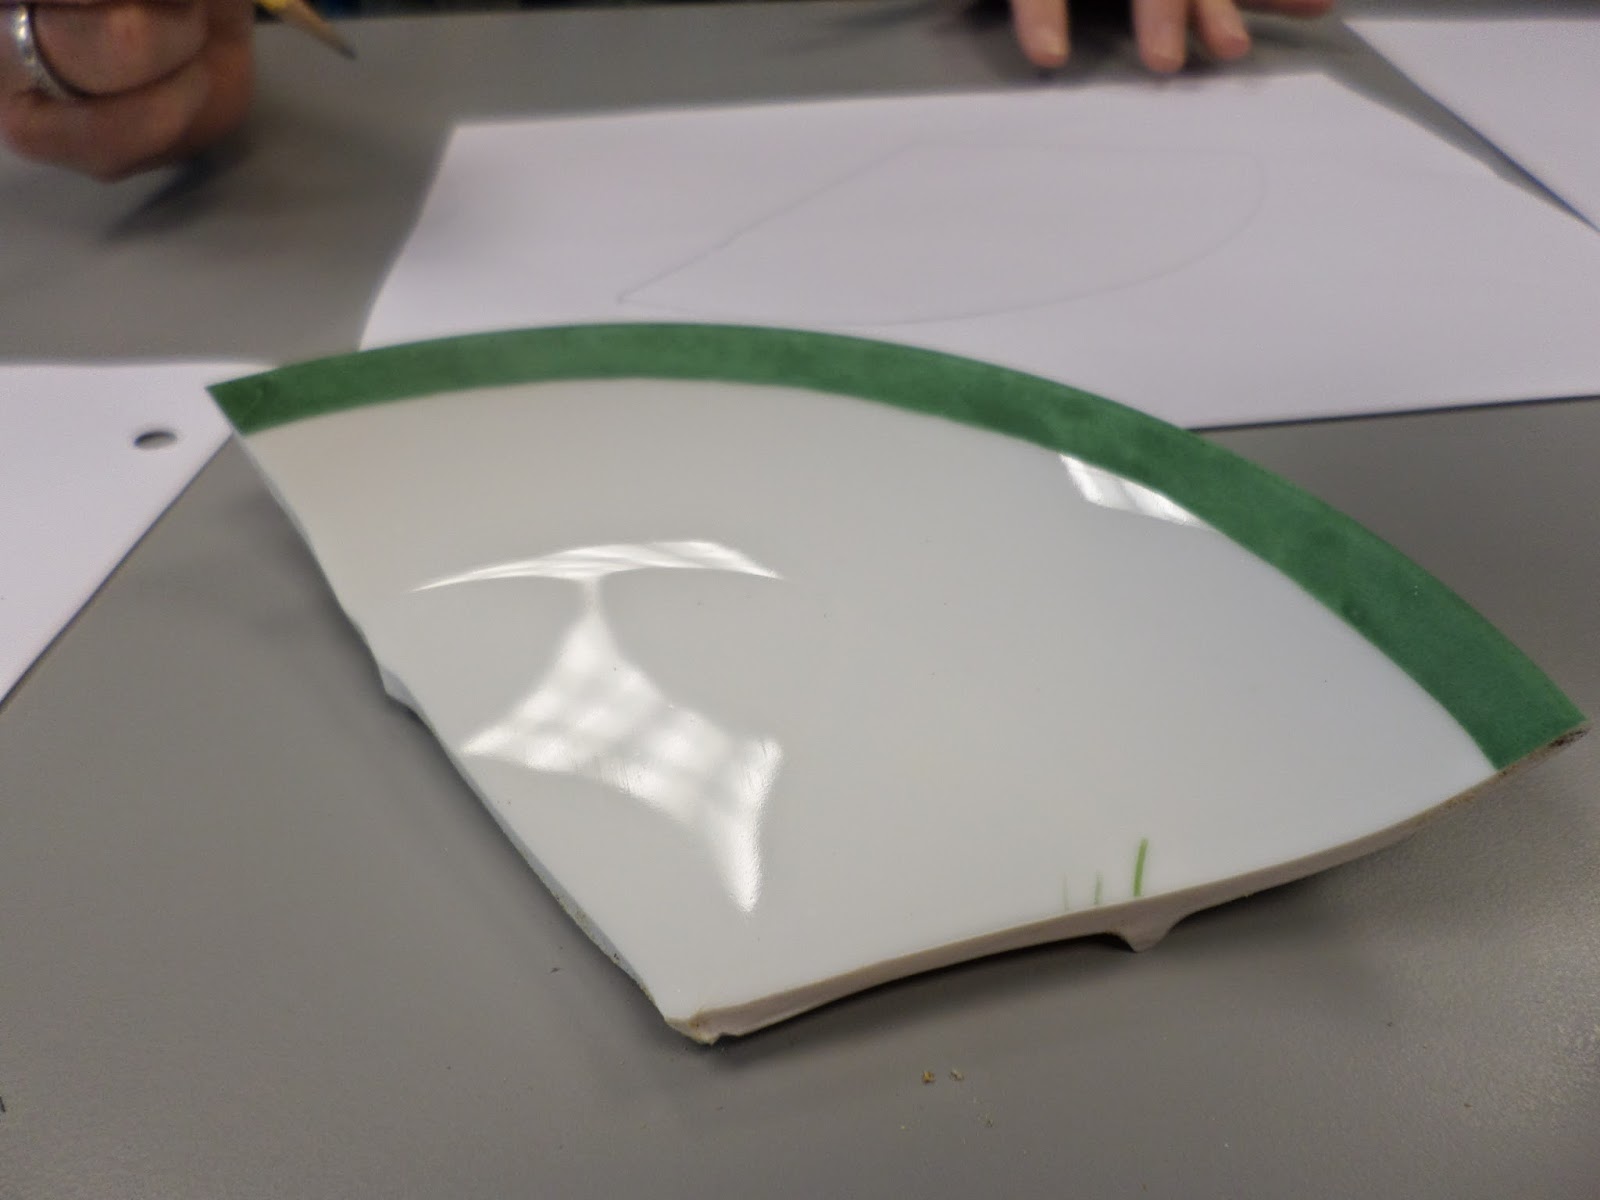
Since I doubt I’ll ever get a chance to pursue archaeology, I was excited to get to try my hand at an archaeology dig during the workshop. The workshop facilitators urged us to use caution in this activity to avoid injury. One person per pair was instructed to come to the bucket, don a pair of work gloves, and use the Mickey Mouse/Cars trowels to unearth an ancient artifact to carry back to their desk and trace. I actually let my partner do the digging so I could document the process with my camera. After digging in the sand, my partner unearthed a shard of pottery. It looked like it was once part of a plate.
Our task was to calculate how big the original plate was that our shard belonged to. Then, we were to compare the measurement we found to the other groups in the hope that some of our shards might fit together to form a more complete artifact.
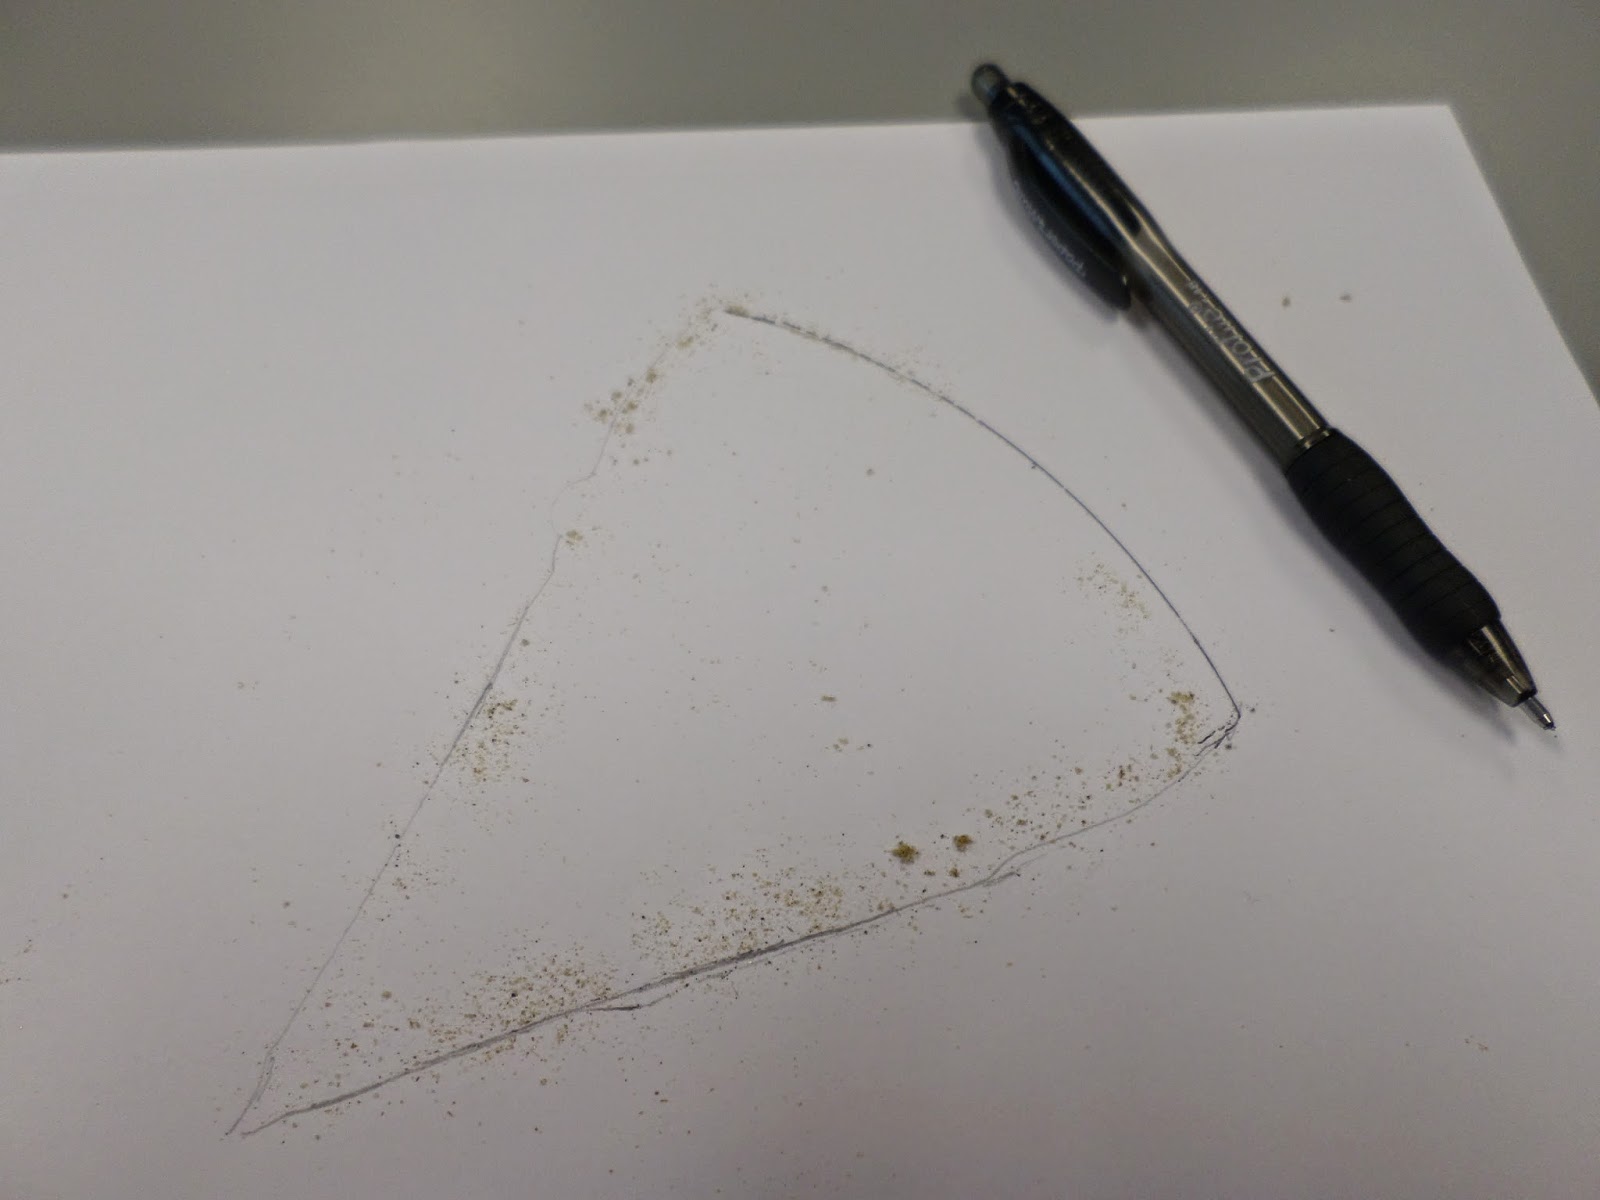
Our first step was to trace our artifact on plain copy paper. This was a little tricky. And sandy.
I didn’t actually remember to take a picture of our artifact. But, here’s the artifact of the other group sitting at our table.
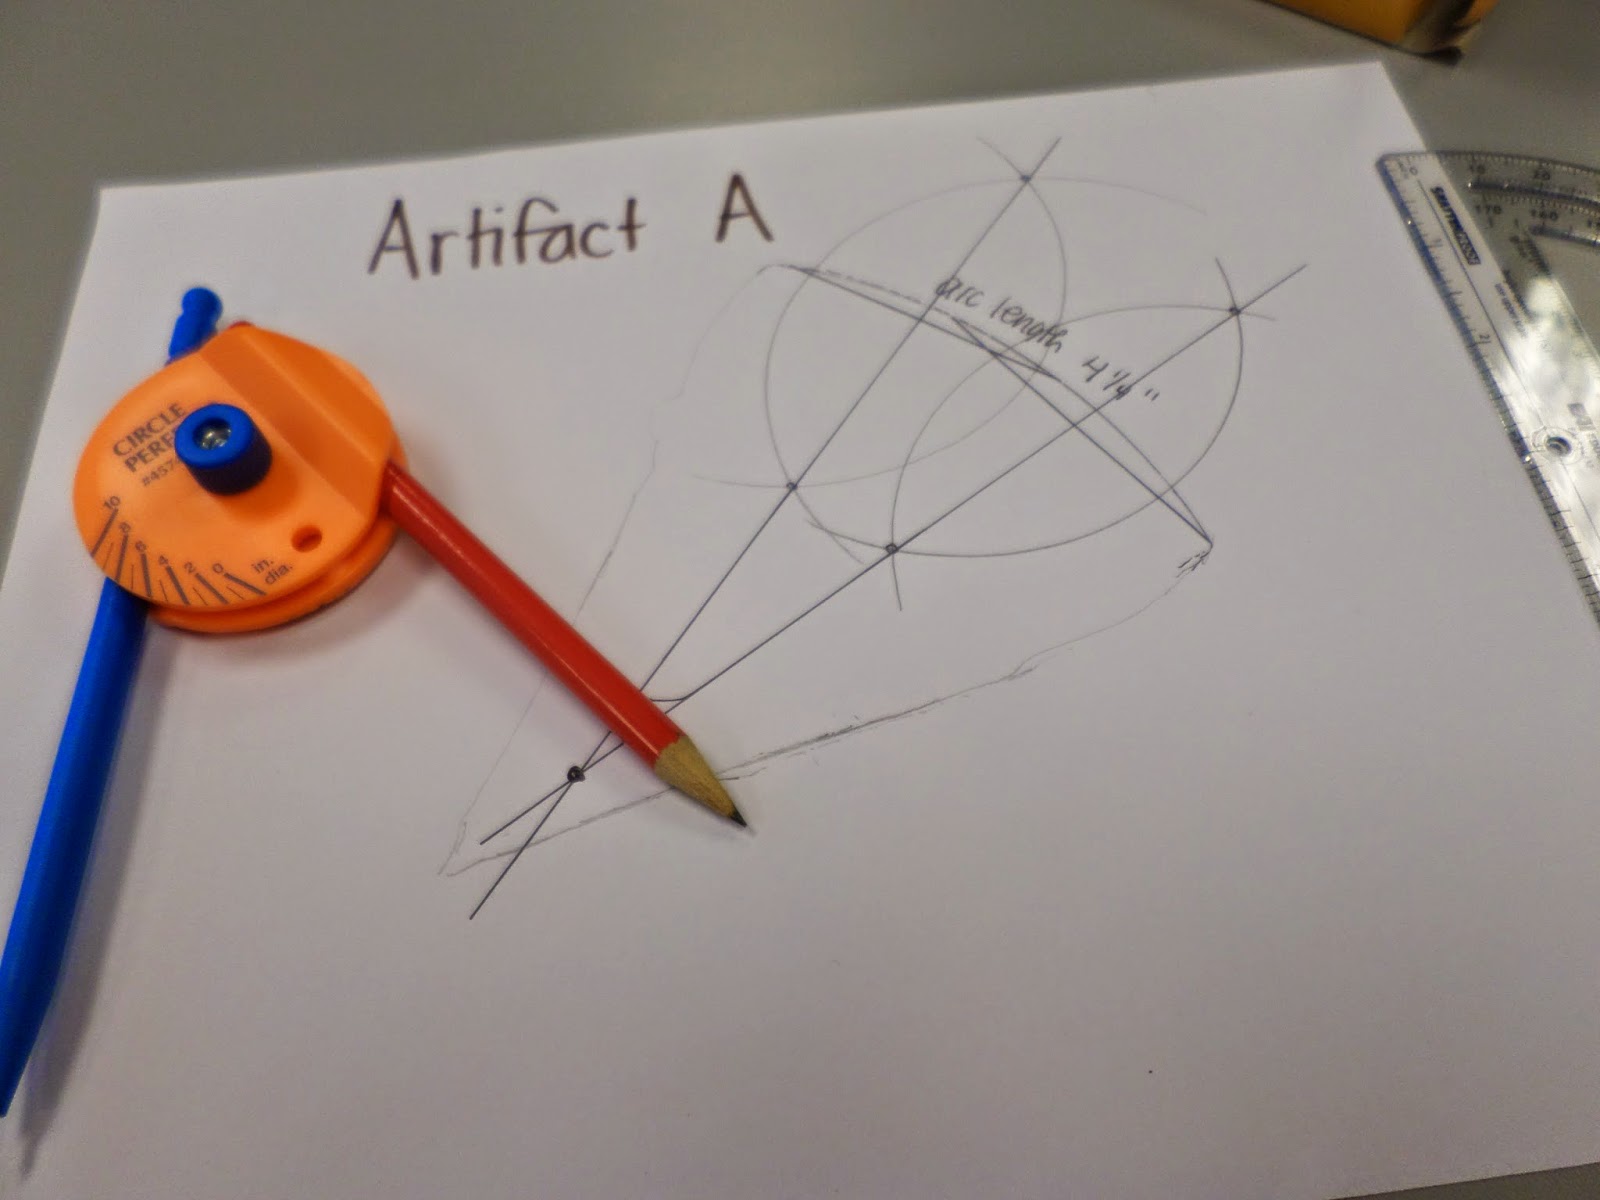
Once we had our artifact traced, we had to decide on a strategy. How could we figure out how large the original plate was? Our first instinct was to measure the arc length. That wasn’t much help. We had been assured that the plates were not broken in the center. So, how could we find the actual center?
This wasn’t the first time I had had this dilemma. On Monday, we had to take a pre-test. I usually do quite well on these types of things, but this test had several problems that stumped me. On the test, there was a drawing of a piece of the top of a broken glass coffee table. Given this piece of the broken table, instruct your friend what size of circular glass table top he needs to purchase. After measuring the two sides and finding them to be different lengths, I was stumped.
Here I was again. Same problem. Different context. Still stumped.
I guess my table looked lost/confused/dazed because one of the facilitators came over to give us a little shove in the right direction. She told us that we needed to draw two chords.
My geometry is a bit rusty, but I can still draw chords. Now what? Thankfully one of the others at my table had taught geometry recently and remembered that the perpendicular bisector of a chord always goes through the center of the circle. Once we found the perpendicular bisector of each chord, all we had to do was find where the bisectors intersected. Then, it was just a matter of measuring the radius!
And, yes, I did label my paper “Artifact A.” I’m cool like that.
How fun is this activity?!? It kinda even makes me want to teach geometry. This was, by far, one of my favorite activities from the 5-day workshop. I’ve always thought constructions were kinda cool, but I’ve never seen them as useful before this activity.
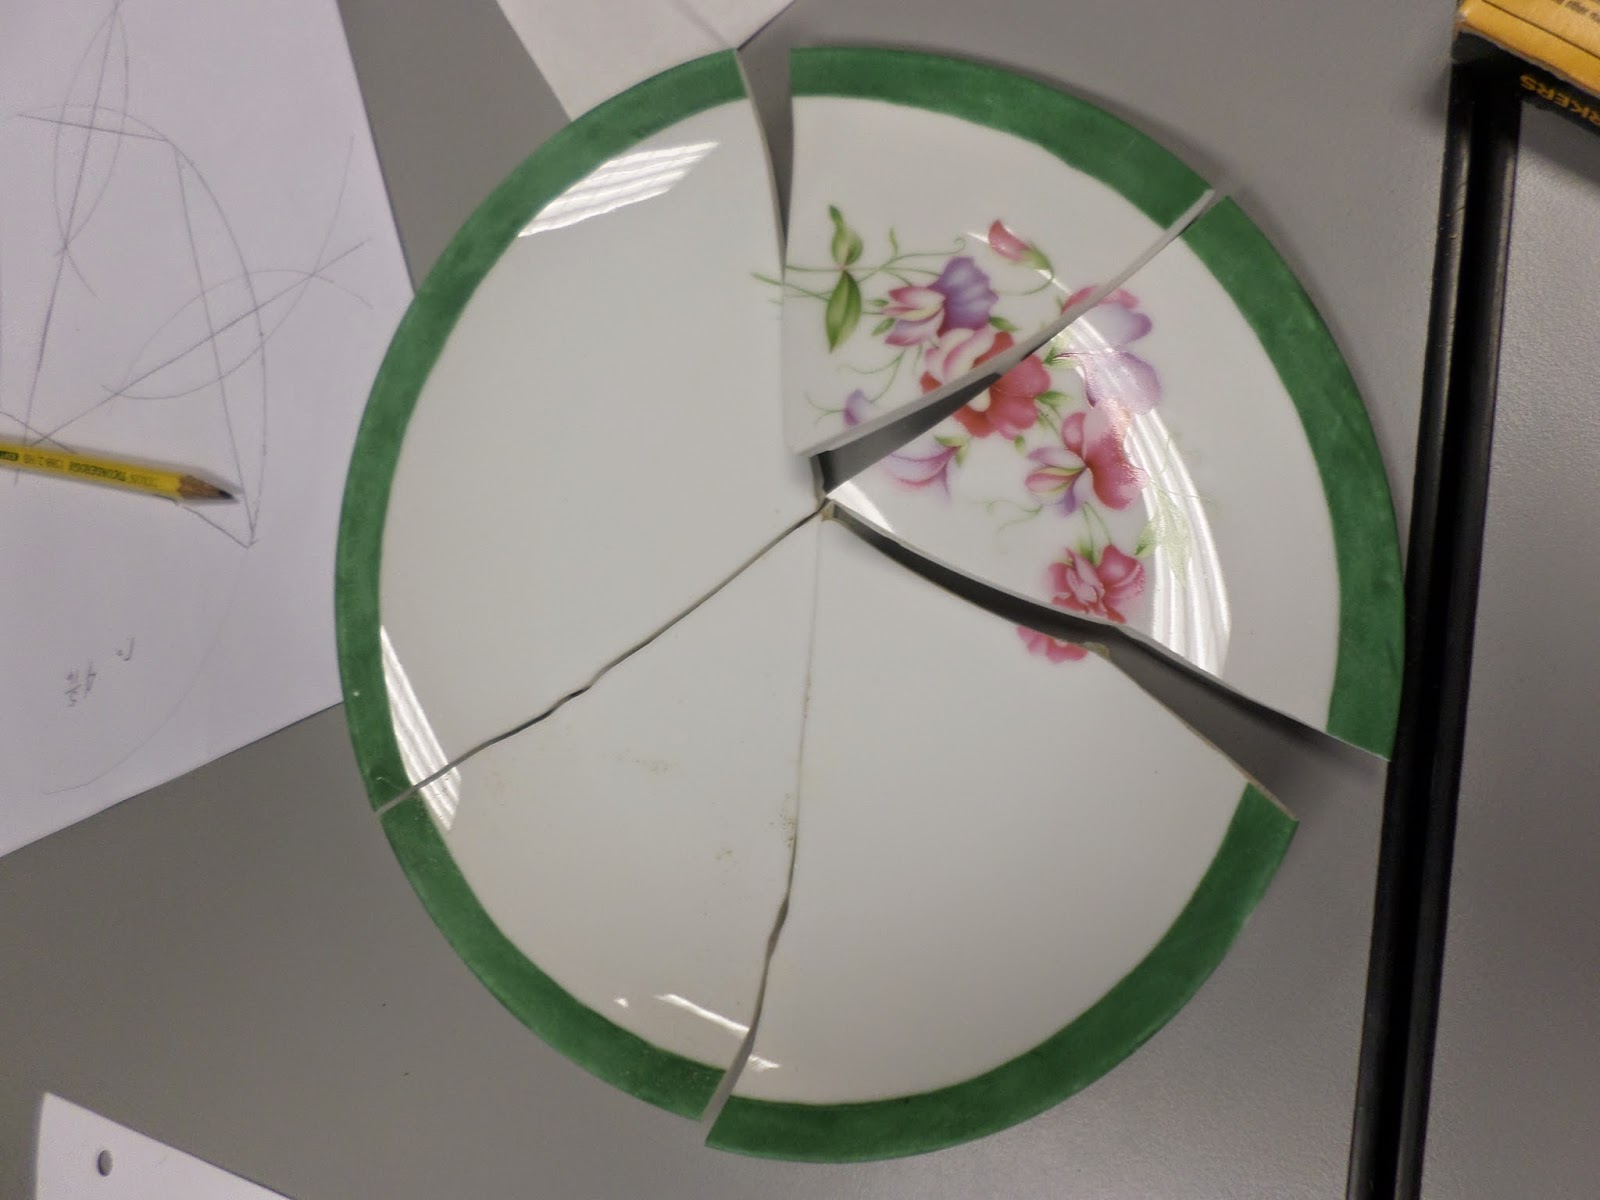
Here’s our reconstructed artifact:
After completing the project, we had a discussion on how to adapt this for our own classroom. We decided that maybe using an actual broken plate wasn’t the best idea. A kid could easily get hurt. One teacher suggested cutting up Chinet plates for the activity. Another said that you could break the plate and just hand out the tracings. Keep the artifact in a ziplock bag so the kids could see it but not touch it.
Here are the instructions we were given in our binder:
Materials
* Large, flat, plastic pan for the digging site
* Ceramic plates of varying diameters – broken into 4 pieces with at least 3-4 inches of outside rim and not ending at the center
* Play sand
* Compass
* Protractor
* Pencil
* Plain Paper
Student Instructions
* Each pair of students should dig for a piece of the artifact.
* Trace the shape of the artifact on paper.
* Using any manipulatives or tools in the classroom, find the radius of your object.
* Find the other groups that have the same measurement and fit the pieces together to form the original artifact as best as you can.
Have you ever done anything like this in your classroom? Can you see yourself using this activity? Please share!
Hi Sarah, I hope you are mice free soon. Thank you for this post. Lots of things to take in. I too am doing the deep cleaning room by room, teacher's brains are wired differently I think. As I cleaned my kitchen I came upon flattened coffee filters. I almost threw them out but then noticed….these are perfect circles…geometry….stash. Maybe they would work here.
I'm the exact same way! I was putting something up in my kitchen cabinets yesterday, and I discovered a stash of oatmeal canisters that I had saved just in case I could make a math lesson out of them! Completely forgot about them! Oops…
Hi, Sarah! So sorry to hear about your mouse! I hate them in my house, too. Two tips for you: First, make sure that trap is along the wall, not the middle of your room. Those little stinkers love to slink along the edges, and rarely do they venture into open spaces. Second, the old fashioned snap traps really do work the best, and you don't have to pick up or touch the mouse directly at all. Use a small plastic bag inverted over your hand to grab the other end of the trap, then roll the bag closed over your little "friend."
Your description of the geometry activity makes me want to teach Geometry. I wish there was some way to use trig to find the size of the plate. This would be a great change of pace activity in the trig portion of my algebra 2 classes, and I love the cross curricular connections.
I didn't even think about where I placed the trap. Great advice!
I'm teaching trig this next year, too. We NEED to find a way to make this a trig activity! Would love to incorporate this into my curriculum!
Oh good, glad someone already mentioned putting the trap(s) at the edges of the room! On to the math! How did they cut the plates? I would think you would need a tile saw or something. Even cutting a plastic plate might give a rough edge.
They wrapped the ceramic plates in towels, balanced them over a box, and hit them with a hammer. They said that you have to make sure that you don't hit the plate in the center; otherwise, the plate will break at the center. I'm not sure how a plastic plate would work, though one of the other participants suggested this.
Hi Sarah. So funny that you chose this activity to write about. I had this problem out of an old Discovering Geometry series years and years ago as one of those problems that required a bit more thinking and chose it as an activity to demonstrate to a group of math teachers. They liked it, too. Now I teach Geometry at a state charter, and yeah . . . I always do this in the circle chapter. As for the mice . . . I returned once after 3 weeks in FL. I got back, and mice had entered my adobe abode. Yes, freaking out screaming and leaping back about 10 feet was my first reaction. Such a girl thing, which just bugged me enormously, but I'm not sure why. Called the exterminator who placed traps, boxes with poison that my kitties couldn't get to and recommended we caulk any open spaces. As for the dinner plates, I think if you put the plate between some dishtowels and a hammer; it might work. Regarding the common core — it ebbs and flows – a cycle in education . . . I hated reading that it brought you down 🙁 . I've been on your distribution list for the past year, and I just think that you are such a wonderful teacher — from the foldables you do to the bright sunshiney spirit that resides within you. Don't despair . . . you make a difference every day. Never doubt it.
I have a copy of Discovering Geometry, but I haven't looked through it that much since I've never taught Geometry. Our workshop presenters are big fans of the series, so it isn't surprising that this activity is from that book! 🙂
Thanks for your sweet, sweet comment!
Yes! That activity looks so fun! Unfortunately, I won't be able to do it until spring semester. They actually use that theorem in an episode of Bones to find the diameter of a murder weapon! Thanks for sharing!
Showing a clip from the Bones episode would be so fun! Hope you are able to use this activity!
Hey that's a picture of me digging! I'm so excited that I made it into your blog. Keep up the blogging even though i know you are crazy busy with grad school right now. You are such an inspiration.
I love that you were able to recognize yourself in the picture. Thanks for your kind words!
Now I *TOTALLY* want to do this activity second semester, after we do the circle theorems and constructions. Thank you for inspiring me!!!!!
<3
Elizabeth (@cheesemonkeysf)
PS — I was always that kid too. I wanted to be an archaeologist. Luckily for me, my mom was *also* always that kid. 🙂
– Elizabeth
You'll have to blog about how it goes, Elizabeth!
Hi,
I just saw this activity and it looks awesome. I read the part that someone put that an episode of "Bones" used that premise – does anyone know which episode?