Dividing Polynomials Using the Box Method Activity
This blog post contains Amazon affiliate links. As an Amazon Associate, I earn a small commission from qualifying purchases.
I could tell my Algebra 2 students still needed a lot of practice dividing polynomials using the box method, so I put together this activity.
We did this activity the day after we completed our dividing polynomials using the box method foldable.
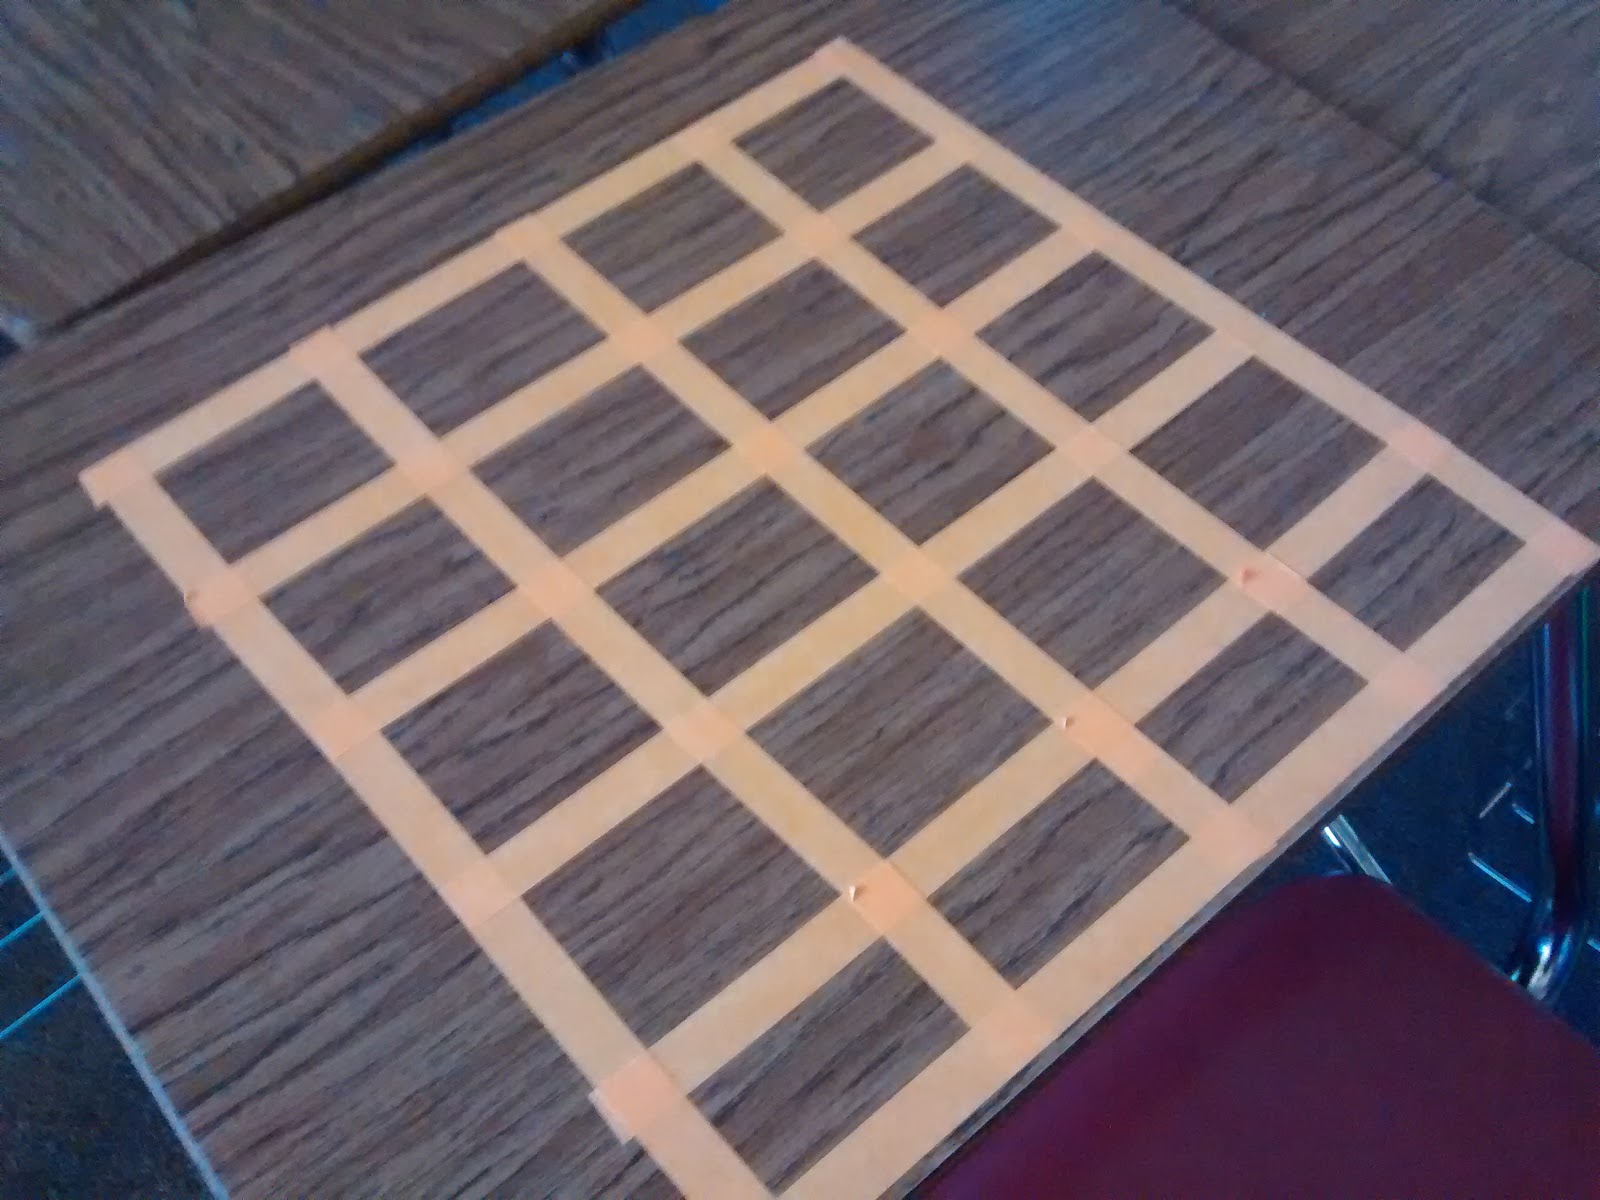
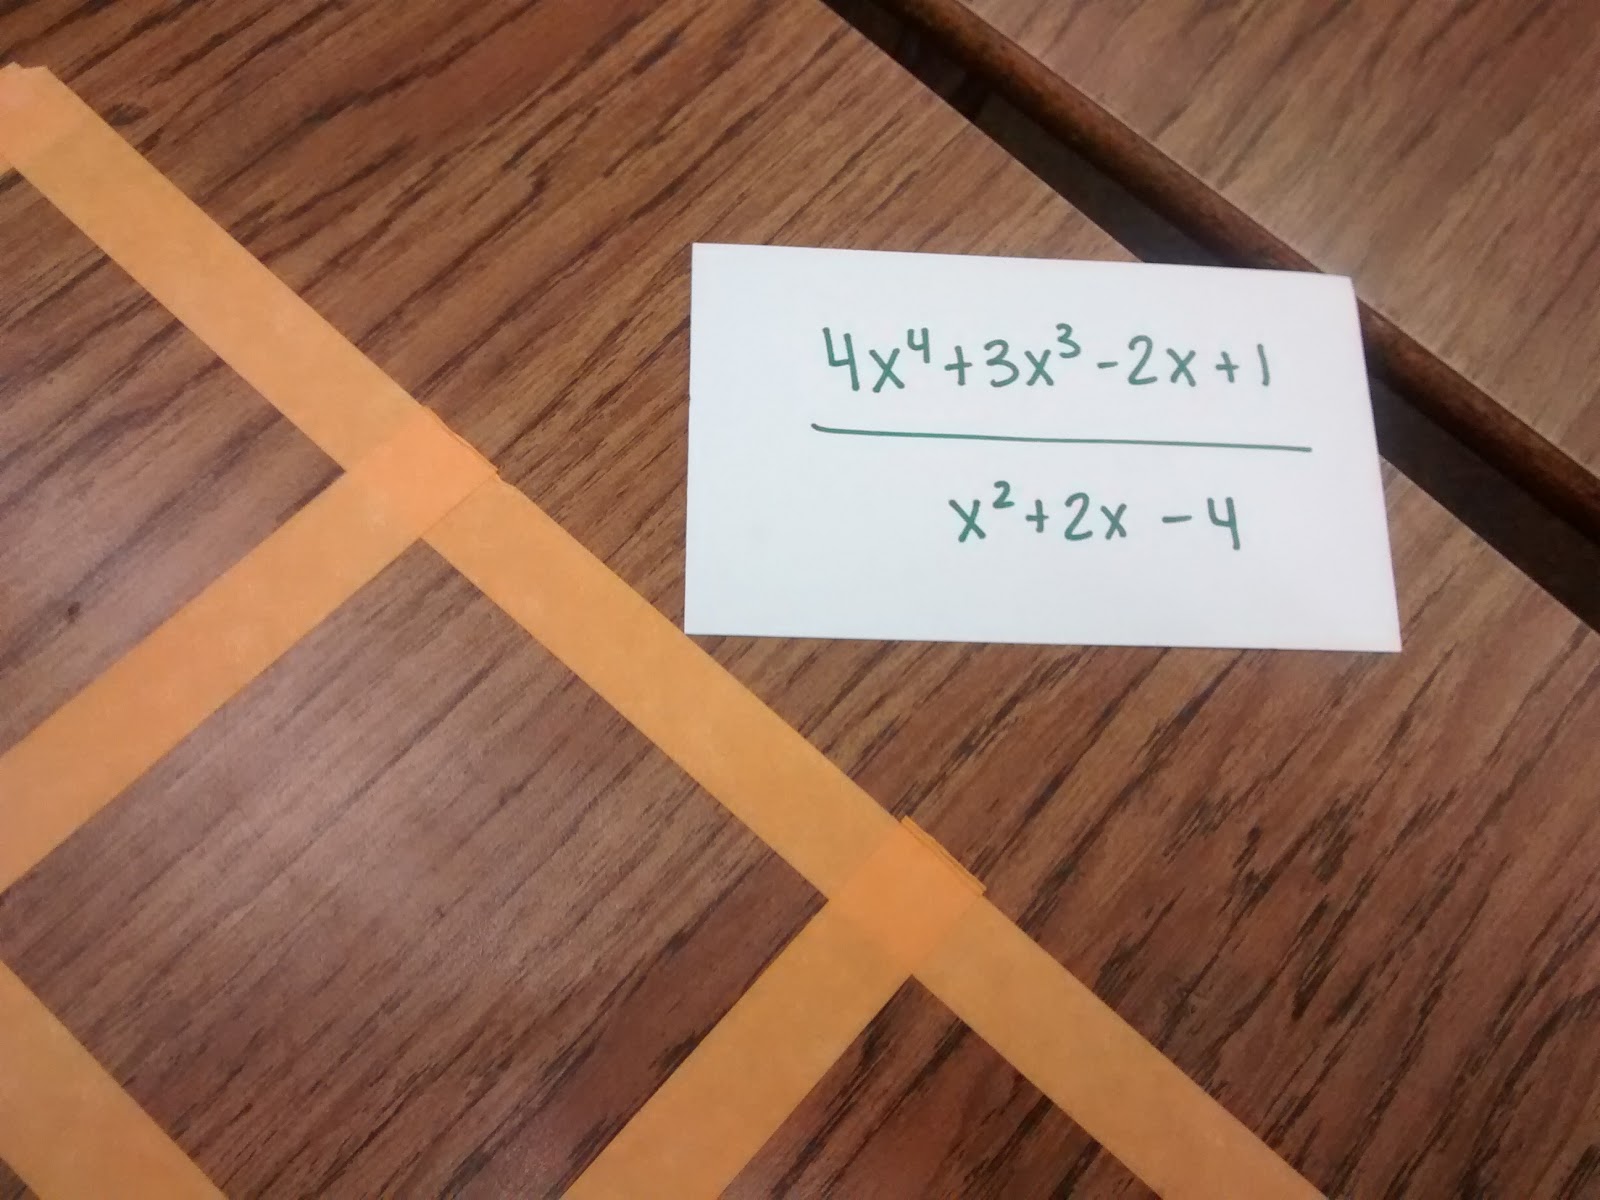
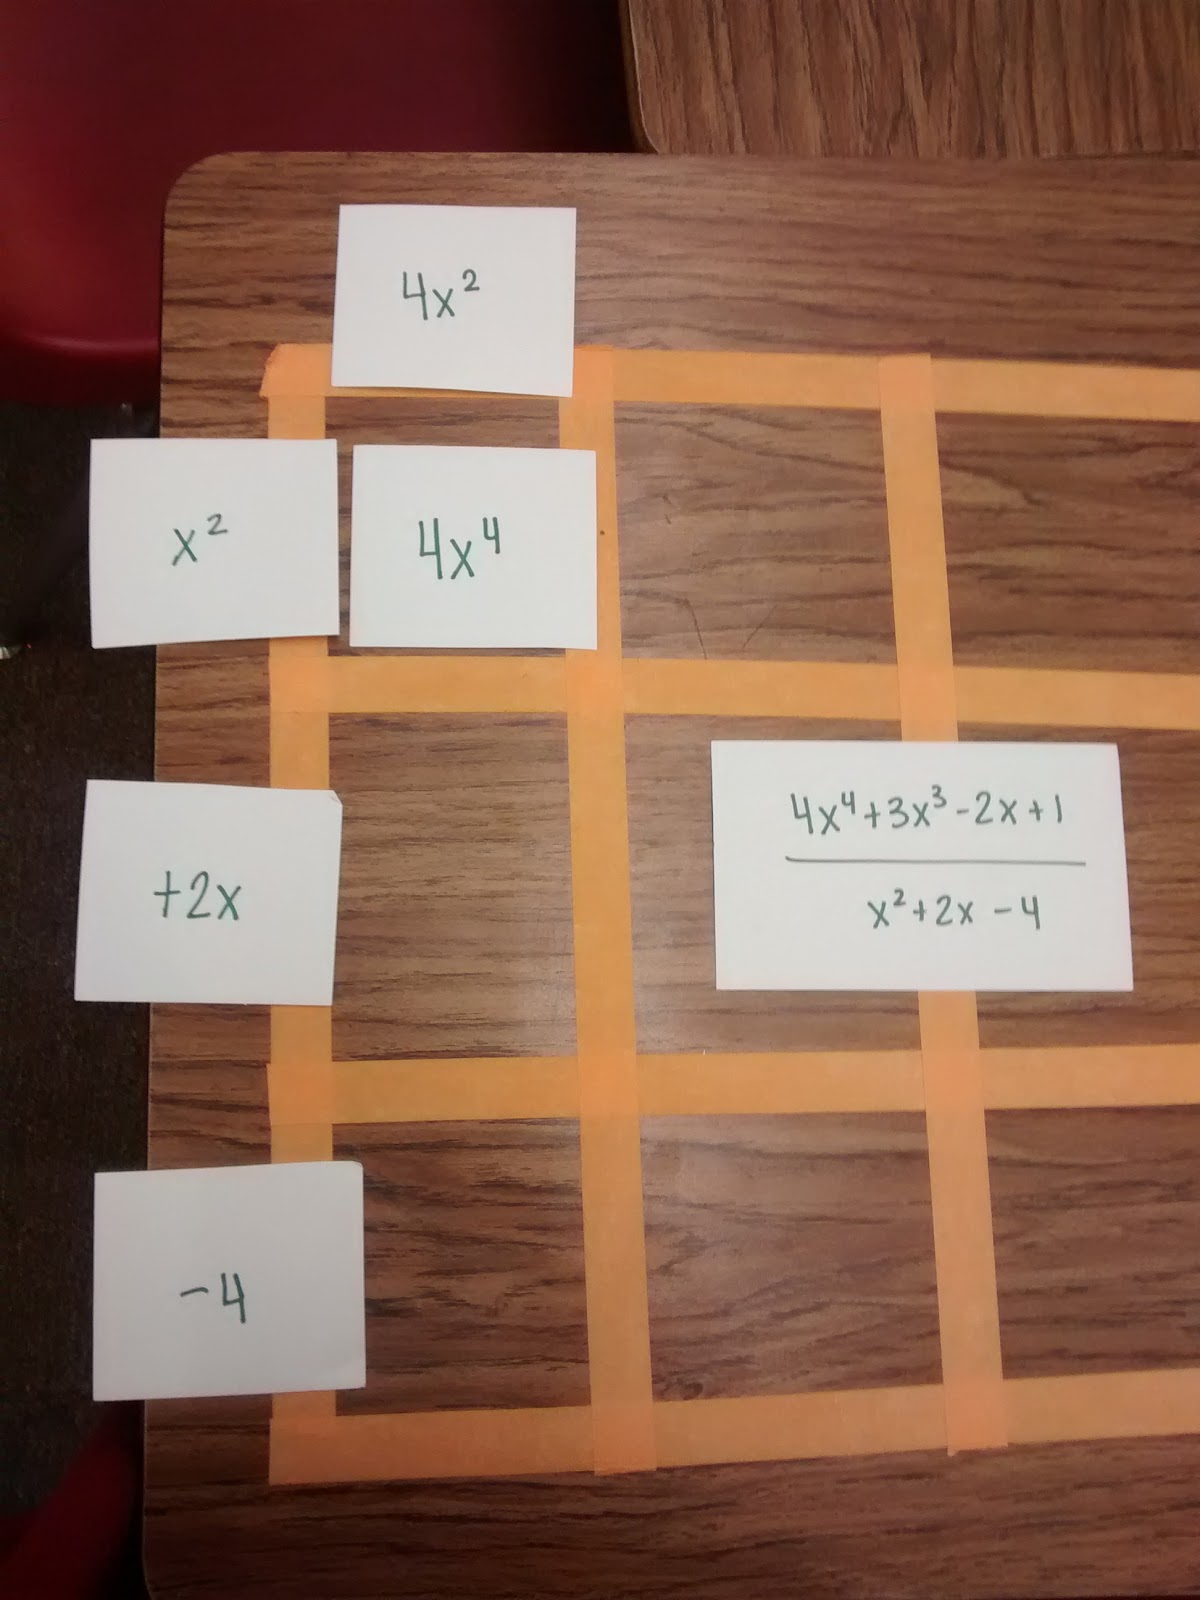
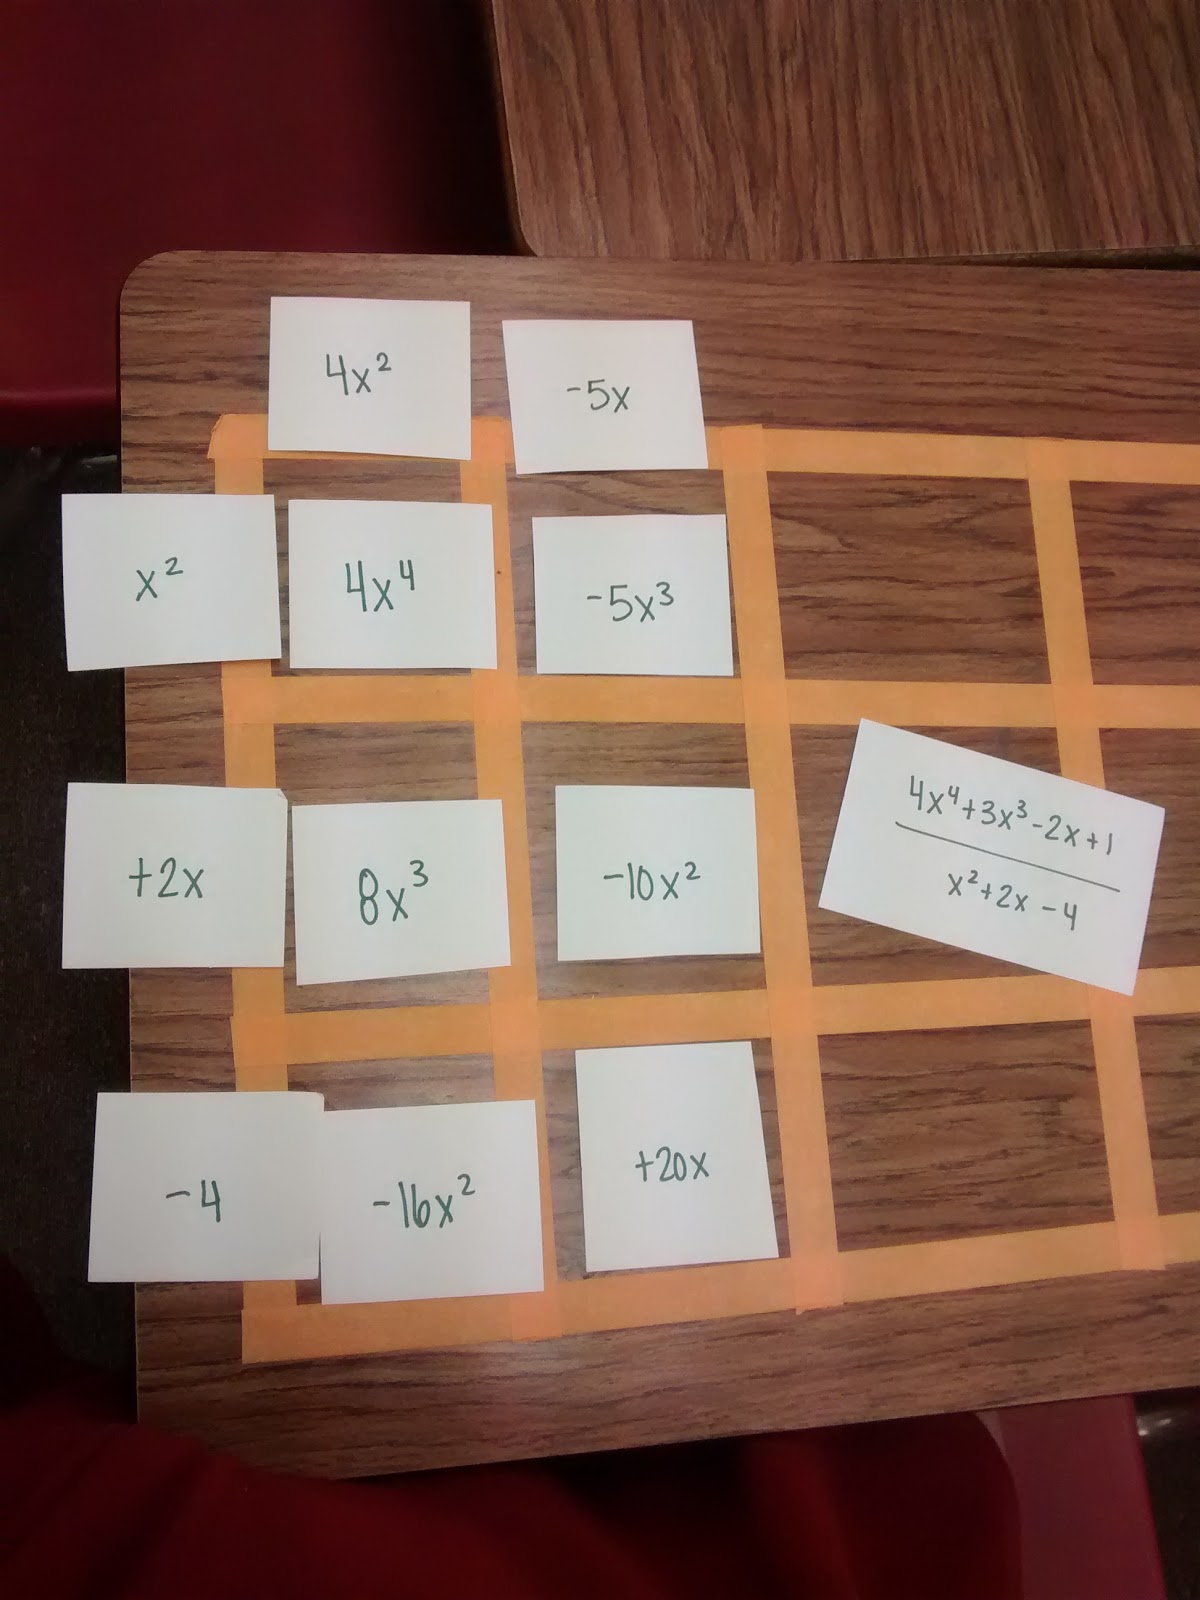
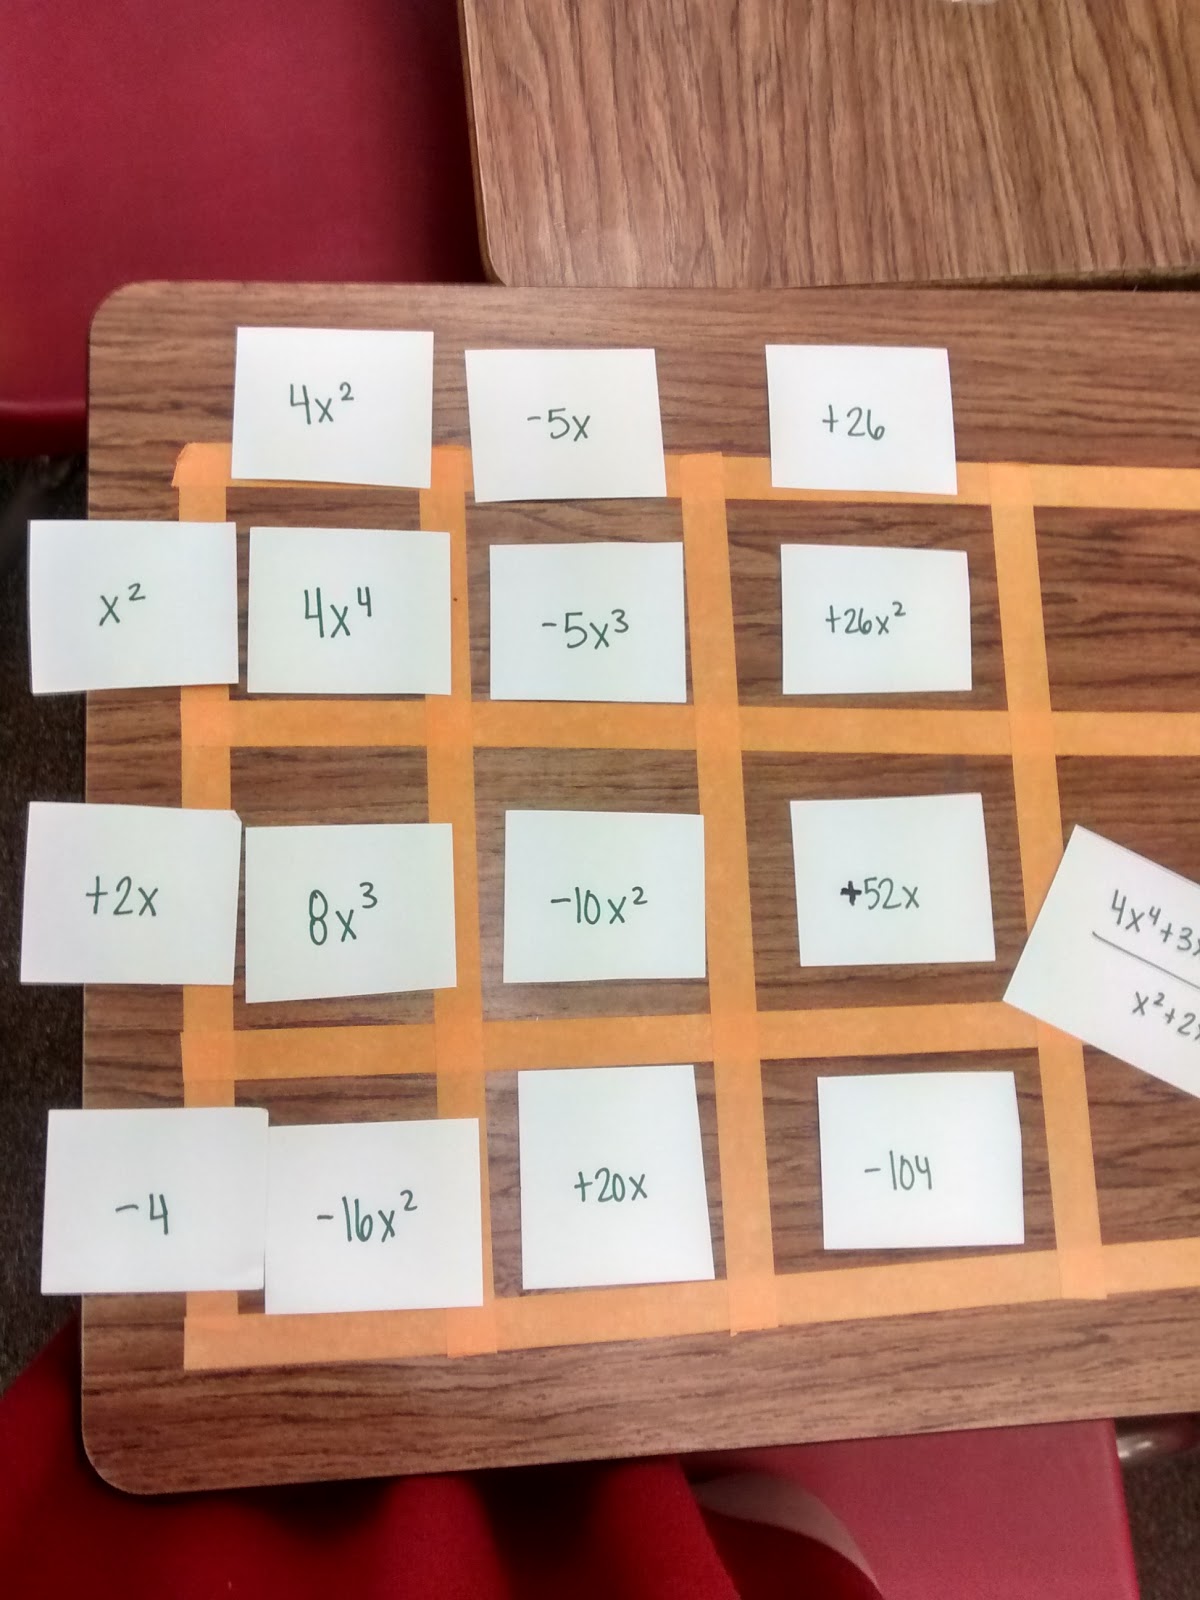
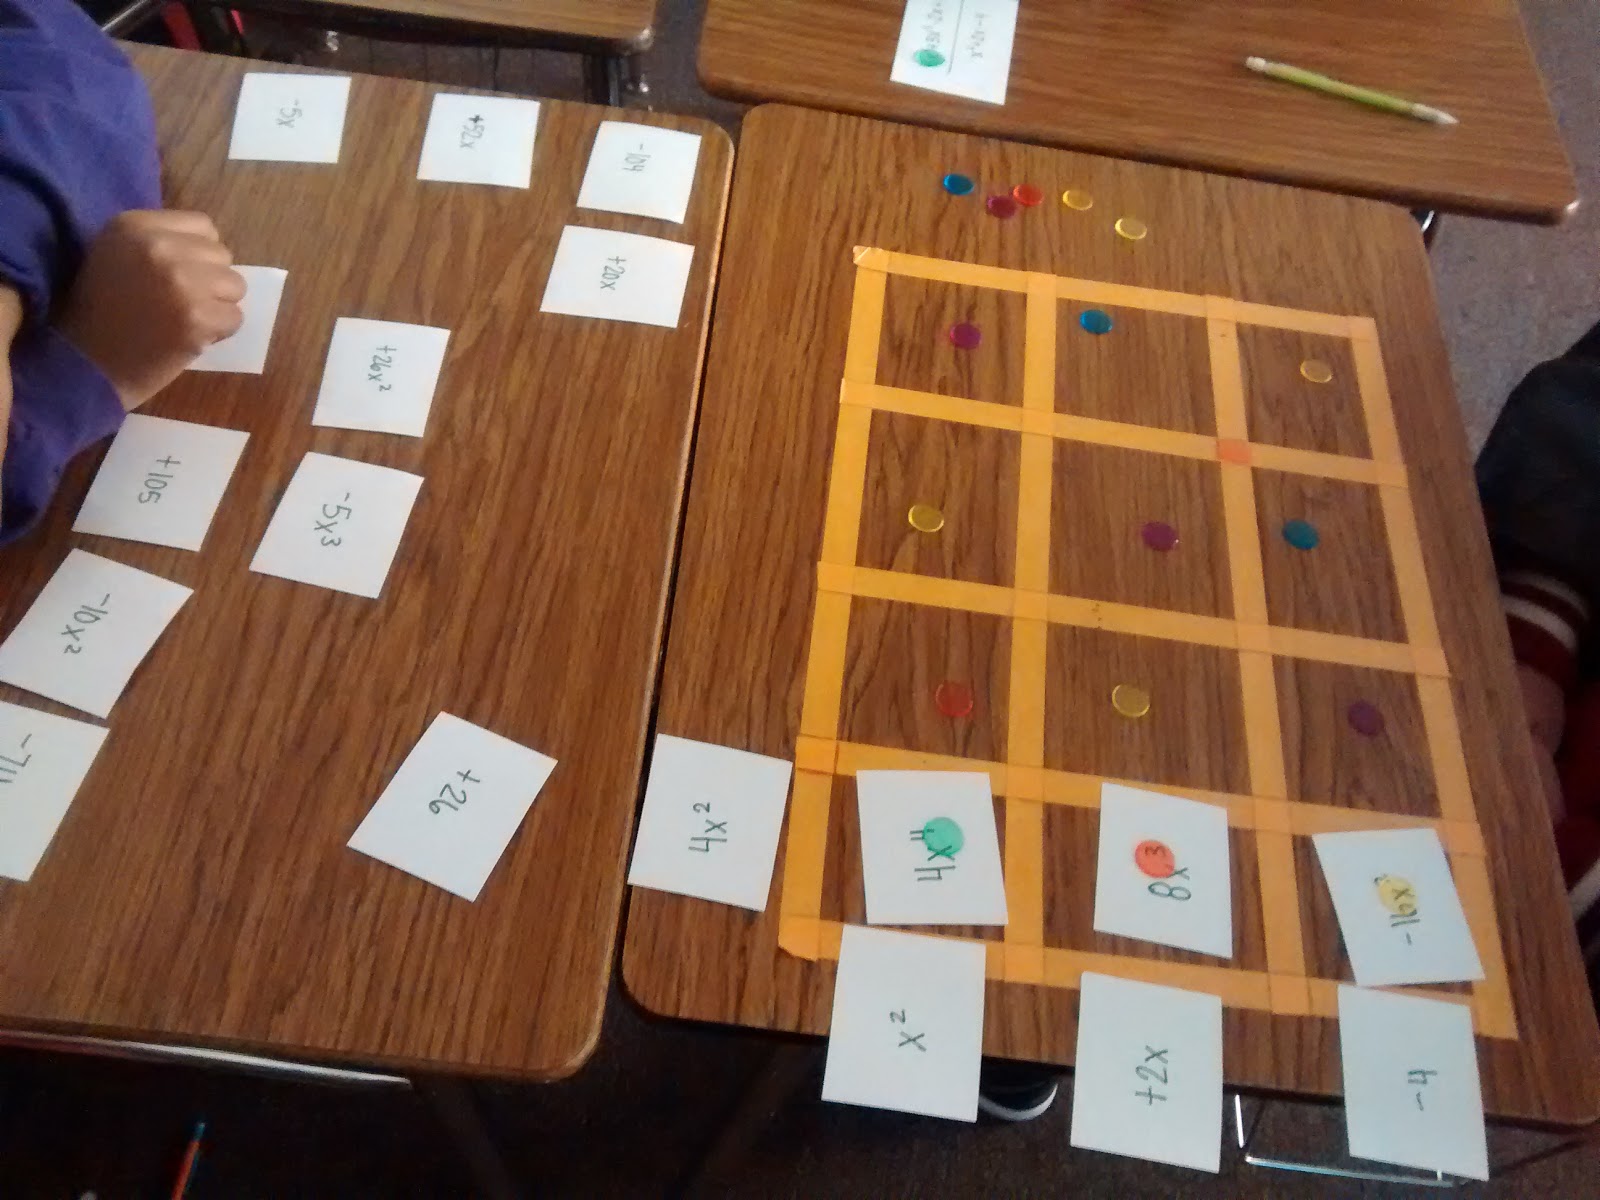
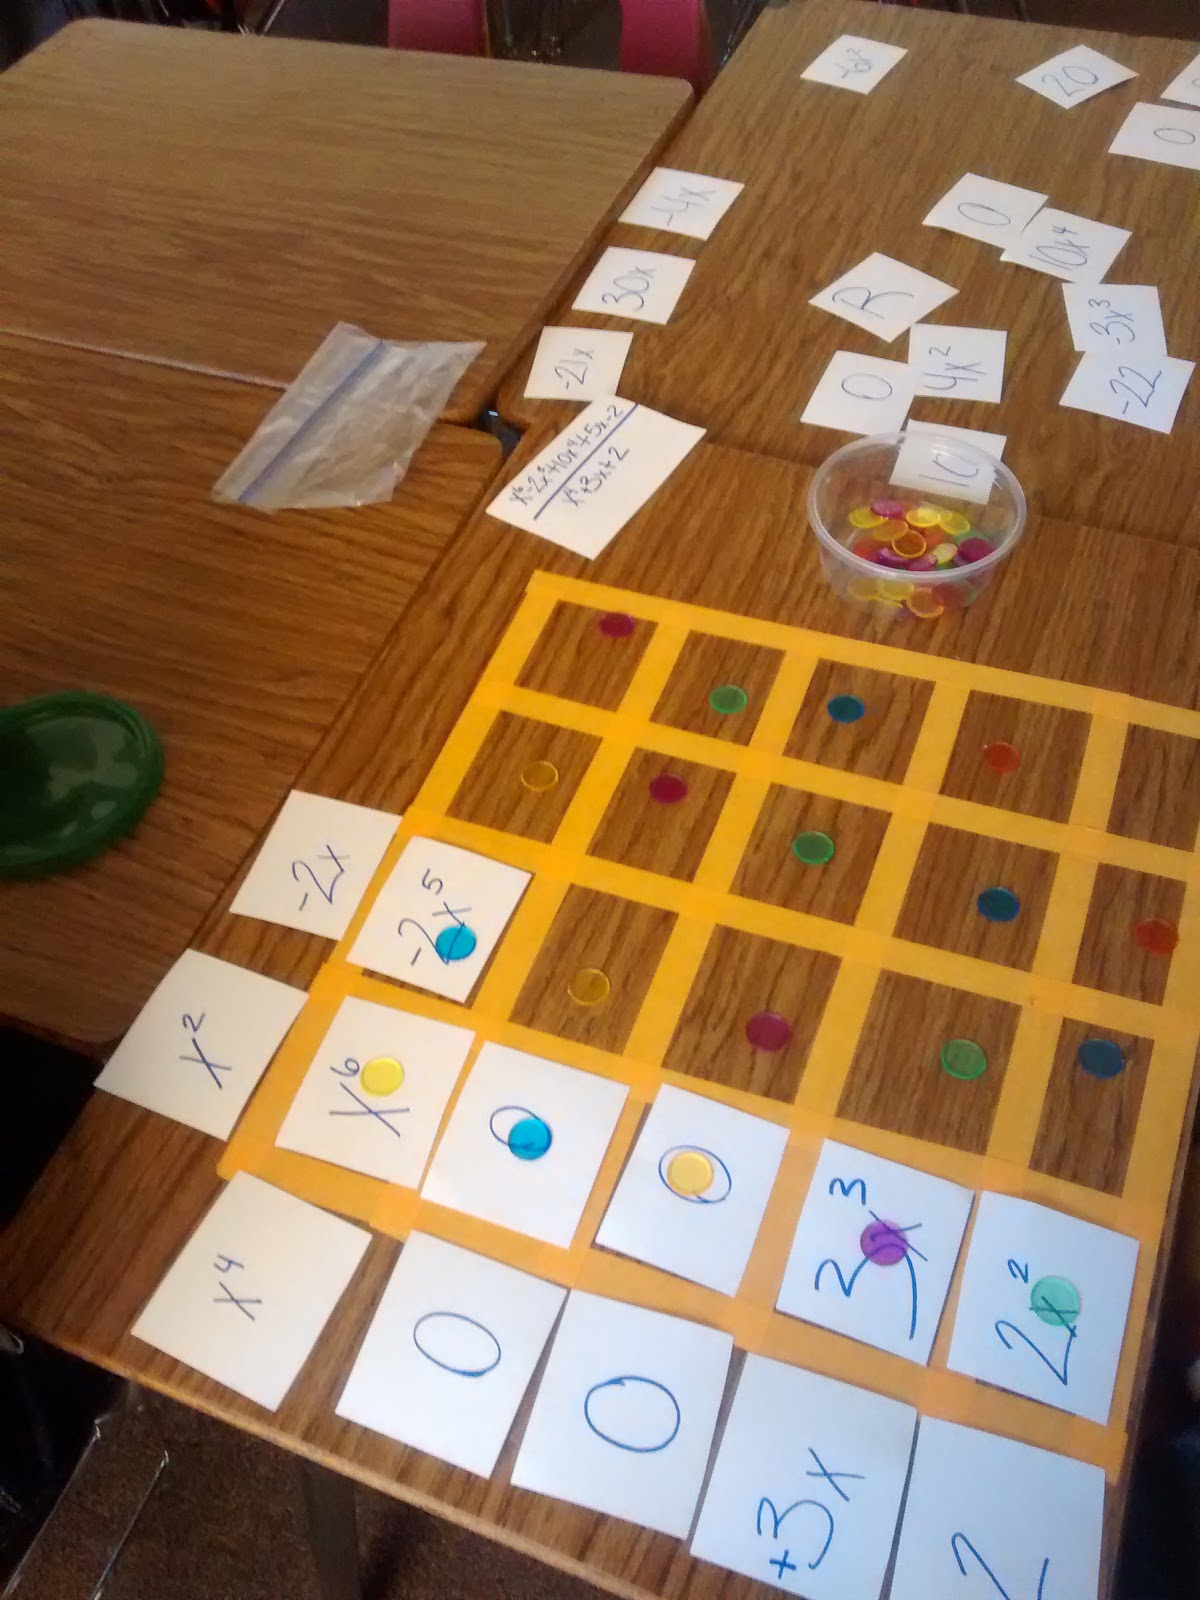
I decided to devise some dividing polynomial jigsaw puzzles for my students to put together. I took orange painter’s tape and made boxes like this on four of the desks.
Students were all abuzz with questions about what in the world was on the desks. My Algebra 1 kids were especially offended when I explained it was for my Algebra 2 classes. Several students claimed that they wanted to learn to divide polynomials so they could use it.
My Stats students were a bit miffed, too, because I didn’t do this for them last year when they were in Algebra 2.
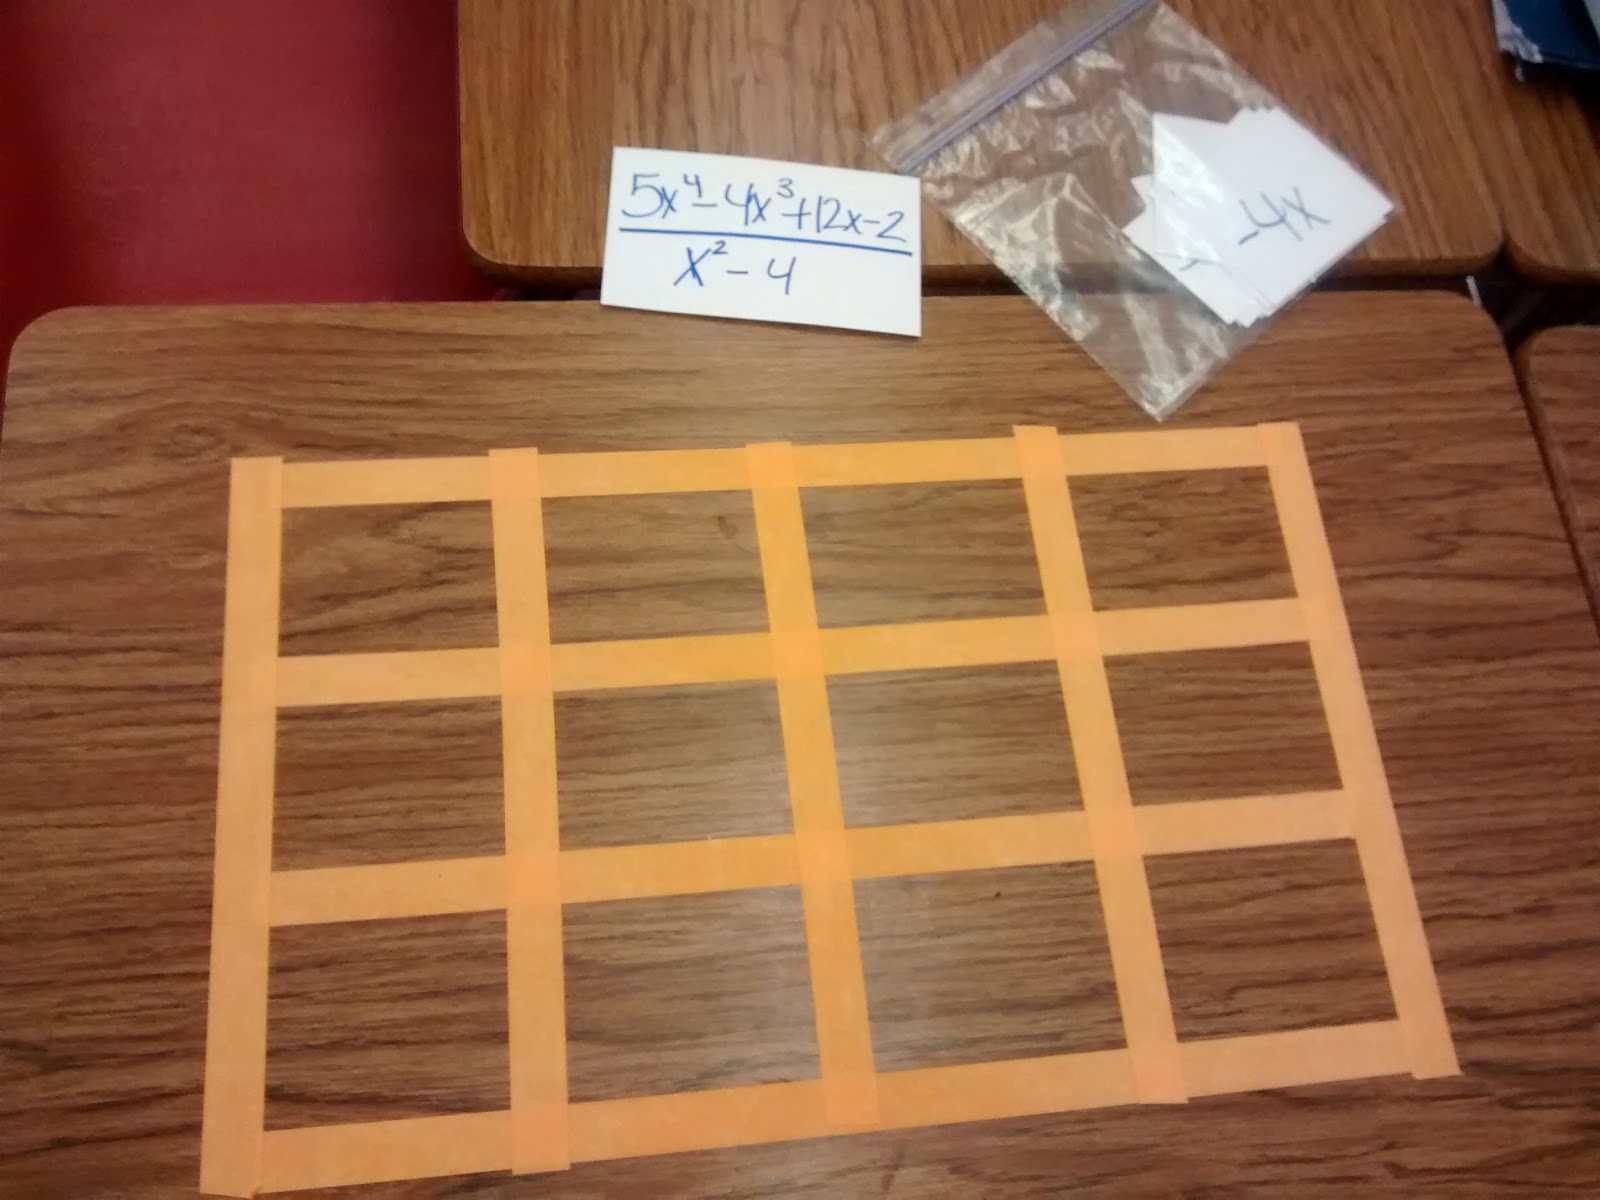
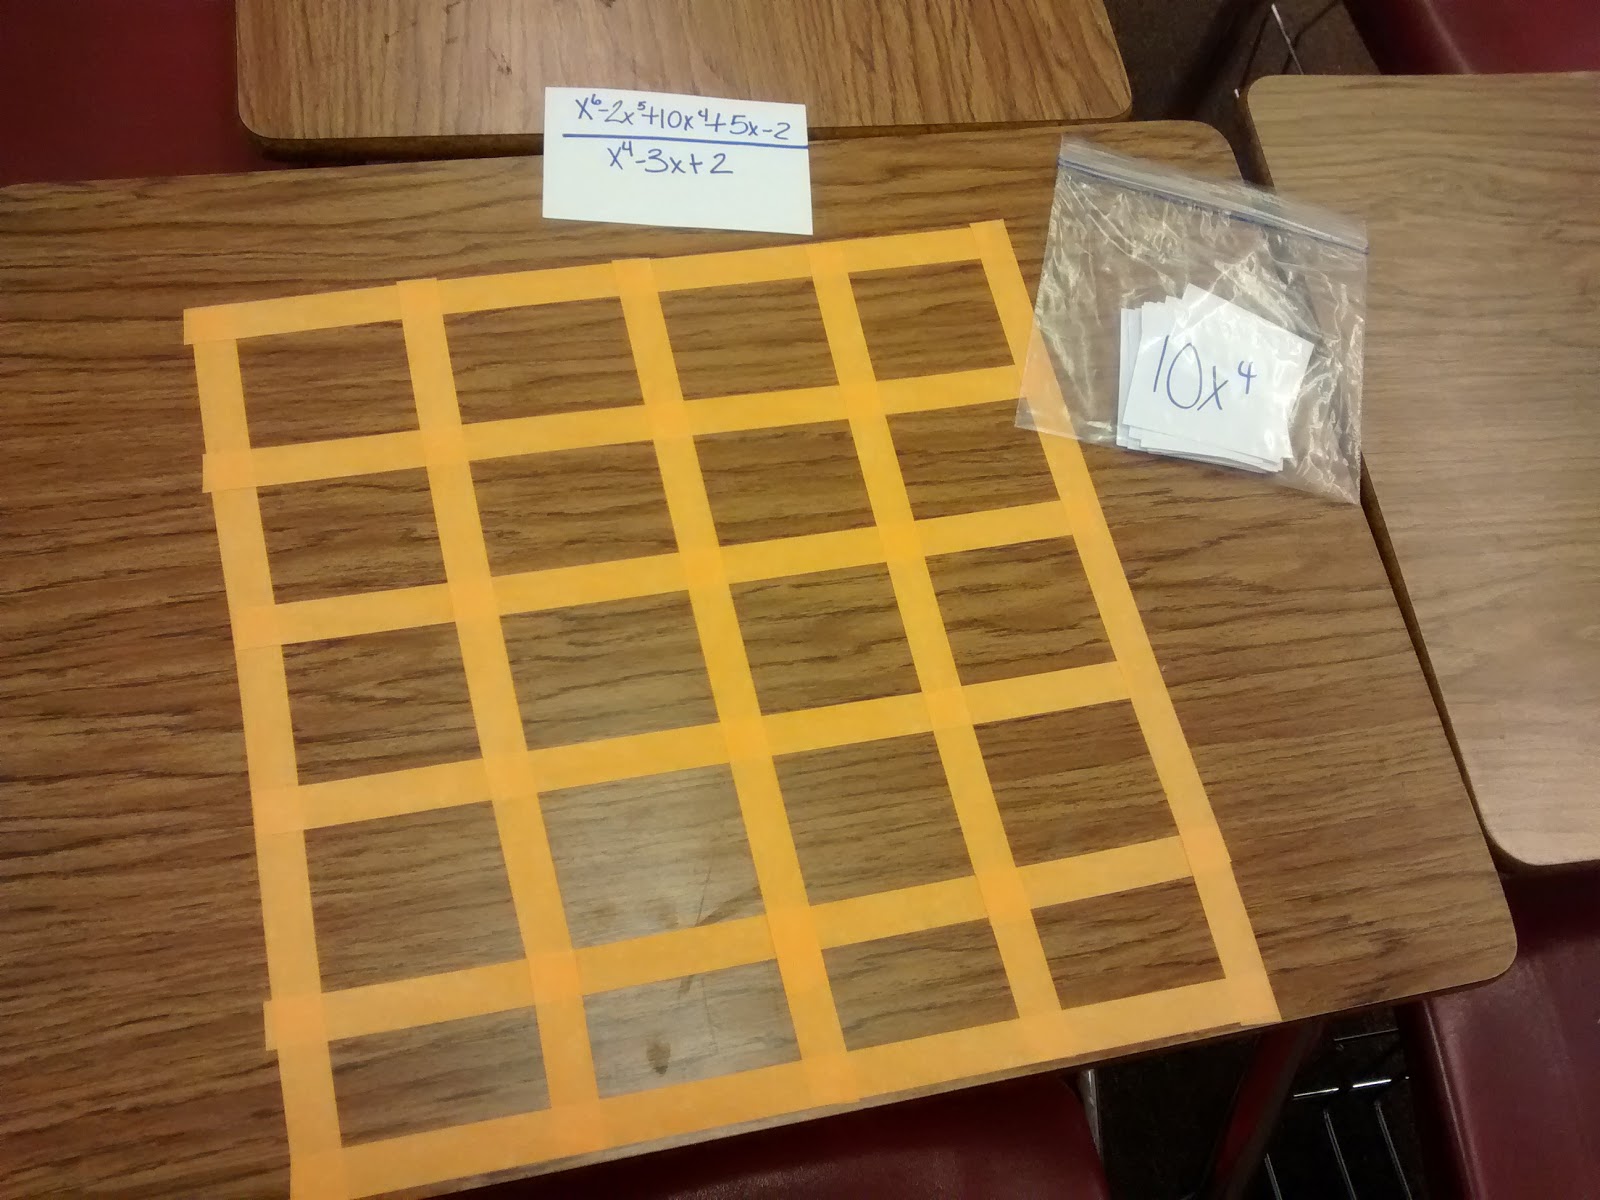
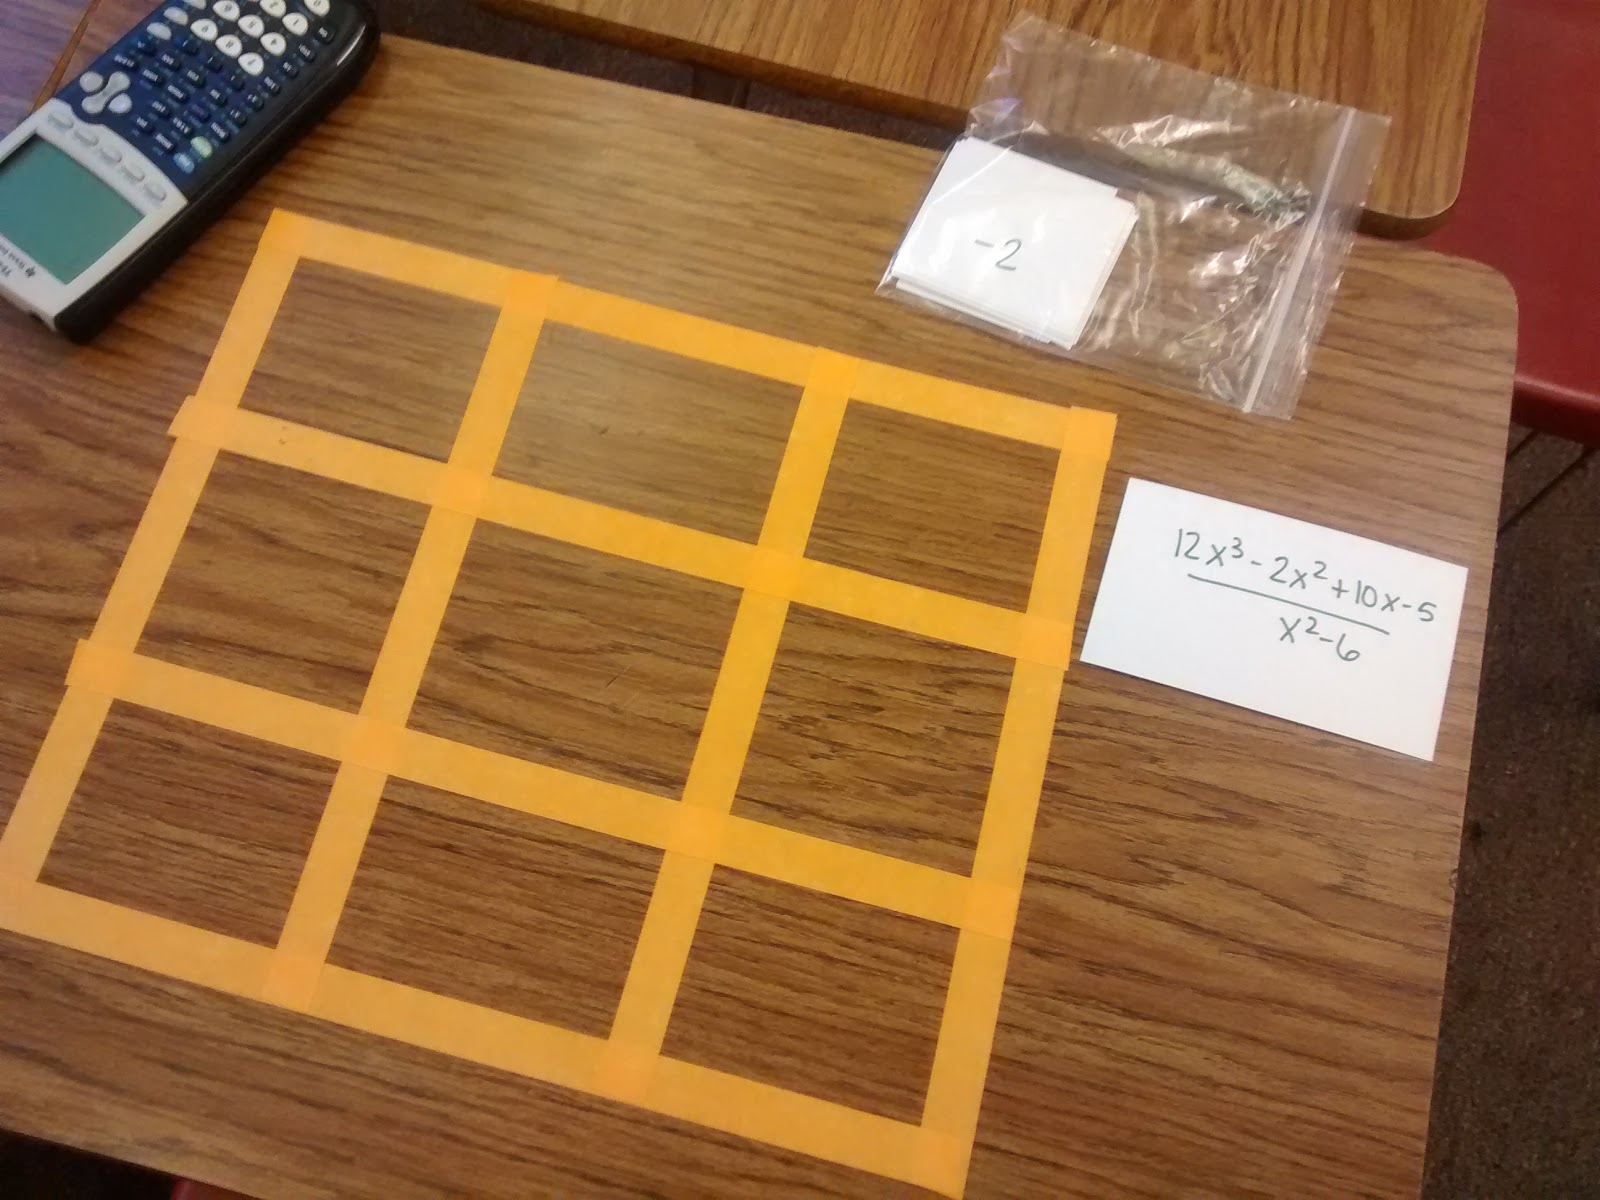
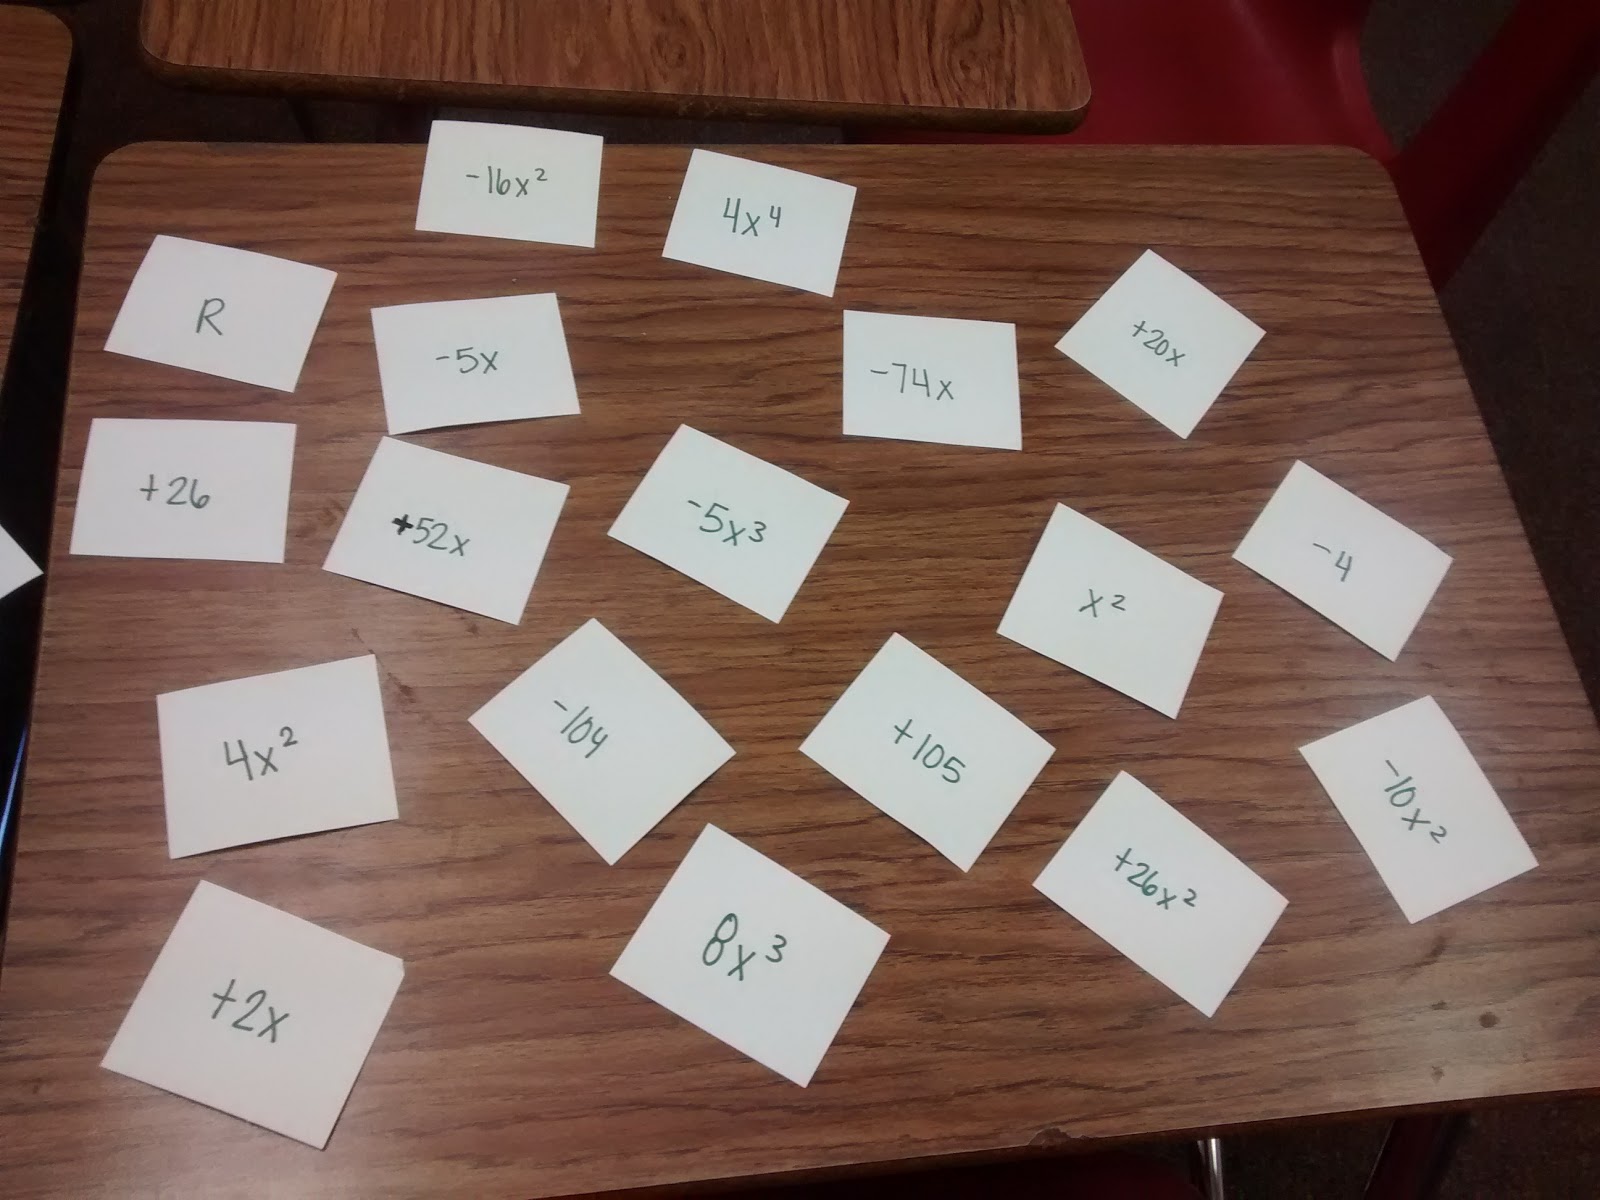
Each station had a pre-built box, a dividing polynomial problem, and the necessary pieces to fill out the box. Students were placed in groups of 4. They had to circulate around each of the 4 stations in the room. Due to small class sizes, I only had 3 groups circulating around the 4 stations.
At each station, only one person is allowed to touch the cards. The rest of the students can coach and give assistance, but only one person gets to put the puzzle together. The person who puts the puzzle together changes at each station. So, everyone gets a chance to put one entire puzzle together. This was a good structure because kids knew that they would be in charge of putting the puzzle together one time which meant it was important to pay attention! And, it also meant that kids had to do a lot of math talk because they weren’t always allowed to touch the cards.
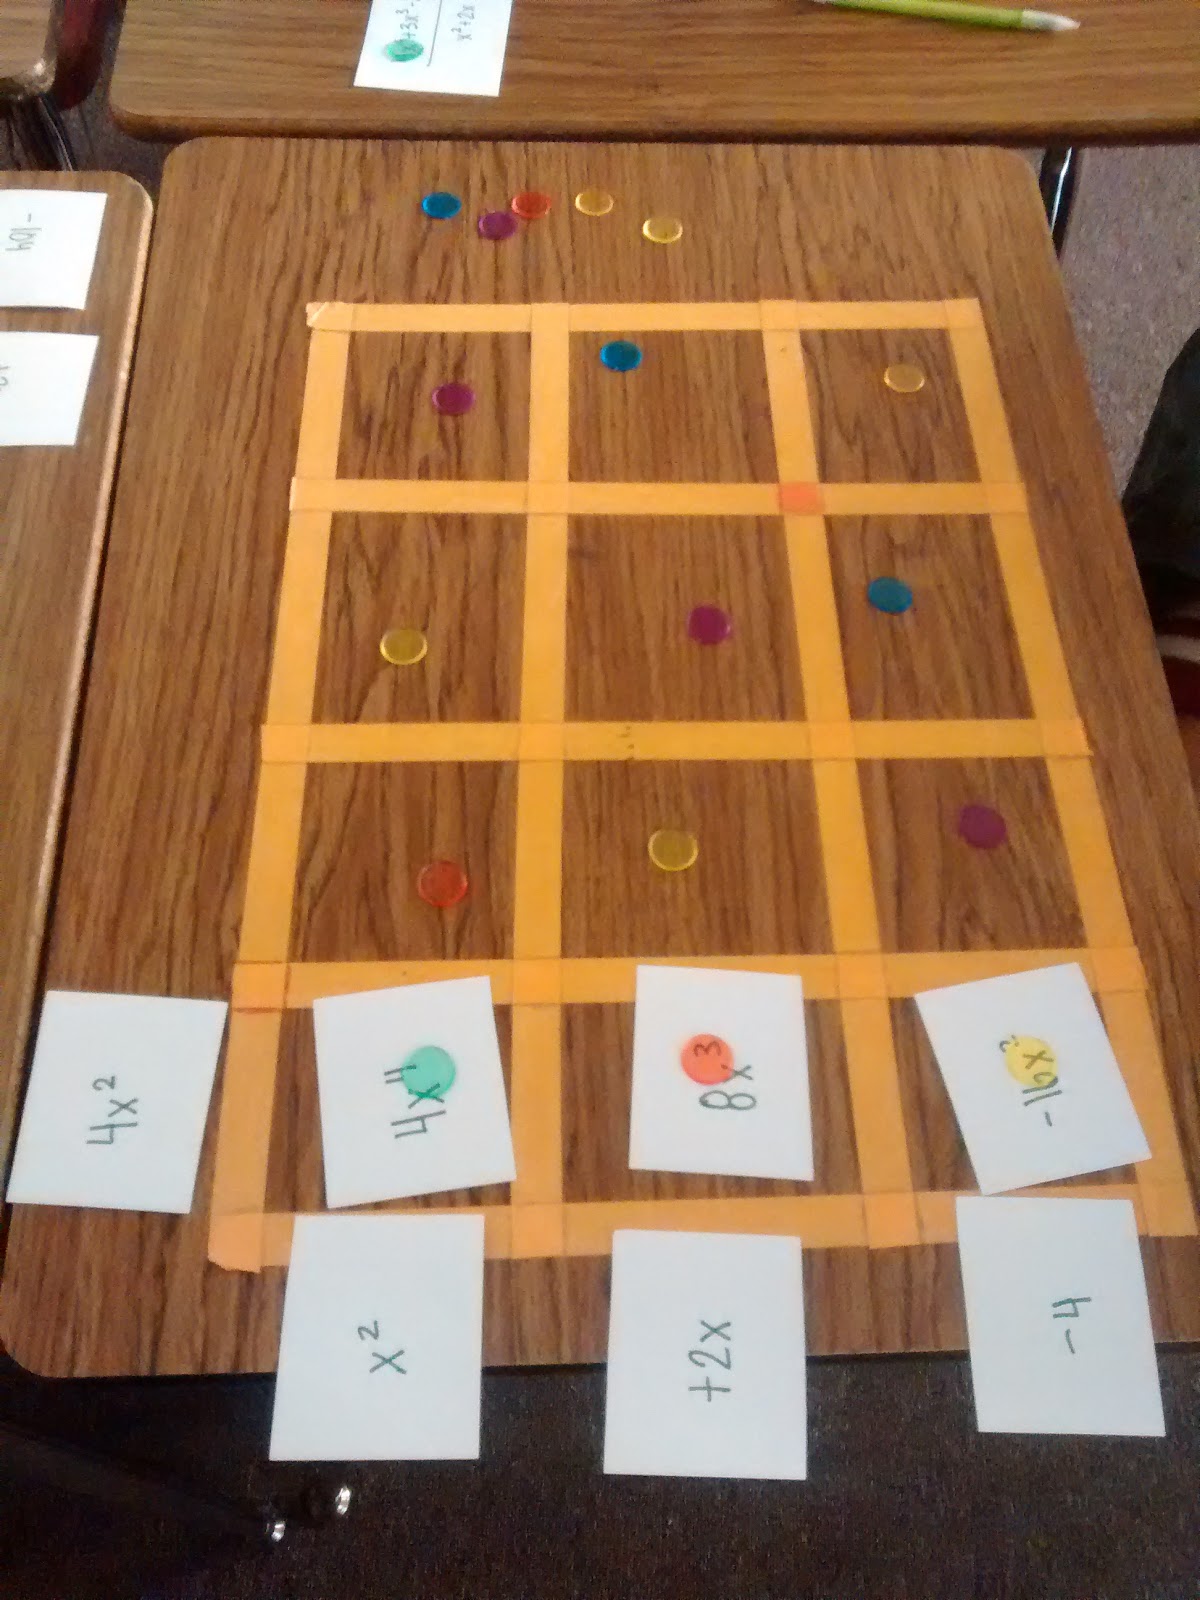
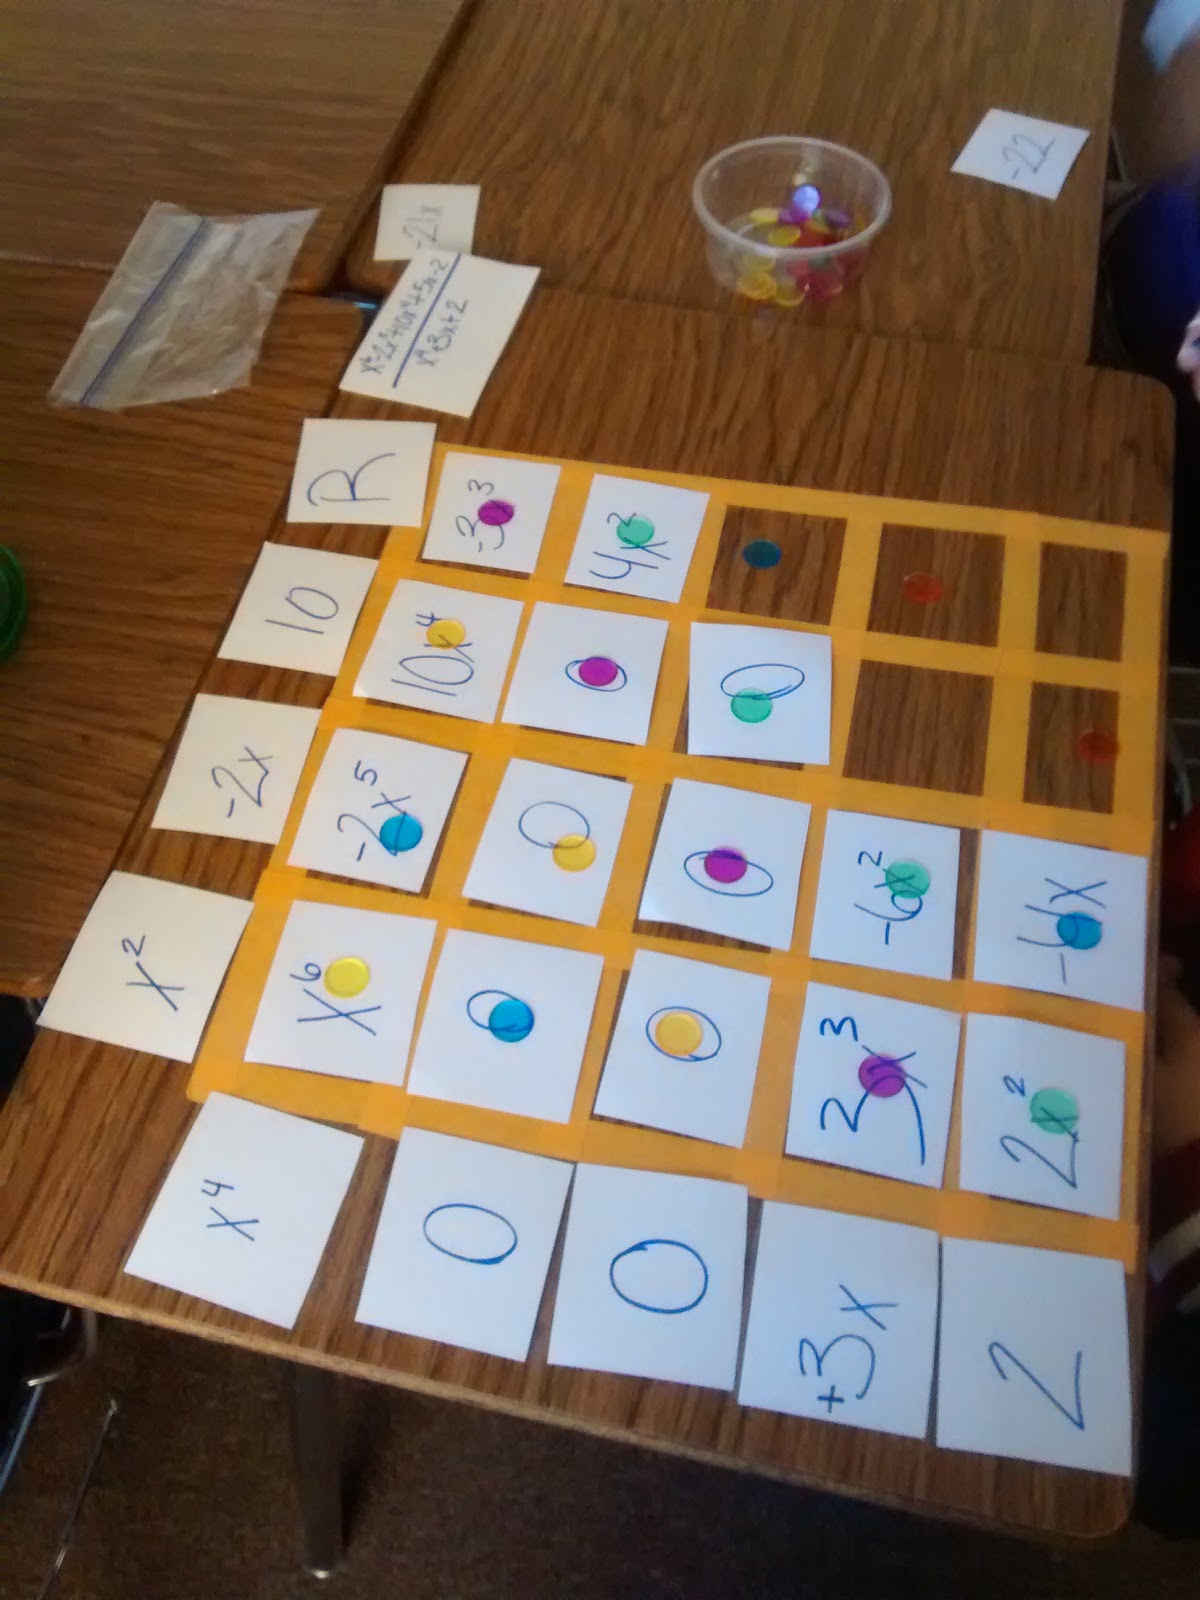
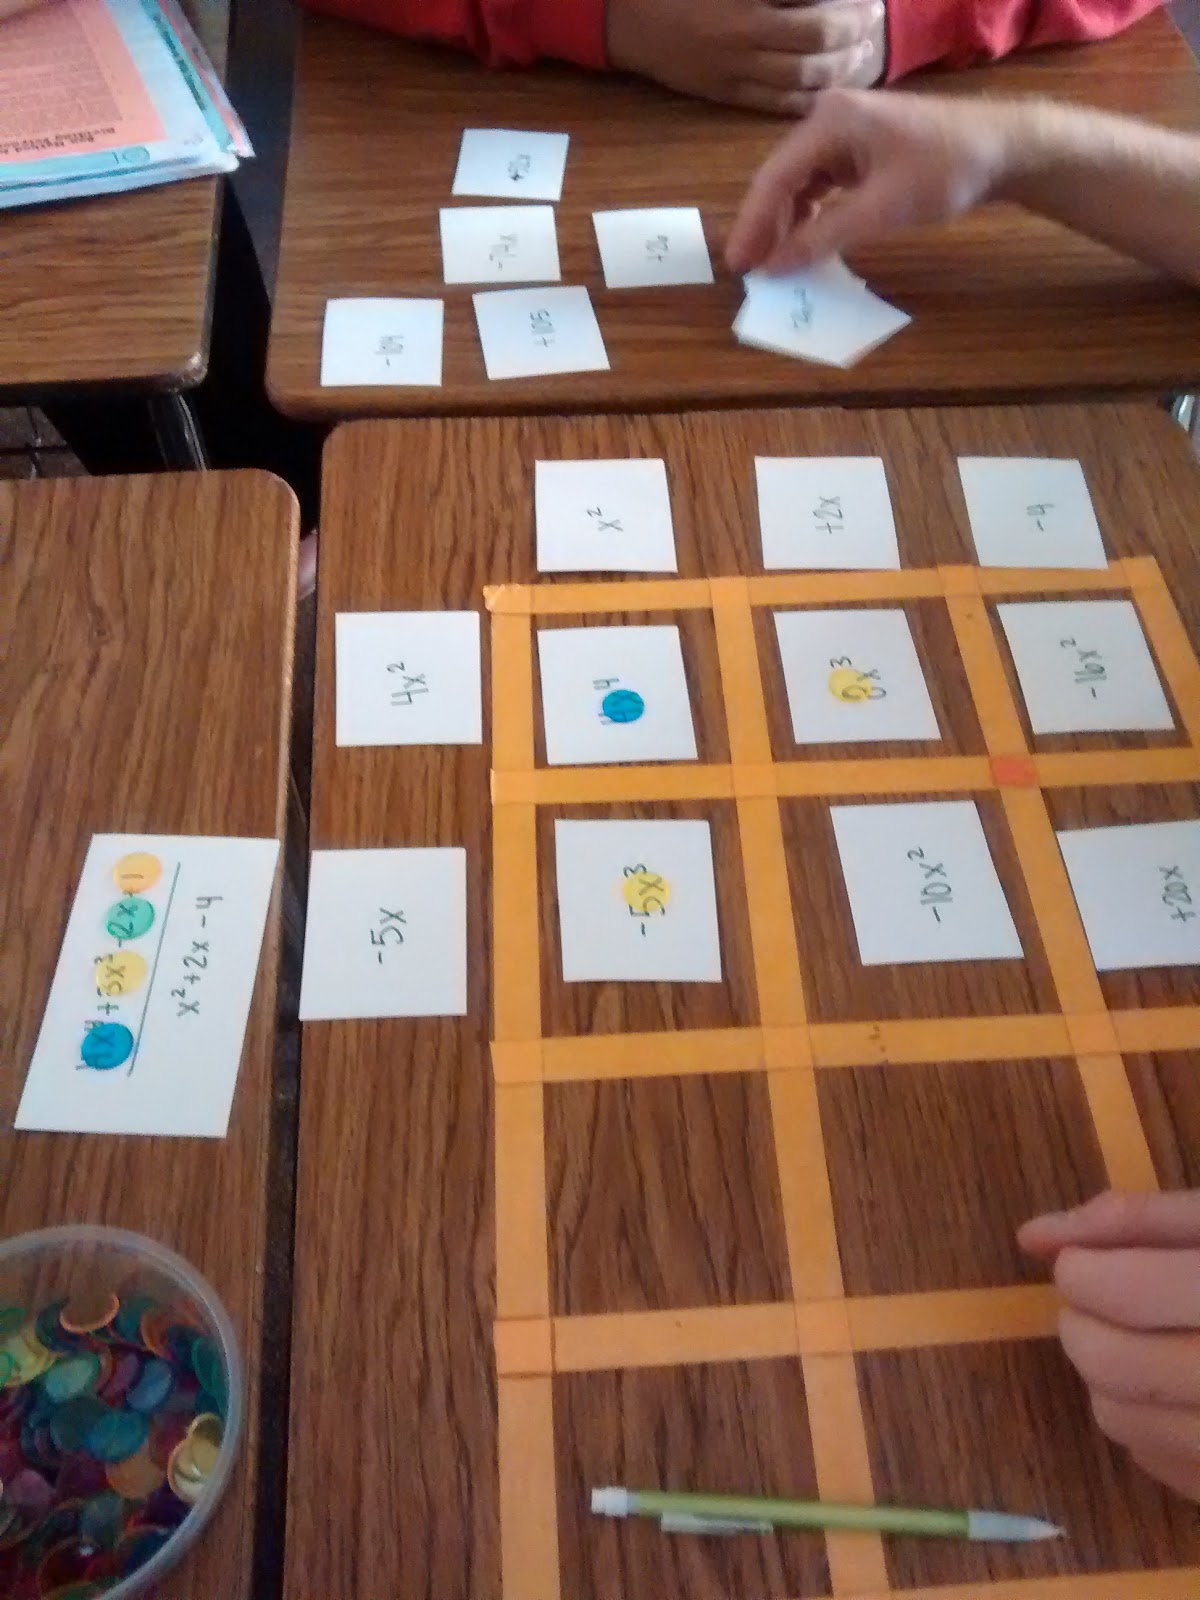
The stations looked like this:
And this:
And this:
And this:
If you’re confused about how this works, you’re in luck because I’m about to show you.
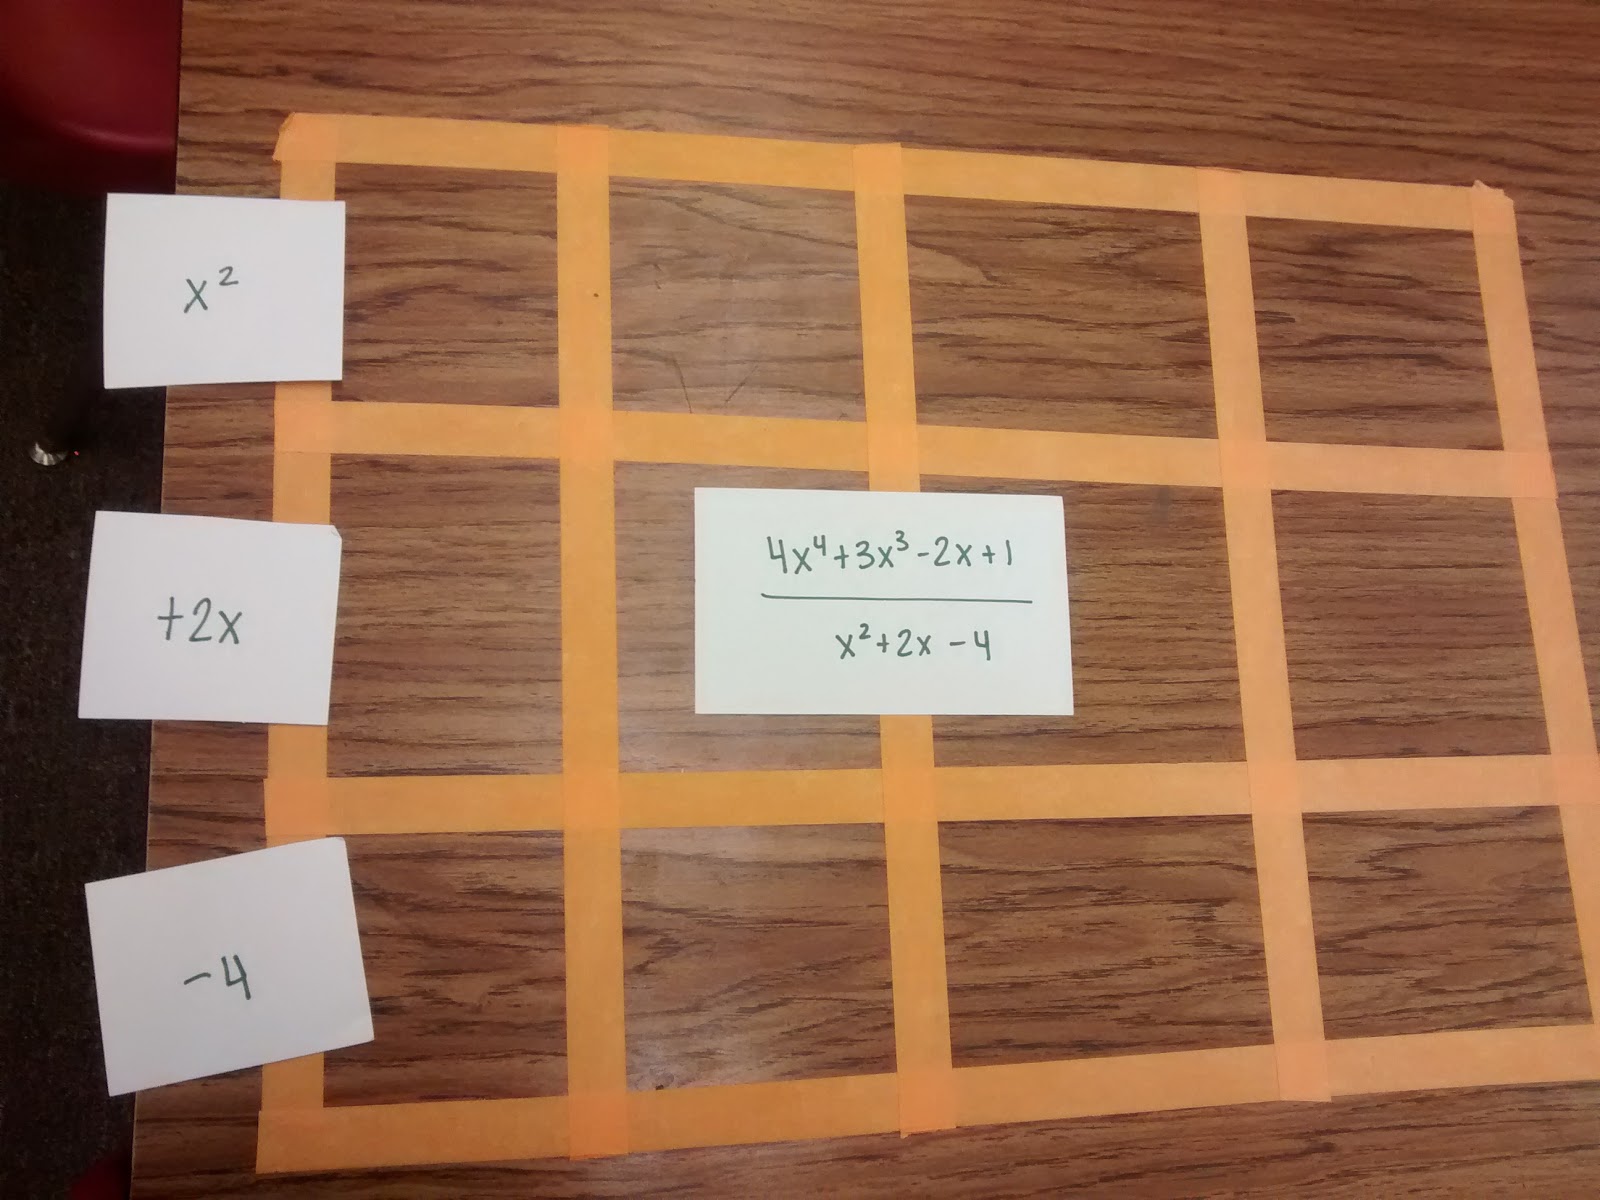
Lay out all of your pieces.
Take the polynomial you are dividing by and put it on the outside edge of the box. I didn’t plan very well and put this grid too close to the edge of the desk. Some of my students realized that they could start building the box from the opposite side!
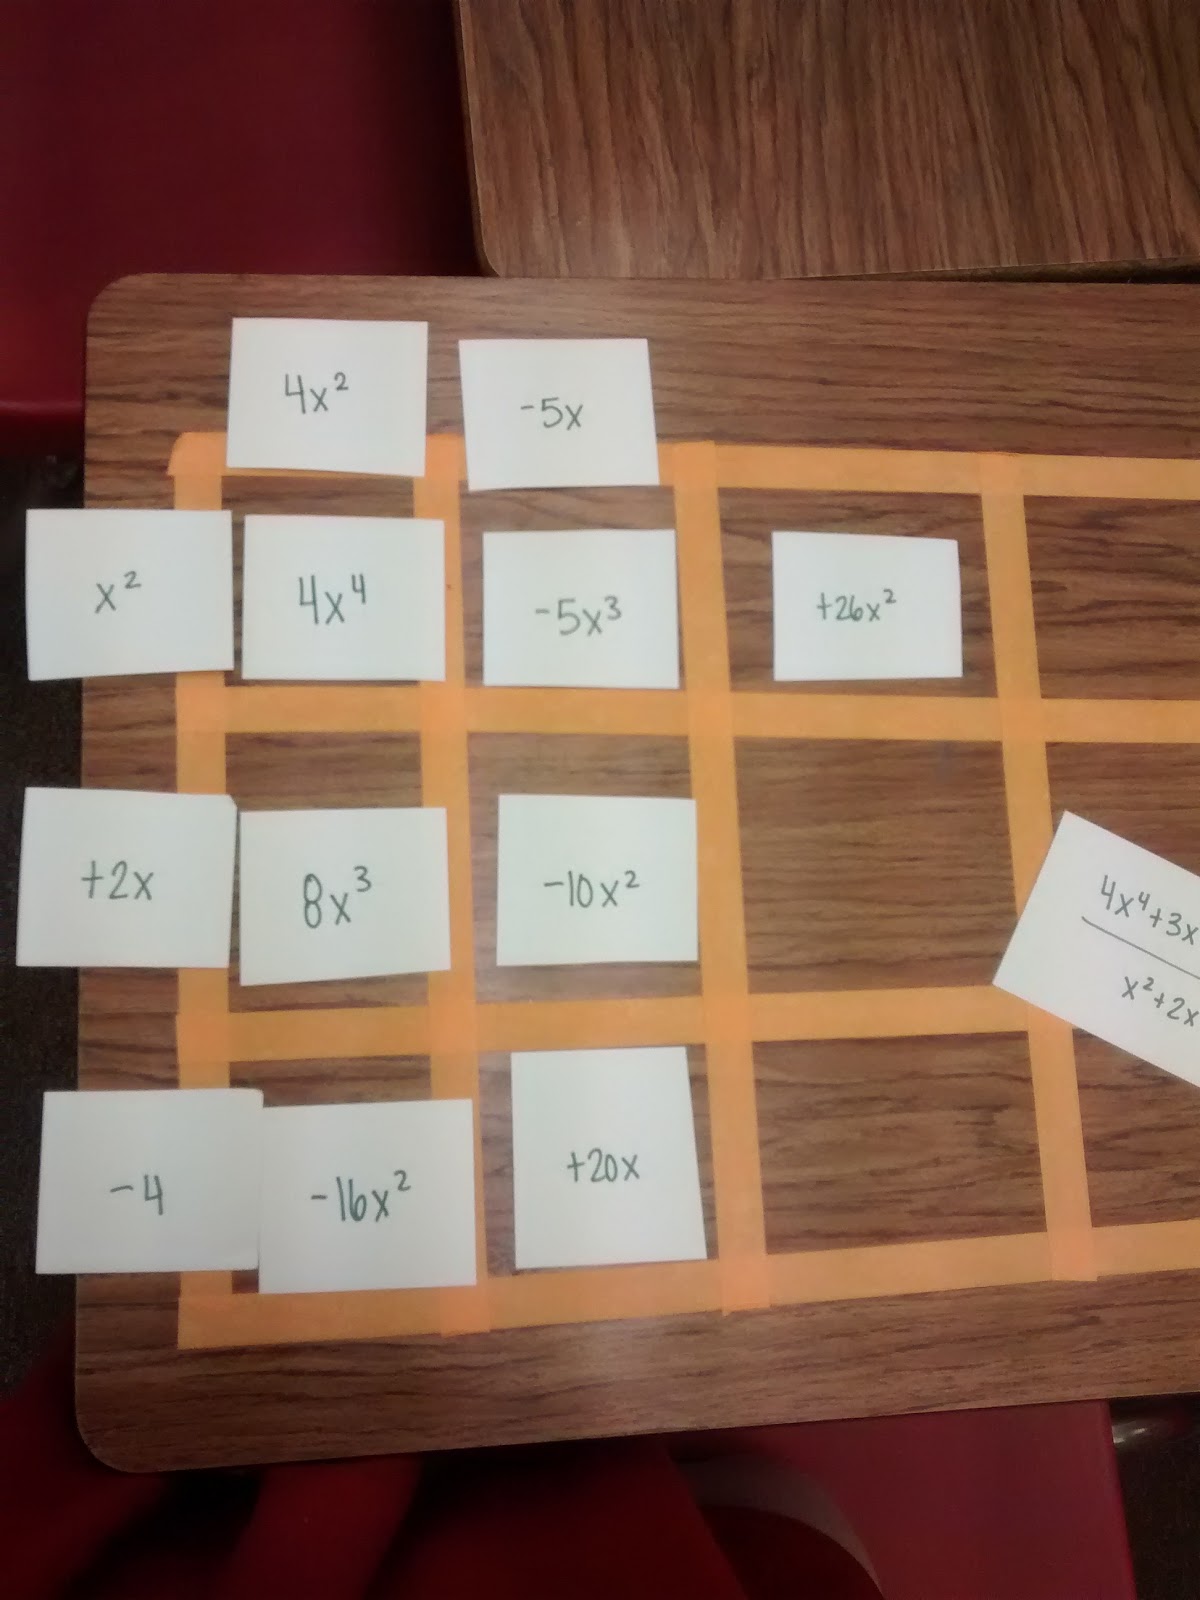
The first diagonal is made up of just the x^4 term of the term being divided. So, we can just go ahead and fill it in the box.
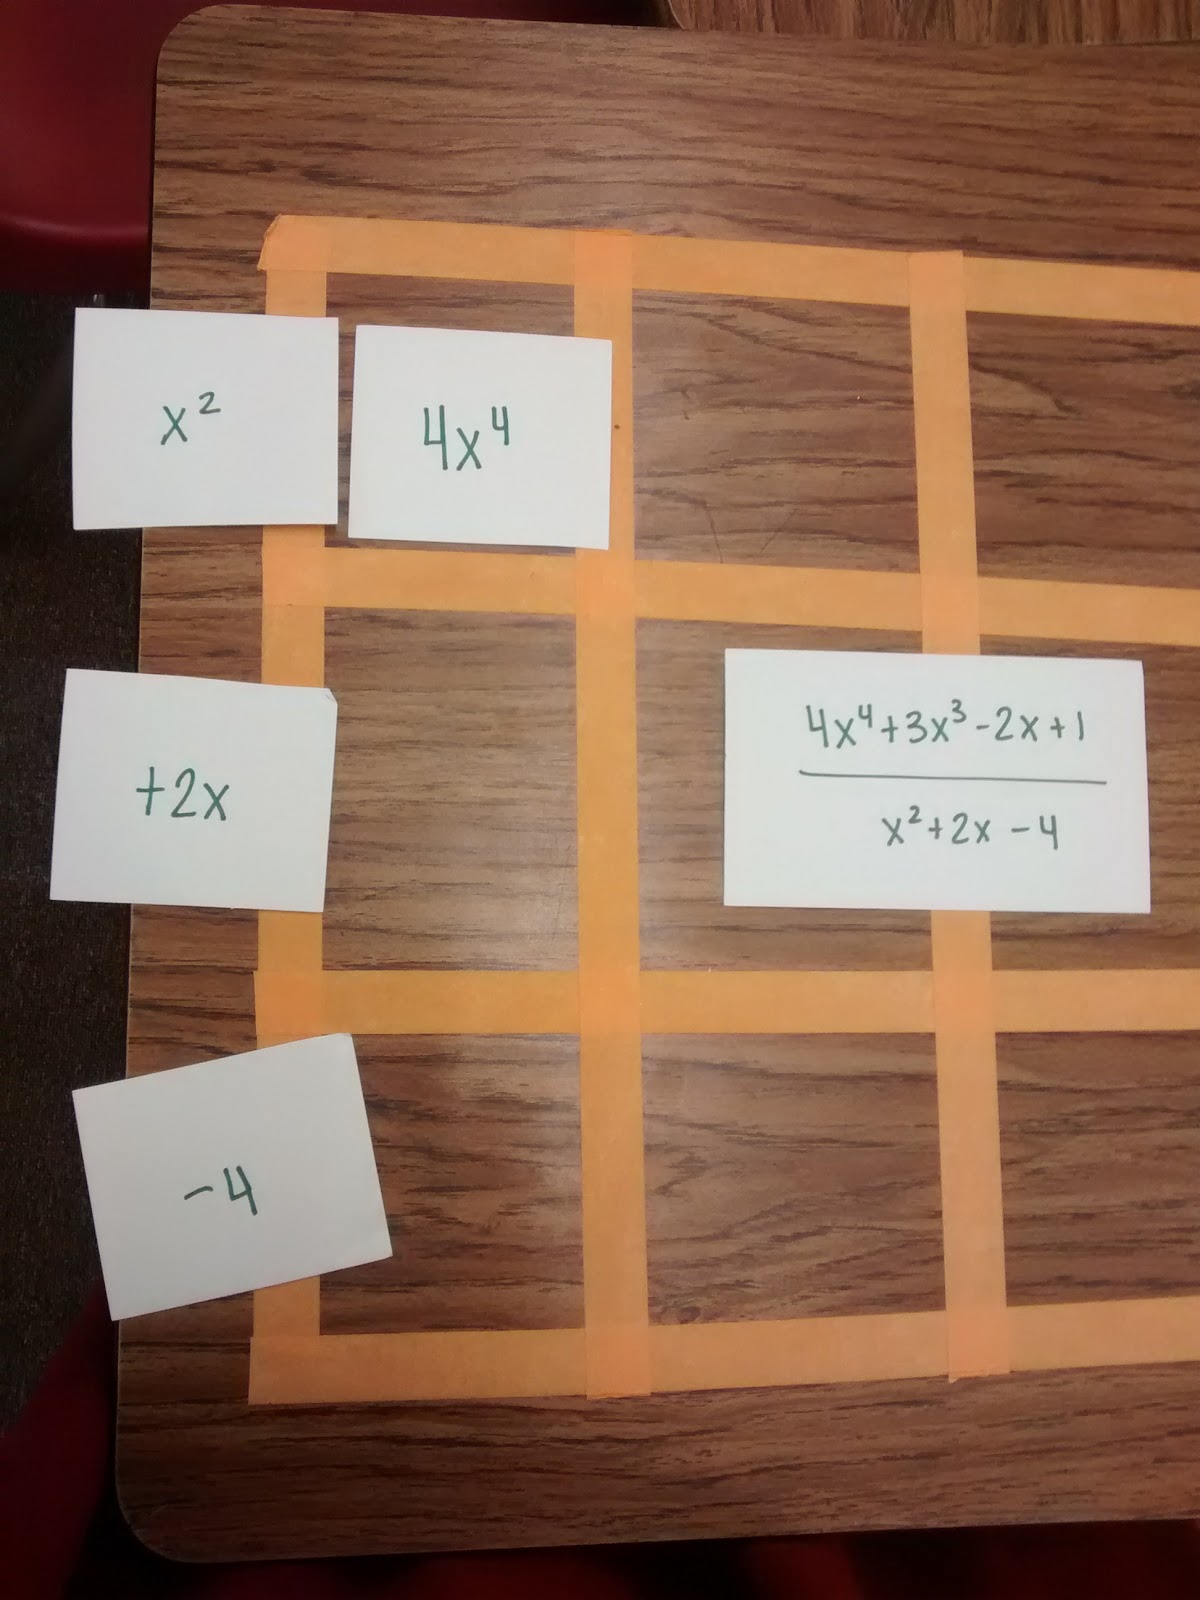
Now, we have to ask ourselves x^2 times what equals 4x^4. That answer goes on top of the box.
Once 4x^2 is on top of the box, we can multiply 4x^2 by 2x and -4 to fill in the rest of that column.
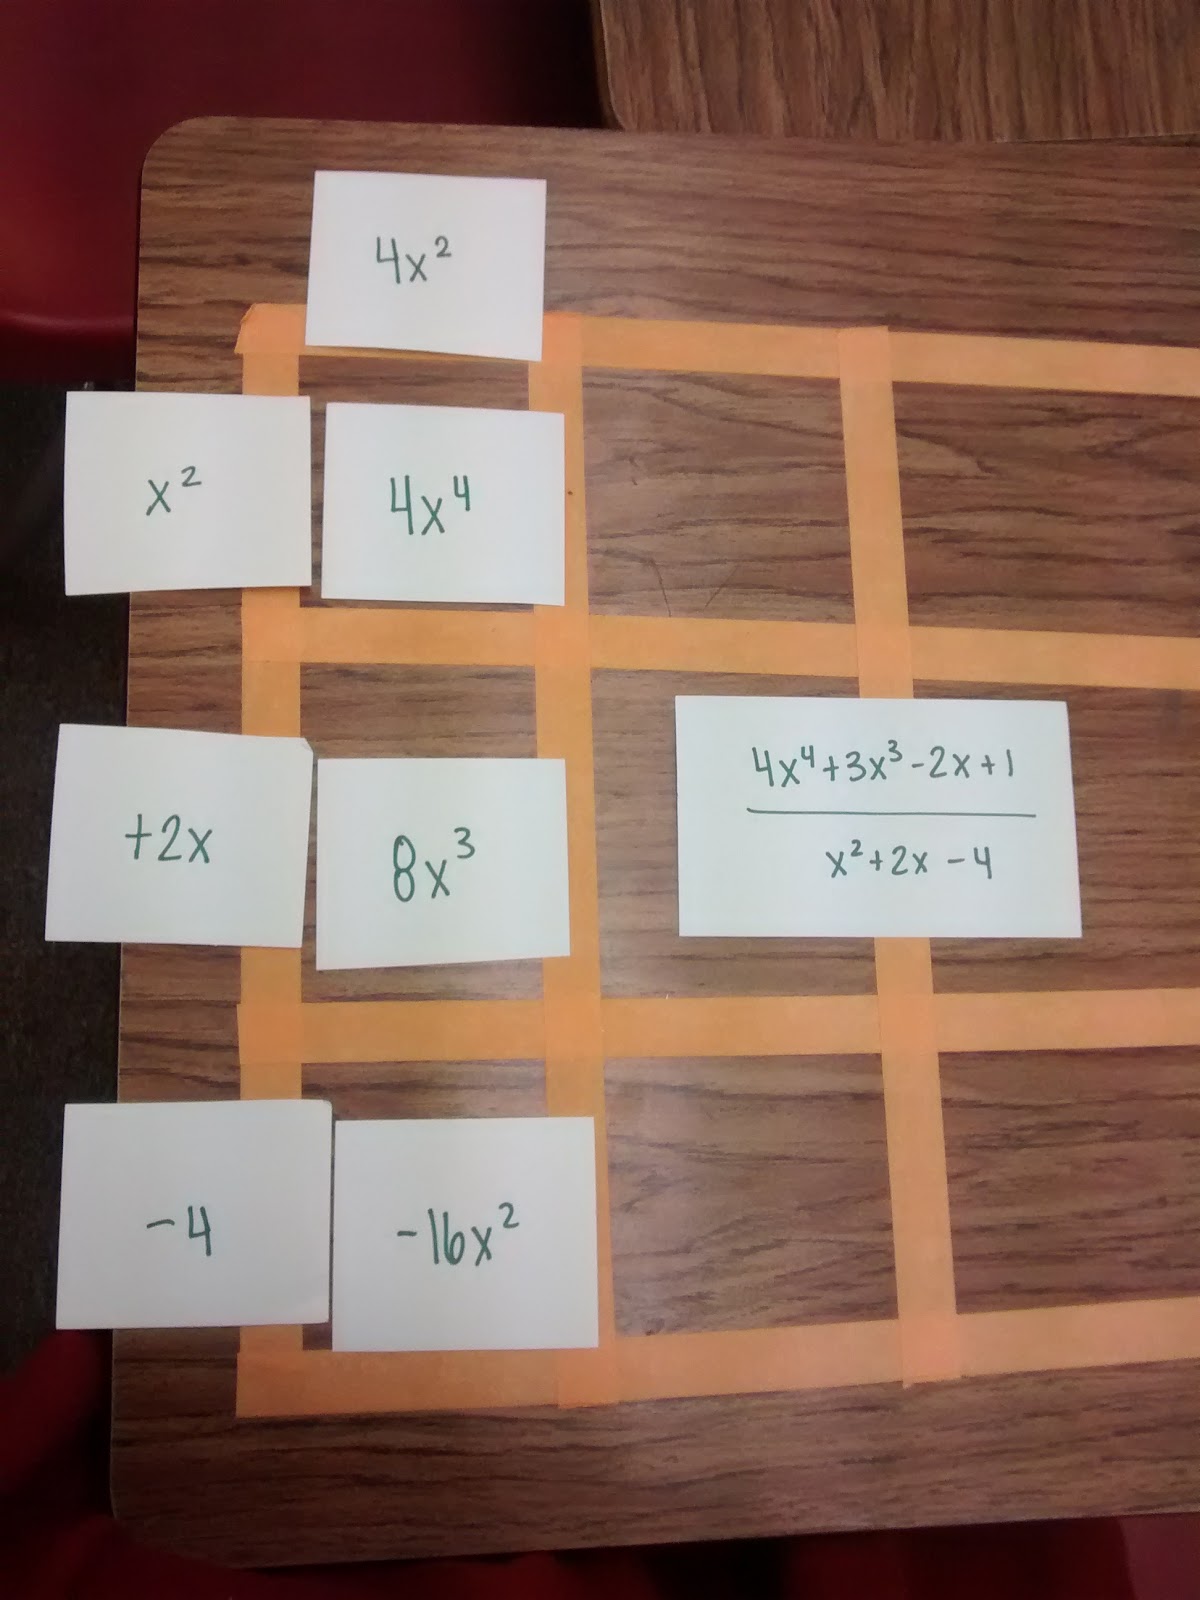
Now, we have our x^4 diagonal taken care of. Our next diagonal needs to sum to make 3x^3. We already have 8x^3. We need -5x^3 to complete the diagonal.
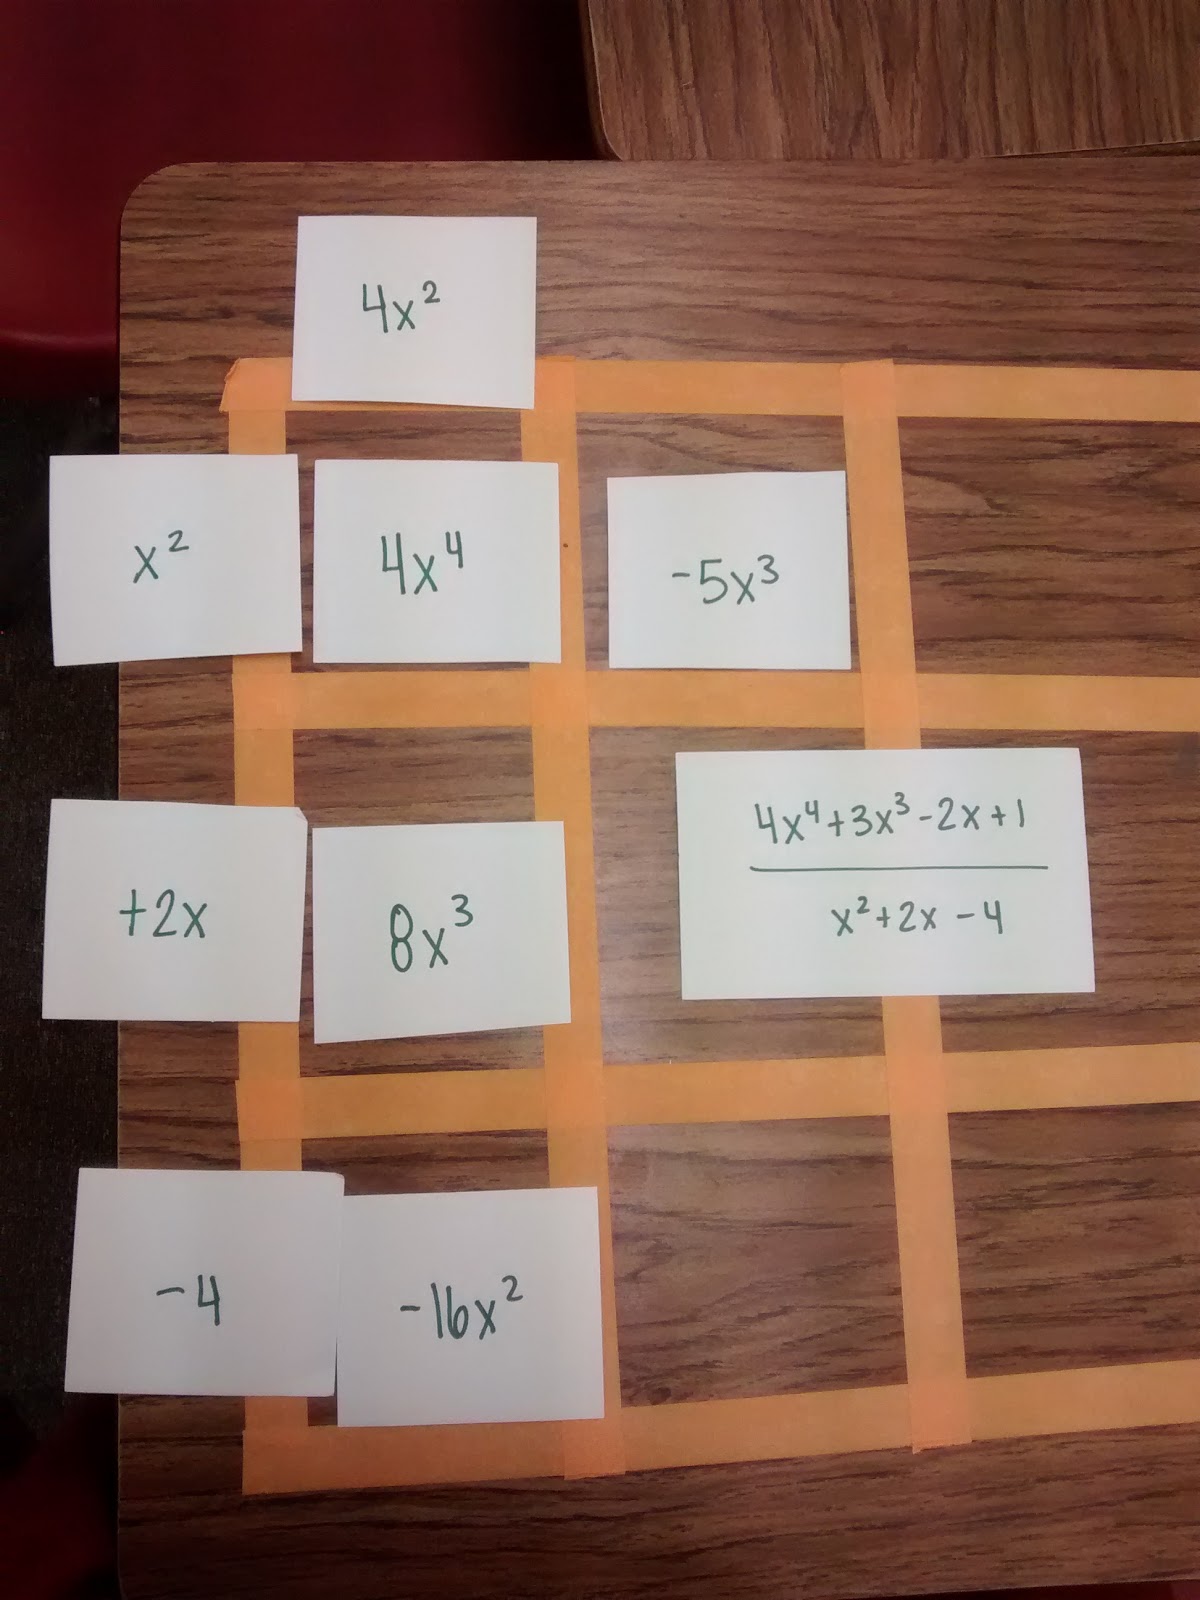
Then, we ask what x^2 needs to be multiplied by to be -5x^3. That answer goes on the top.
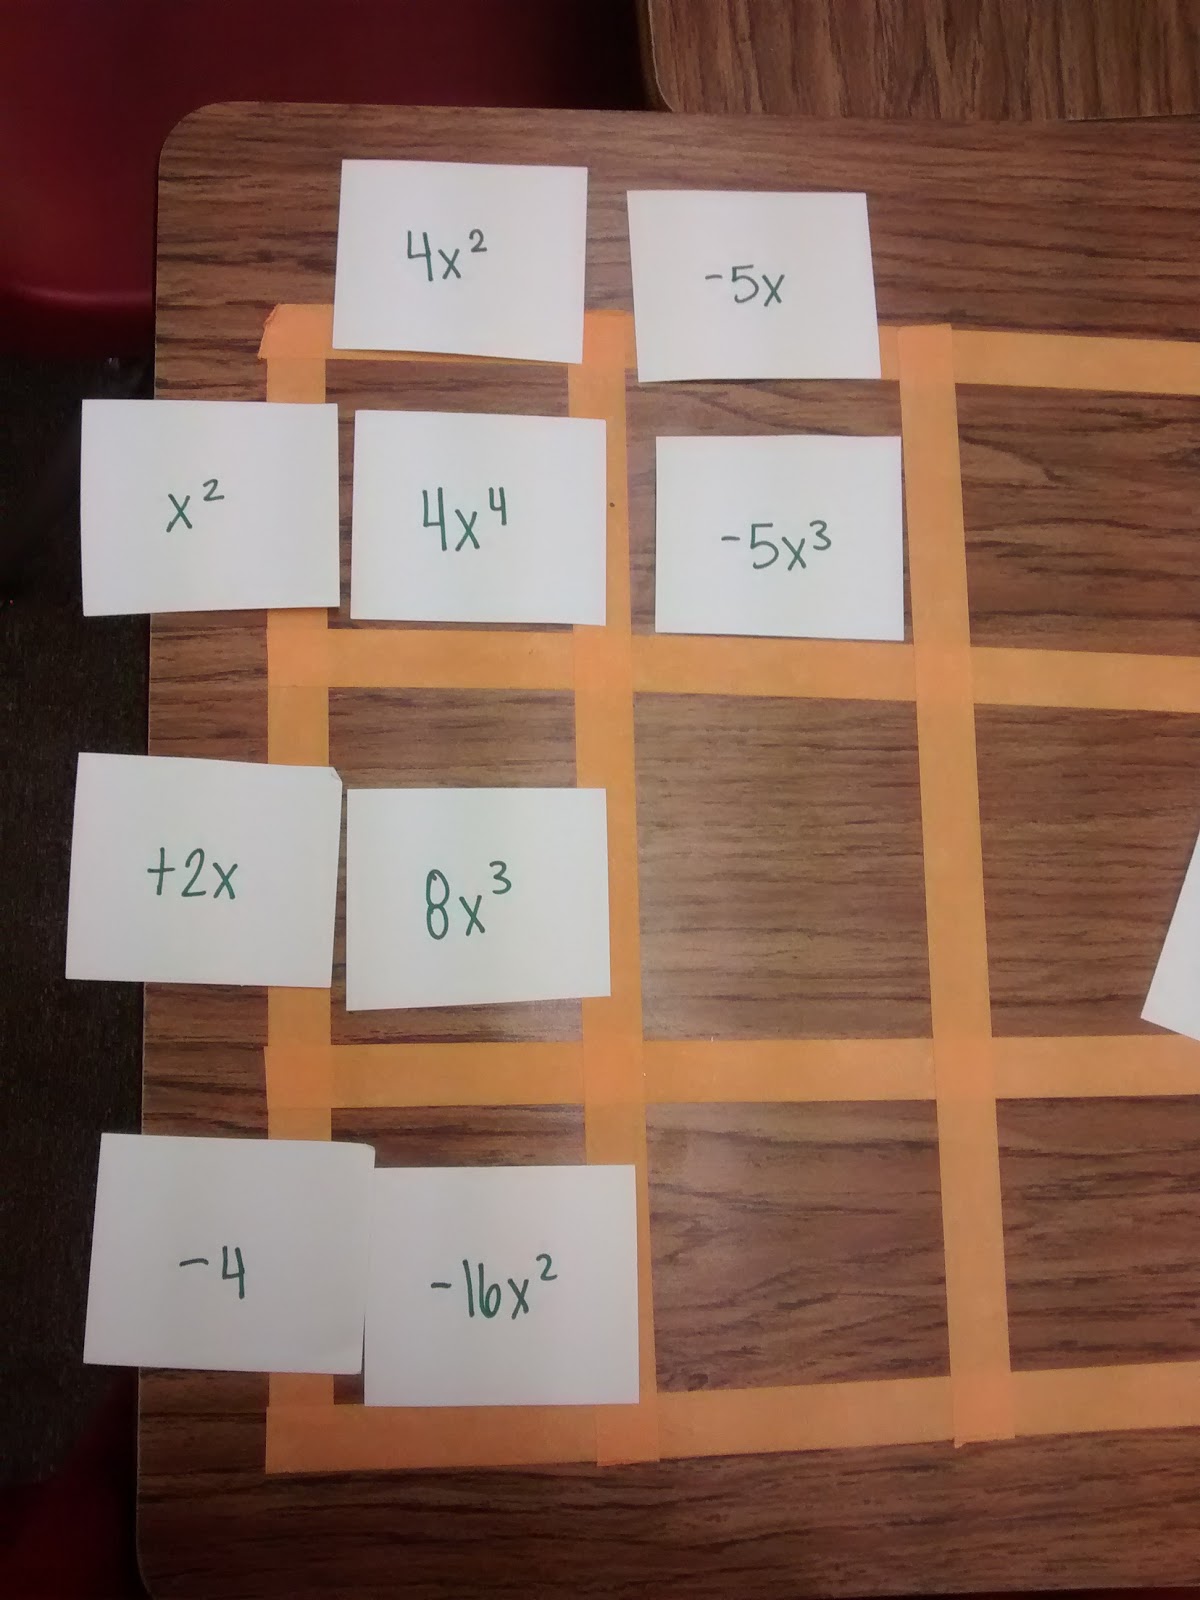
Having the term on top lets us fill in the rest of that column by multiplication.
Now, it’s time to make our third diagonal sum to 0x^2. This sometimes takes a while for students to get used to. -16x^2 and -10x^2 sum to -26x^2. So, we need a +26x^2 to finish out that diagonal.
Getting the hang of this yet? We need to figure out what x^2 needs to be multiplied by to equal 26x^2. This goes on top.
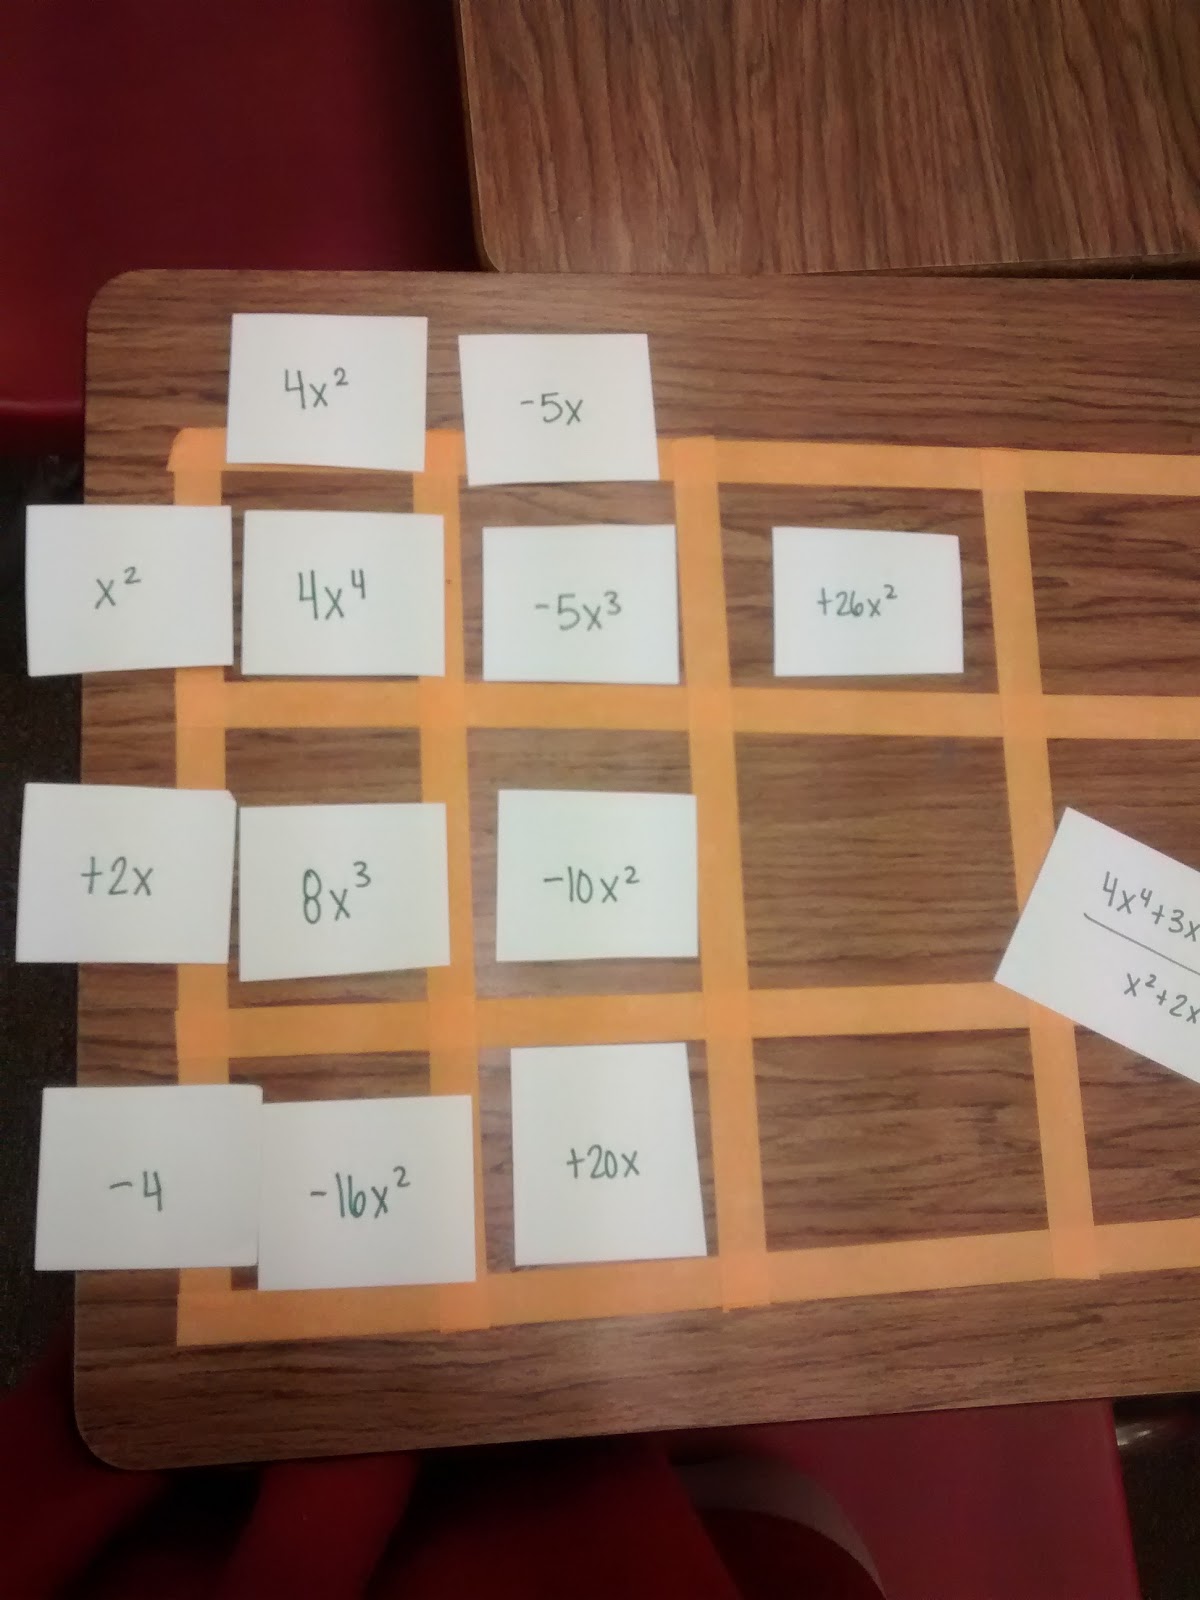
Once we figure that out, we can use multiplication to complete that column.
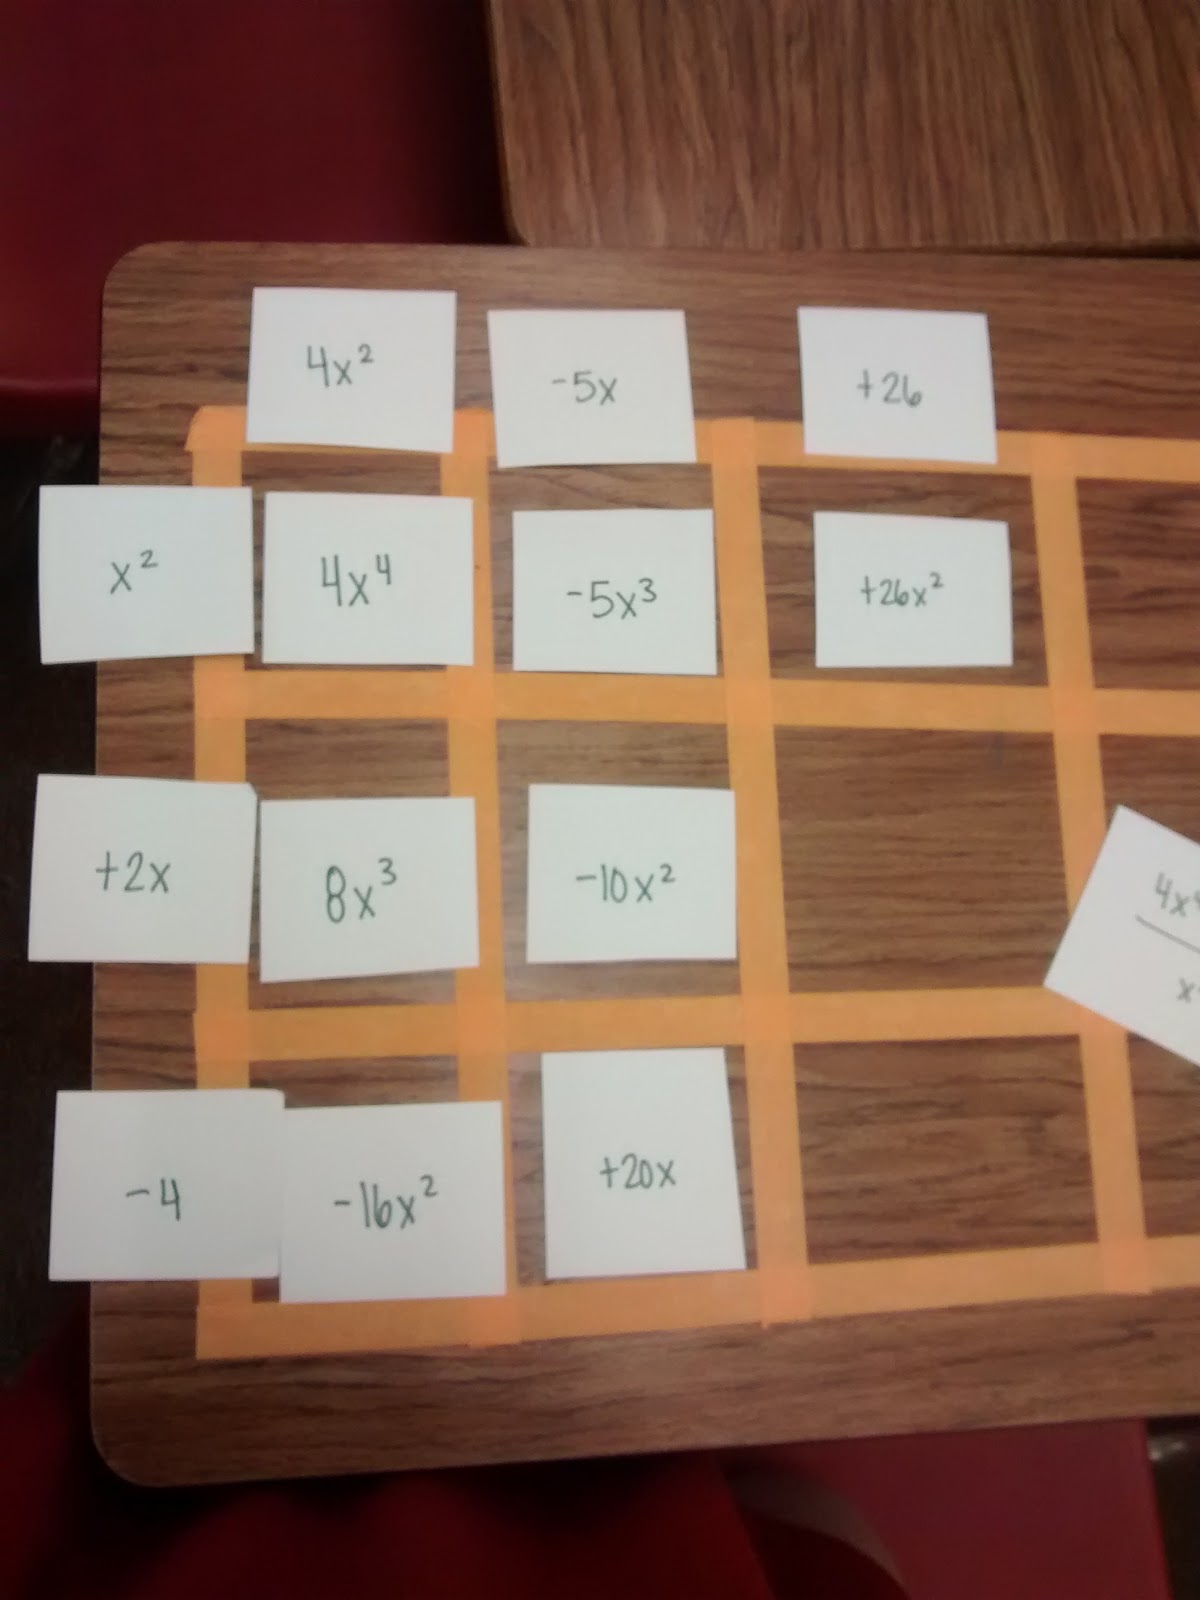
Once you write a constant on top of the box, it is always followed by an R for remainder. The remainder gives us a chance to make sure the diagonals sum to exactly what we need them to sum to. Sometimes, they will already sum to the correct values which means you have no remainder.
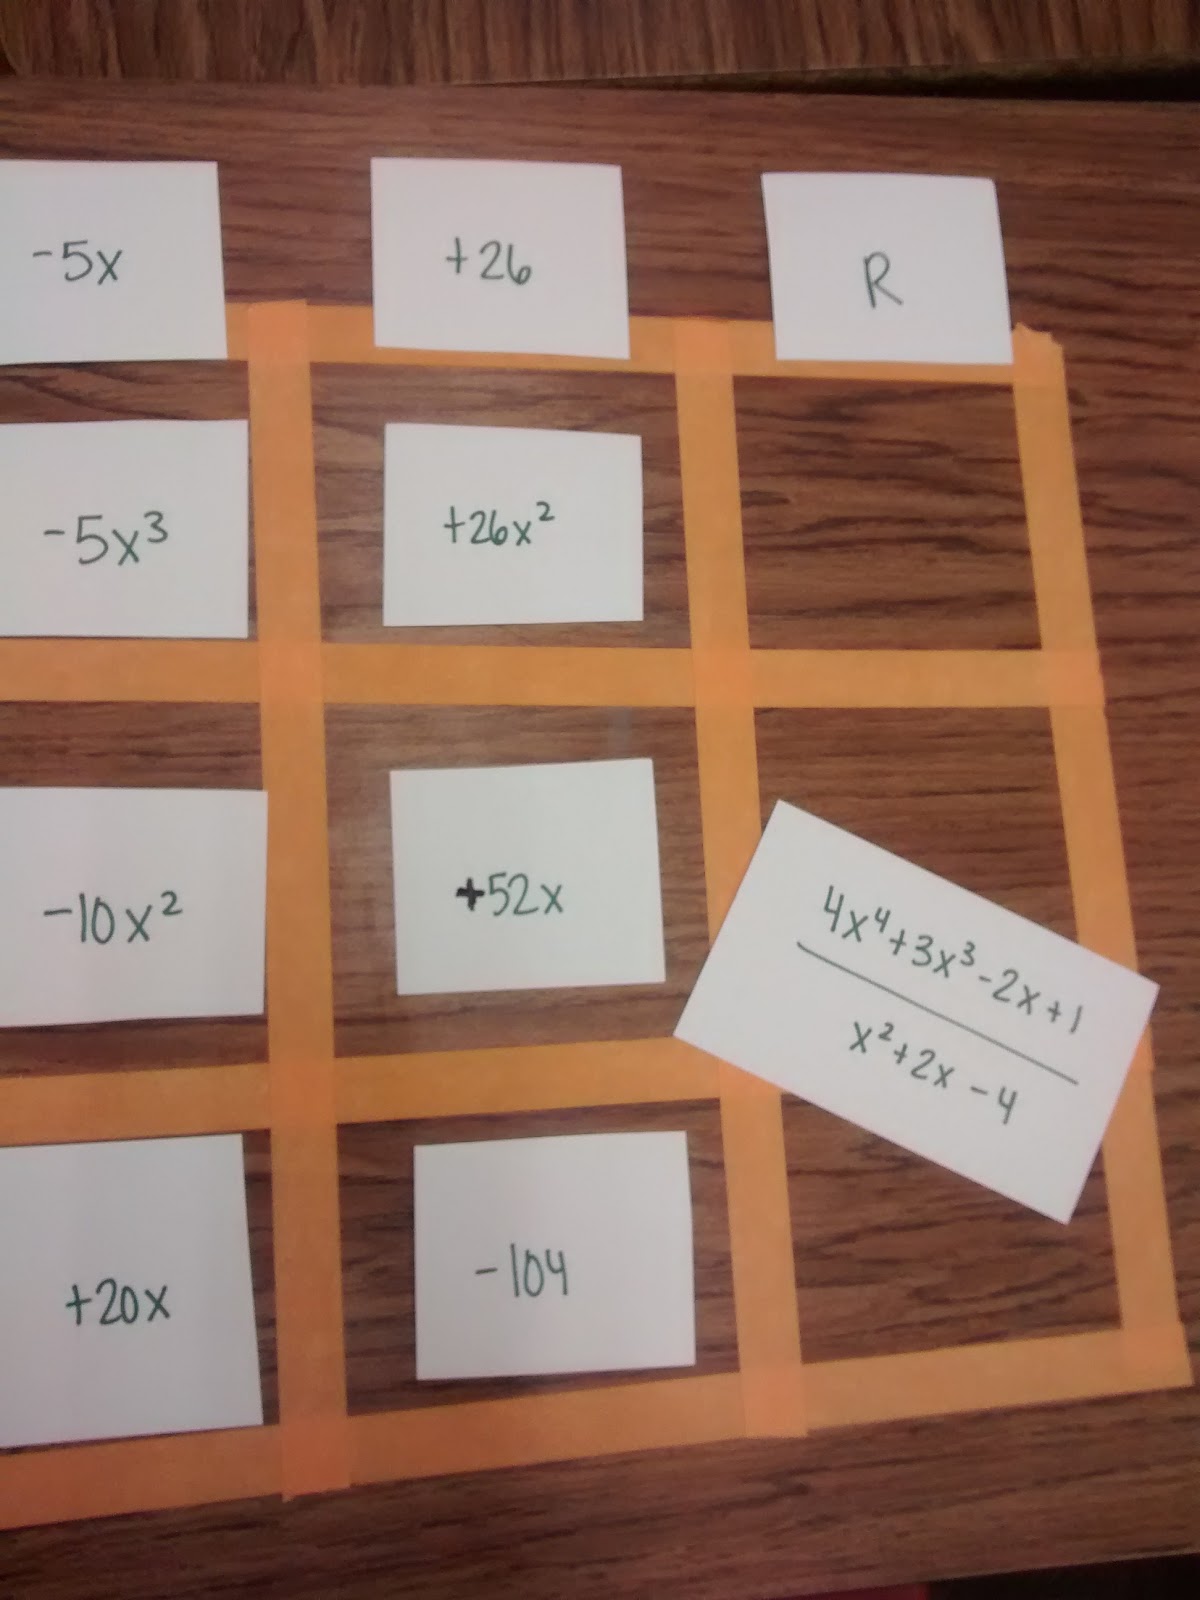
In this case, 20x and 52x needed a -74 x to sum to -2x. And, -104 needed +105 to sum to 1.
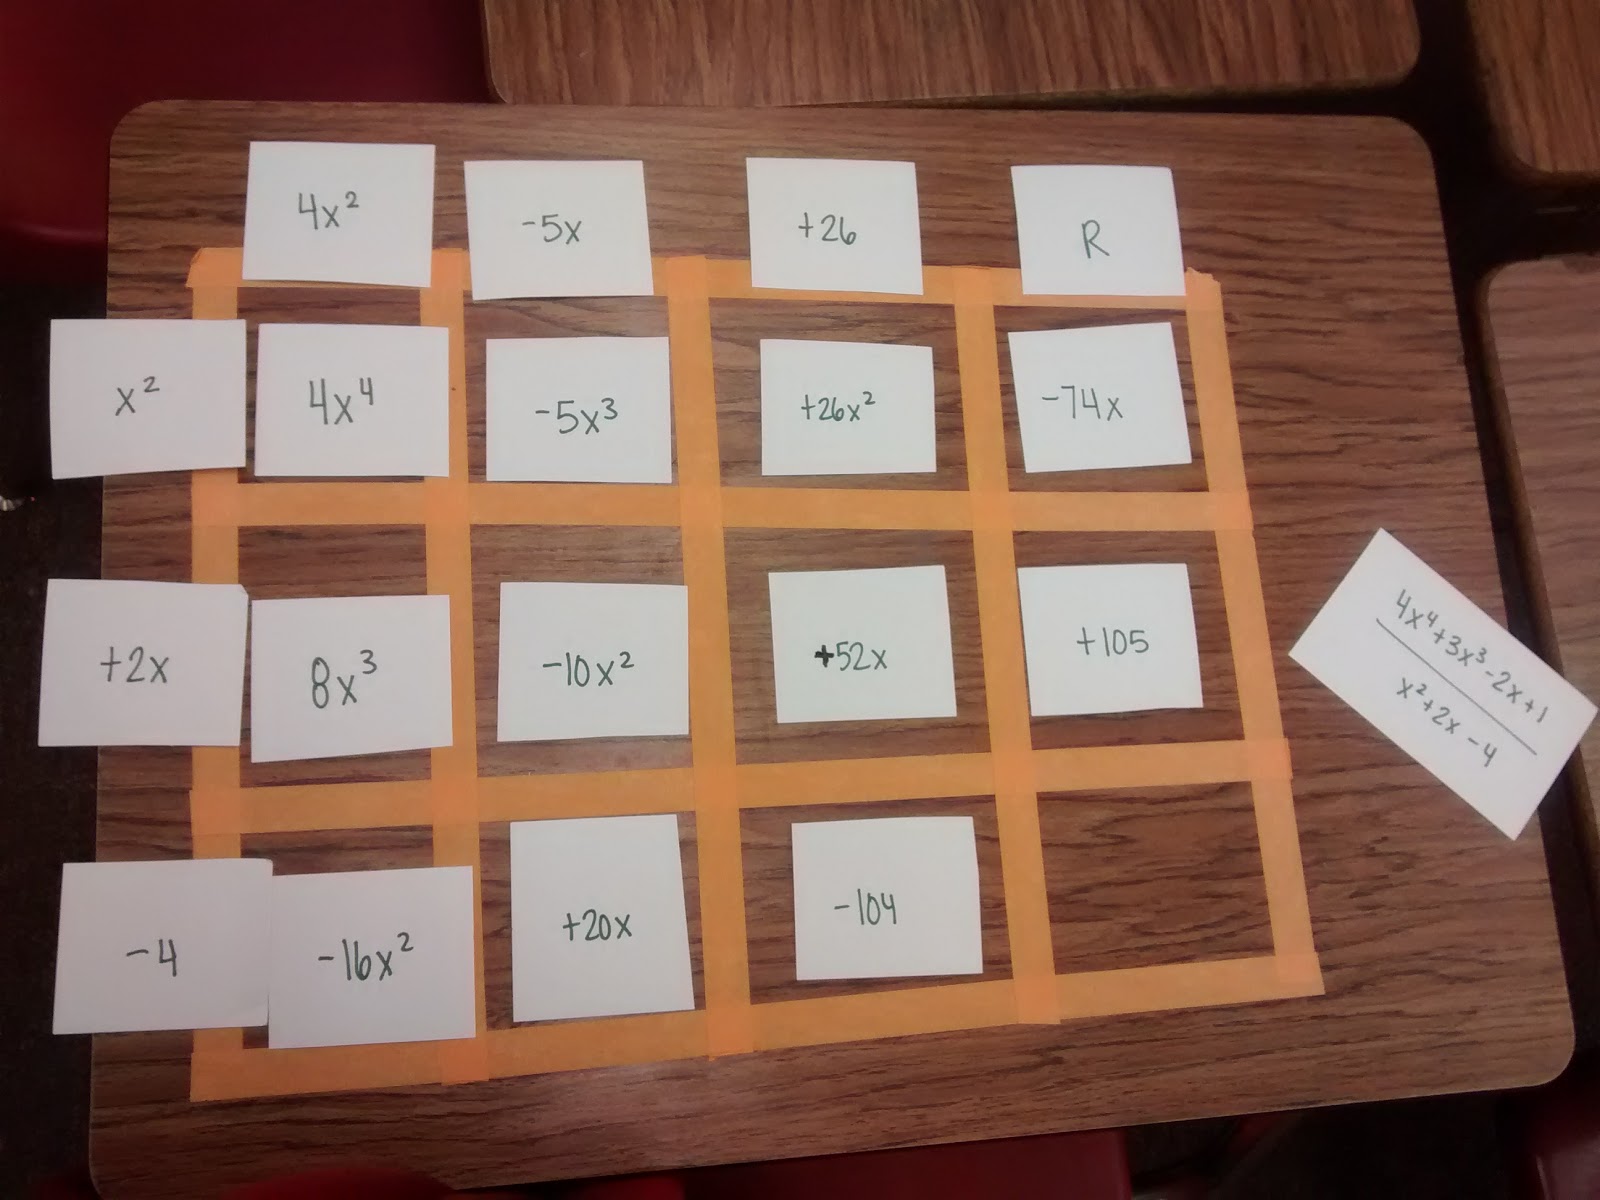
And, we’re done! 4x^2 – 5x + 26 R (-74x + 105) is our answer.
Does it still take a long time to do? Yes. Does it make way more sense than long division or synthetic division? Yes.
One of my students came in after school that day and asked if she could work on one of the puzzles. I said sure. After she finished, she told me that if we had someway to color code the diagonals, it would really help her. So, we started brainstorming ways to do this. Our first idea was some sort of see through colored paper. But, I don’t have any of that. Then, she said we could use bingo chips. I tried this out with another class the next day, and it worked really well.
Here’s some pictures of the bingo chips in action.
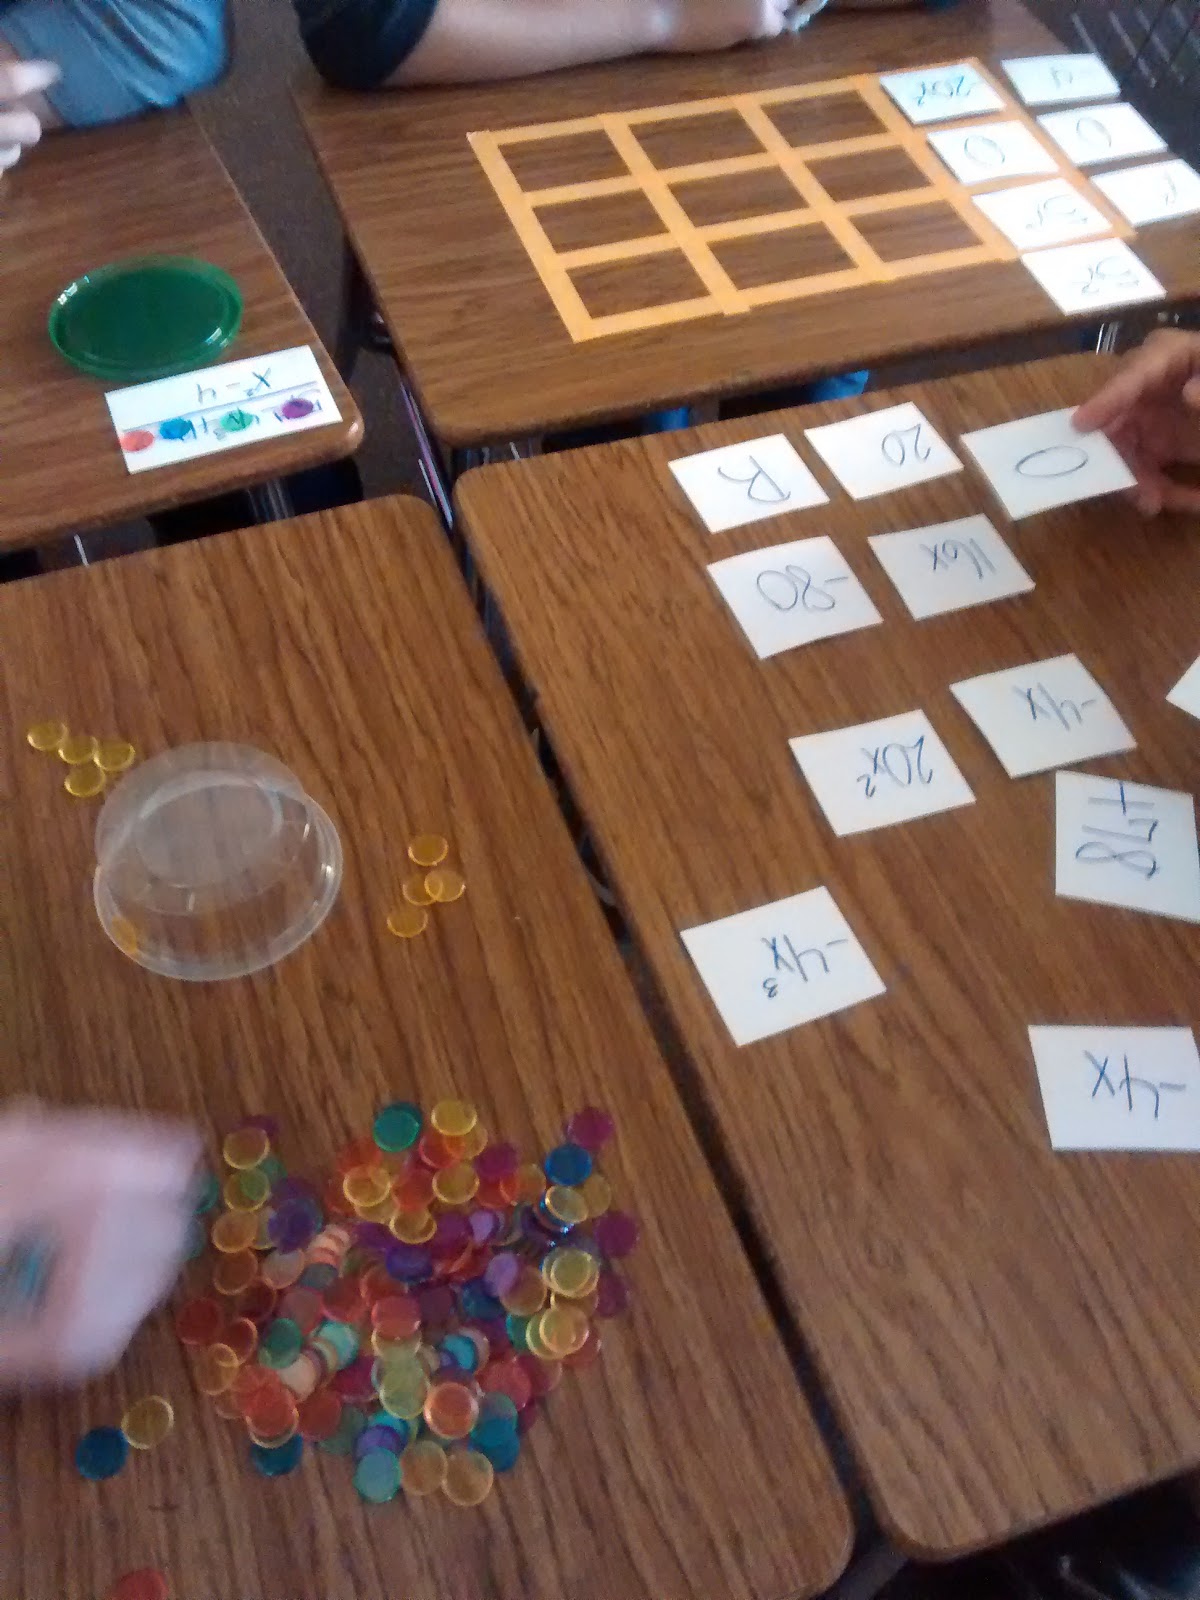
Here’s the group that decided to work from the right side instead of the left side.

My takeaways:
Start using these puzzles with multiplying polynomials. Then, I think they will need less explanation with dividing polynomials.
Bingo chip color coding is awesome.
Next year – make extra cards that don’t belong in the puzzle to challenge students who need it. Could differentiate in this way. Give them choices of each level – easy and hard.
After completing the jigsaw puzzles, students were much more confident about dividing on their own. Still need to work on the best sequencing of when to introduce the puzzle.
Also – the same student who suggested the bingo chips for color-coding diagonals suggested that I give them problems that were already worked out but contained an error for them to find and correct. I really like this idea! I told this student that she should definitely consider teaching as a career because she had a knack for this type of thing!