Graphing Linear Inequalities Foldable
This blog post contains Amazon affiliate links. As an Amazon Associate, I earn a small commission from qualifying purchases.
Yesterday, we started exploring the idea of graphing linear inequalities. We’ve been graphing linear equations for a month now, so it was time to branch out a bit.
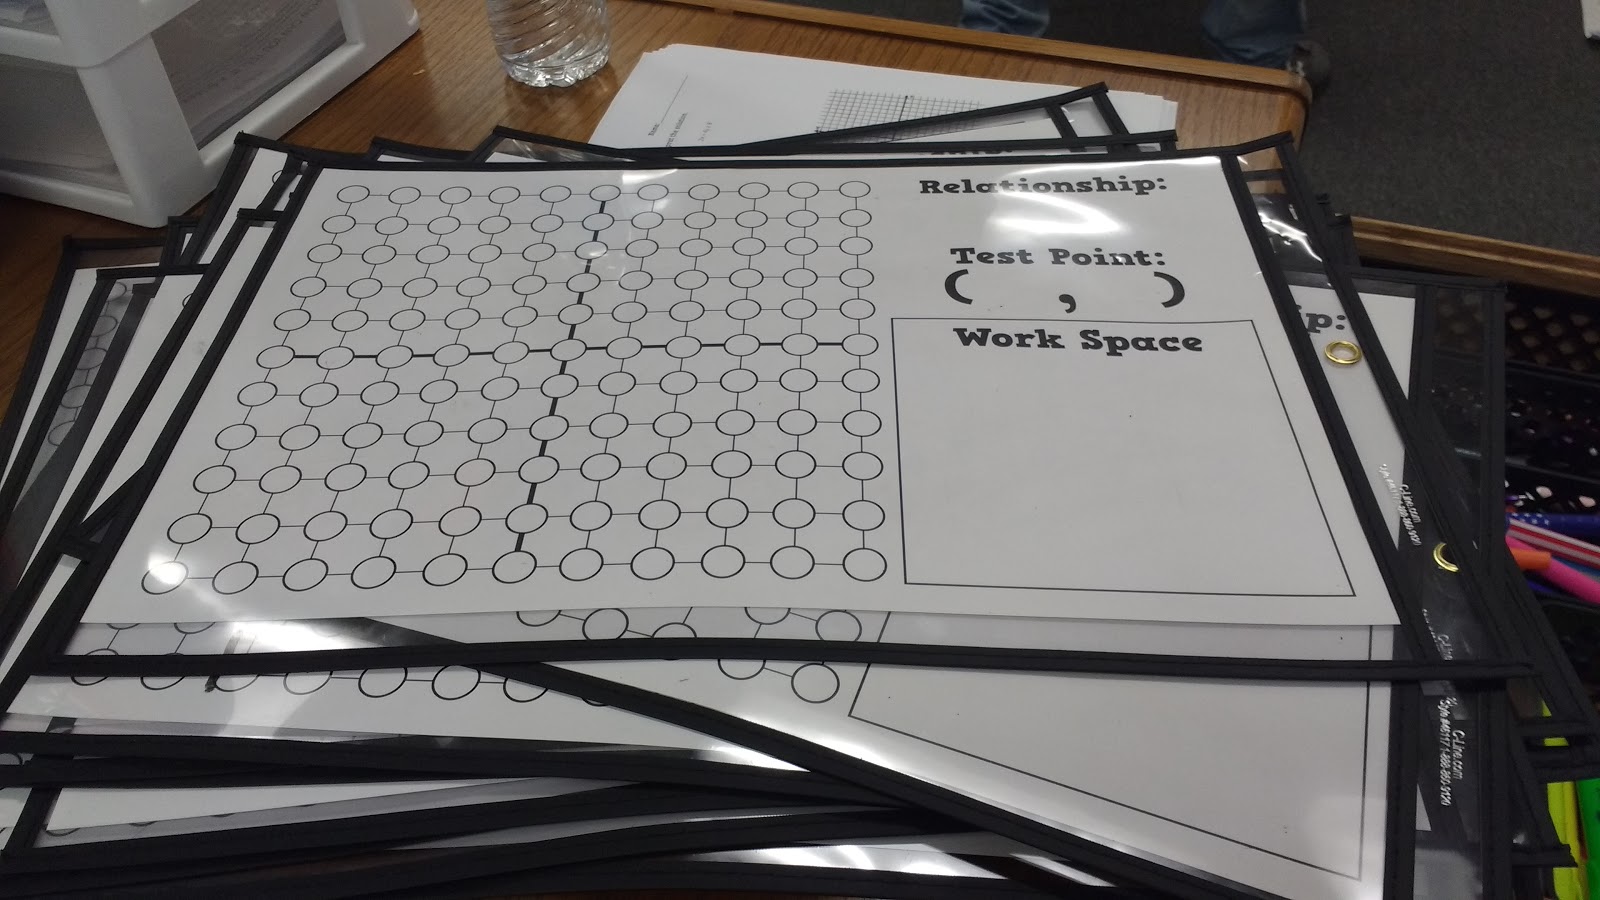
I created a graphing two variable inequalities dry erase template for my 11 x 17 dry erase pockets to help students understand what it means for a point to be part of the “solution.”
Today, I want to focus, instead, on the graphic organizer I created to walk my students through how to graph a linear inequality AFTER we understand what it means for a point to be part of the solution of an inequality.
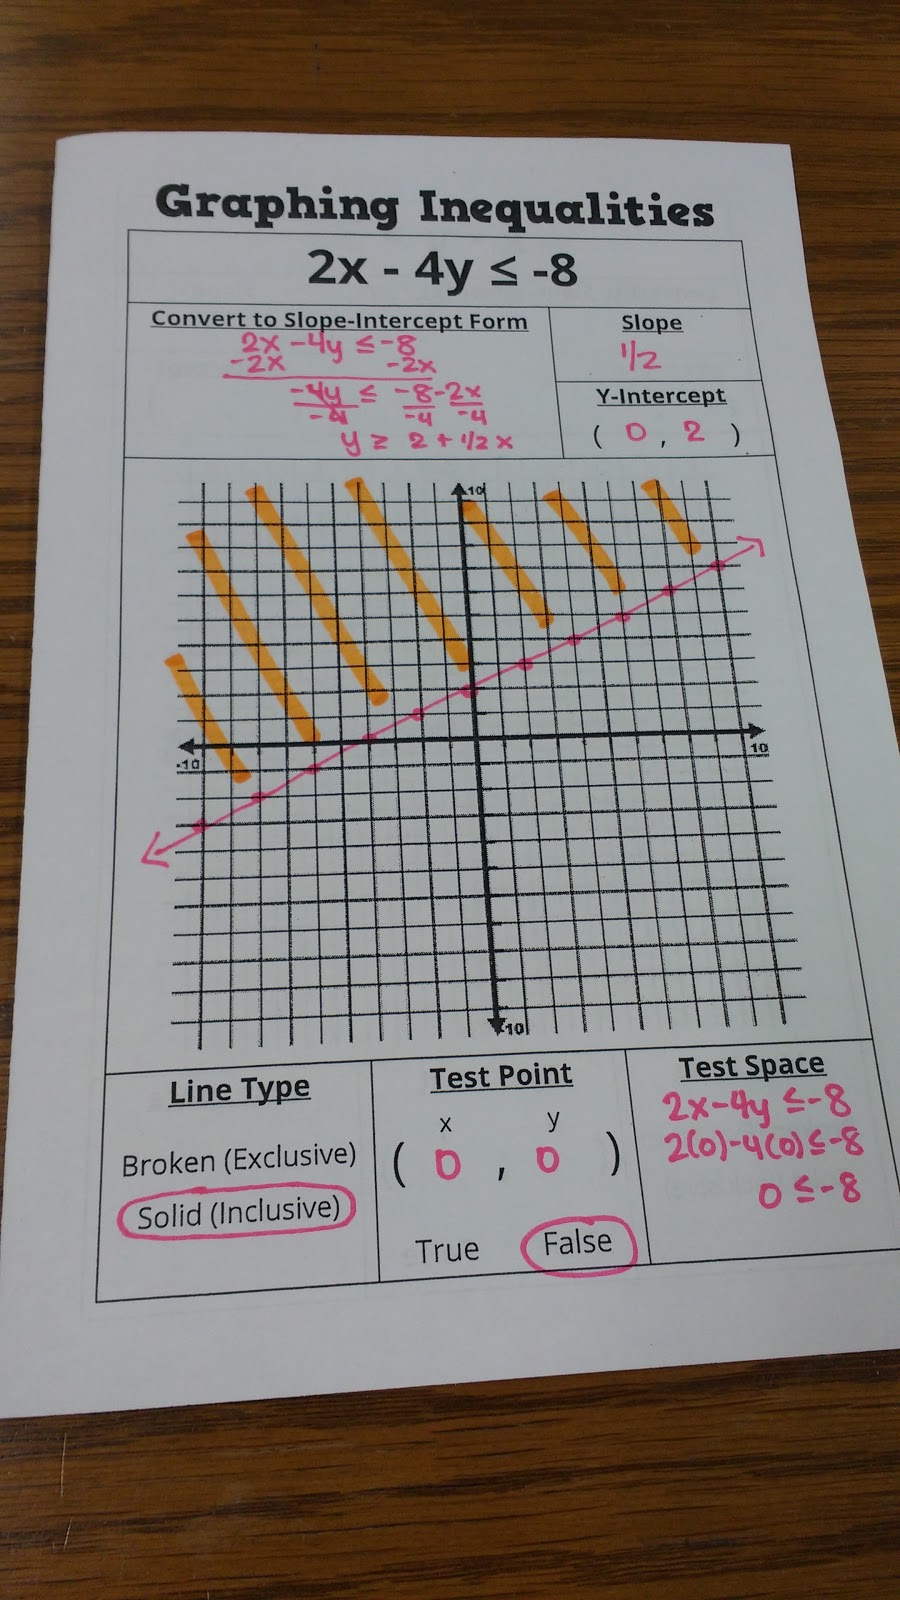
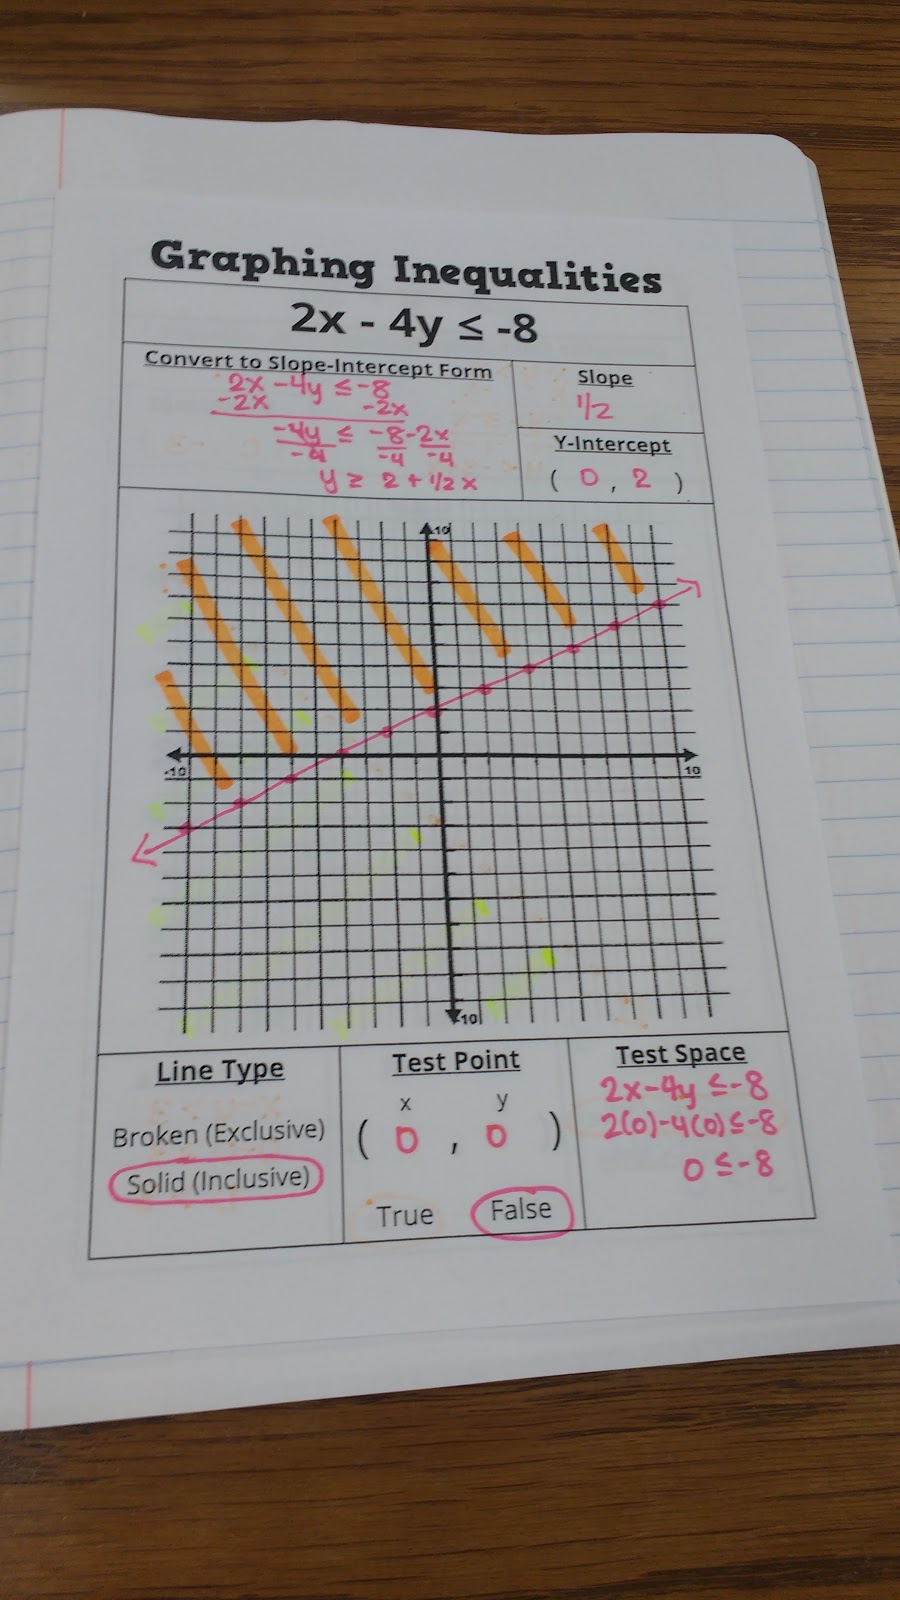
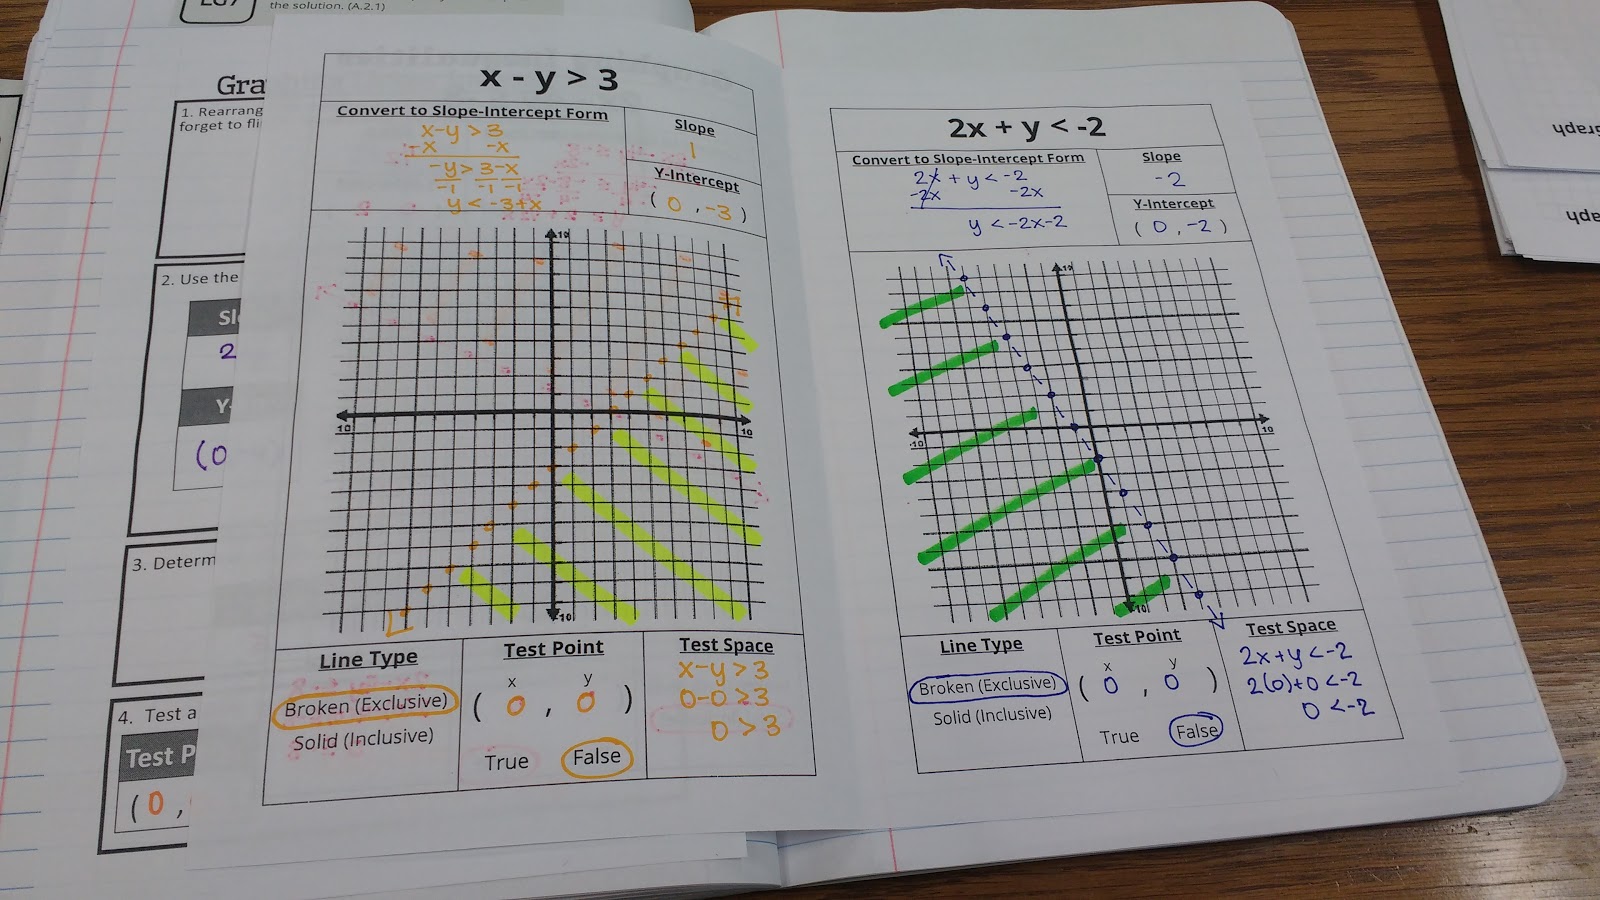
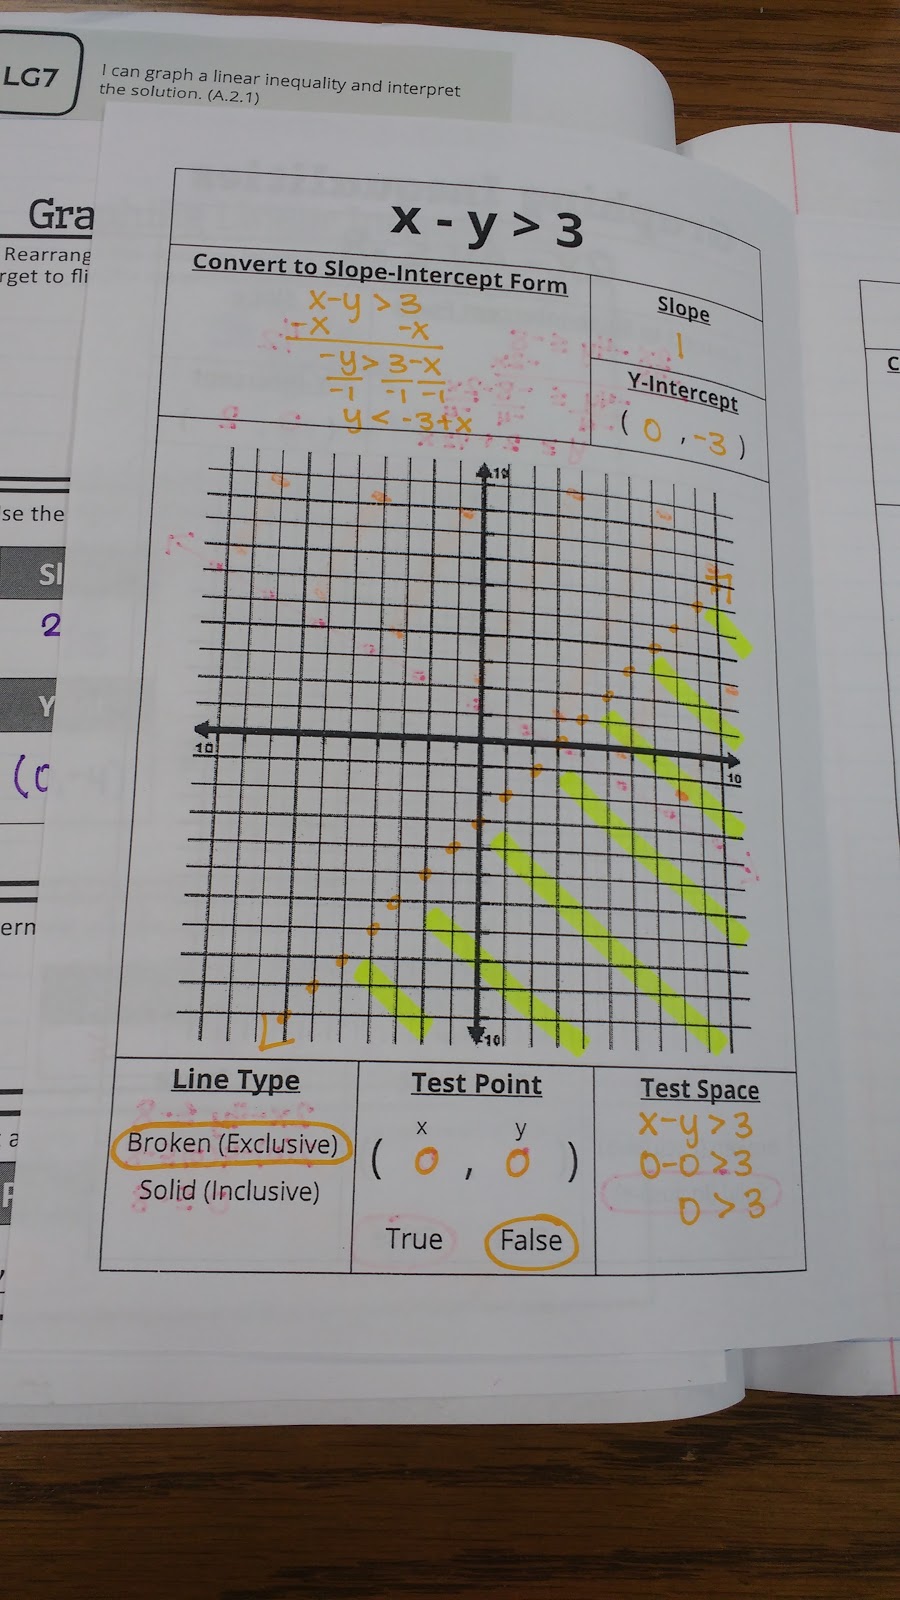
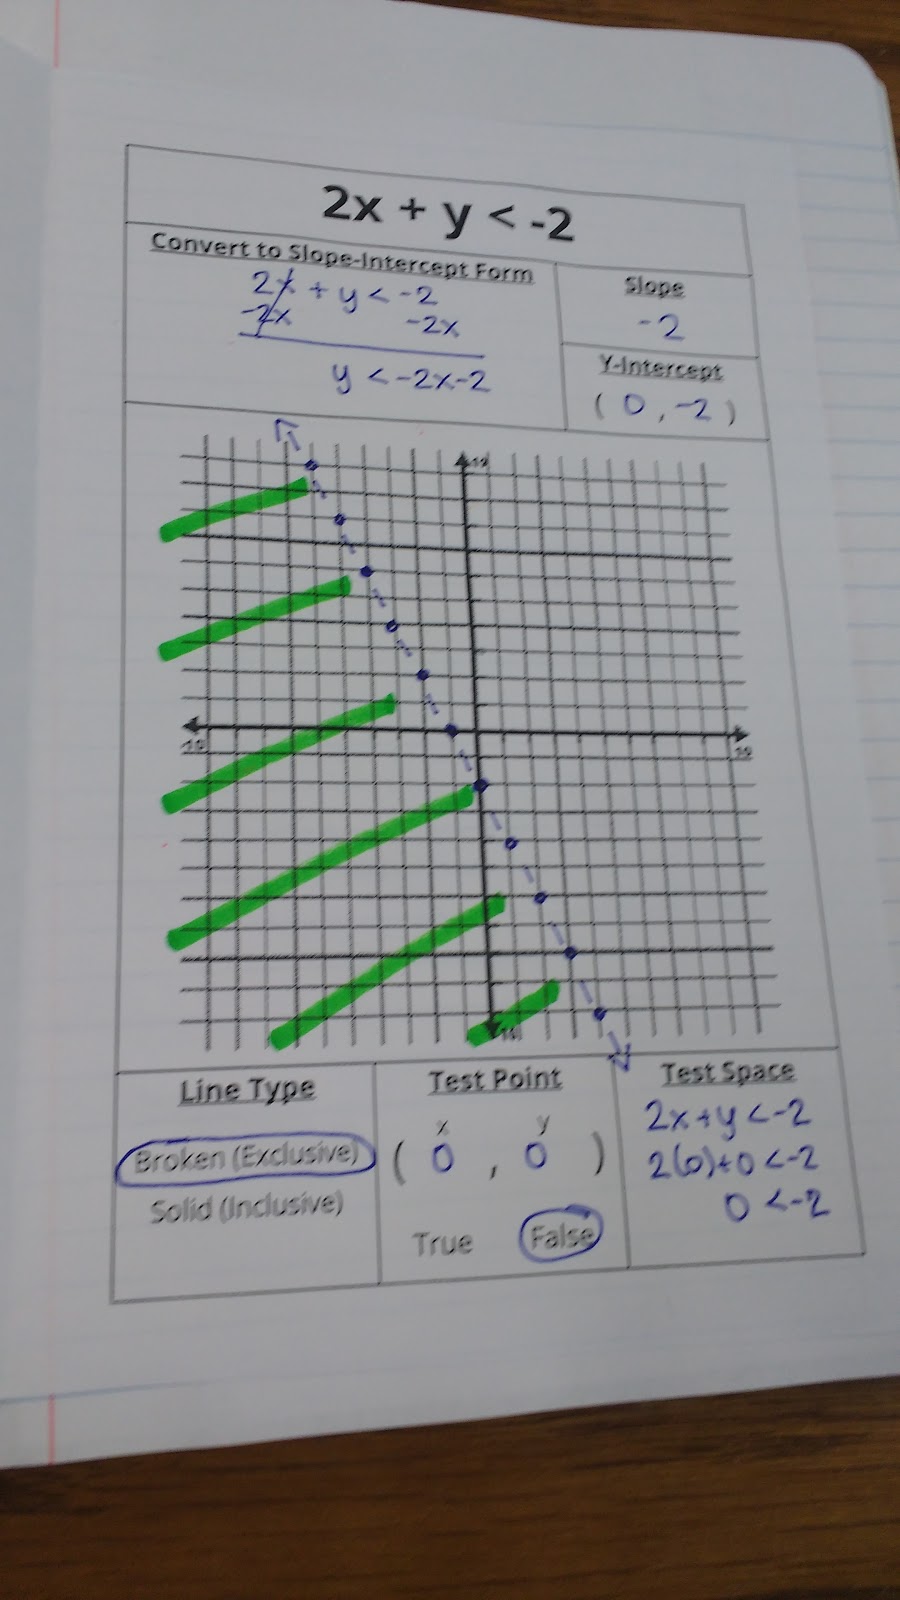
This is a slightly different approach than I took last year, and I want to take this chance to reflect on the WHY behind my changes.
Here are photos of last year’s notes.
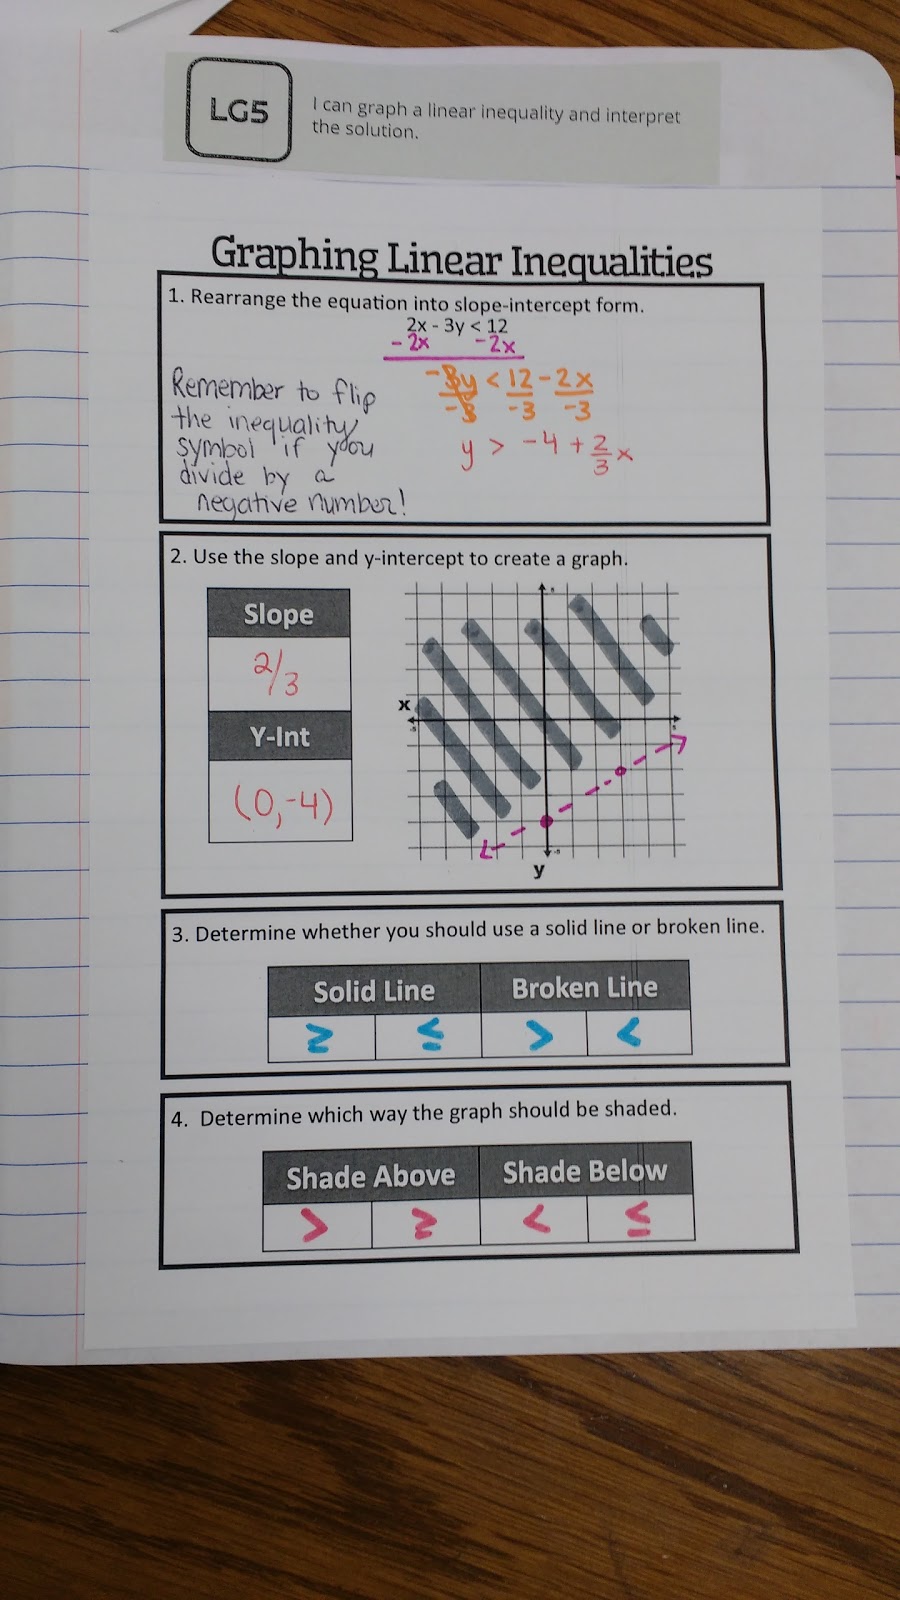
I didn’t take a picture of this page today, but I re-used this page with slight modifications.
On Step 1, I pre-typed my reminder to flip the inequality symbol if you divide by a negative.
The biggest change was on Step 4. I opted to move away from teaching students that we shade above the graph for greater than and below the graph for less than. I started using this method several years ago because I found that my students were making mistakes when evaluating test points. This year, I decided to really emphasize evaluating expressions at the beginning of the year. So far, I’m SUPER-pleased with how it has been going. I don’t think I will ever go back to just teaching the short-cut method for shading.
One reason for moving away for the short-cut method is that it ONLY works when the inequality is in slope-intercept form. Every single year, I have students who look at the inequality symbol in the original inequality (usually standard form) and use that to determine their shading instead of the symbol in the slope-intercept form version.
Also, I am starting to recognize that my decision a few years ago to stop teaching graphing equations/inequalities by intercepts is no longer necessary. I stopped using this method because I wanted my students to really have a chance to master translating between the different forms of linear equations/inequalities. For the past two years, I’ve been making my students practice translating between different forms a LOT more than I used to, so I’m beginning to realize that there’s no reason to avoid teaching graphing by intercepts anymore.
Guys, this teaching thing is tough. As teachers, we want to do what is best for our students. But, it is so hard to know what that is. It is easy to fall into the trap of doing something because that’s how you did it last year without thinking if that is still the best, most appropriate method. I’m finding more and more that I often shift the way I teach one topic without realizing the ten other topics that this influences also need to be shifted slightly as a result.
Enough pondering the reality of being a teacher. Let’s get back to last year’s approach.
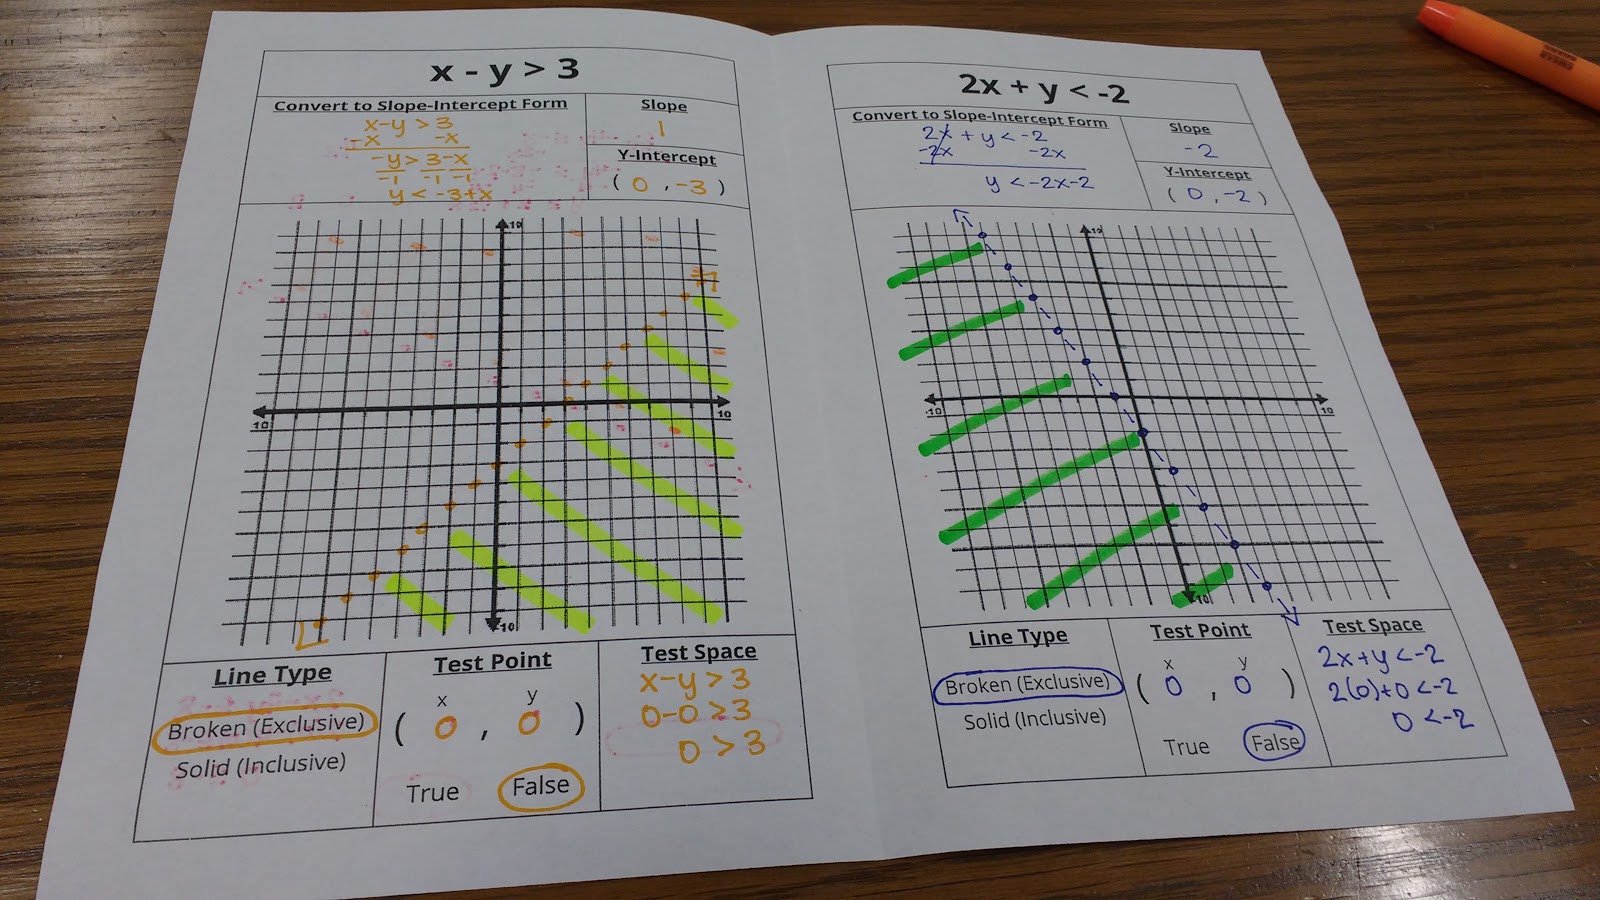
After filling out the graphic organizer, we moved immediately to practice. I achieved this by having students complete 12 practice problems that could be found in 2 “poof books.”
Here’s an example of an inside page:
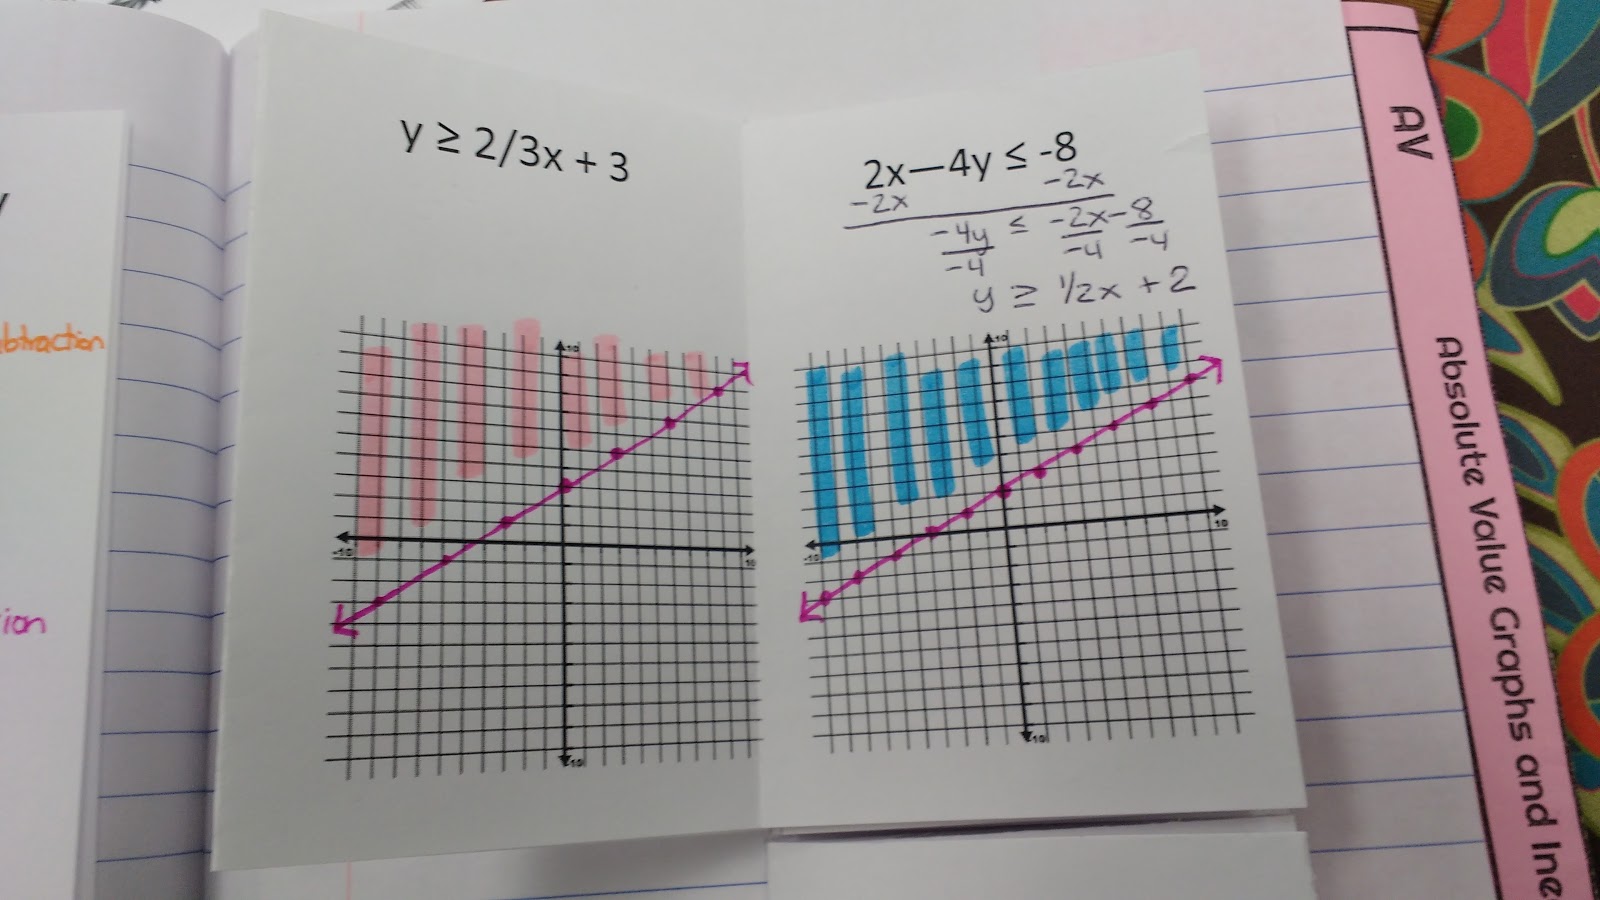
When I looked back at these practice books last night while planning today’s practice, I kinda cringed. There wasn’t anything necessarily wrong about my approach. It just wasn’t as thorough as it come be. If I wanted my students to test points to determine their shading, where would there be the space to do that?
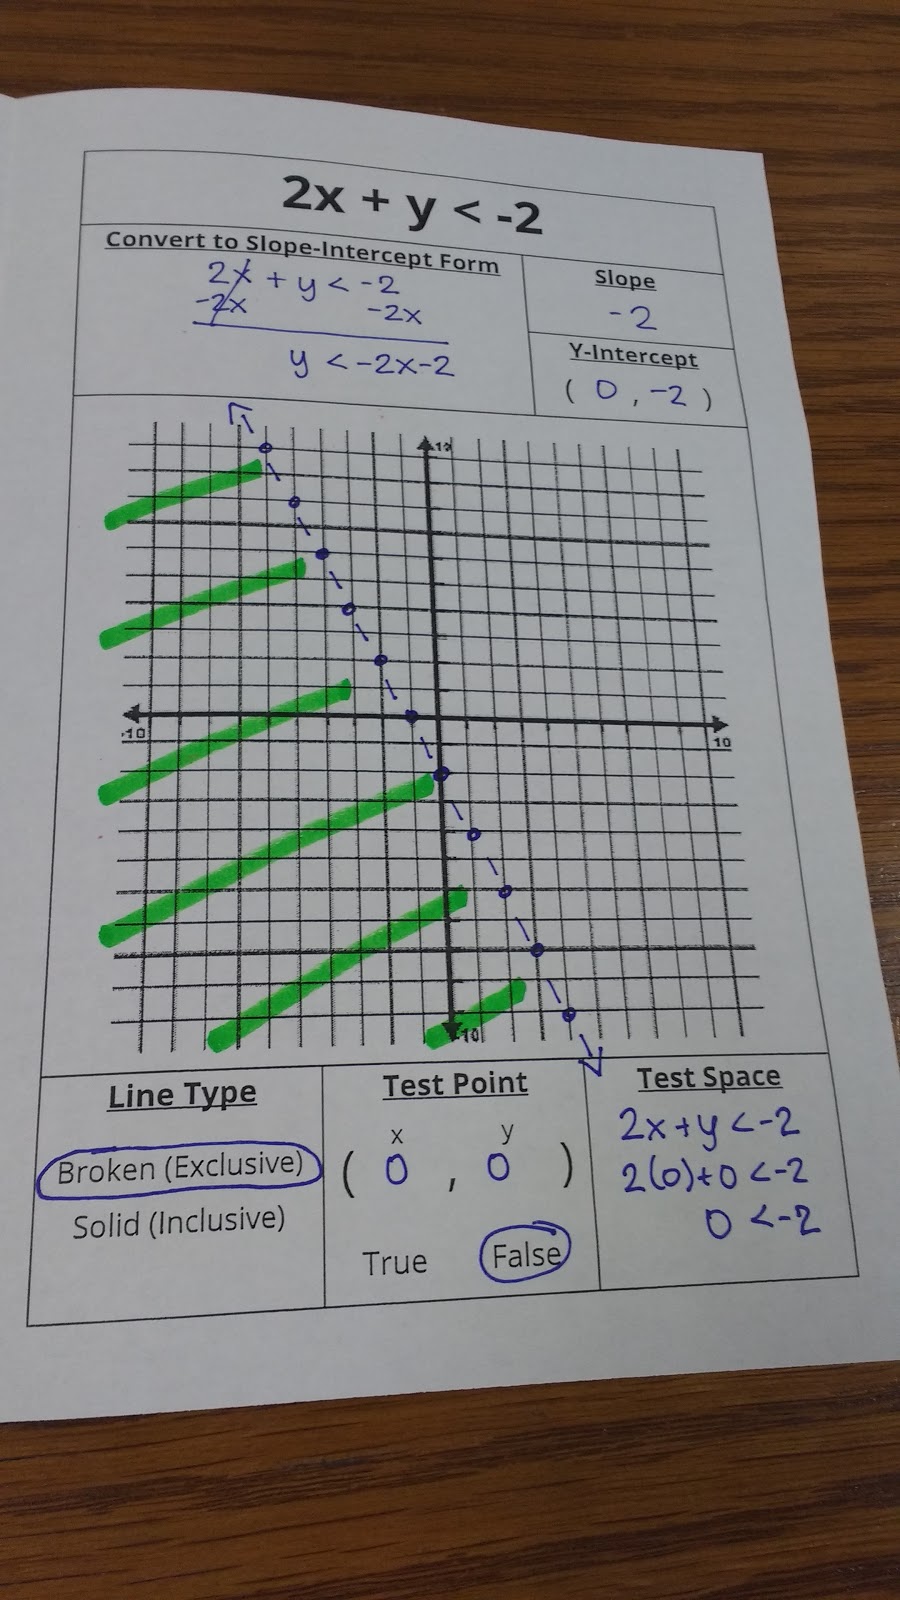
This led to my new graphic organizer:
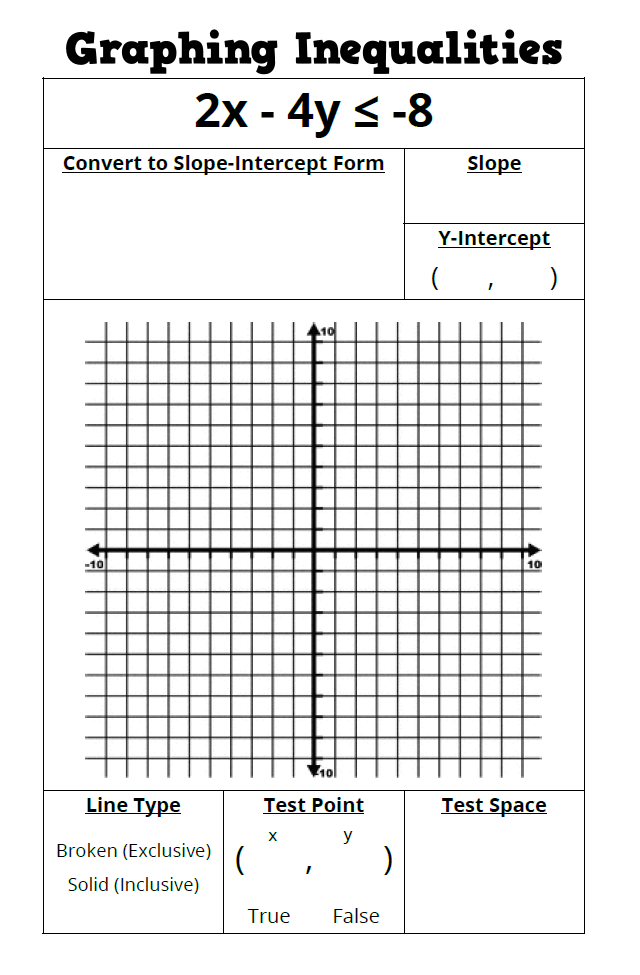
Instead of breaking down the steps only ONCE on a graphic organizer, I decided to give my students the structure of the graphic organizer for EVERY SINGLE PRACTICE PROBLEM. This means my students have less practice problems to reference in their notebooks, but I think they are actually better references.
My students have really taken to the idea of testing points. They’ve also realized that (0, 0) is the best point ever to test!



Yeah! I start this topic after our 2 week break for the Lunar NewYear (vacation started at 4pm today!) I am looking forward to using your materials in a couple of weeks!
HI Sarah! where did you find the template at the top of the page? Would you mind sharing?
Thank you for always being so generous with your knowledge and creations. I would love to use the graphic organizer from this post, but I don’t see it in the box link provided. Is it shared somewhere else.
I just updated the links at the bottom of the post. Thanks for letting me know!