Combining Like Terms Cut and Paste Activity
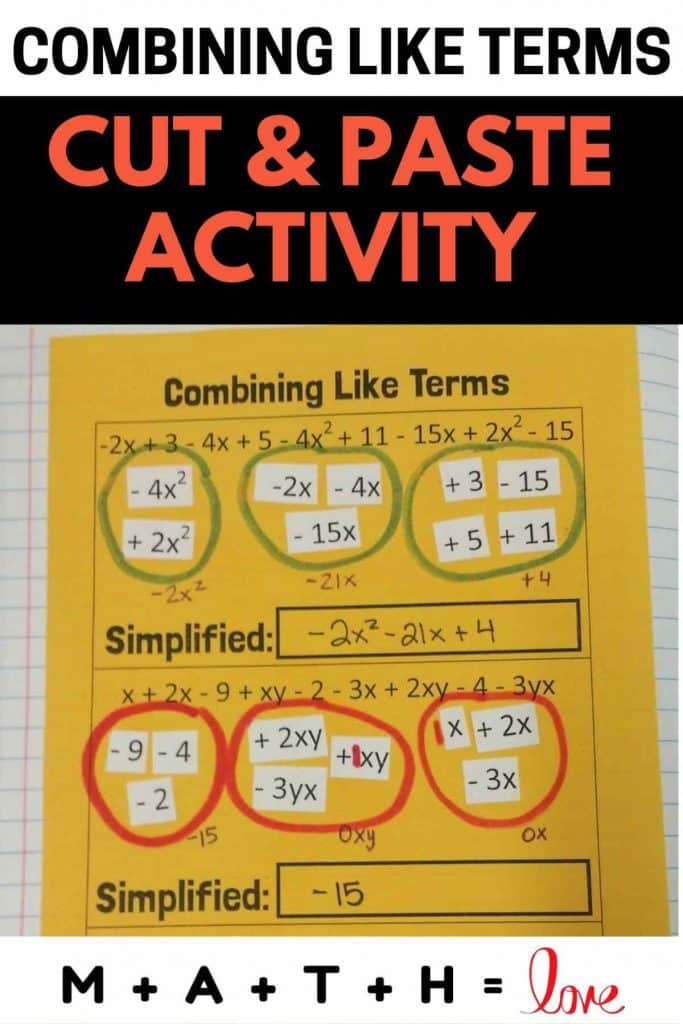
Combining Like Terms Activity (Version 3.0)
I modified my combining like terms strip activity that I have used for the past two years. This year, I added a box for students to write their simplified answer in. I think it really helped them organize their work better!
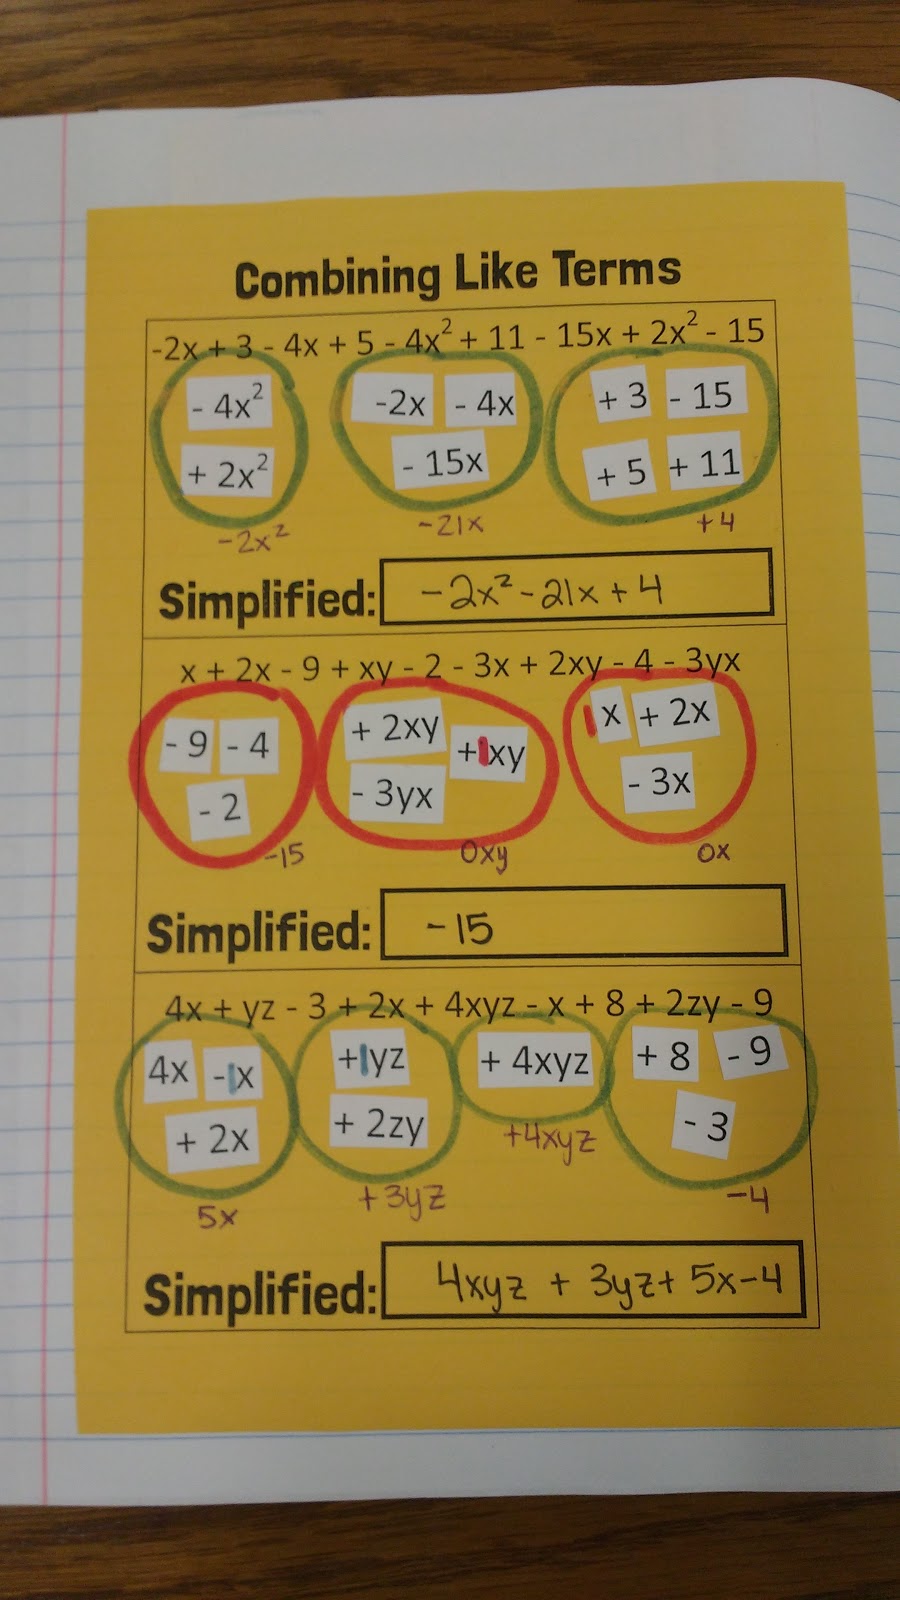
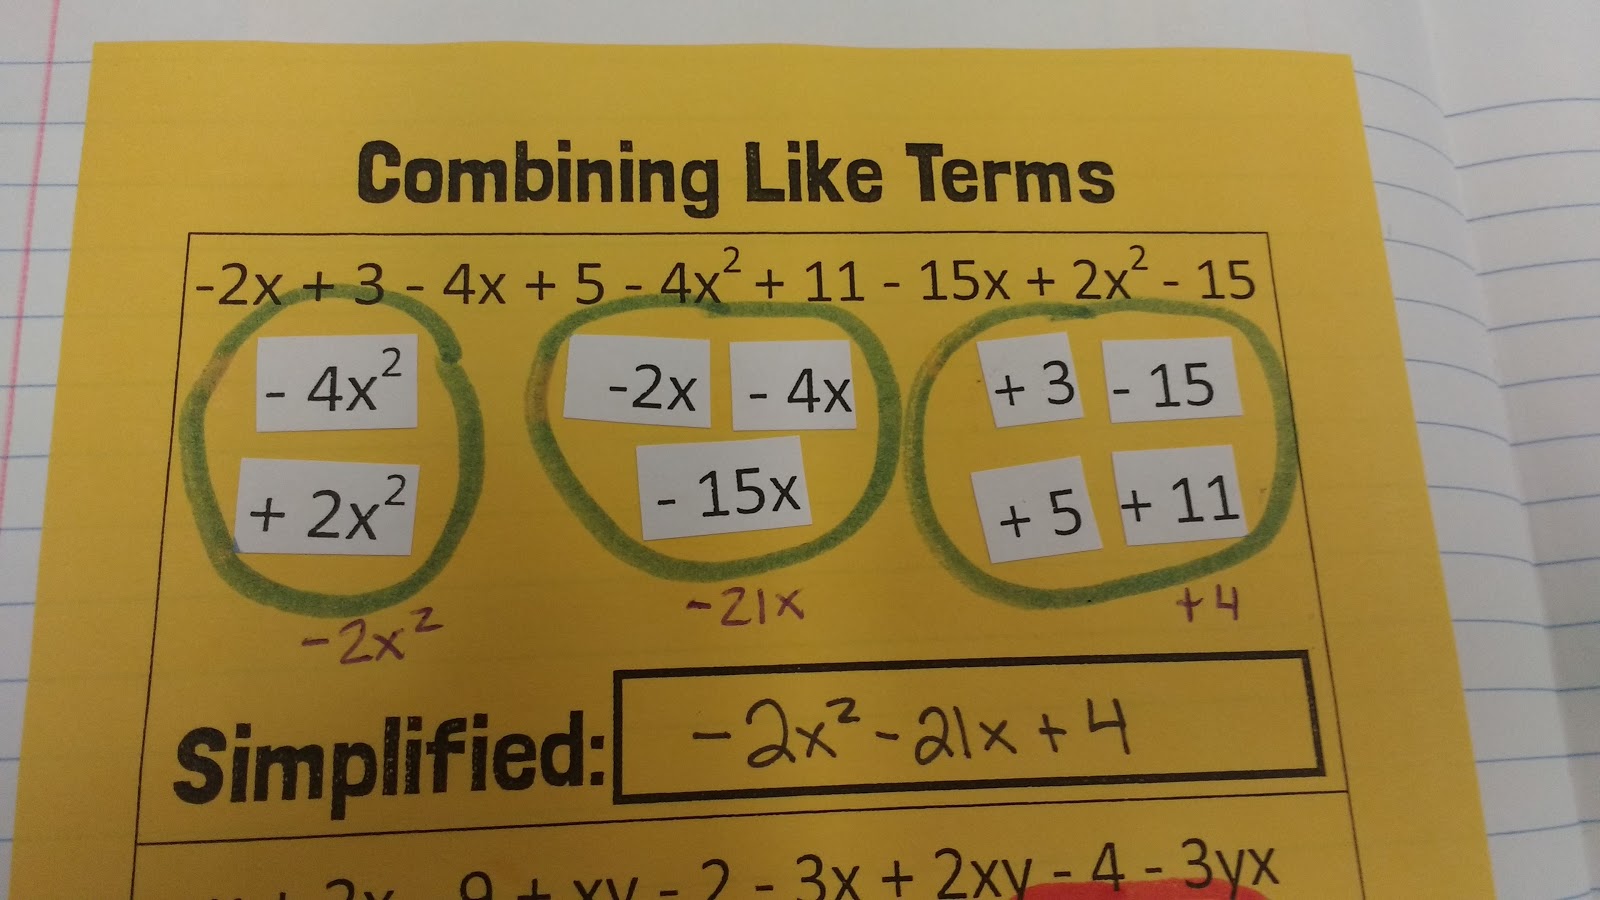
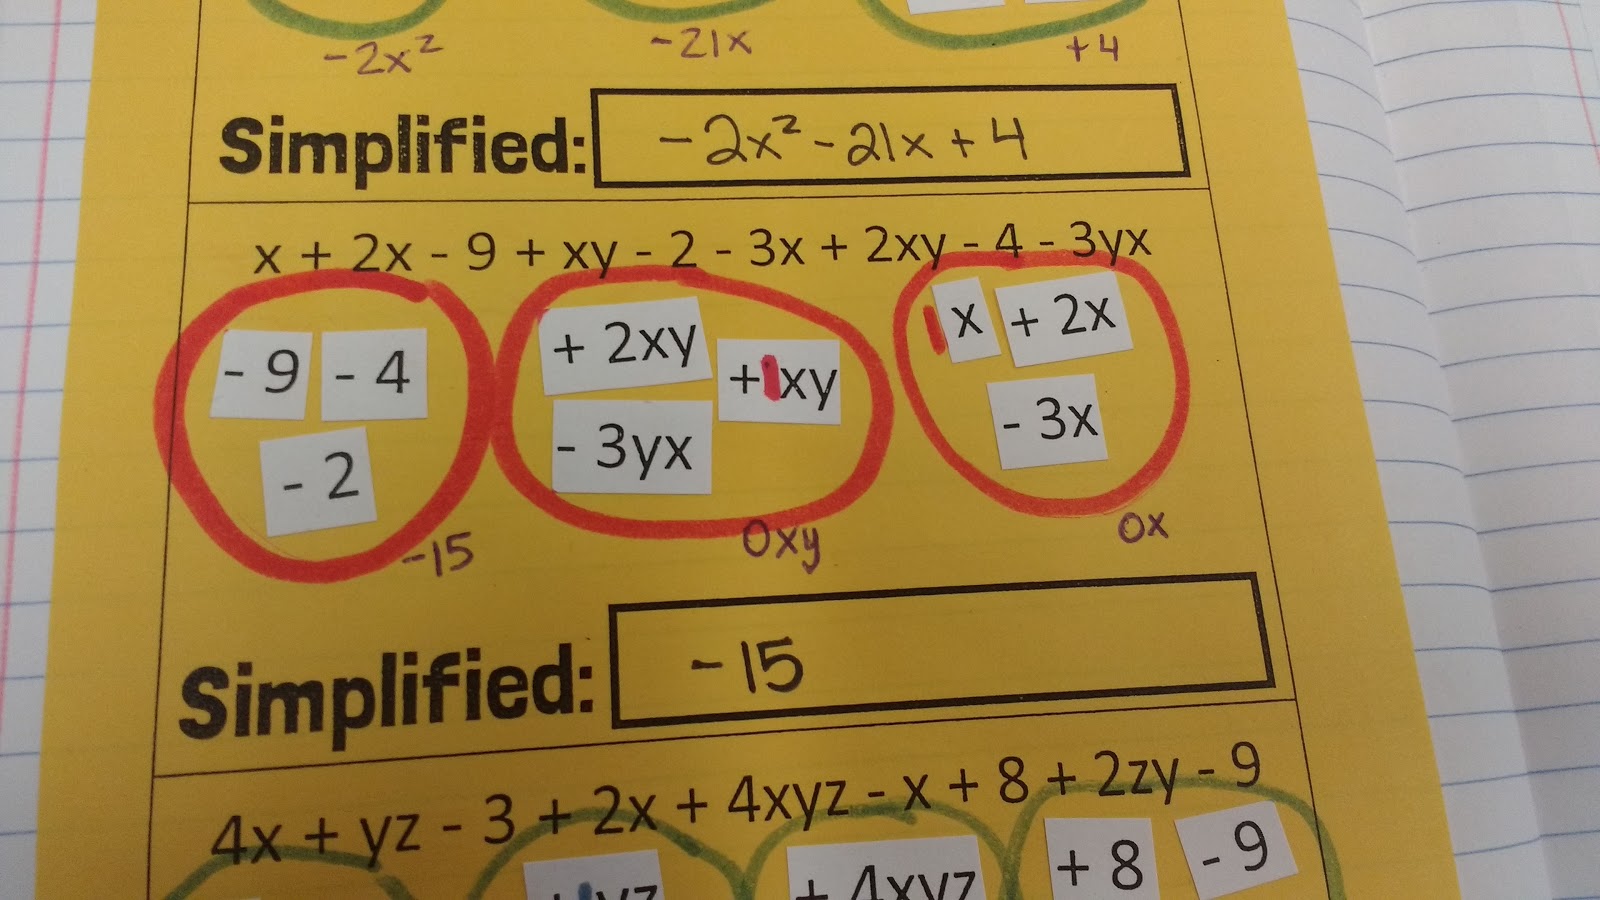
Close-ups of each problem:
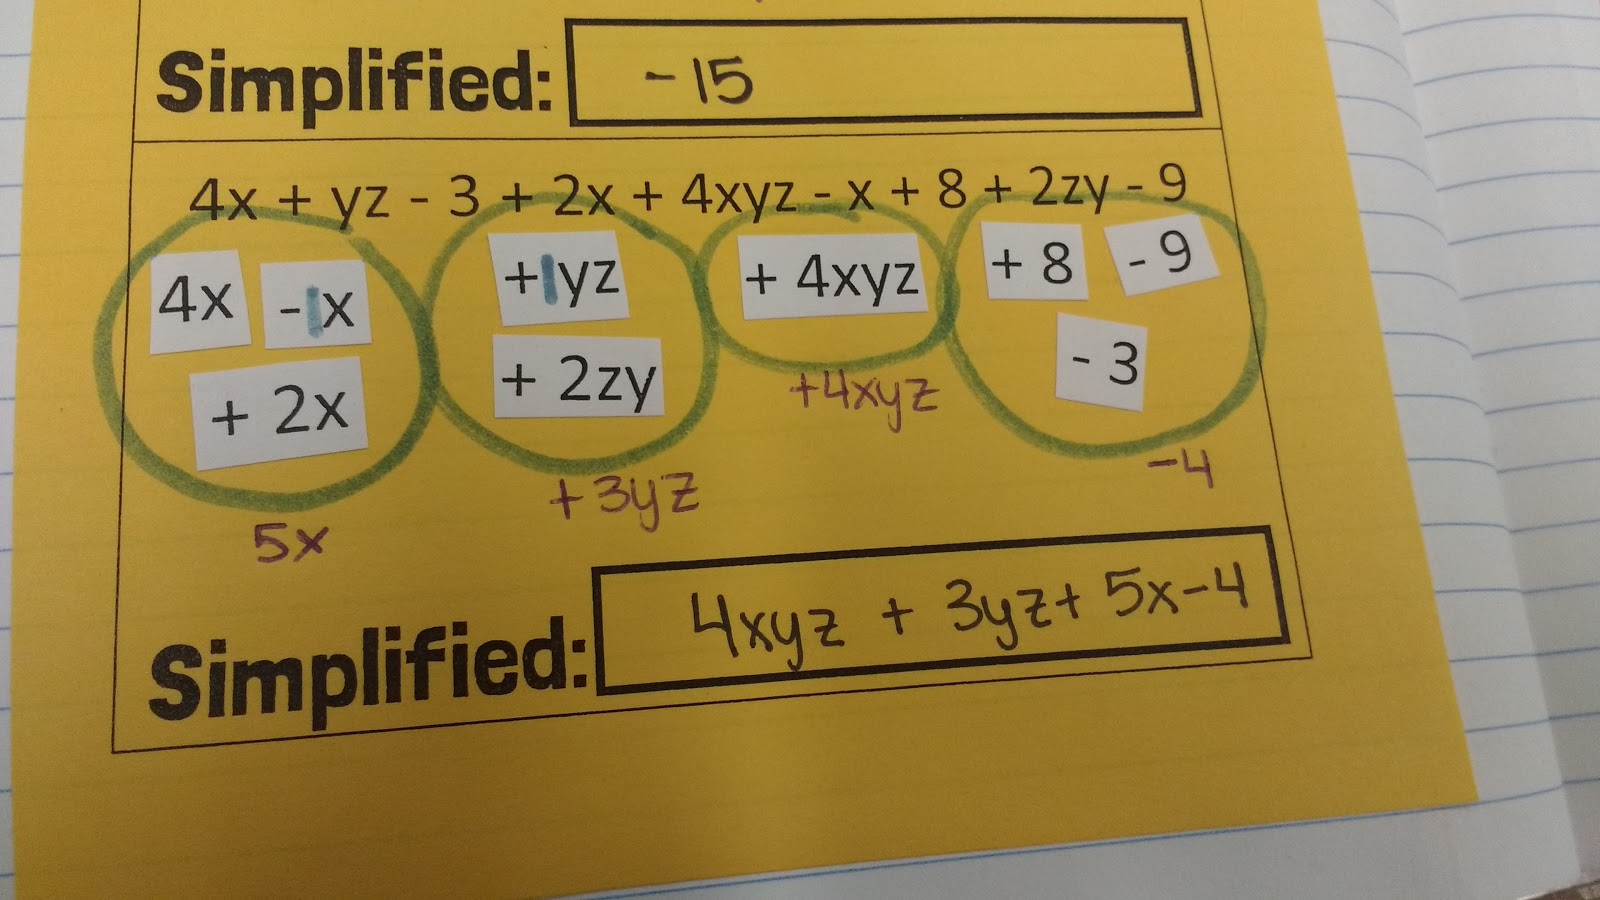
Looking for a fun combining like terms puzzle? I suggest checking out my combining like terms maze!
Combining Like Terms Activity (Version 2.0)
Our third skill this year in Algebra 1 is to be able to rewrite expressions, equations, and inequalities by applying the distributive property and combining like terms. I was able to take how I taught these concepts last year and improve them (hopefully) for the better.
I have a few students taking Algebra 1 with me for a second time due to failing last year, and they commented that I taught this way better this year than last year.
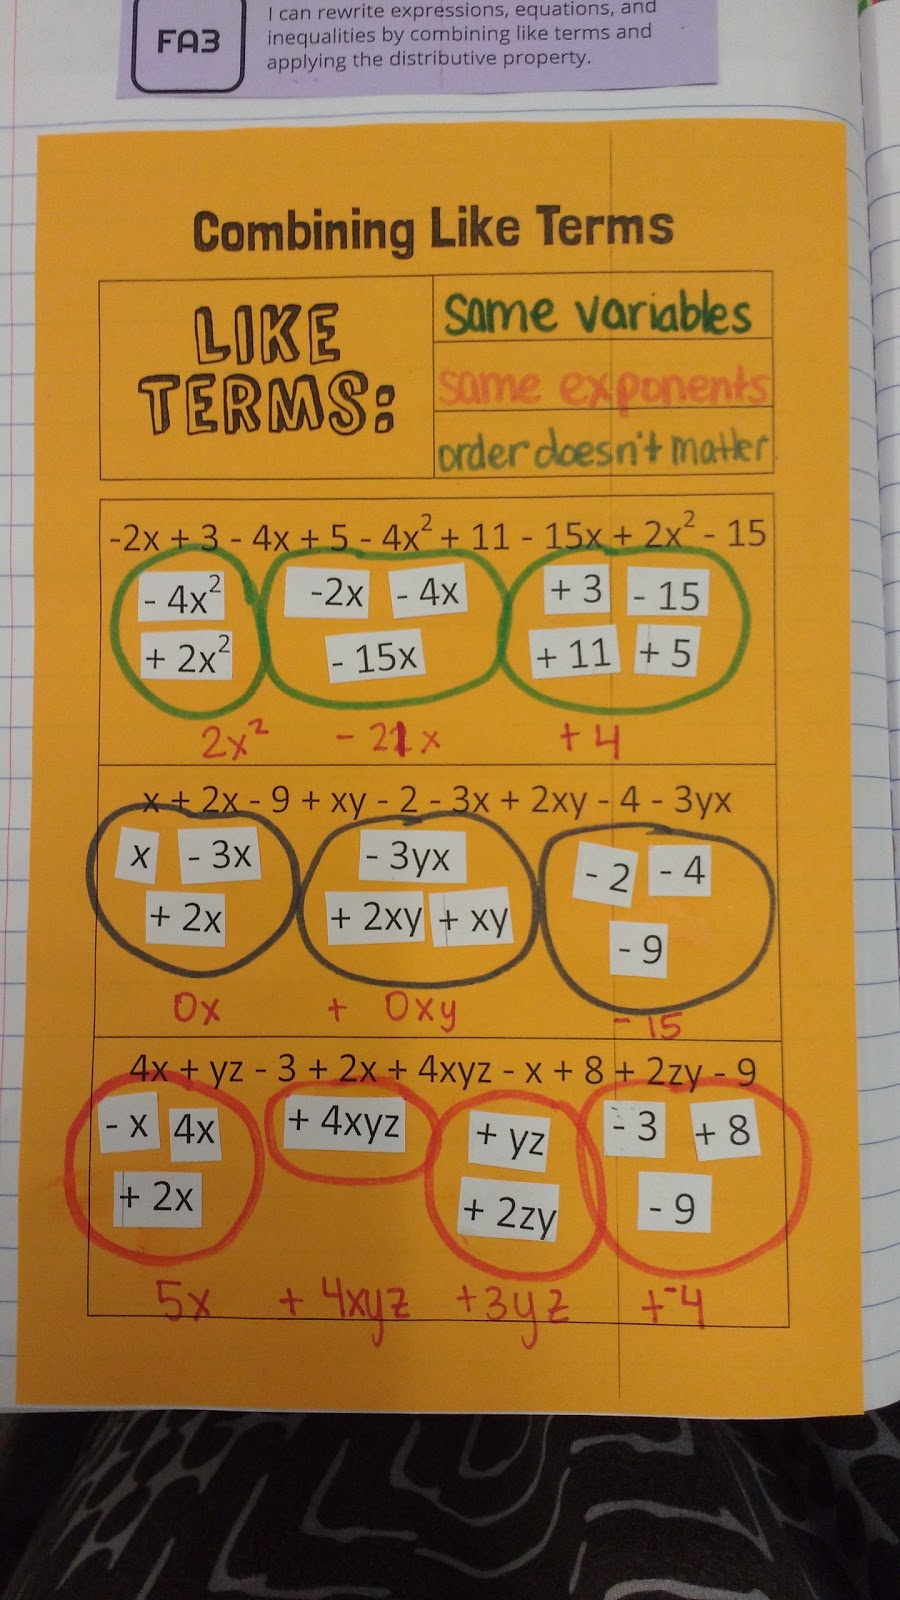
I was multi-tasking (aka eating lunch) while I was doing this, and I ended up making a few arithmetic mistakes. I think I fixed them all, though.
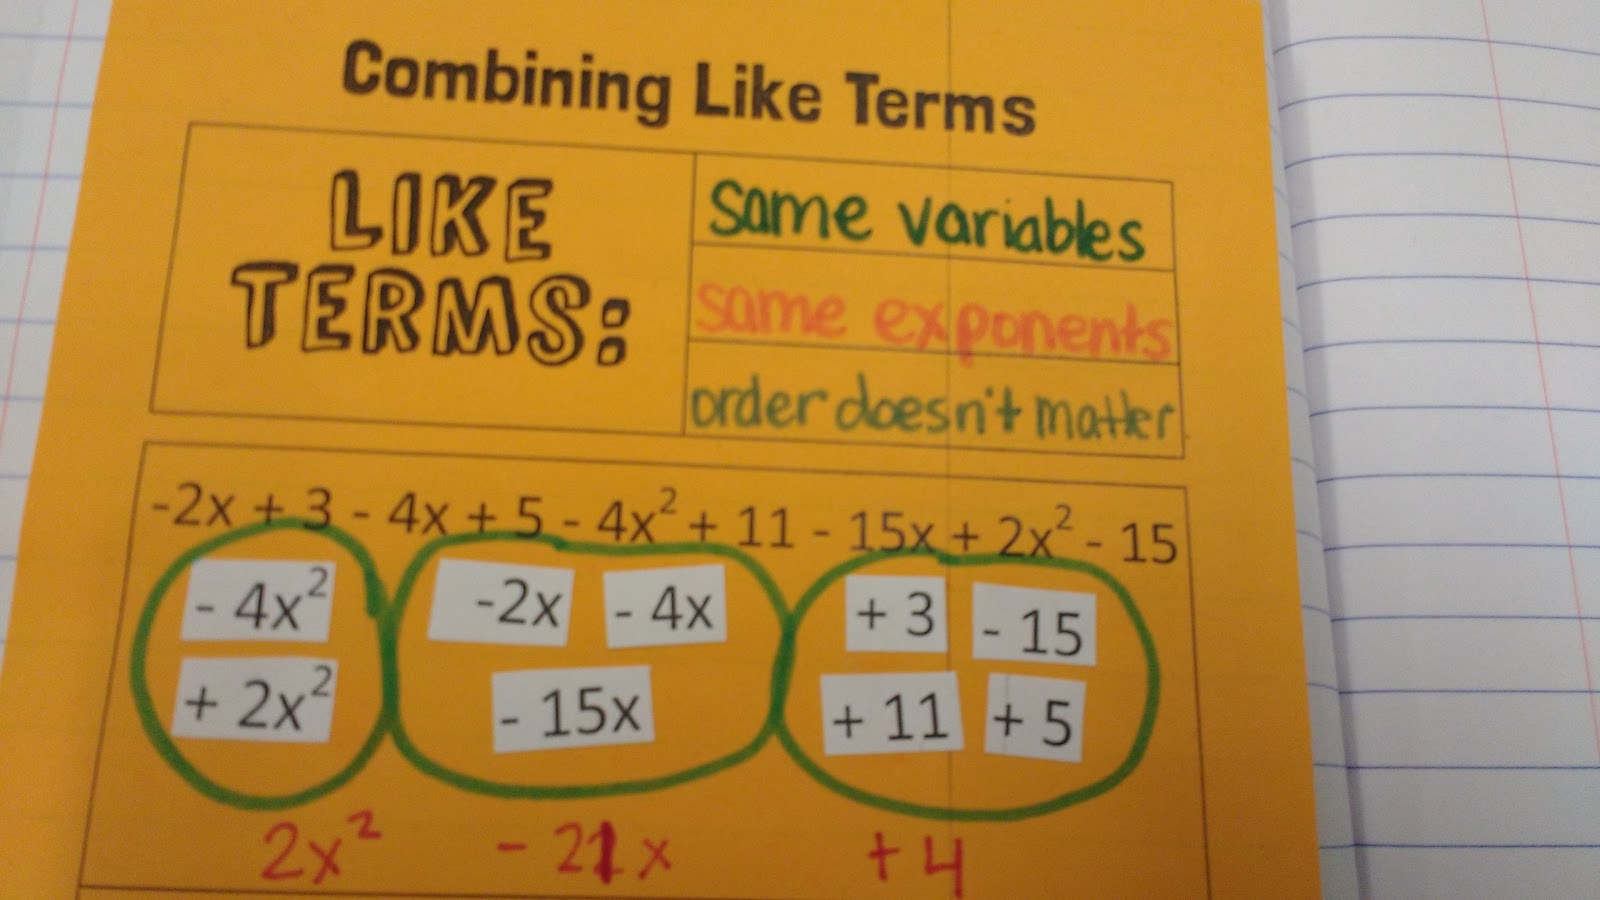
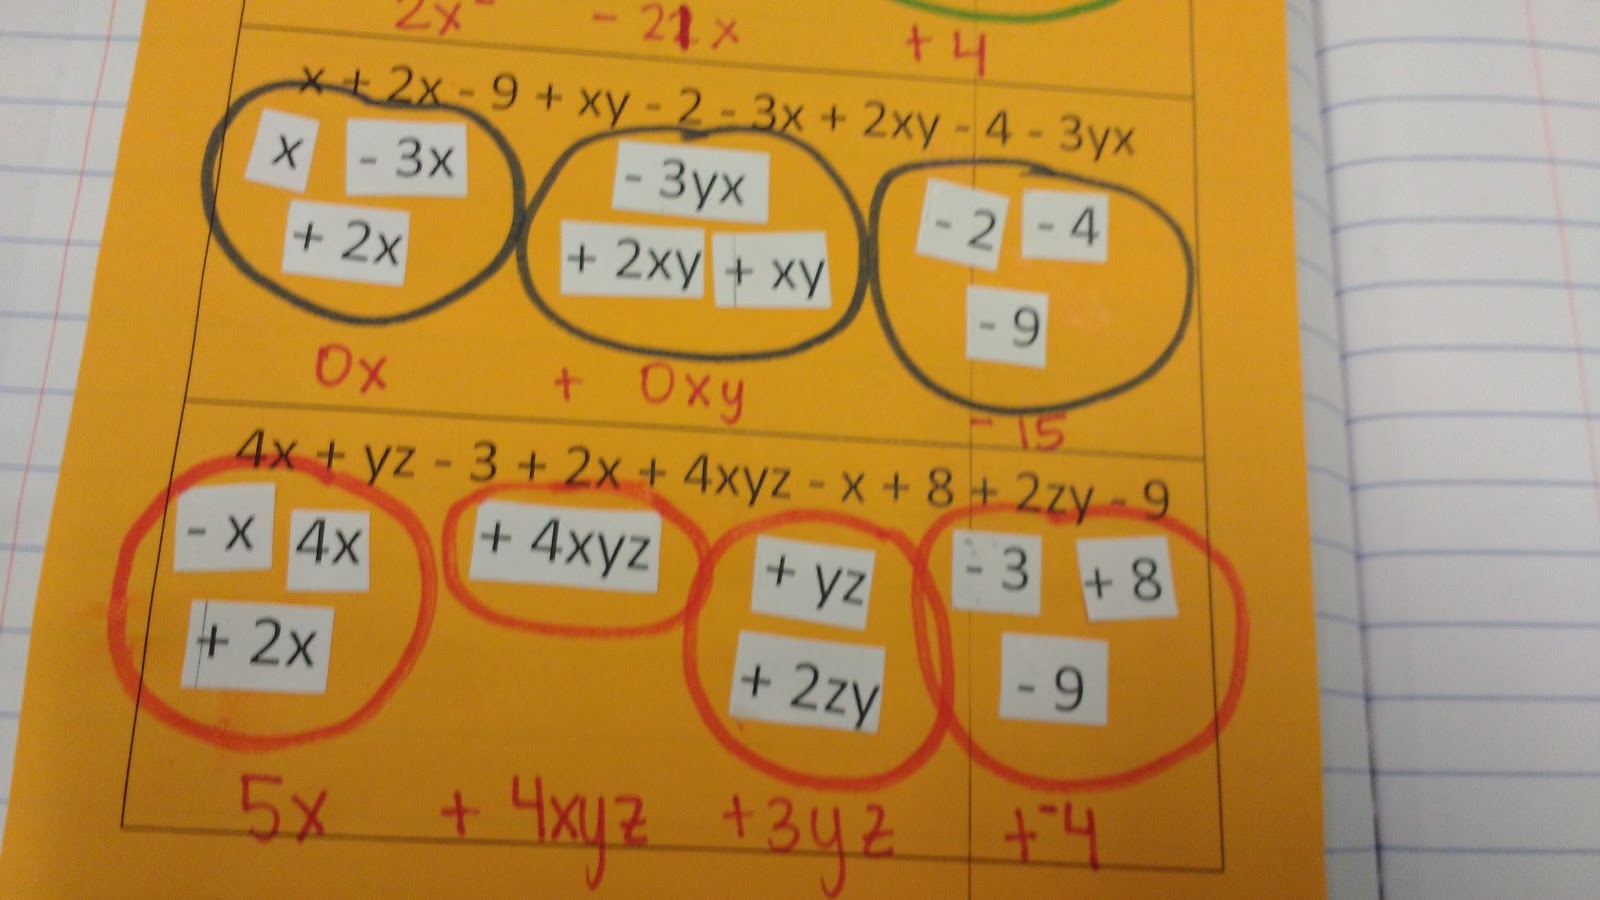
I gave my students the three expressions on a small piece of paper. They cut them into individual strips of expressions.
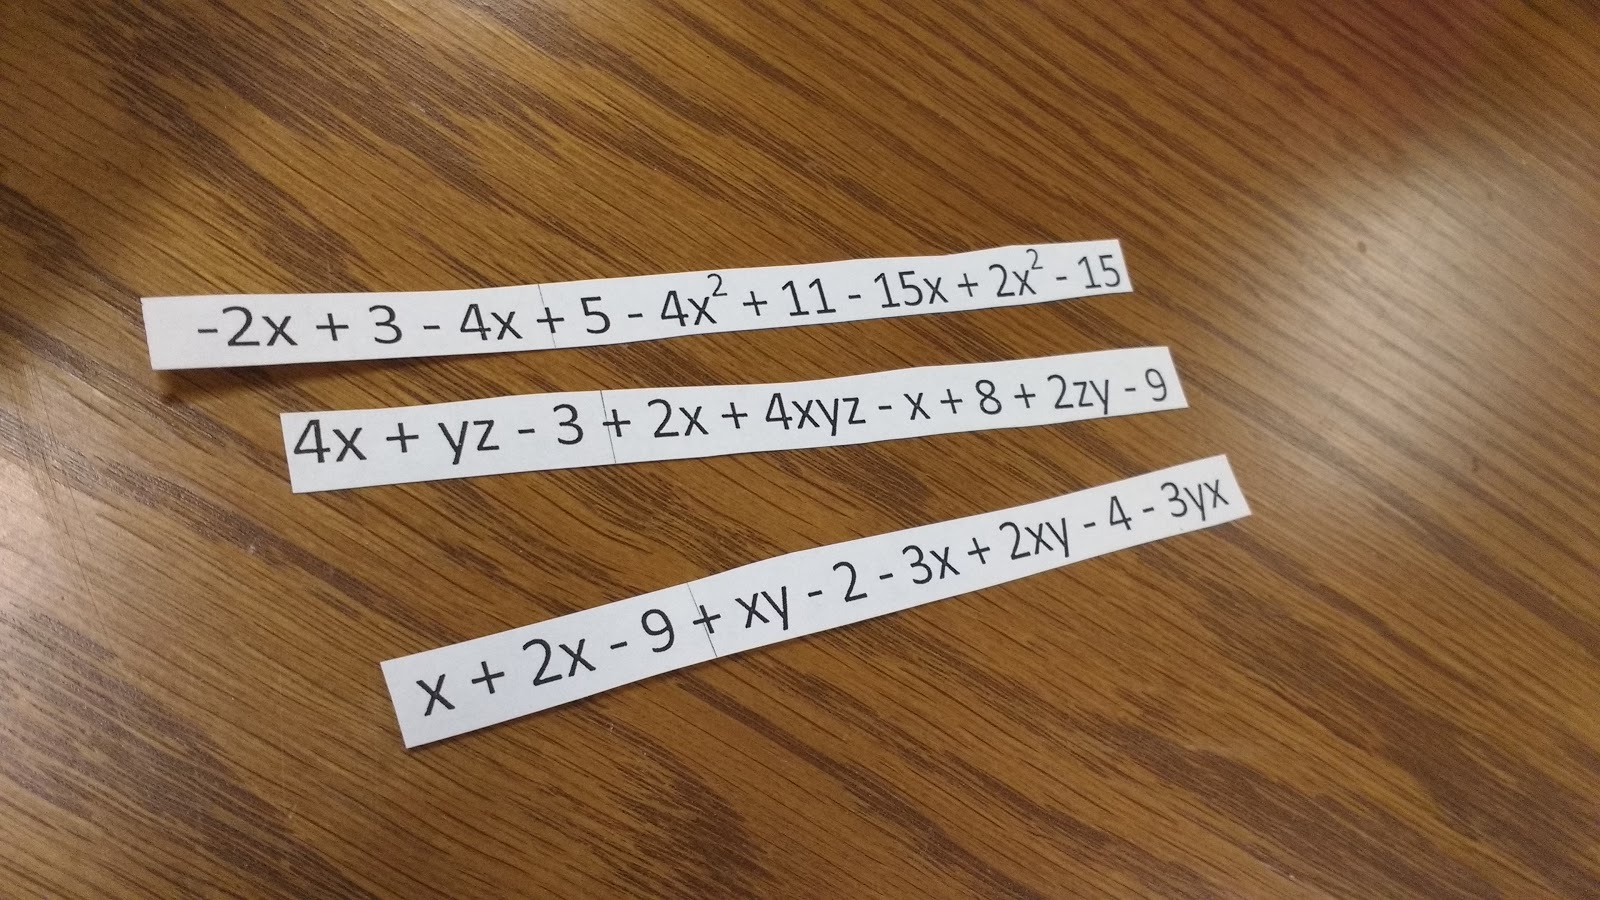
Then, one at at a time, we cut the strips into their individual terms. After making a pile of terms, I asked students to apply what we had just learned about the definition of like terms to put their terms into piles. I would ask students how many groups of terms they ended up with.
Different students grouped them differently, and this led to great discussions amongst my students. They would back up their points of view with the definition which was awesome!
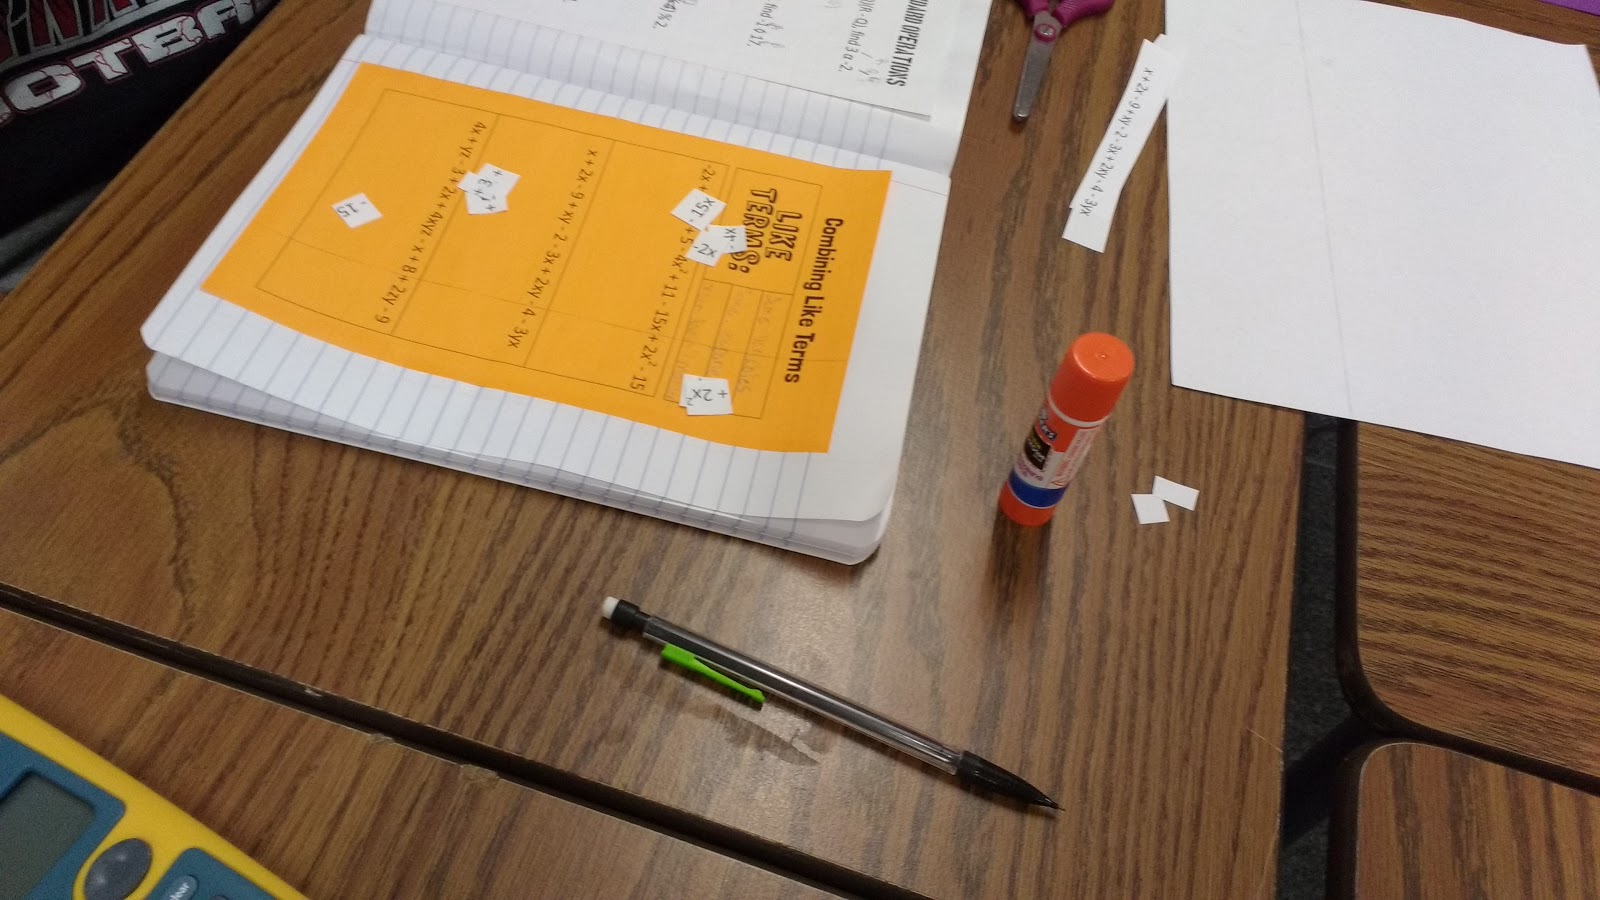
Here’s a student’s work on putting the terms for the first expression into groups:
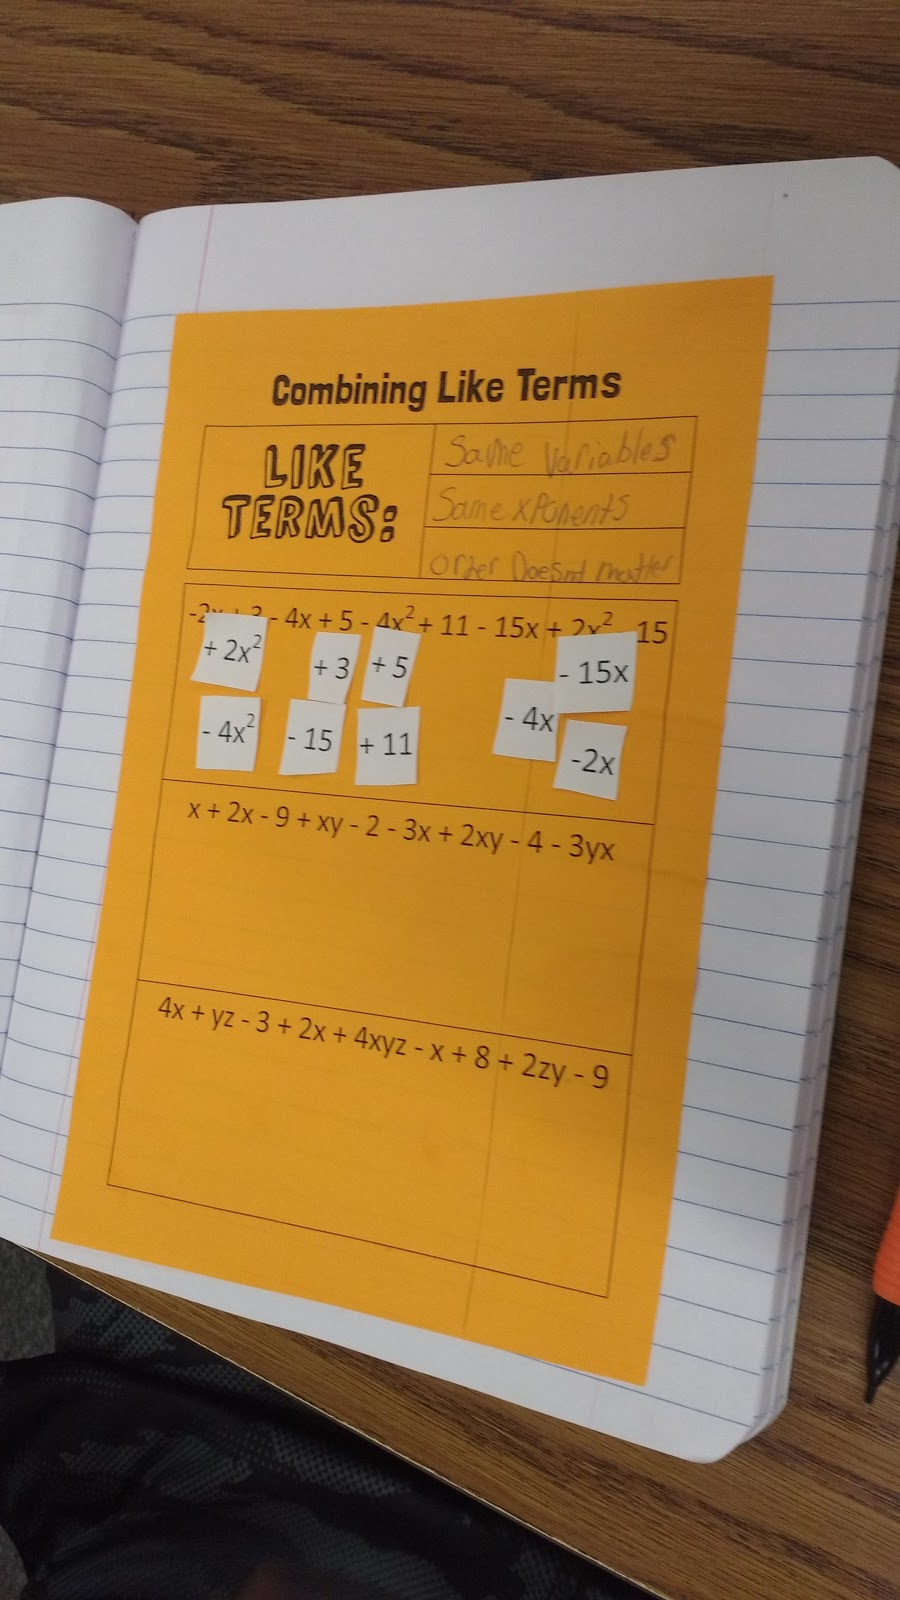
Once we were all happy with how the terms were grouped, we glued them in.
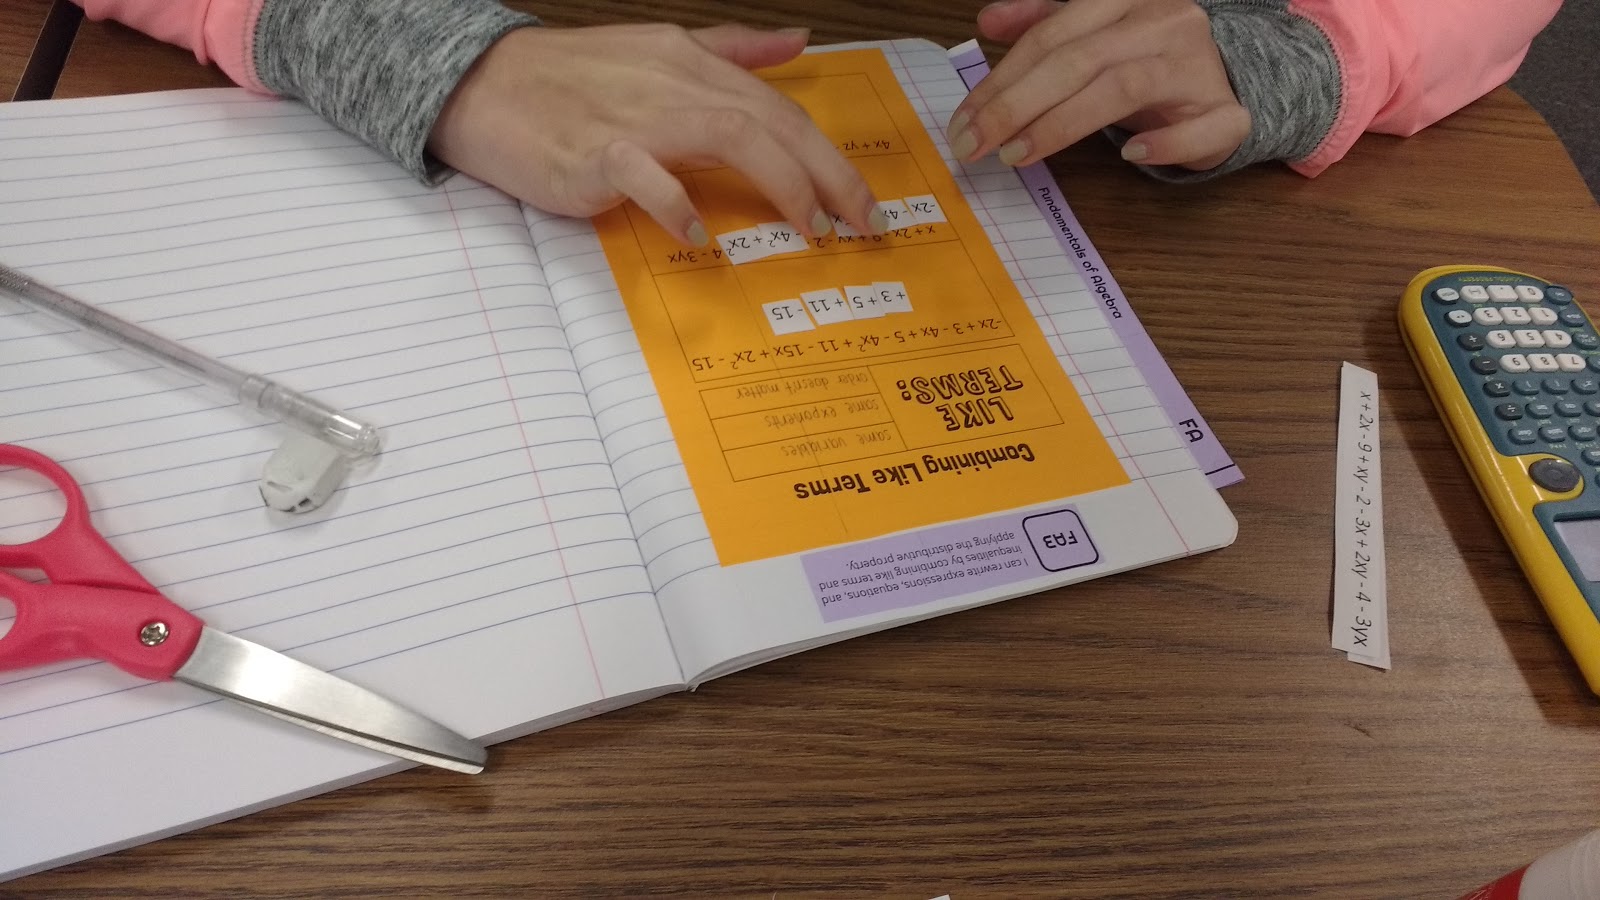
I overheard a student say “This is fun!” as she was deciding how to put the terms into groups. It was great formative assessment for me as a teacher to see how the lesson was going. As a class, we combined the coefficients or constants to form our final, simplified answer.
On the next day, we continued combining like terms in the context of applying the distributive property. I wanted to do this in a way that tied directly into the “grouping” of like terms we had been doing on the day before.
I’m pretty proud of the way I came up with to do this! We followed up this combining like terms activity with a distributive property foldable.
Combining Like Terms Activity (Version 1.0)
This year, I decided to really emphasize combining like terms with my Algebra 1 students. In retrospect, I should have done the same thing in Algebra 2 because they were still struggling with what they can and cannot combine.
I thought this would be a one day lesson, but it ended up taking my students two days to work through it. There were lots of great conversations happening, so I think it was definitely worth it!
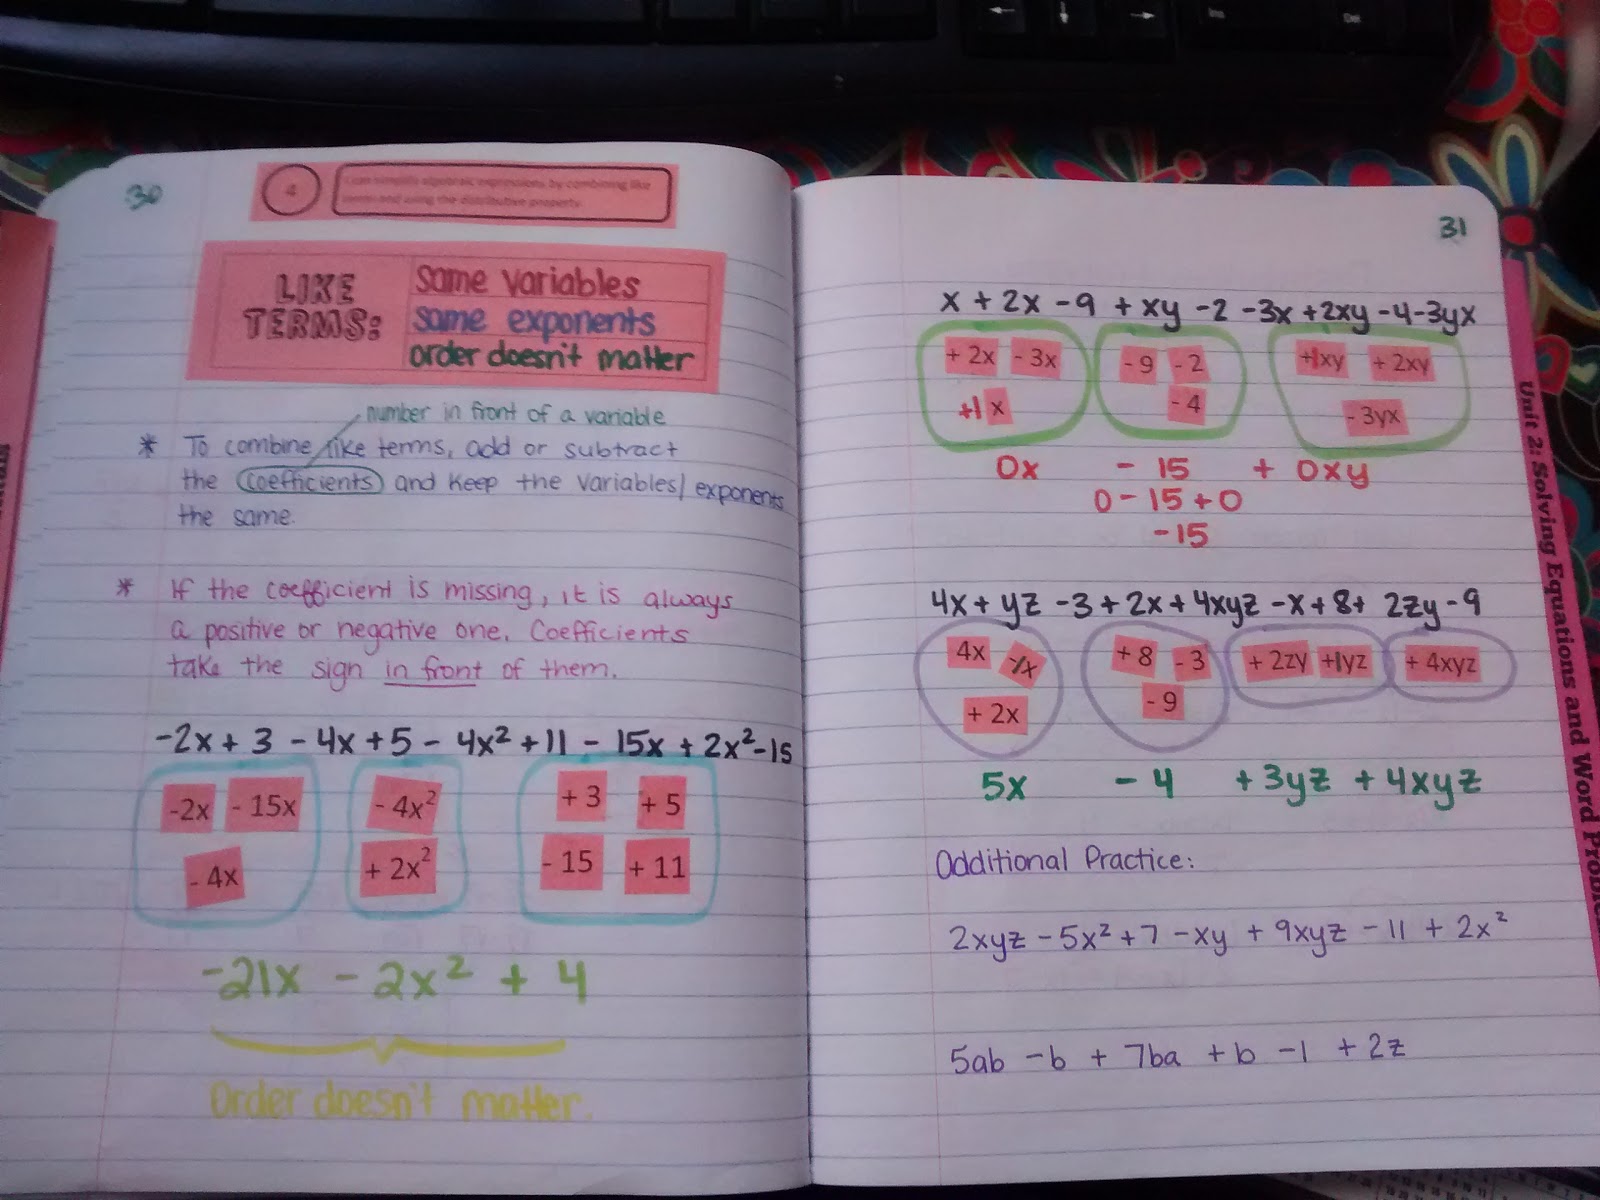
I gave students a quarter sheet of paper that had a note box and three polynomial expressions.
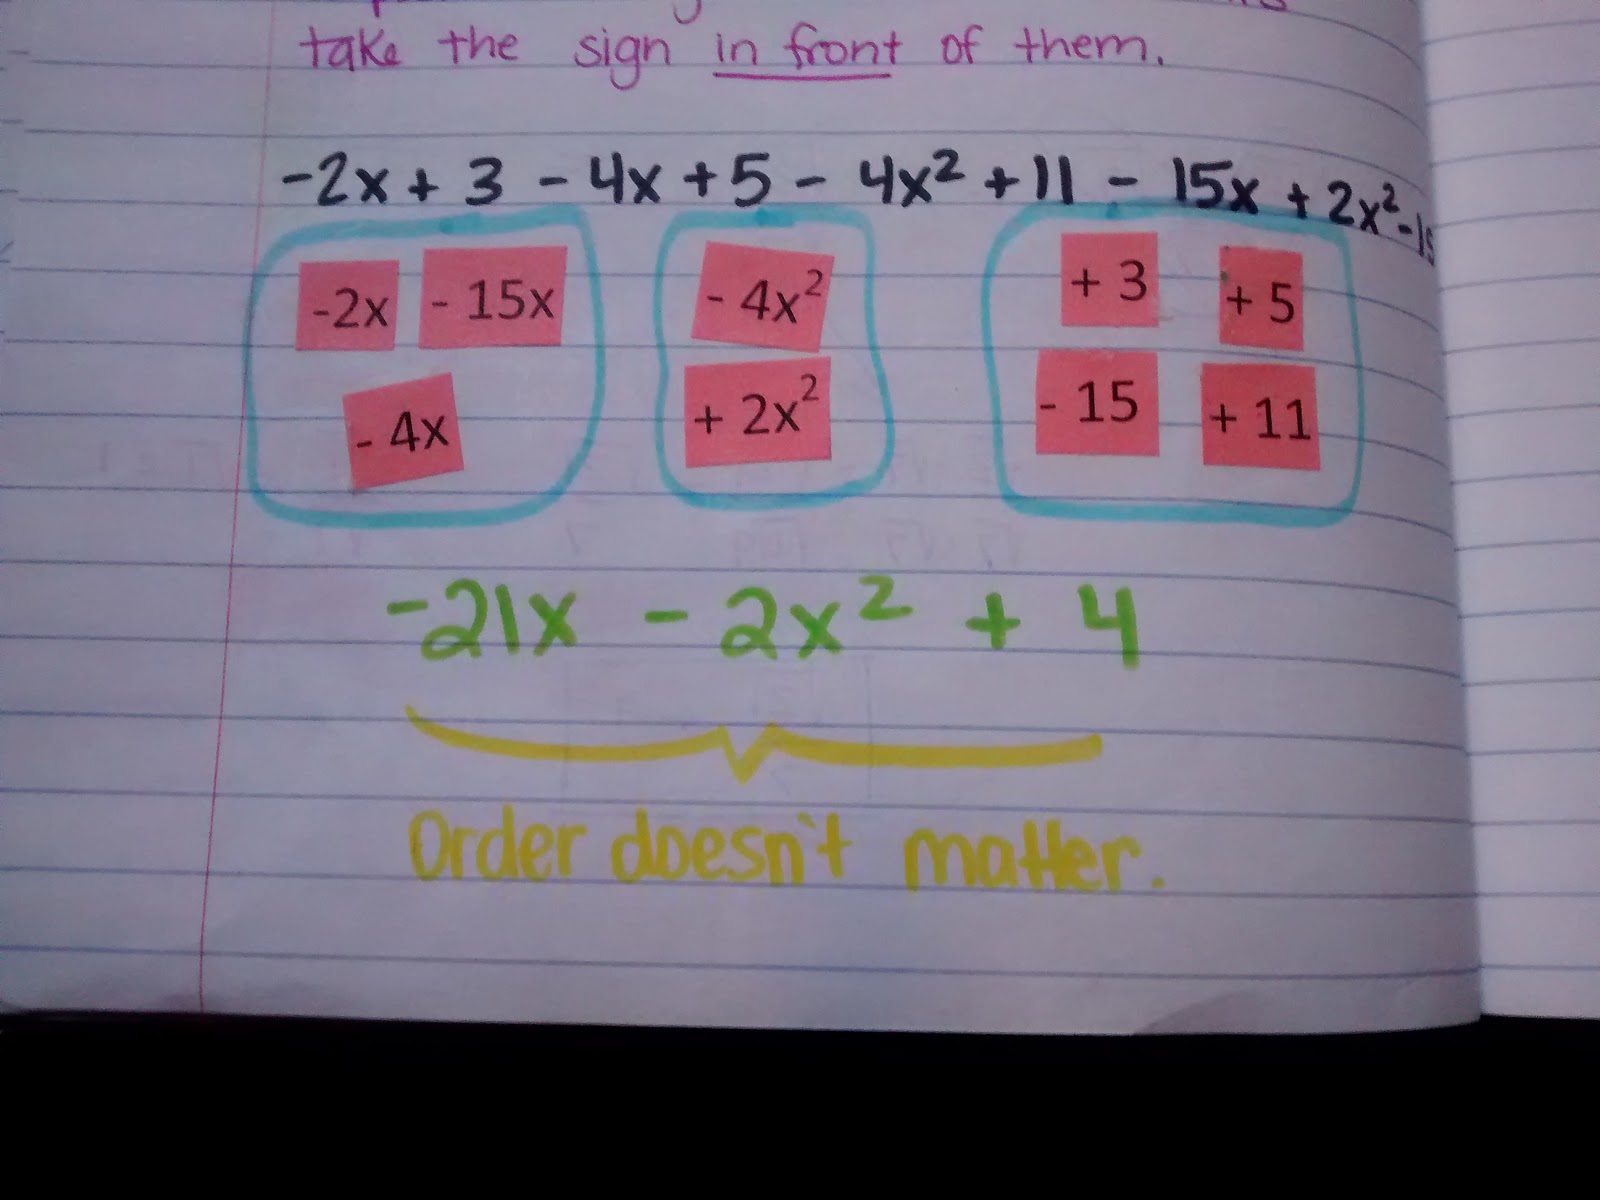
We began by taking some notes over what like terms are. I really wanted to emphasize to my students that xy and yx are like terms, so I really pushed the “order doesn’t matter” this year.
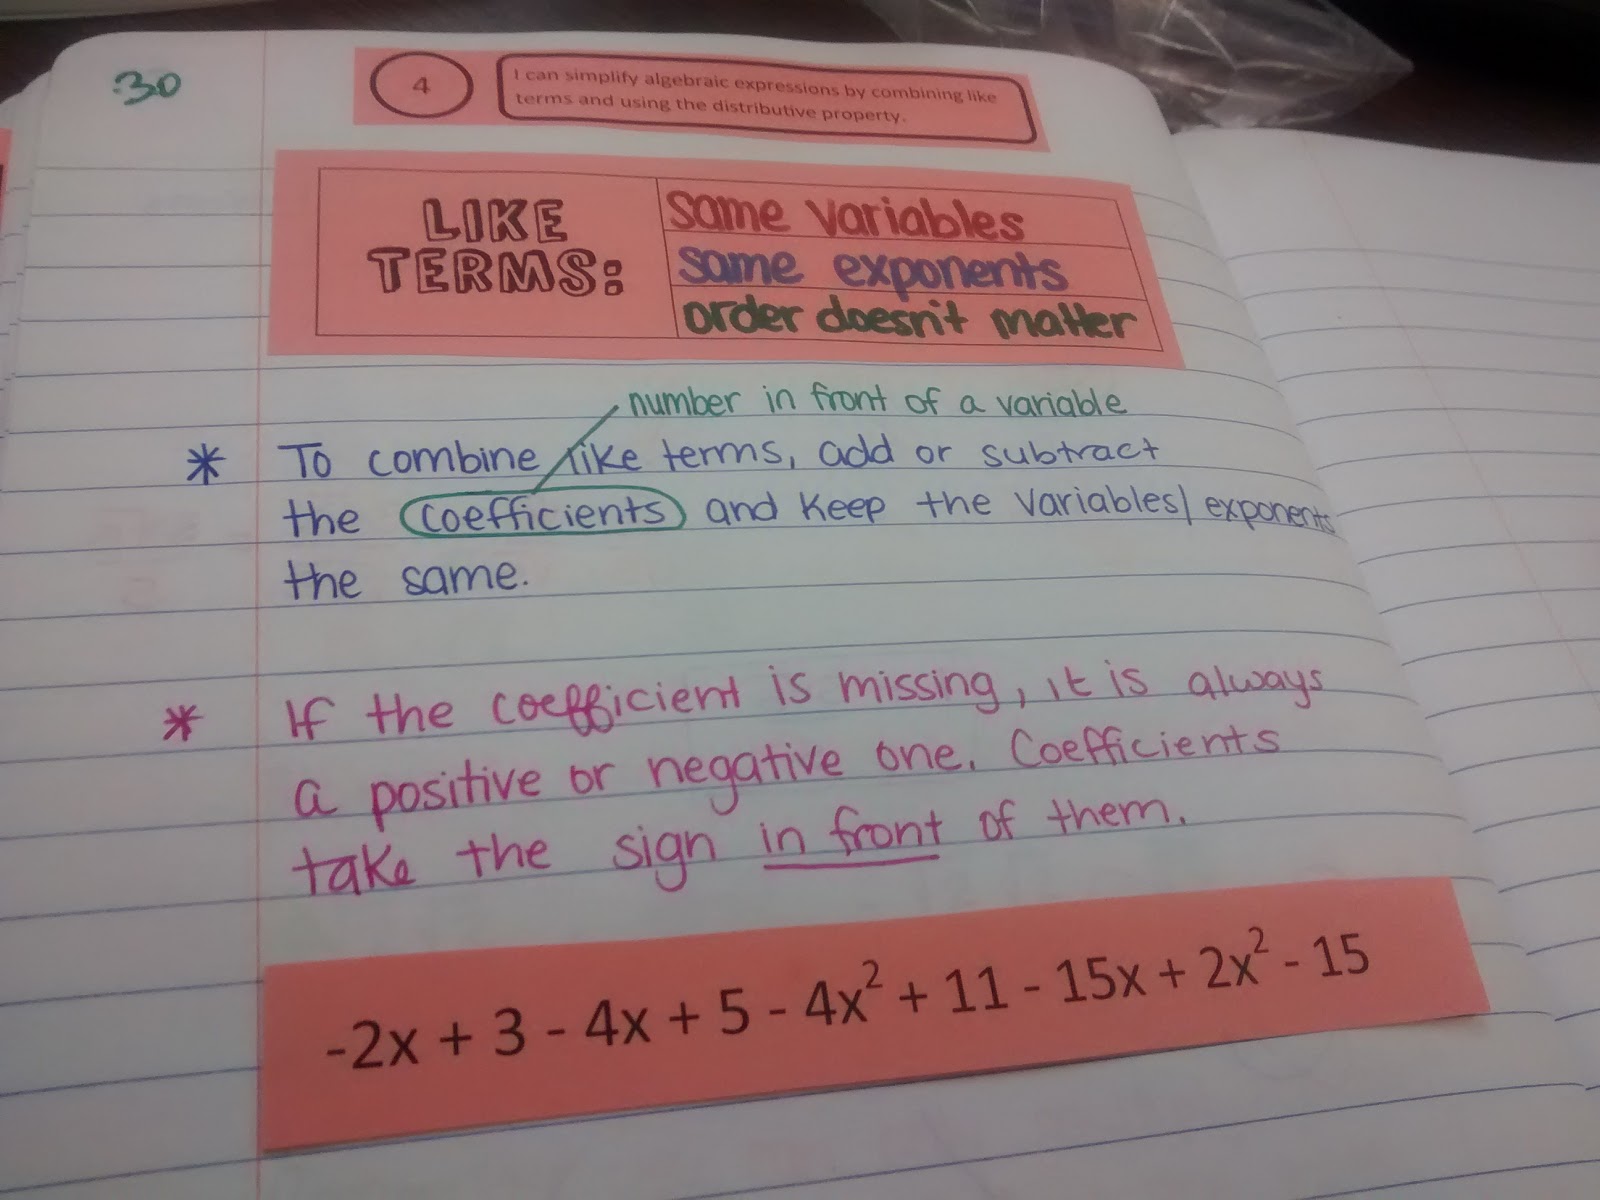
I had them copy down the first polynomial strip in their interactive notebooks.
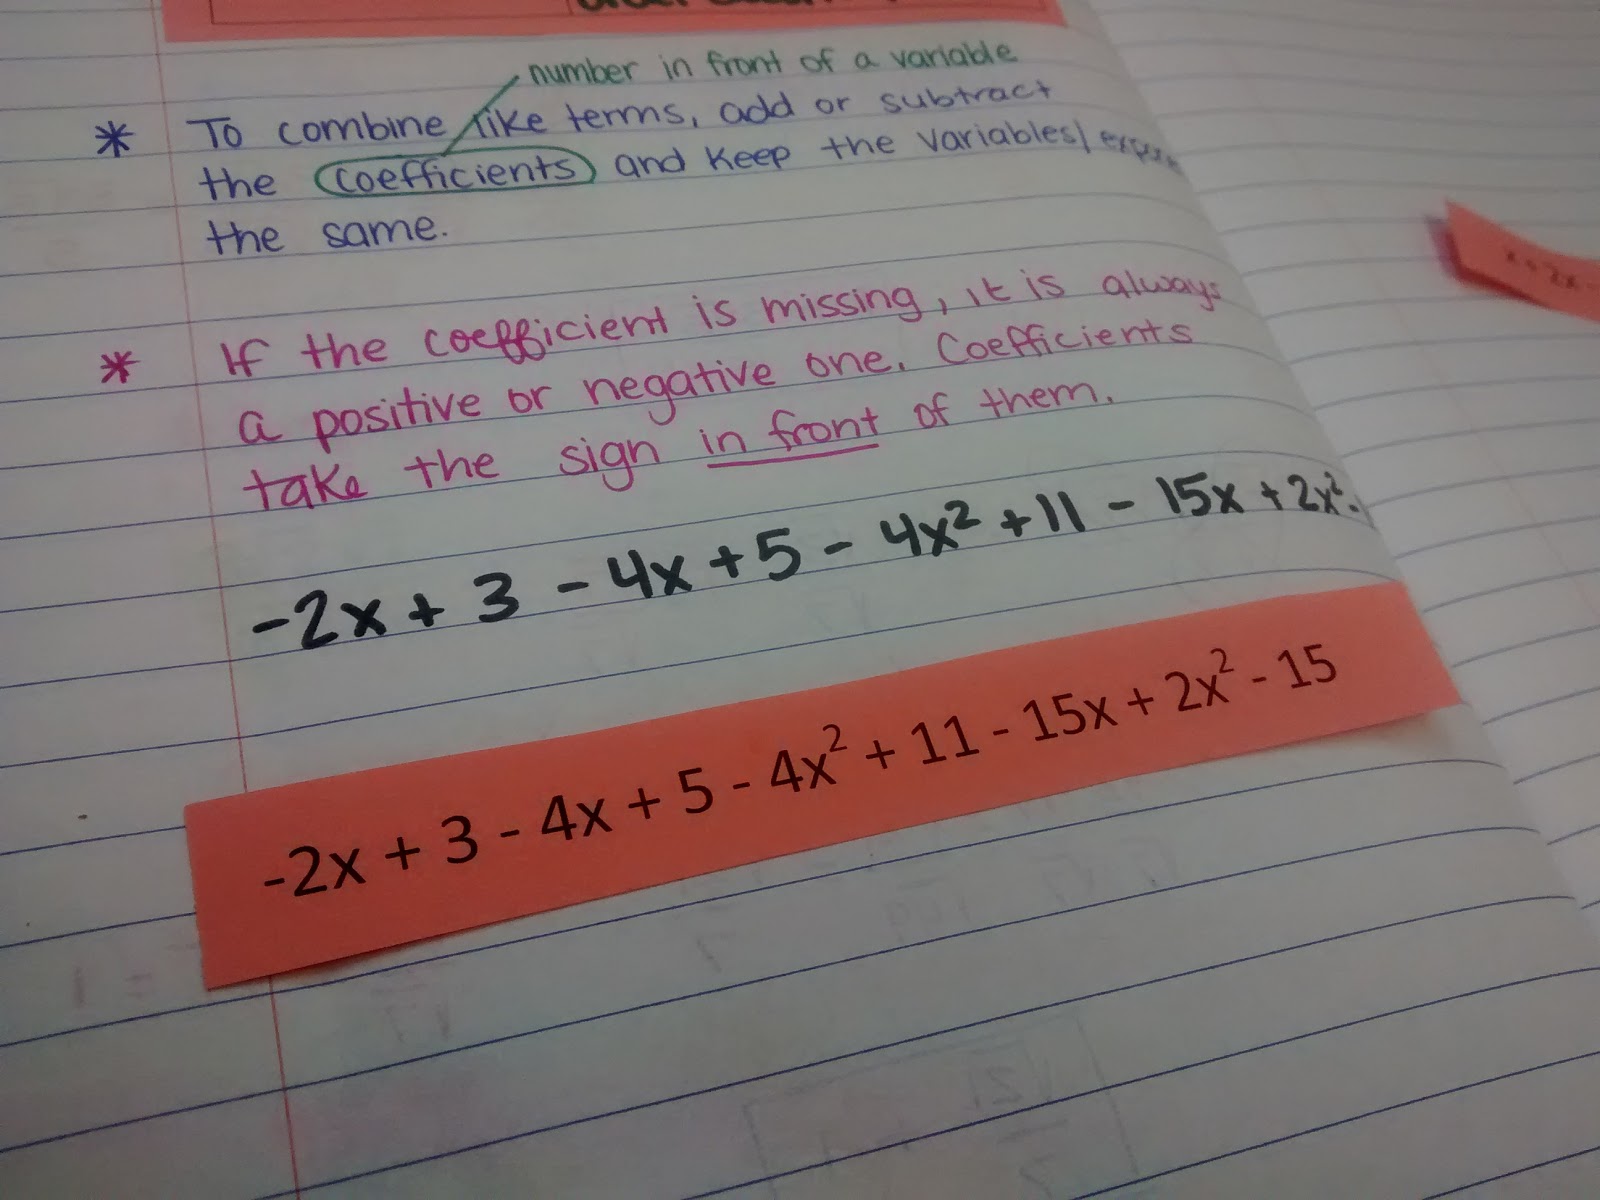
Then, the students had to cut the strip into terms. This led to a great discussion of what a term is. Students had to make sure they cut the strip so that each term contained the sign in front of it.
Students were super careful to make sure they were cutting the strips correctly which is exactly what I was hoping for.
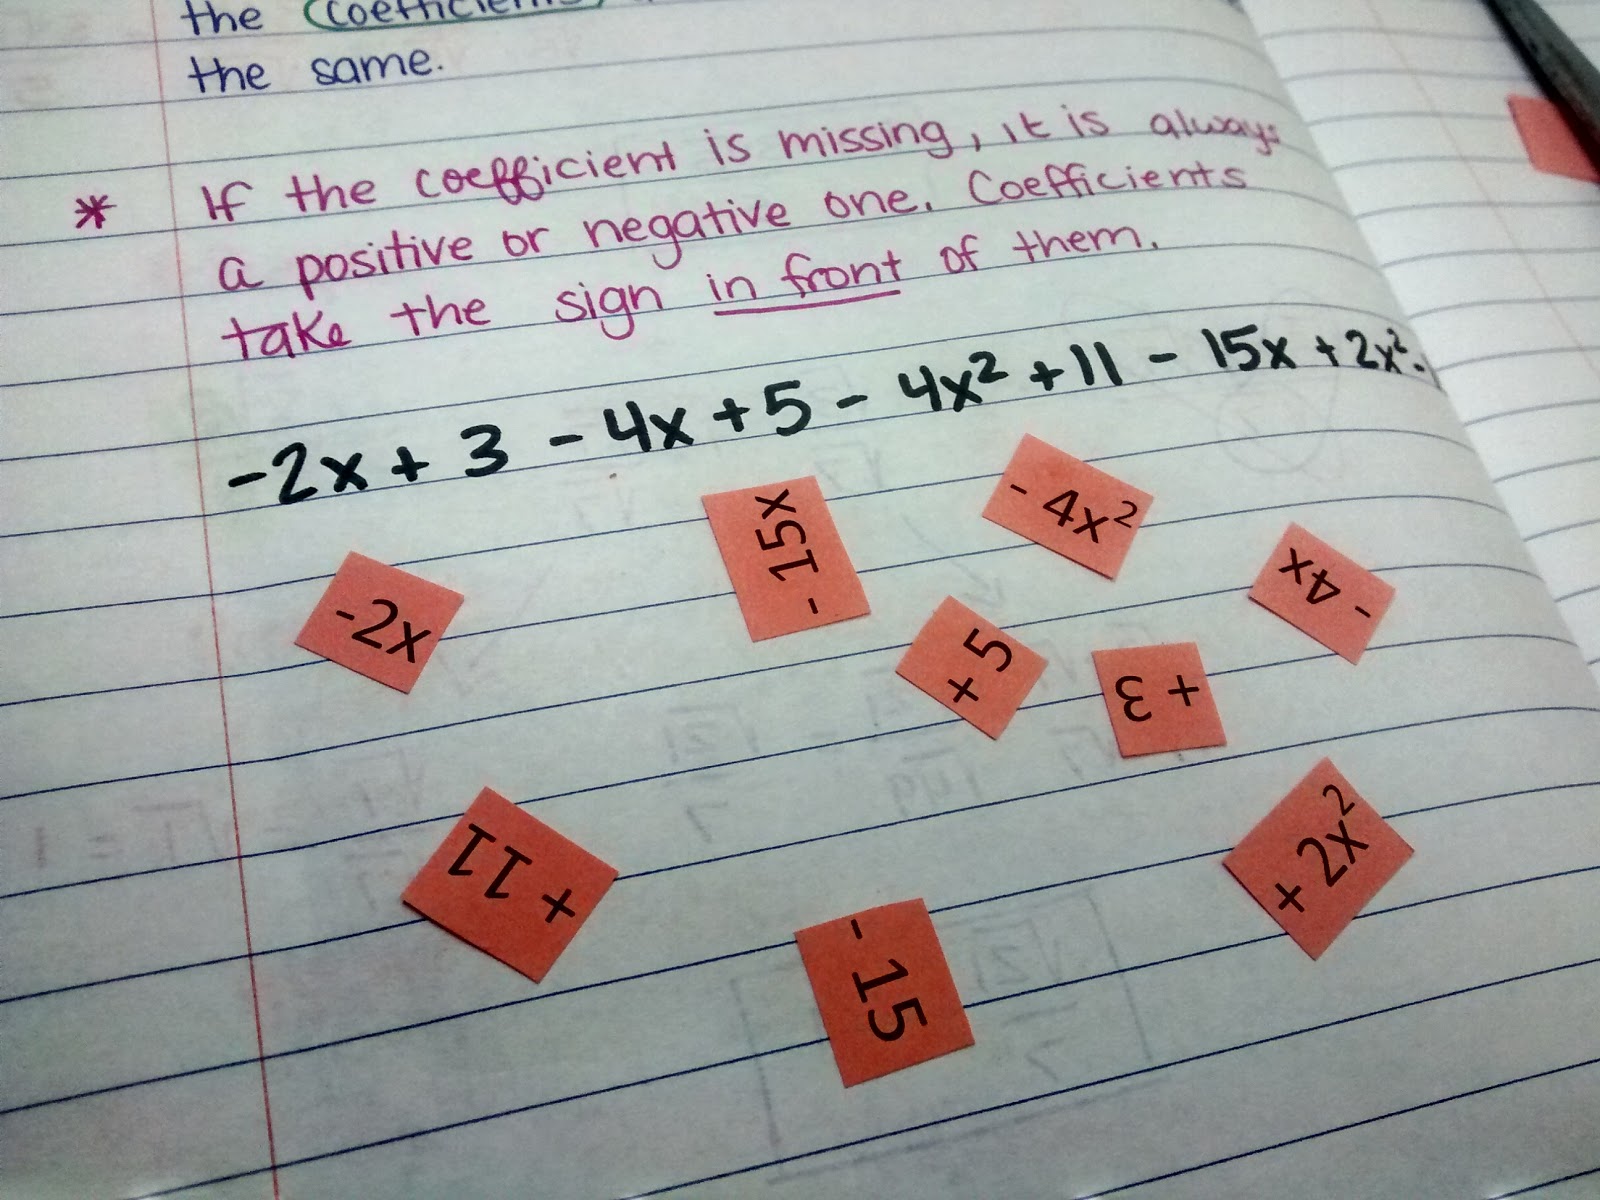
Next, I instructed students to group the terms into groups that were like terms. This is where the best conversations happened. After students sorted their terms, I asked them how many groups they had.
When students realized they had sorted into a different number of groups, they started justifying their groupings to their classmates. It was just awesome to see them pointing each other back to the definition of like terms.
Finally, we decided on how the terms should be grouped.
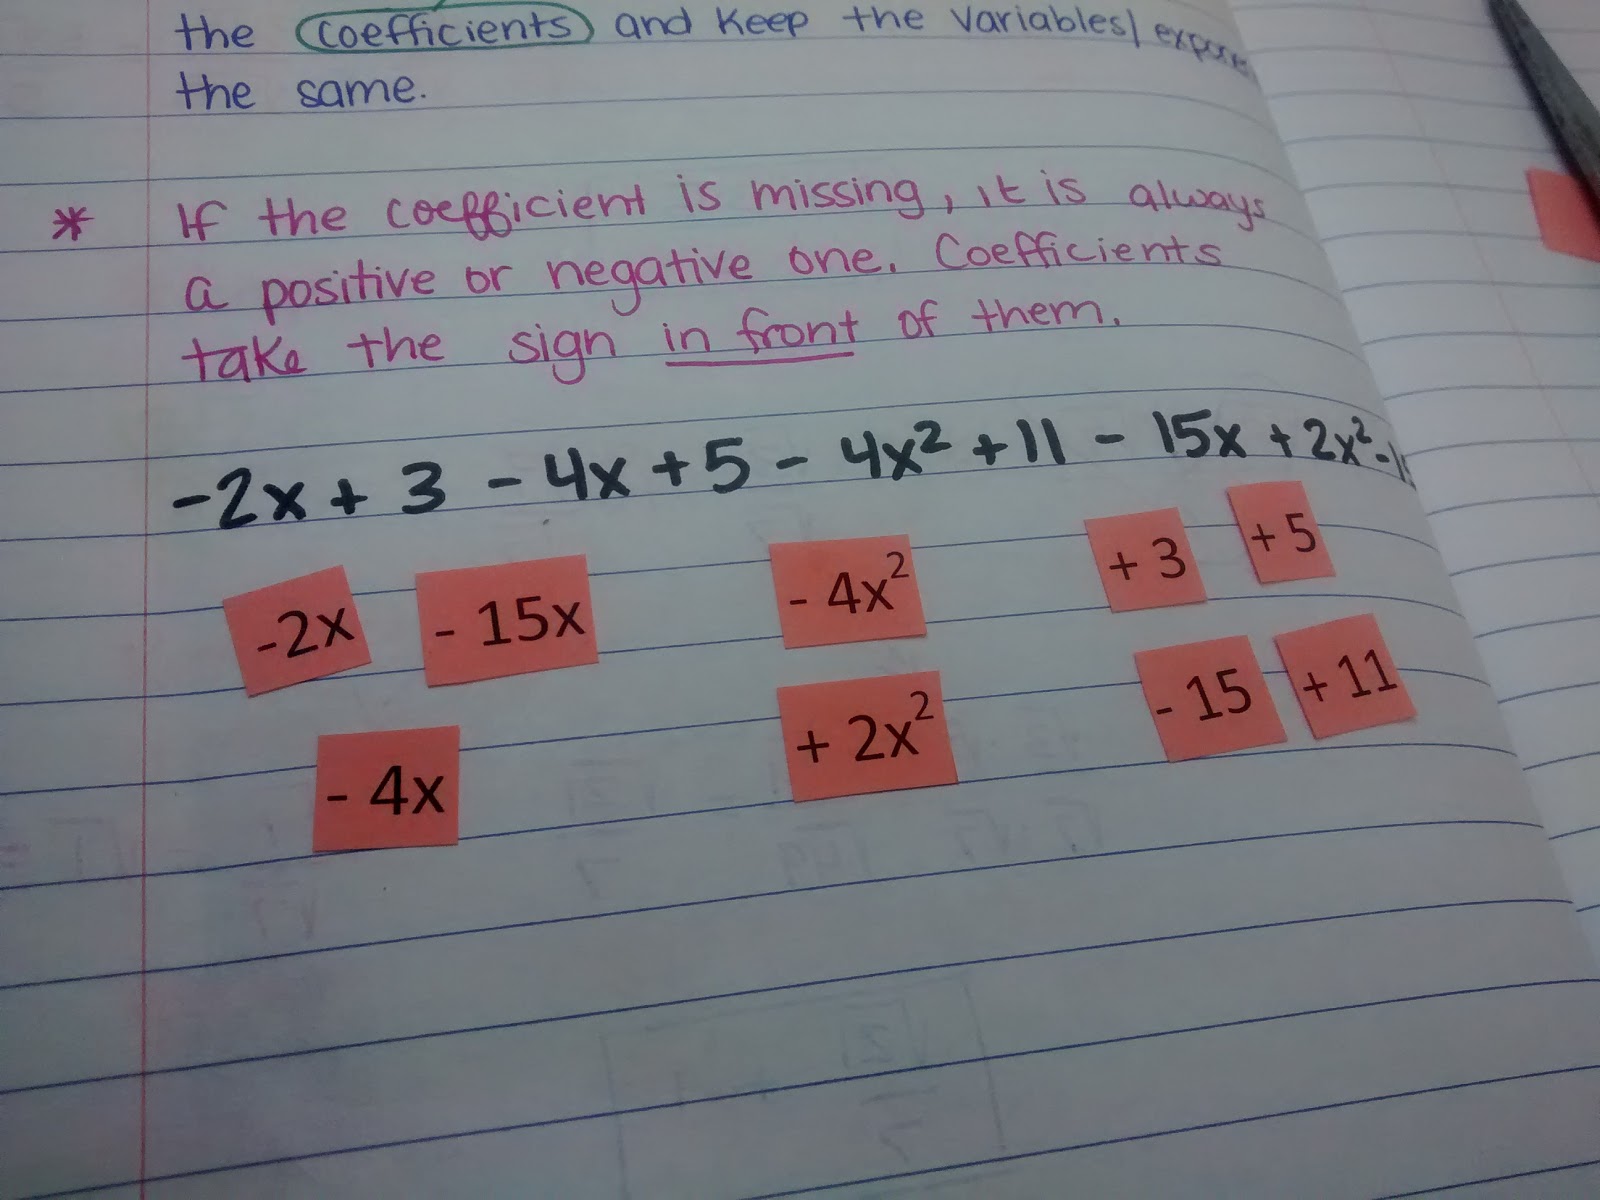
Next, I instructed students to glue in their groupings. I intentionally did not tell them how to group them in. Luckily, the students glued them in different orders which let us discuss the fact the order of the terms doesn’t matter.
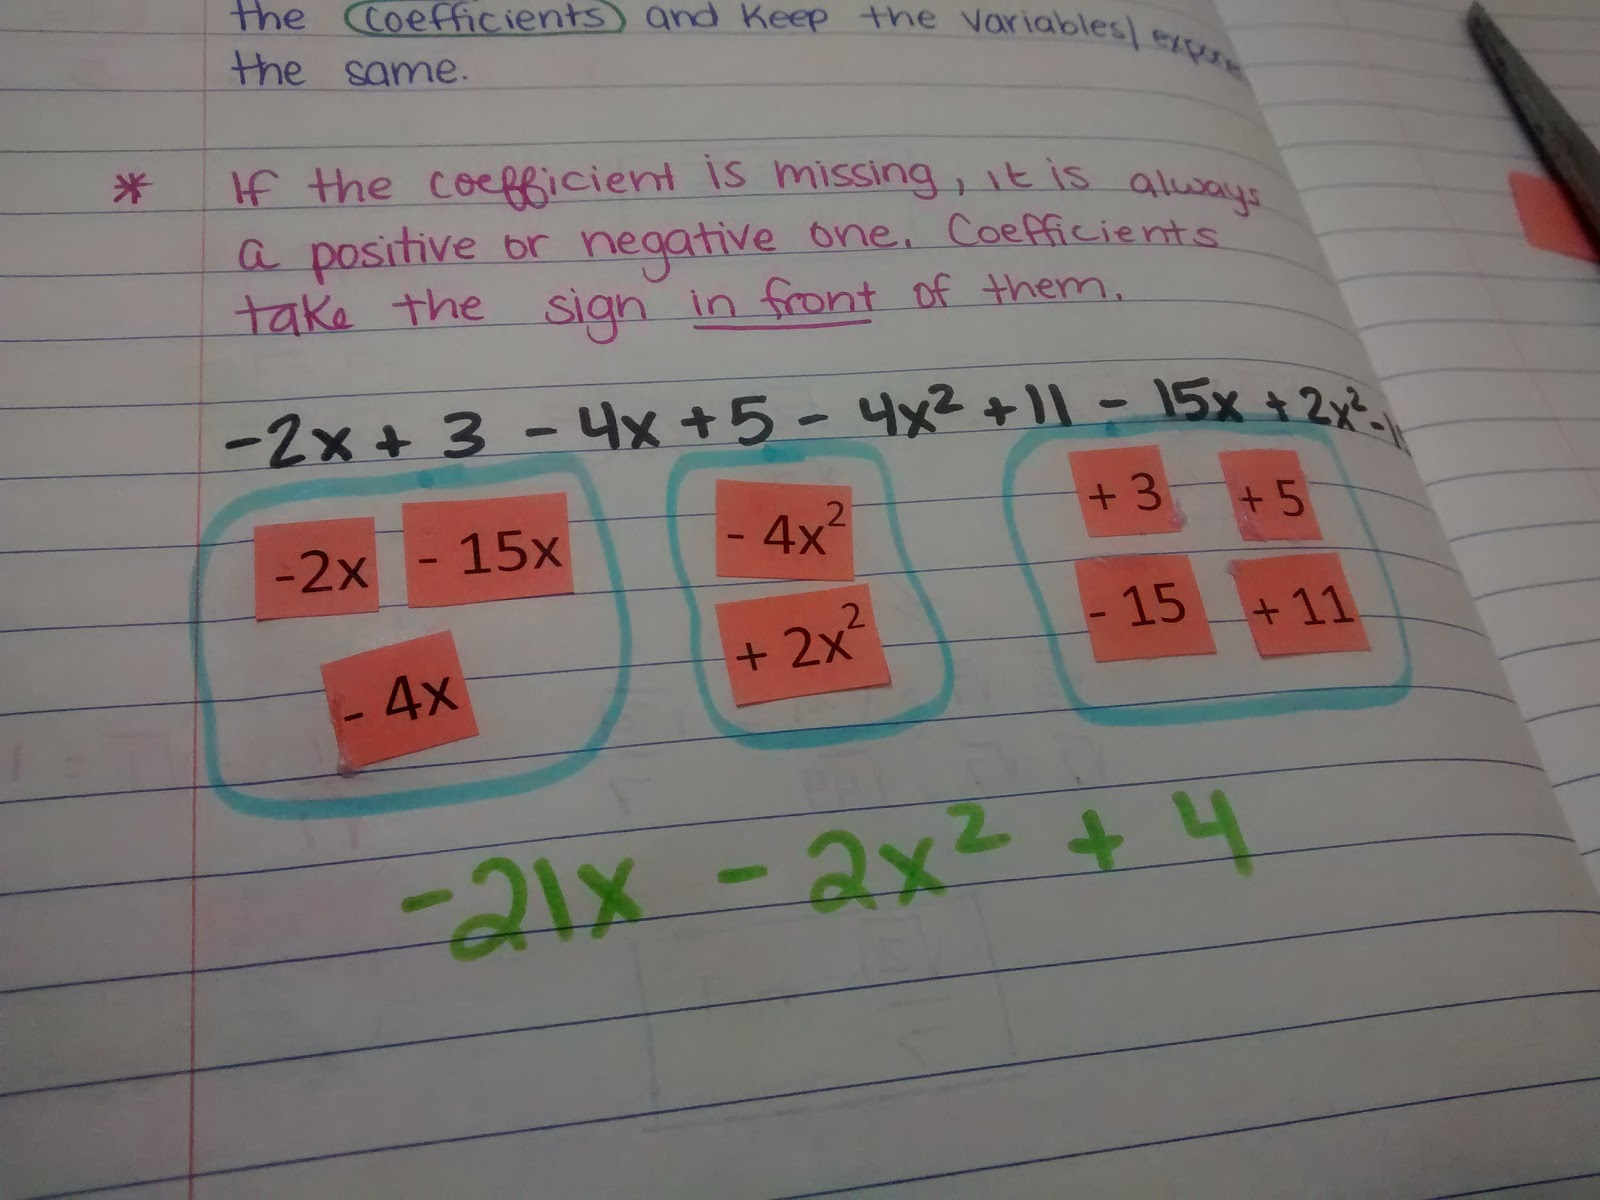
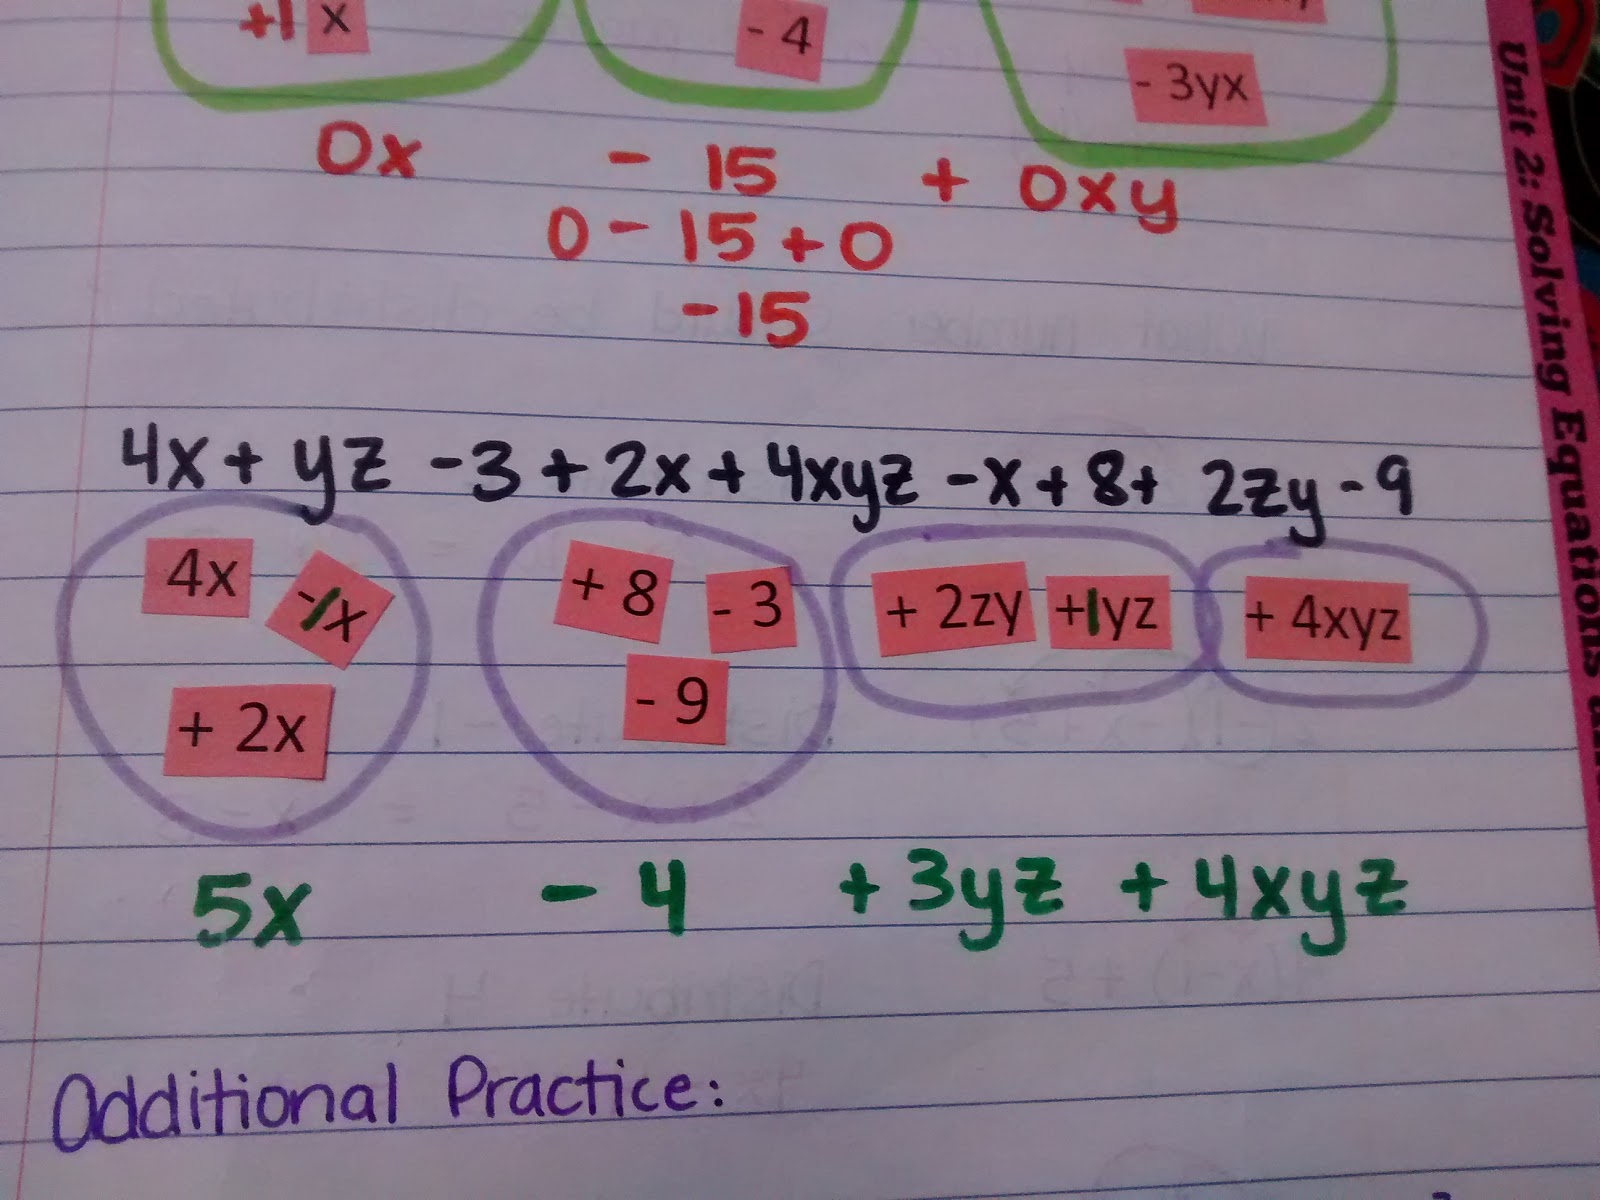
Finally, we circled the groups and combined the coefficients. Since the students glued the groups in in different orders, their terms ended up in different orders. I emphasized that this was okay as long as the sign in front of 21x was negative, the sign in front of 2x^2 was negative, and the sign in front of 4 was positive.
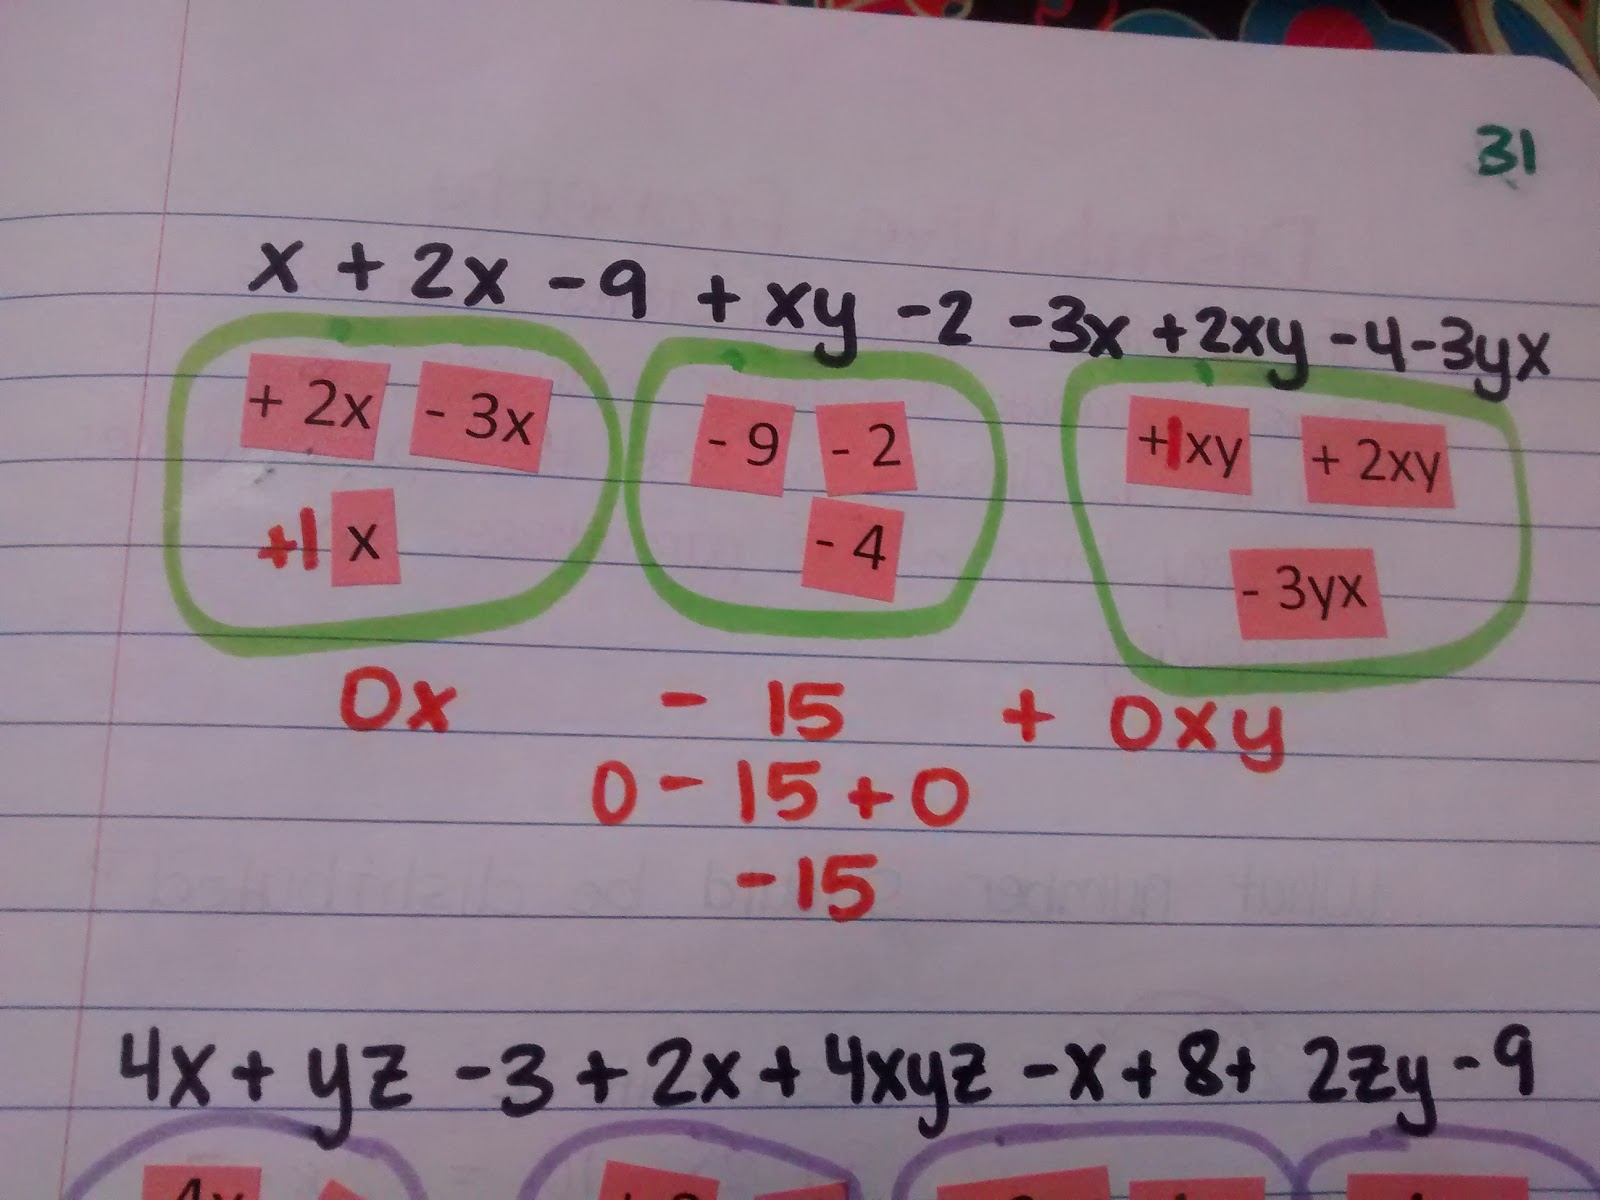
Next, they proceeded to do the next two problems in their groups.
The zero coefficients and invisible one coefficients freaked some of my students out, but they persevered.
Last problem:
We finished the class period off with two additional practice problems. The kids were quite miffed that I did not give them strips to cut because how else would they figure out what the terms were. To remedy this, many students drew “cut lines” between the terms to separate them.
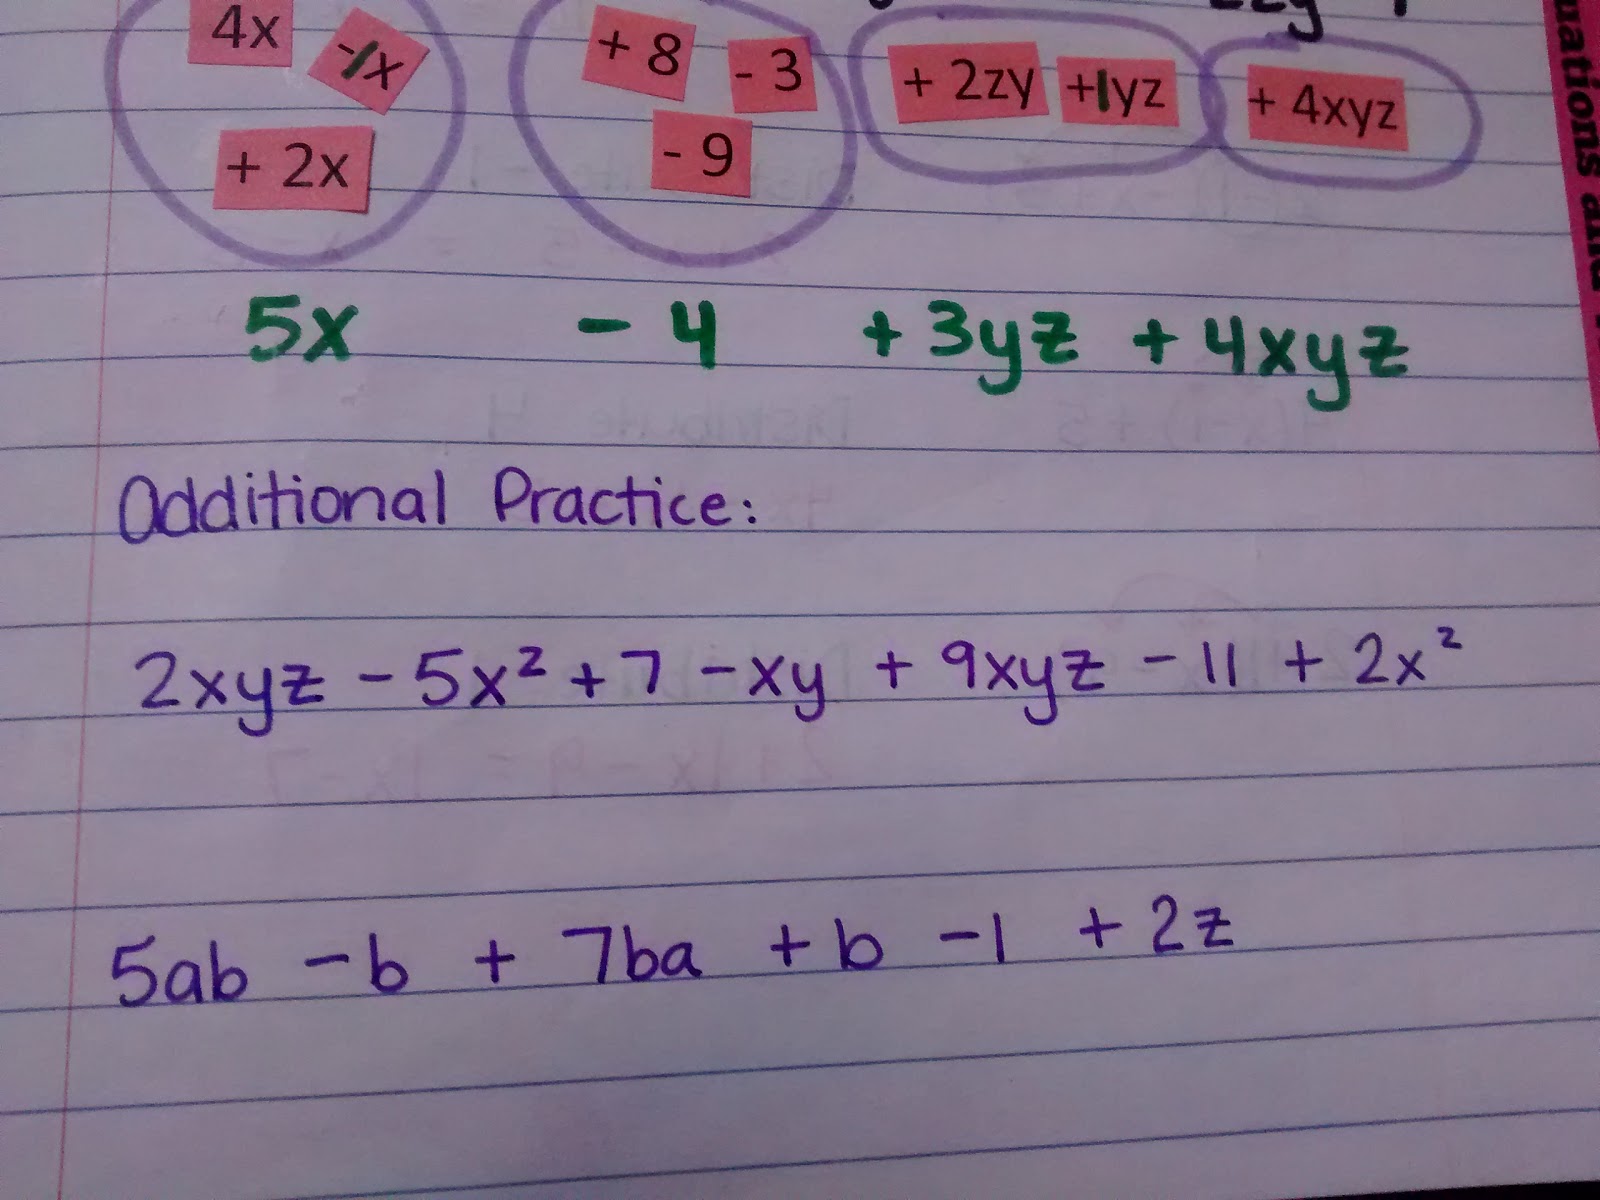
I like this activity got students actually separating terms, grouping them, and combining them. I hope I made an abstract concept a little more concrete and understandable for my students.
Free Download of Combining Like Terms Activity
Version 3.0
Version 2.0
Version 1.0
Click here to Download
Combining Like Terms Strips (PDF)
3929 downloads – 116.00 KB




Thank you so much for blogging about this! I saw your Twitter post and had my fingers (and toes!) crossed that you'd share your files. As always, LOVE the awesome things you come up with and LOVE that you share!
Idea…what if you had a student pick a value for x and plug it into the first expression and the last? and HOLY COW they're equal! then have a student pick another value and HOLY COW they're equal! I'm not sure that I ever really focused on the fact that when we simplify, these things are still the equivalent for any value of x. Like I would focus on the "how" but not the "what we're actually accomplishing"
Then when you get to equations, start with an equation that has a weird answer like 147. Again ask students to pick values of x (and hope they don't pick 147). Oh, wait, these sides aren't equal! It ONLY works for this one special value of x (147). Or maybe have the answer be a smaller number that they might try (3?) so it would work if they chose that, but not for others?
I'm kind of thinking out loud here but if I had to teach Alg I again I would really want to focus on the fact that expressions are true for any x; equations are true for a limited number of x, and functions are true for a limited-but-infinite (whoa…mind blown!) set of x and y values that we can display as a graph.
Also one of teachers at school has the Ss draw a vertical "river" below the equation sign and you only change if you cross the river. I think the vertical line visual is very useful when they're just starting out, otherwise I get students try to simplify 2 + 3x + 5 by subtracting the 2 from the 2 and the 5!
Love this! I'm using the distribute worksheet today. Small mistake on the last row? Should it be -2×2 + 7x – 2?
Hello Sarah! I'm a college student studying to be a Middle School or High School Math Teacher. One of my Math Education teachers encouraged us to start following Math Blogs to gain knowledge and insight for our future classrooms. I stumbled upon your blog for an assignment last semester, so I've decided to return to it to better prepare myself as a future educator.
I really like how the first day of the lesson really gave students the power to group the terms however they would like to do so. Not only that, but you have examples for one, two, and three-variable expressions. Having students construct their own expression makes it seem fun and easier when it comes time to distribute and combine like terms.
The foldable is a nice way to tie things together, the grouping and the distributive property. Drawing the arrows from the number that gets distributed is a nice visual representation, as well as having each column of the table be one step in the simplification process. It's very easy to follow and gives students structure to build off. My one comment/suggestion would be to maybe incorporate a variable somewhere on the outside of the foldable. A student who is used to A,B, and C being numbers may get confused when they see the variable and not distribute it otherwise.
Overall, I think this is a fun way to combine the distributive property with like terms while still adding valuable content to the interactive math notebook.
Thank you so much for this. I think it will be a great way for them to organize it and understand it as well!
Thank you! I really appreciate you sharing your work with us!
You're welcome, Jennifer!
Thank you for sharing! I'll be using this for an extra intervention period/activity with my 8th graders 🙂
Do you have the files available to download? Not sure if I just missed where they were or is this just pictures of what you did with explanation.
Hi, Sarah, I wanted to make sure you were aware that the last problem should read -2x^2 + 7x – 2 just in case you didn't catch that little mistake. Thank you for this foldable; I'm using it tomorrow! 🙂
Hi, Sarah. Do you still have the documents available to share? Thanks!
I've done something similar with my students, but this is exactly what I need to help the kids understand. Thanks so much for making this available!!
This is great! I used it for my Sped kiddo and he understood it perfectly. Thanks for sharing!
How do you teach students to figure out what the coefficient will be once you have sorted into like terms? For example -2x, -4x, -15x. Do your kids recognize these as negative numbers once they are alone? Do you have them add all the numbers as negatives (i.e., -2+-4+-15) or just use the signs that are there (i.e., -2-4-15)?
I tried the link but it doesn't work. Did it get removed?
I made a digital version based on this post for my 8th grade CCSM class. I did the interactive notebook for like terms and a practice activity as google slides.
The link will create a copy in your google drive.
https://docs.google.com/presentation/d/1vzf54Yj9TuWFf2RF5dblY7d_nFoj2CF5ee6FqslcYz4/copy?usp=sharing