Dividing Polynomials Using the Box Method Puzzles
This blog post contains Amazon affiliate links. As an Amazon Associate, I earn a small commission from qualifying purchases.
I want to convince you why dividing polynomials using the box method is my favorite method for dividing polynomials.
After taking a 2 year hiatus from teaching Algebra 2 to dabble in teaching physical science and chemistry, I’m back at it this year. One of the things I really missed about teaching Algebra 2 was getting the opportunity to introduce my students to the super versatile box method for working with both multiplying and dividing polynomials.
This year, some students have been quick to embrace the box method for multiplying polynomials. Others have been resistant and insist on FOILing everything. This is okay. My goal is not to push my students toward a single method. Instead, my goal should be to expose students to different methods and let them choose which method works best for them. Exposure to the box method for multiplying polynomials is ample to allow them to use the box method for division.
Let’s stop for a second and talk about other methods for polynomial division.
Dividing Polynomials Using Long Division
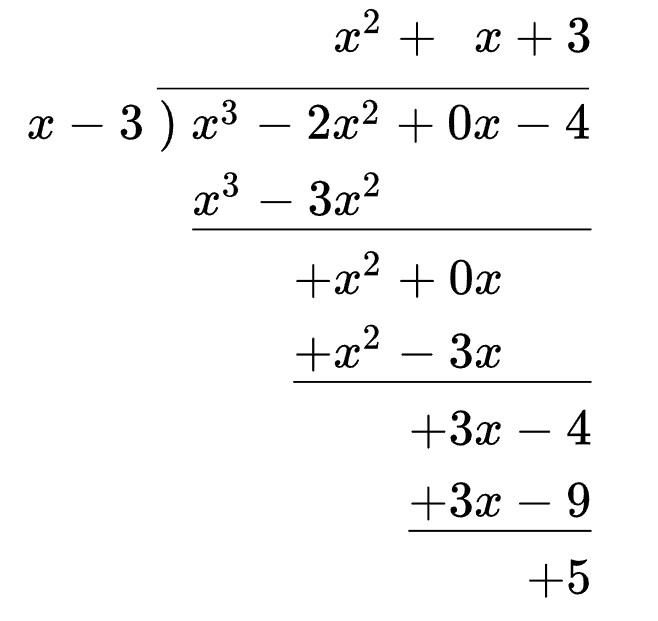
Sigh. This is how I taught my Algebra 2 students to divide polynomials as a first year teacher. This was how I learned to divide polynomials when I was an Algebra 2 student myself.
I had to spend precious class time reminding my students how to do long division of just numbers before we could ever delve into the world of long division of polynomials. It was very algorithmic.
Then, there were those pesky sign changes that students ALWAYS forgot to perform. It was incredibly difficult to examine a student’s work quickly and find their mistakes.
Dividing Polynomials Using Synthetic Division
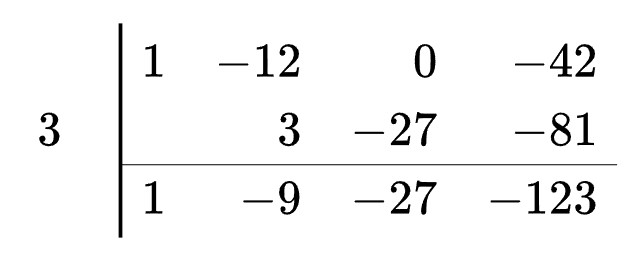
Confession Time: I can never remember how synthetic division works. I’ve tutored many a pre-calculus student who has come to me with a question about synthetic division.
The first thing I always have to do is look at an example in the book and remind myself how it works. There’s something about this algorithm that keeps me from retaining it over a long period of time.
My other complaint with this method is that its application is limited. It ONLY works if you are dividing a polynomial by a binomial in the form (x – a) or (x + a).
Dividing Polynomials Using the Box Method
So, it is my disenchantment with these methods that has led me to embrace the box method, grid method, area method, or whatever else you want to call it for polynomial division. I love that this method does not feel as algorithmic as the other two methods.
After tweaking my approach to introducing dividing polynomials over the past few years, I have finally arrived at something I’m pretty happy with.
This year, we started with some basic notes. The only real guidance I gave to my students to start was that we were dividing instead of multiplying which means we have to set up our box slightly differently.
When we multiply polynomials, we set up our box with the polynomials we are multiplying on the outside and work toward finding our answer on the inside of the box. With dividing, we know the final answer (inside of the box) and one of the factors (side of the box). Our goal is to find the missing side of the box.
With this limited guidance of where to put what, my students are usually able to figure out the rest of the process themselves. It’s truly a beautiful thing to watch unfold.
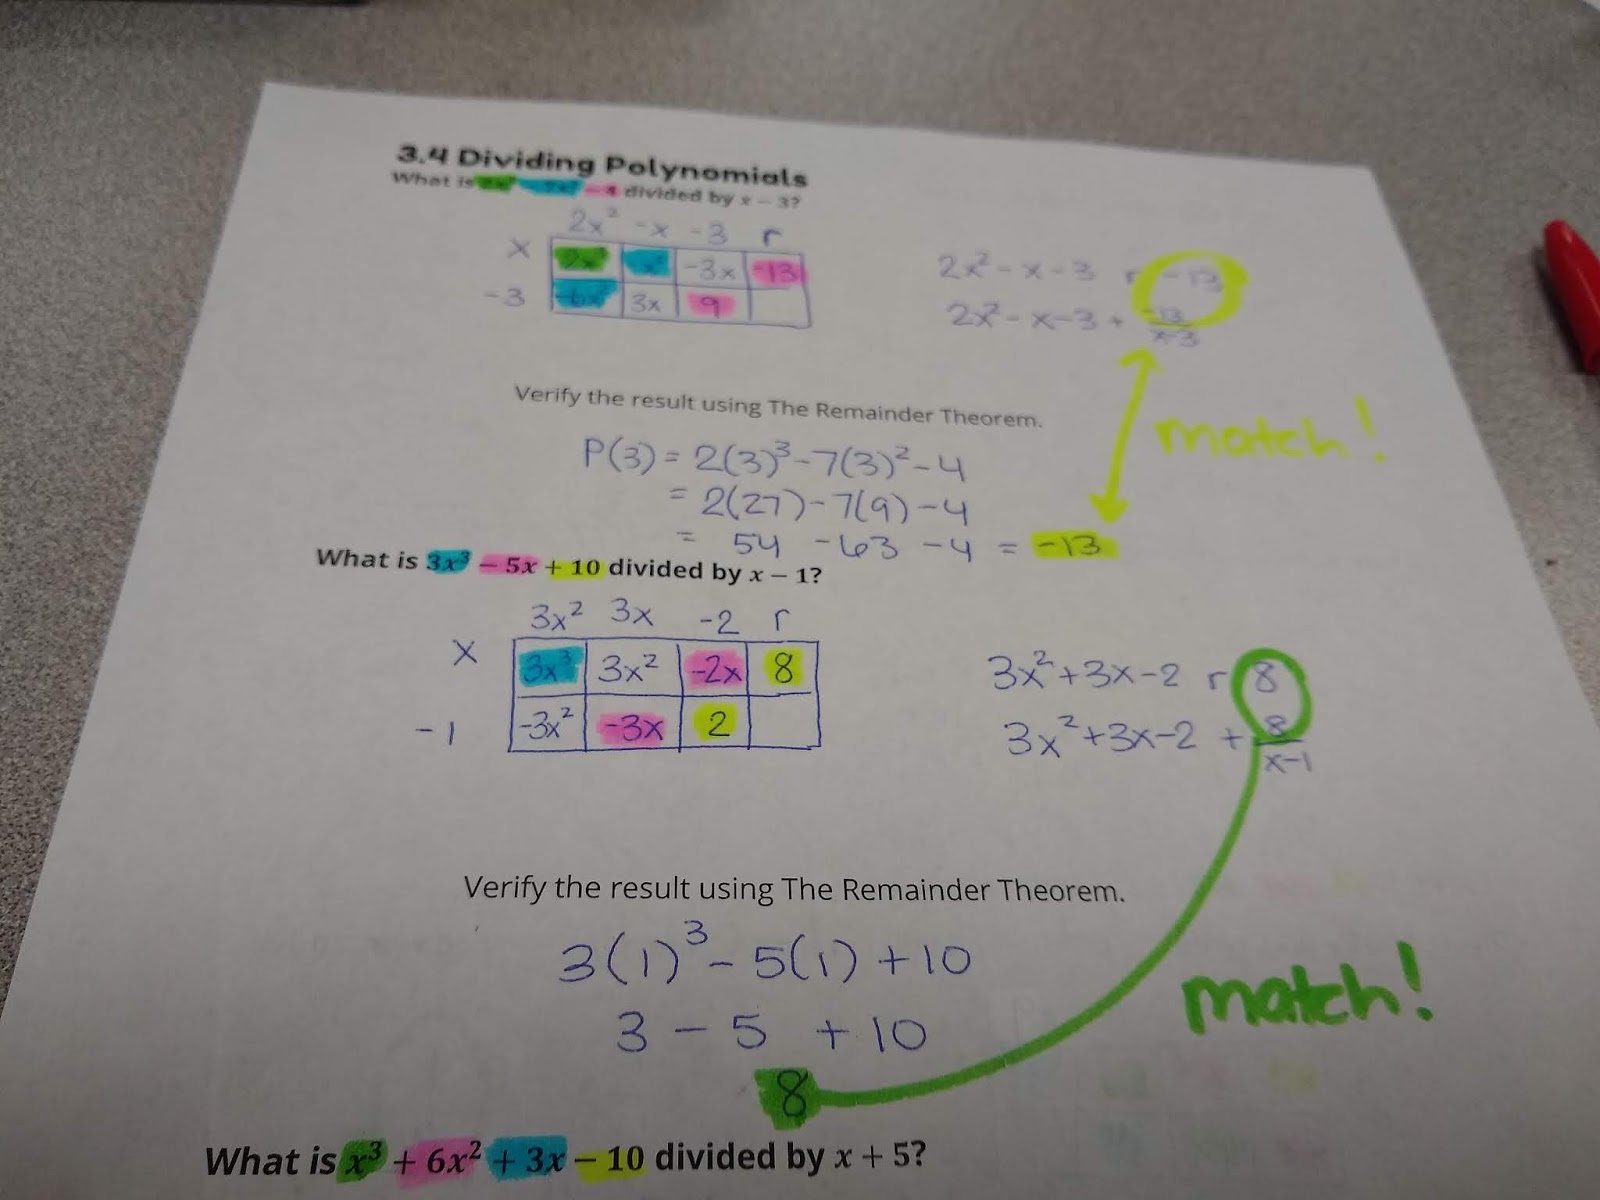
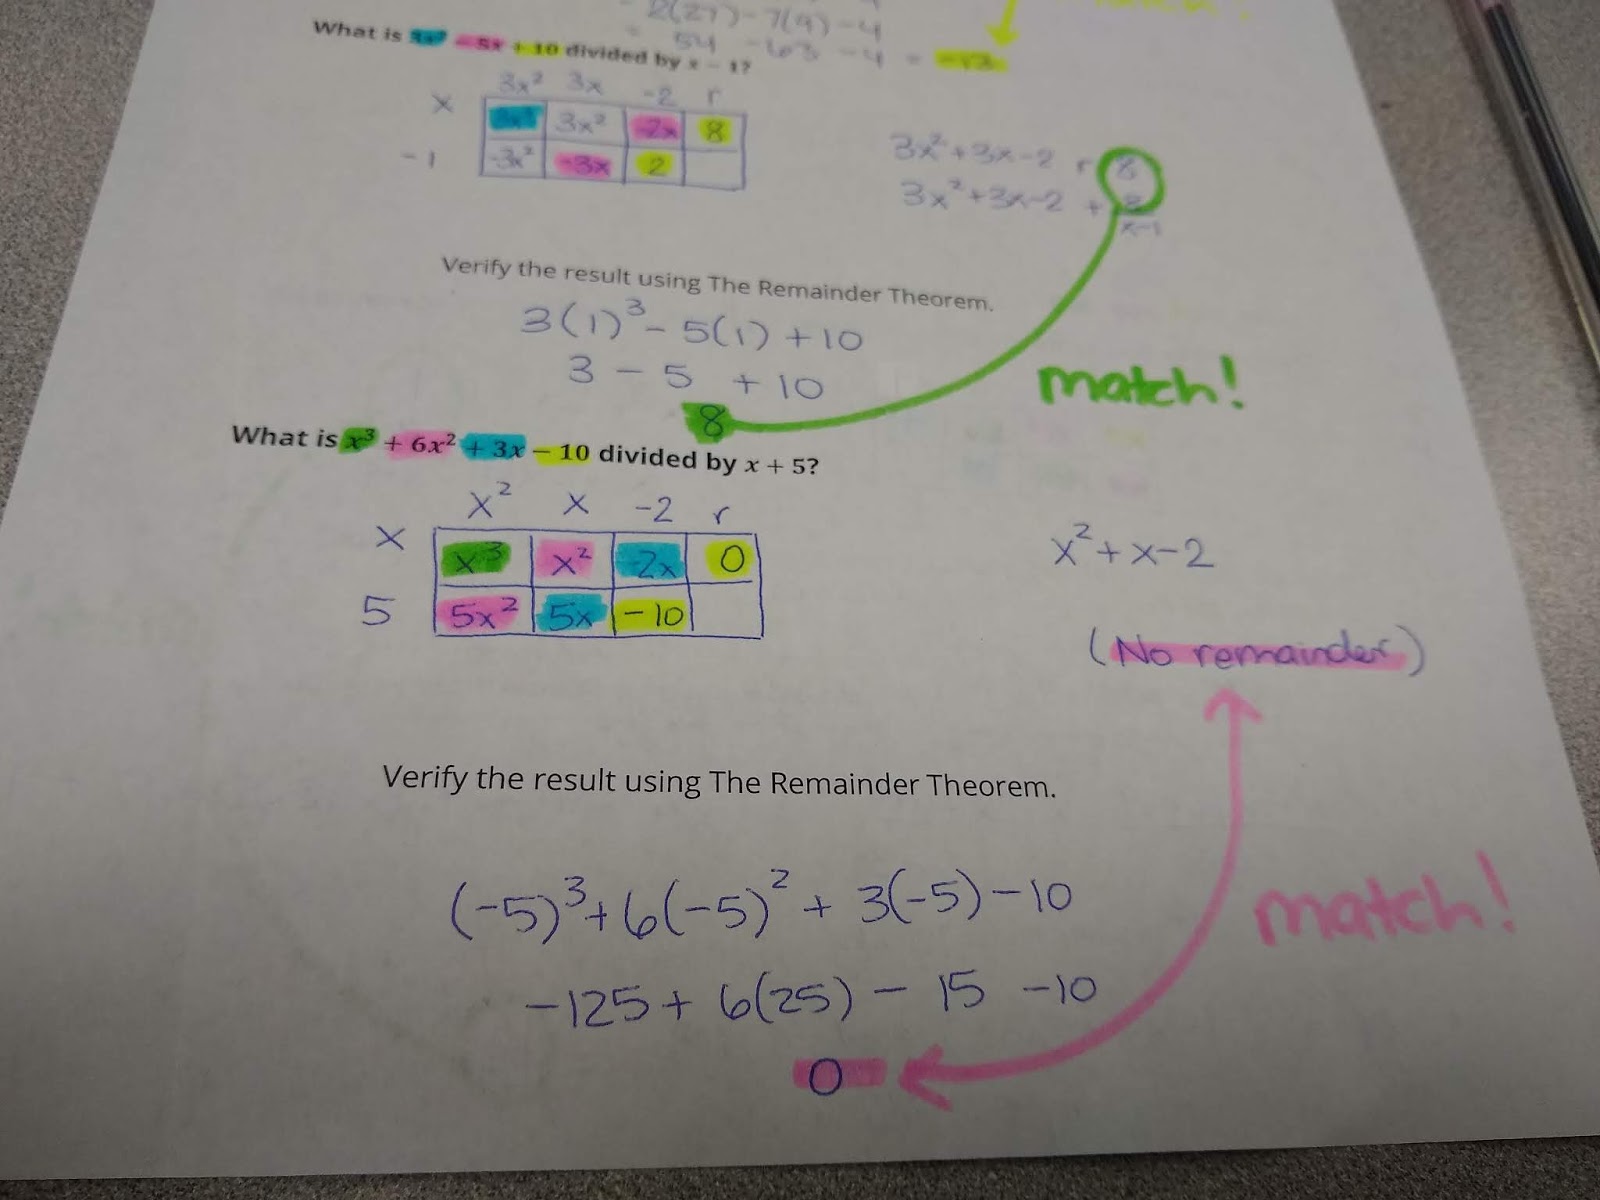
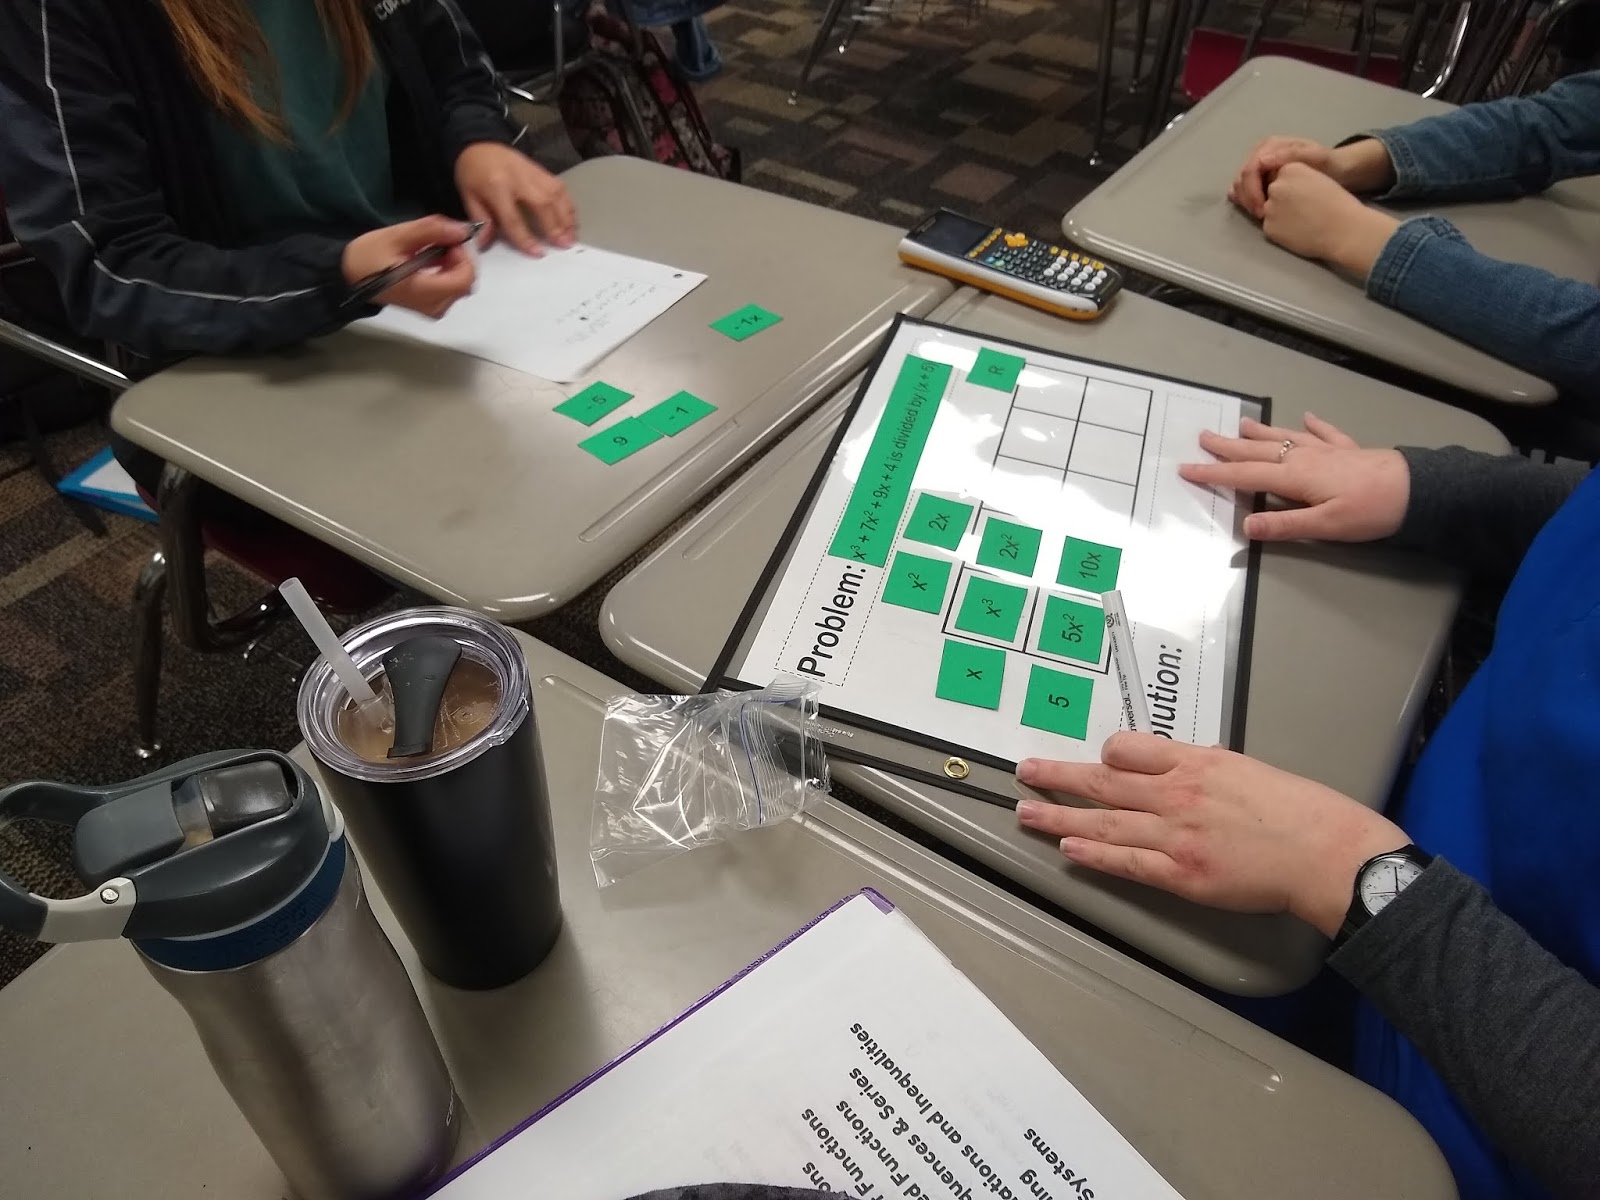
I often get asked how the box method works, so I want to walk you step by step through a solution using this method. I’ll be using a set of paper manipulatives that I created for my students to give them some much needed scaffolding between the problems we did together as notes and the problems they have to do independently on their own.
Students were given a dry erase template, a dividing polynomials problem, and a set of all of the necessary cards to complete the division process. I like to think of these as mini dividing polynomial puzzles for students to solve.
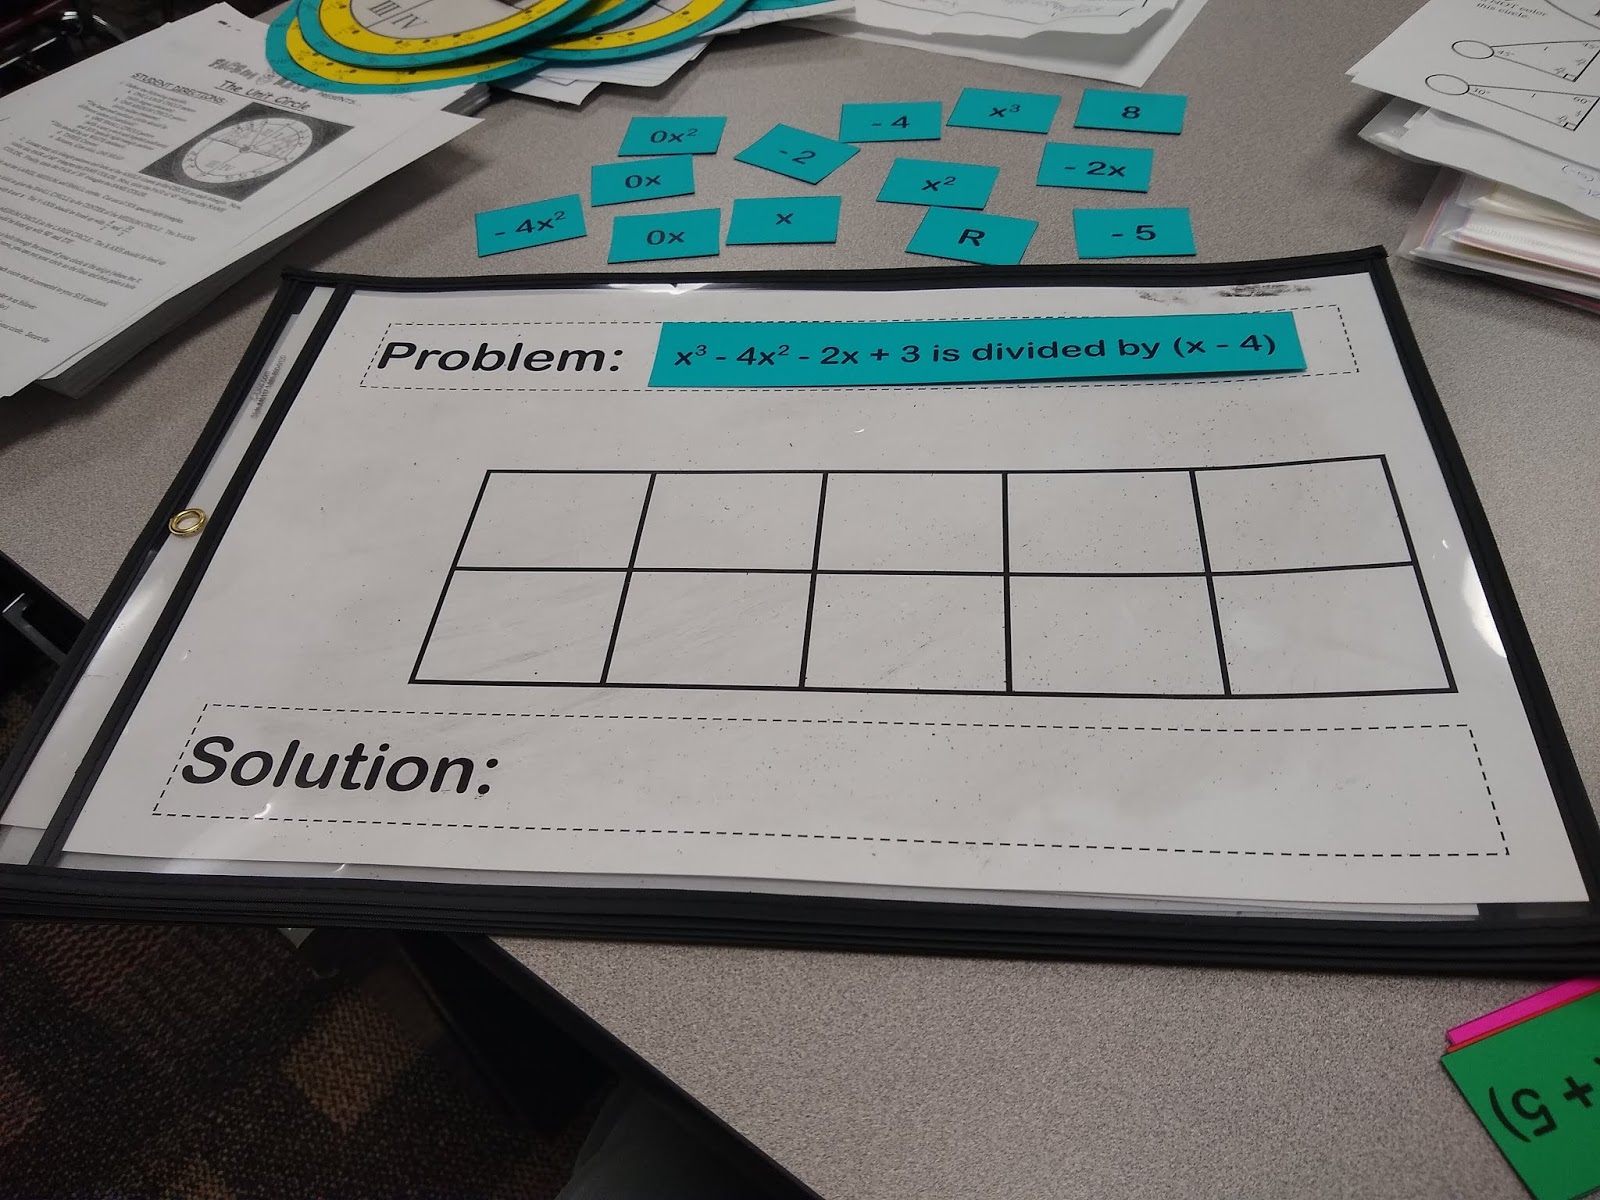
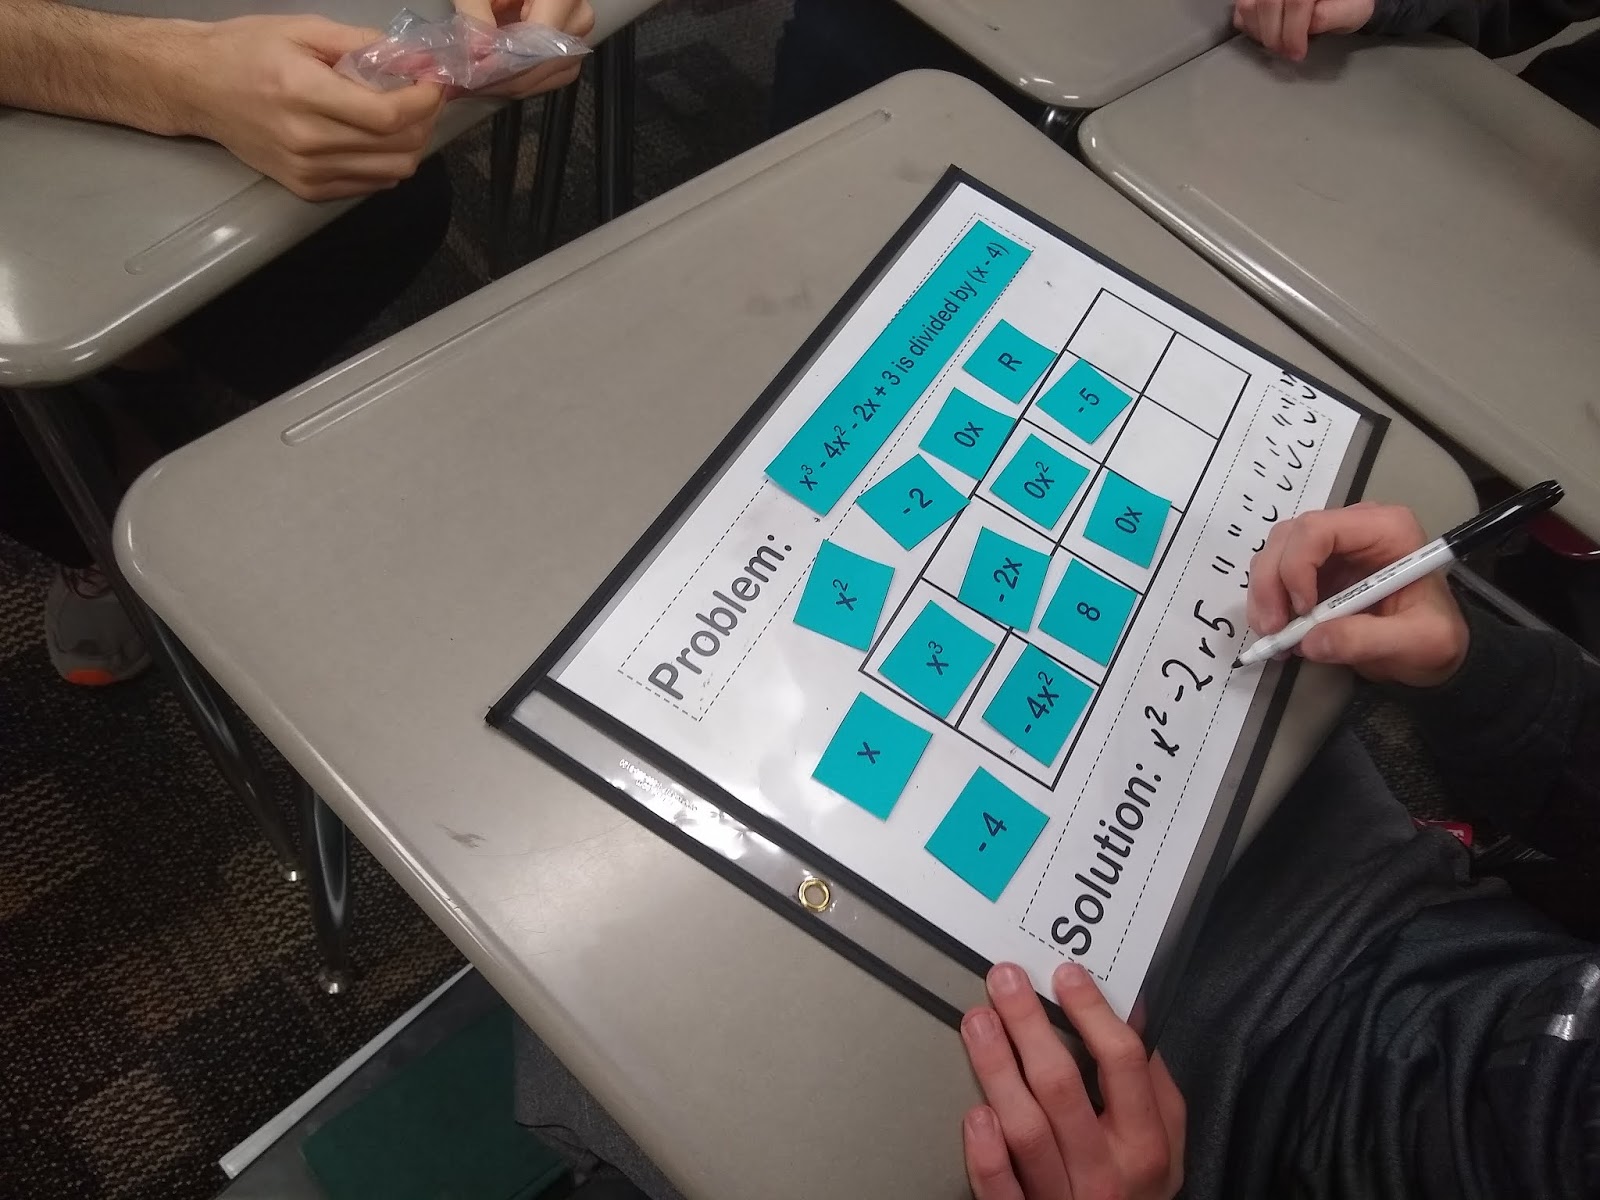
Since we are dividing by (x-4), we are considering that (x – 4) is a factor of the original polynomial. If it is, we will end up with remainder 0. If it was not actually a factor, we will end up with a remainder. To show that (x – 4) is a factor, we place it on the side of our box.
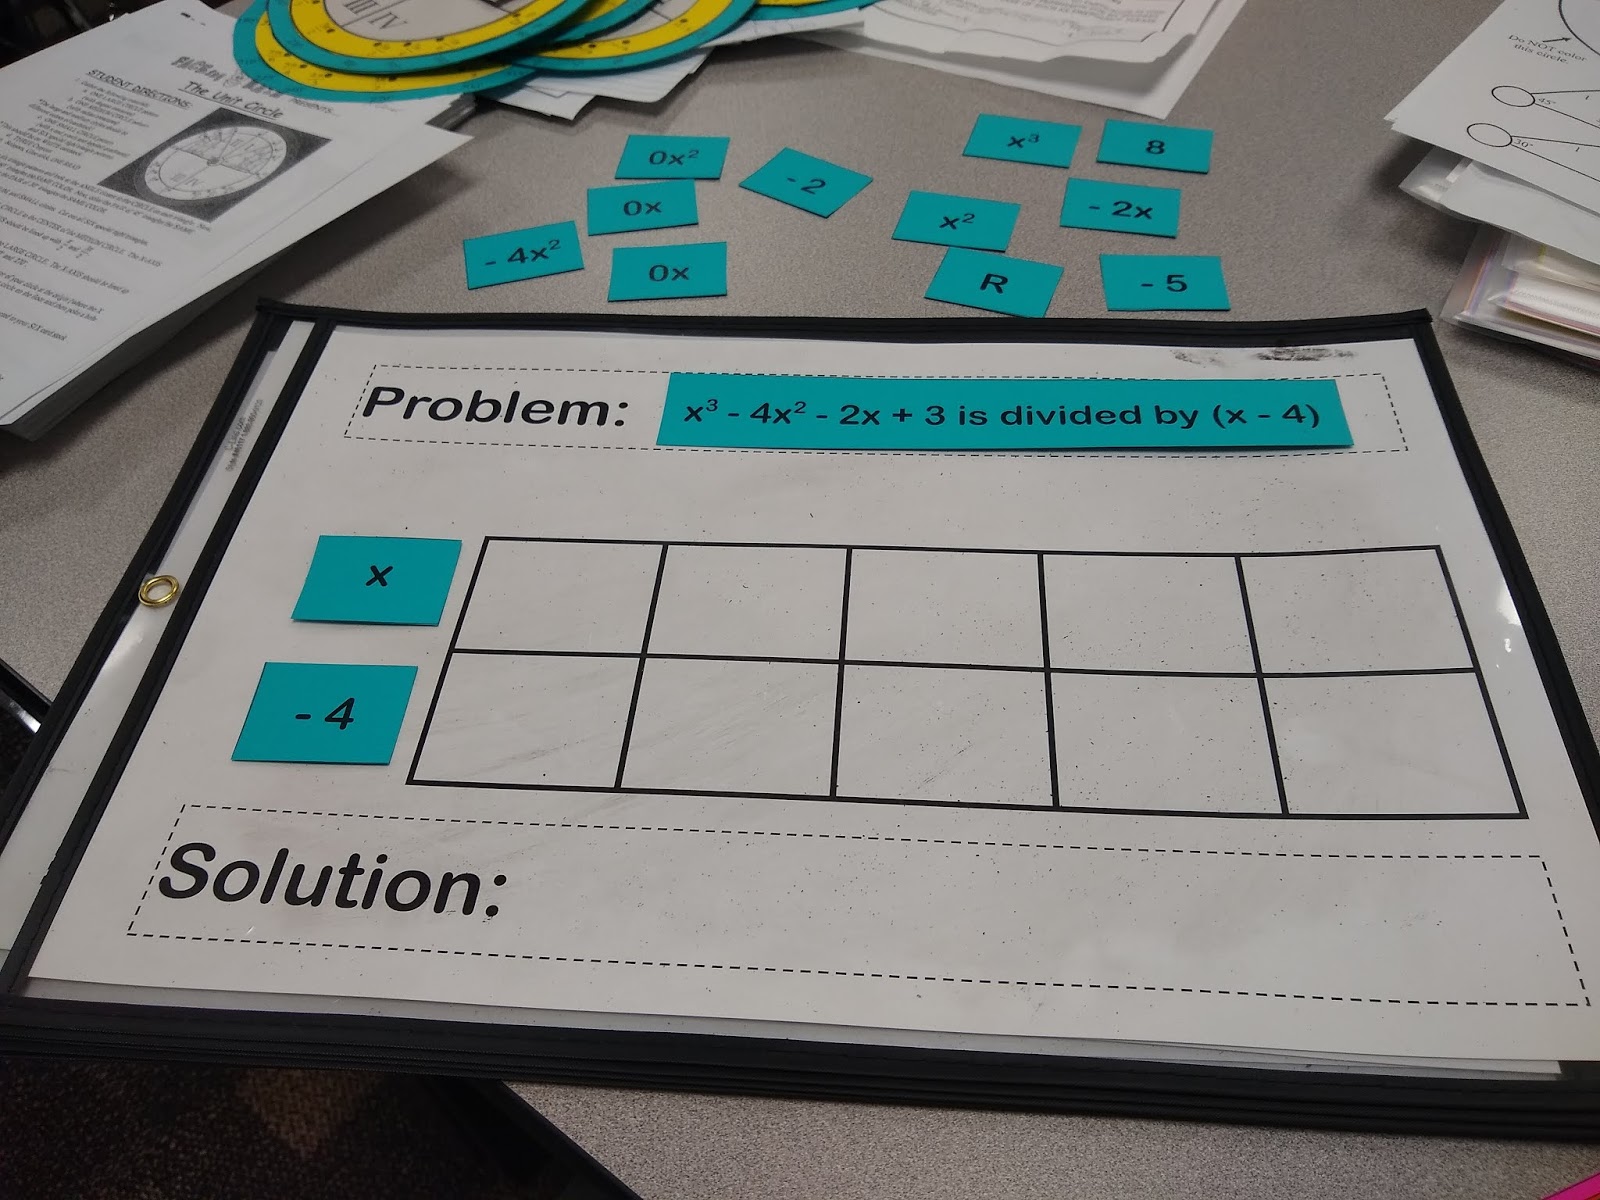
The polynomial that is being divided by (x – 4) represents the area of the box. The first term of this polynomial (when written in standard form, of course) will always go in the top left box. This is usually the point where I stop explicitly guiding students in how to set up a division problem and let them take over with their suggestions.
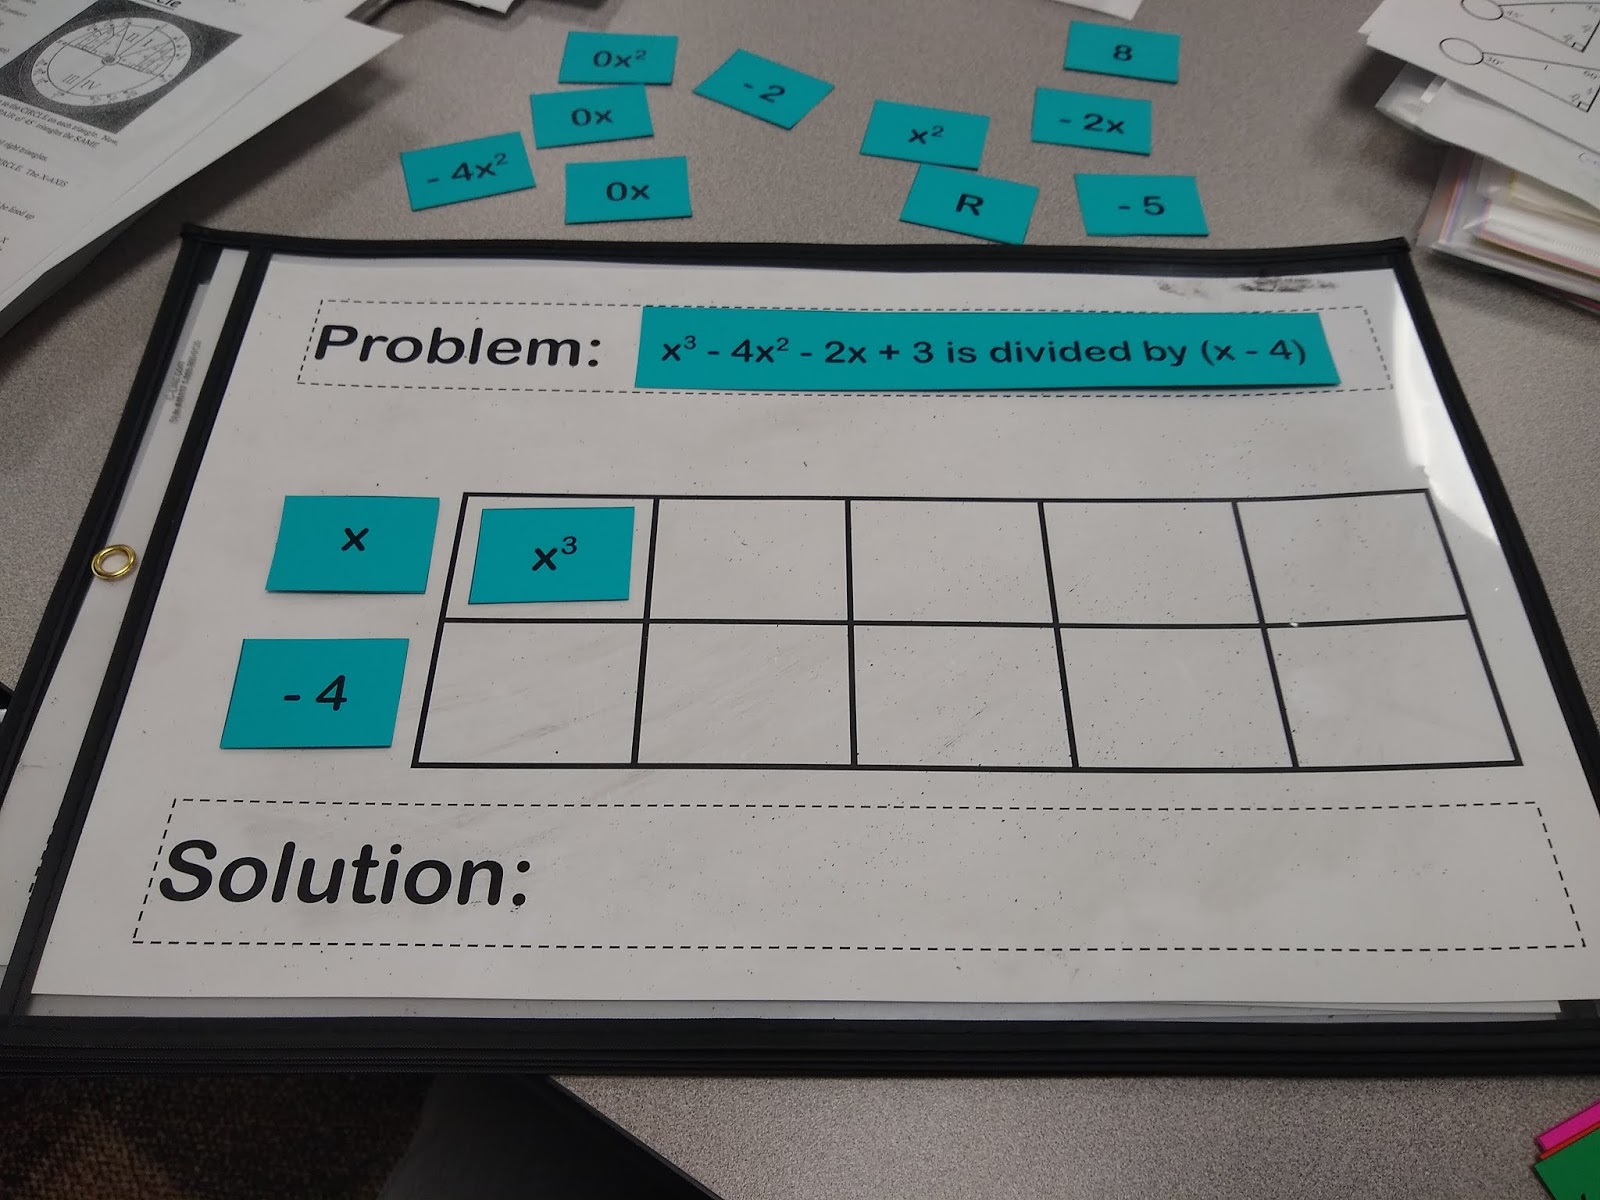
x times what equals x^3? x^2. Now, we have the first part of our solution. I can also multiply the x^2 I just found by the -4 to get -4x^2.
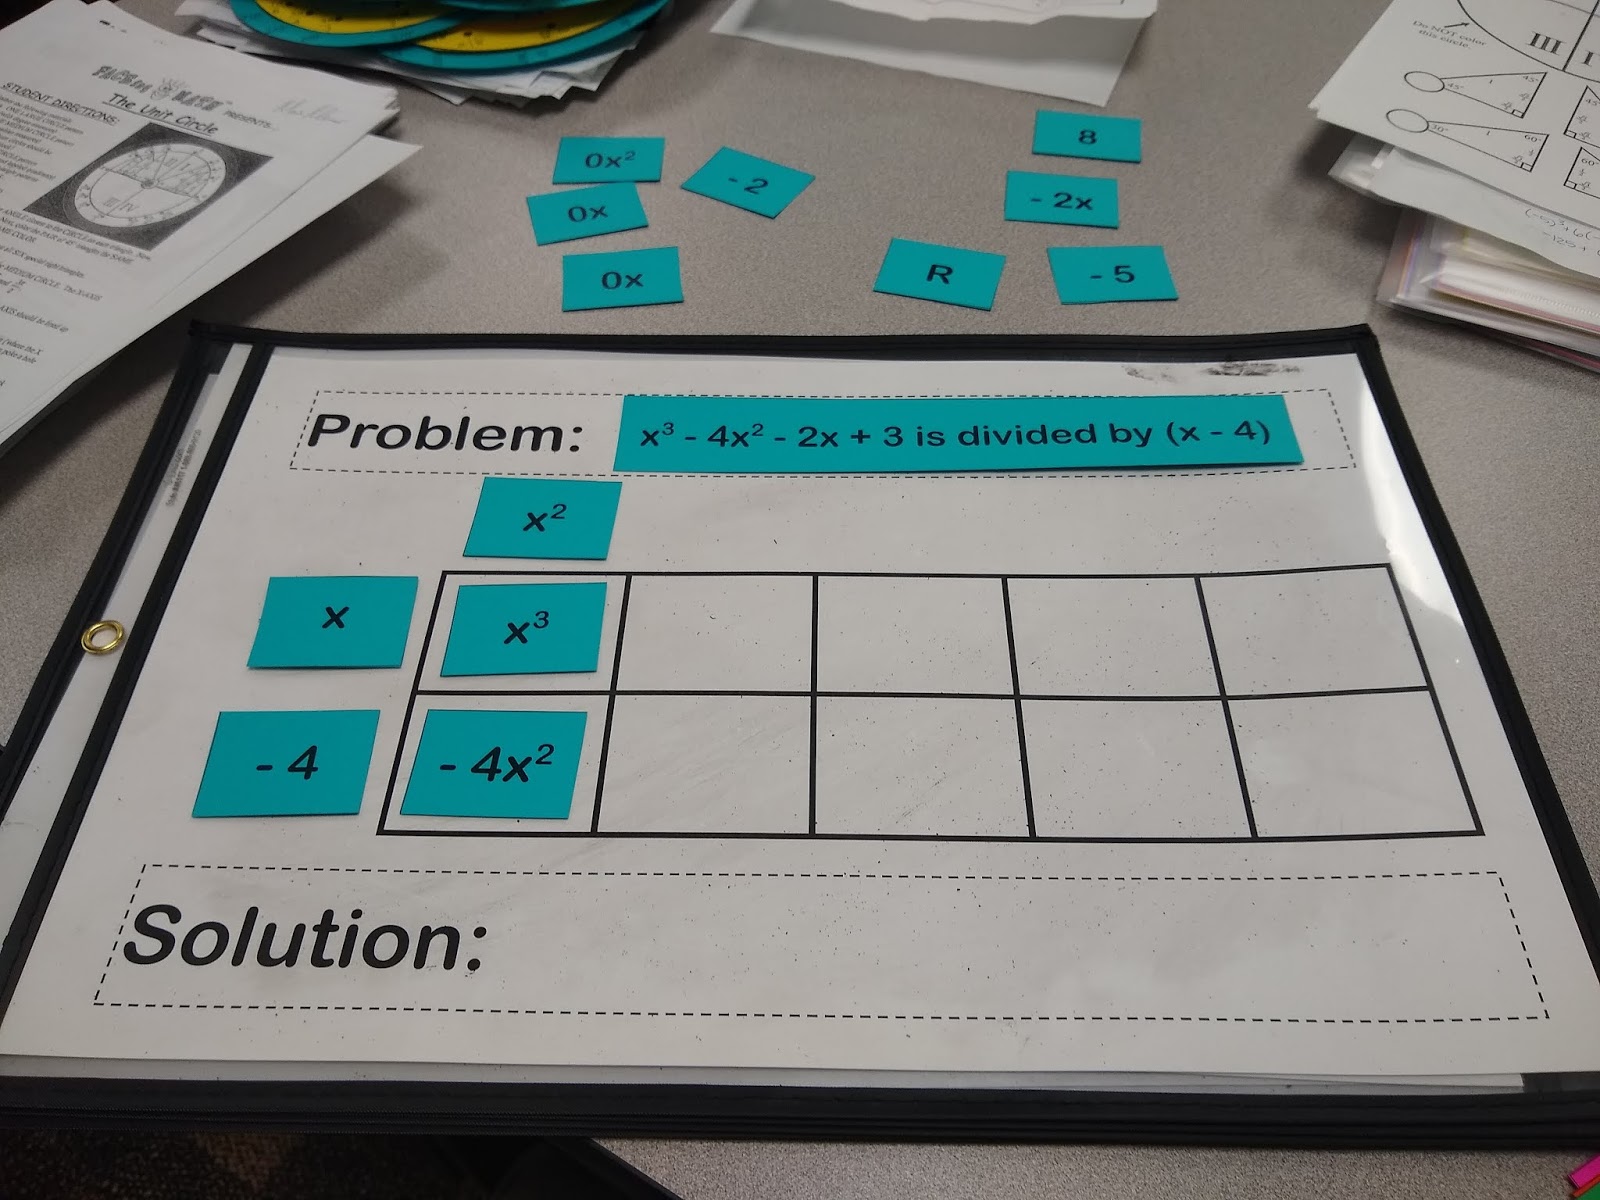
At this point, I always ask my students if we want -4x^2. Yes we do! So, I need a like term to add to -4x^2 that will not change its value. The only thing I can add to -4x^2 and not change its value is 0x^2.
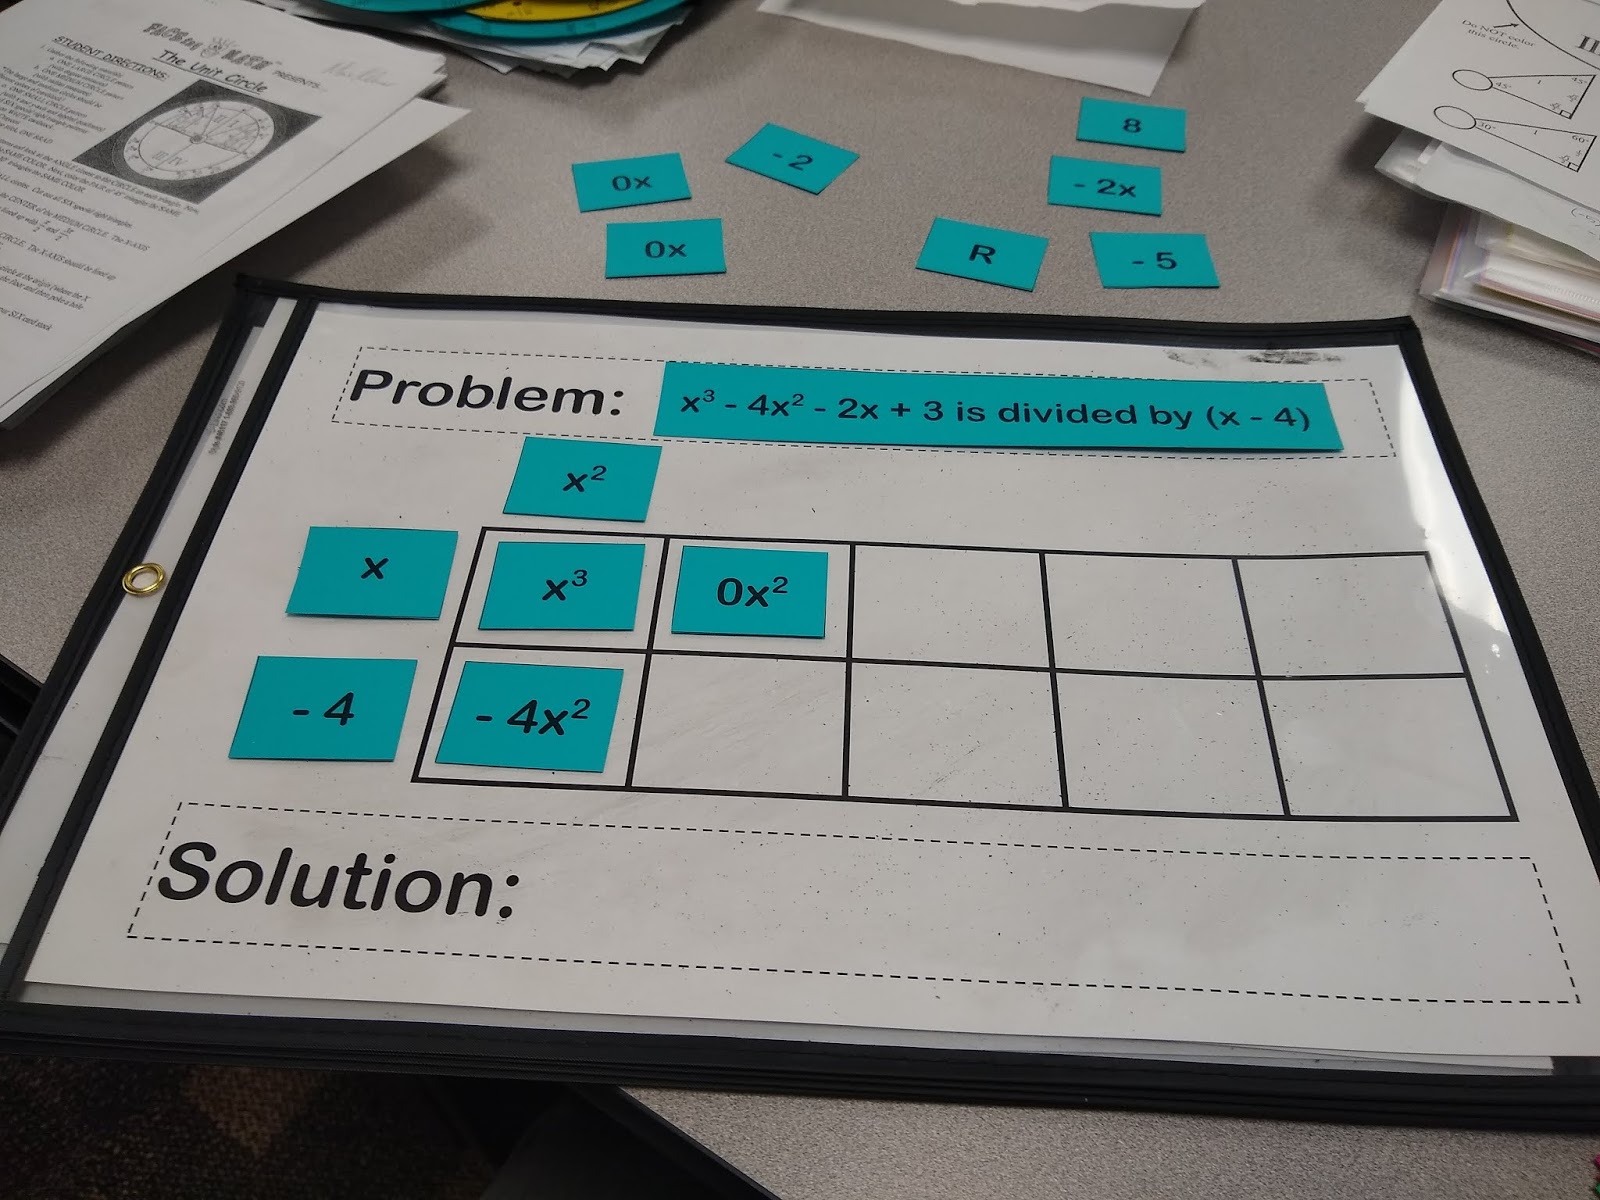
x times what equals 0x^2? 0x.
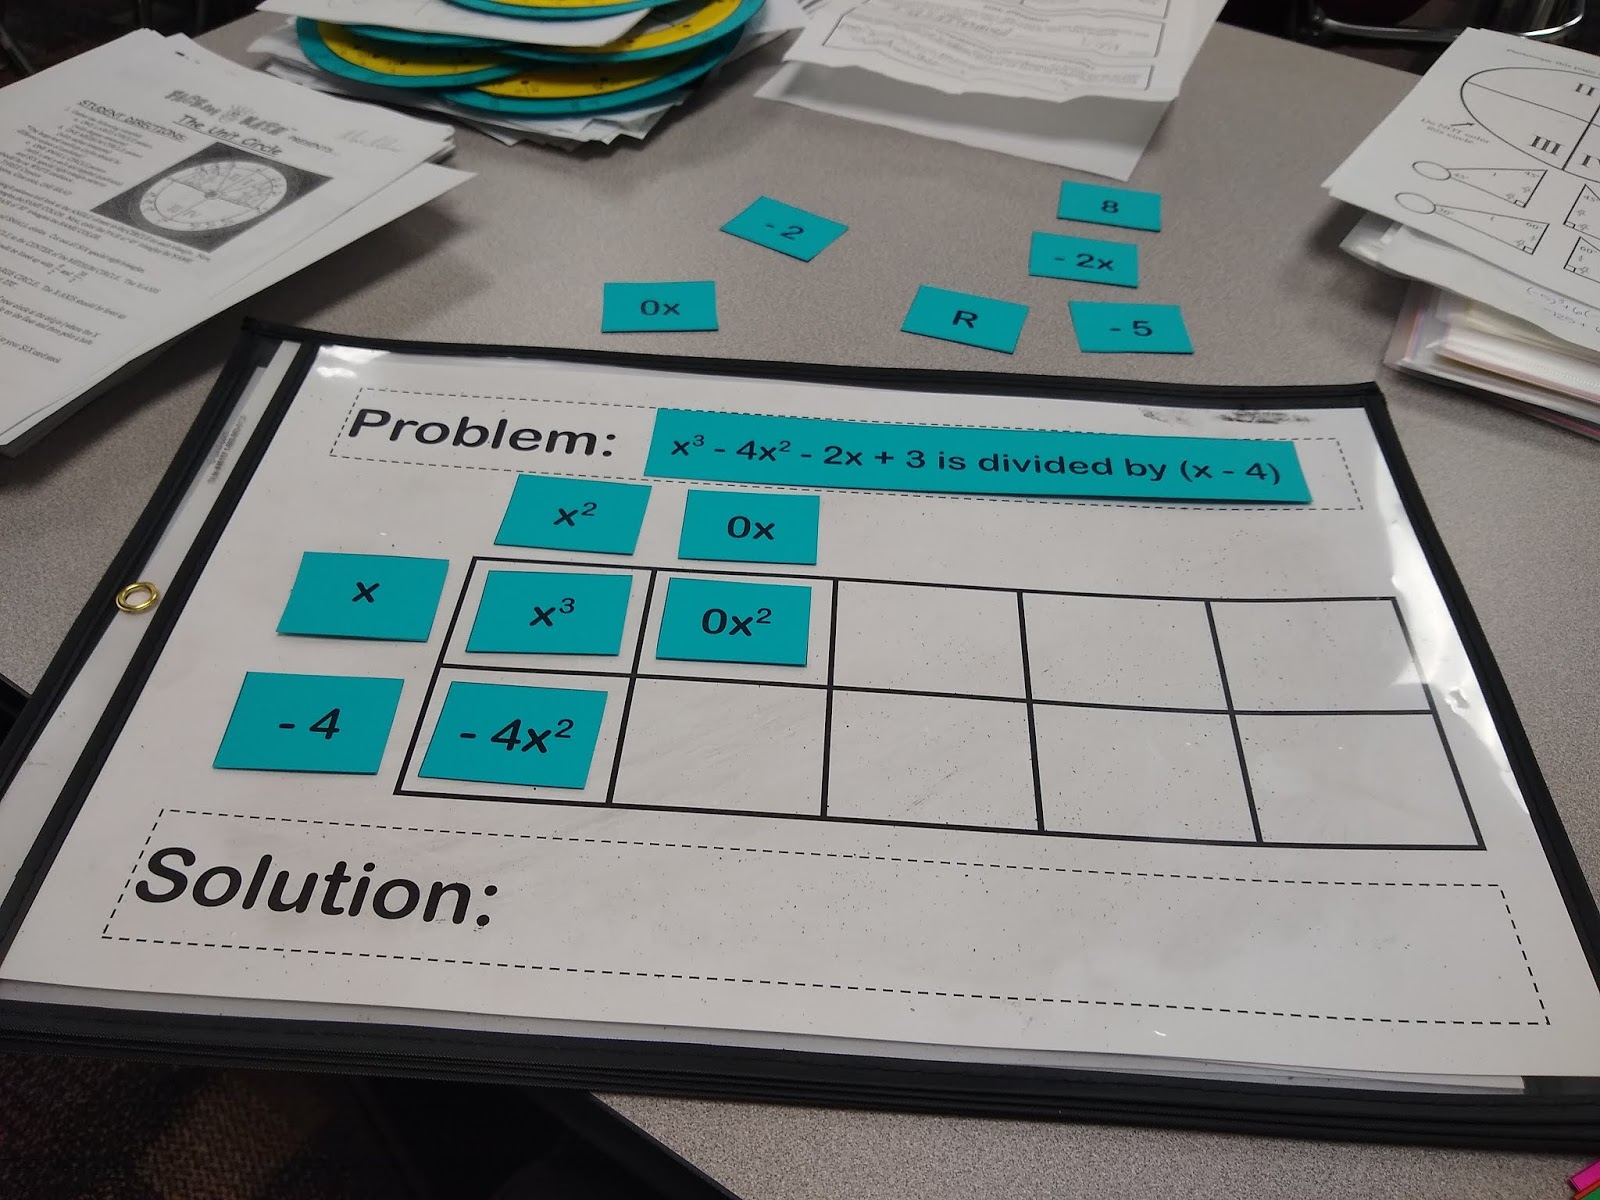
Now that 0x is in our solution, I can multiply it by -4 to arrive at 0x.
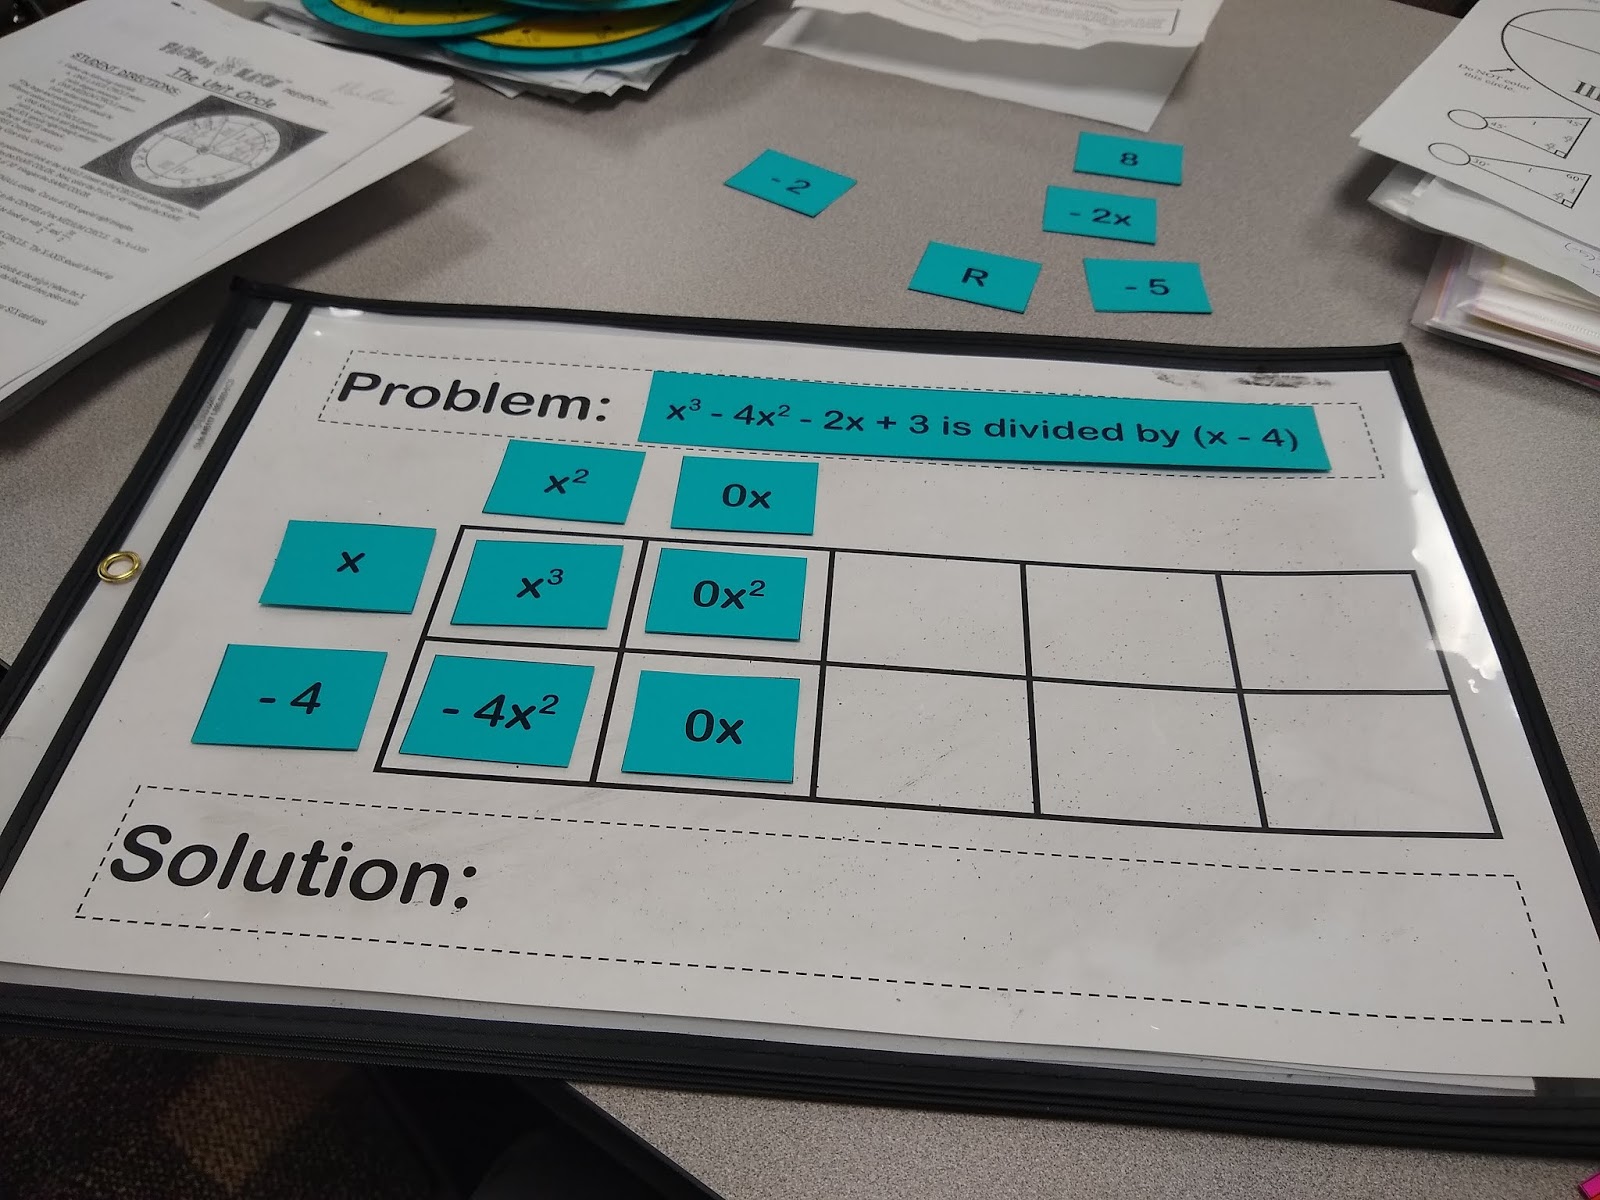
Do I actually want 0x? No. My original problem tells me that I want -2x. What can I combine with 0x to arrive at -2x? -2x.
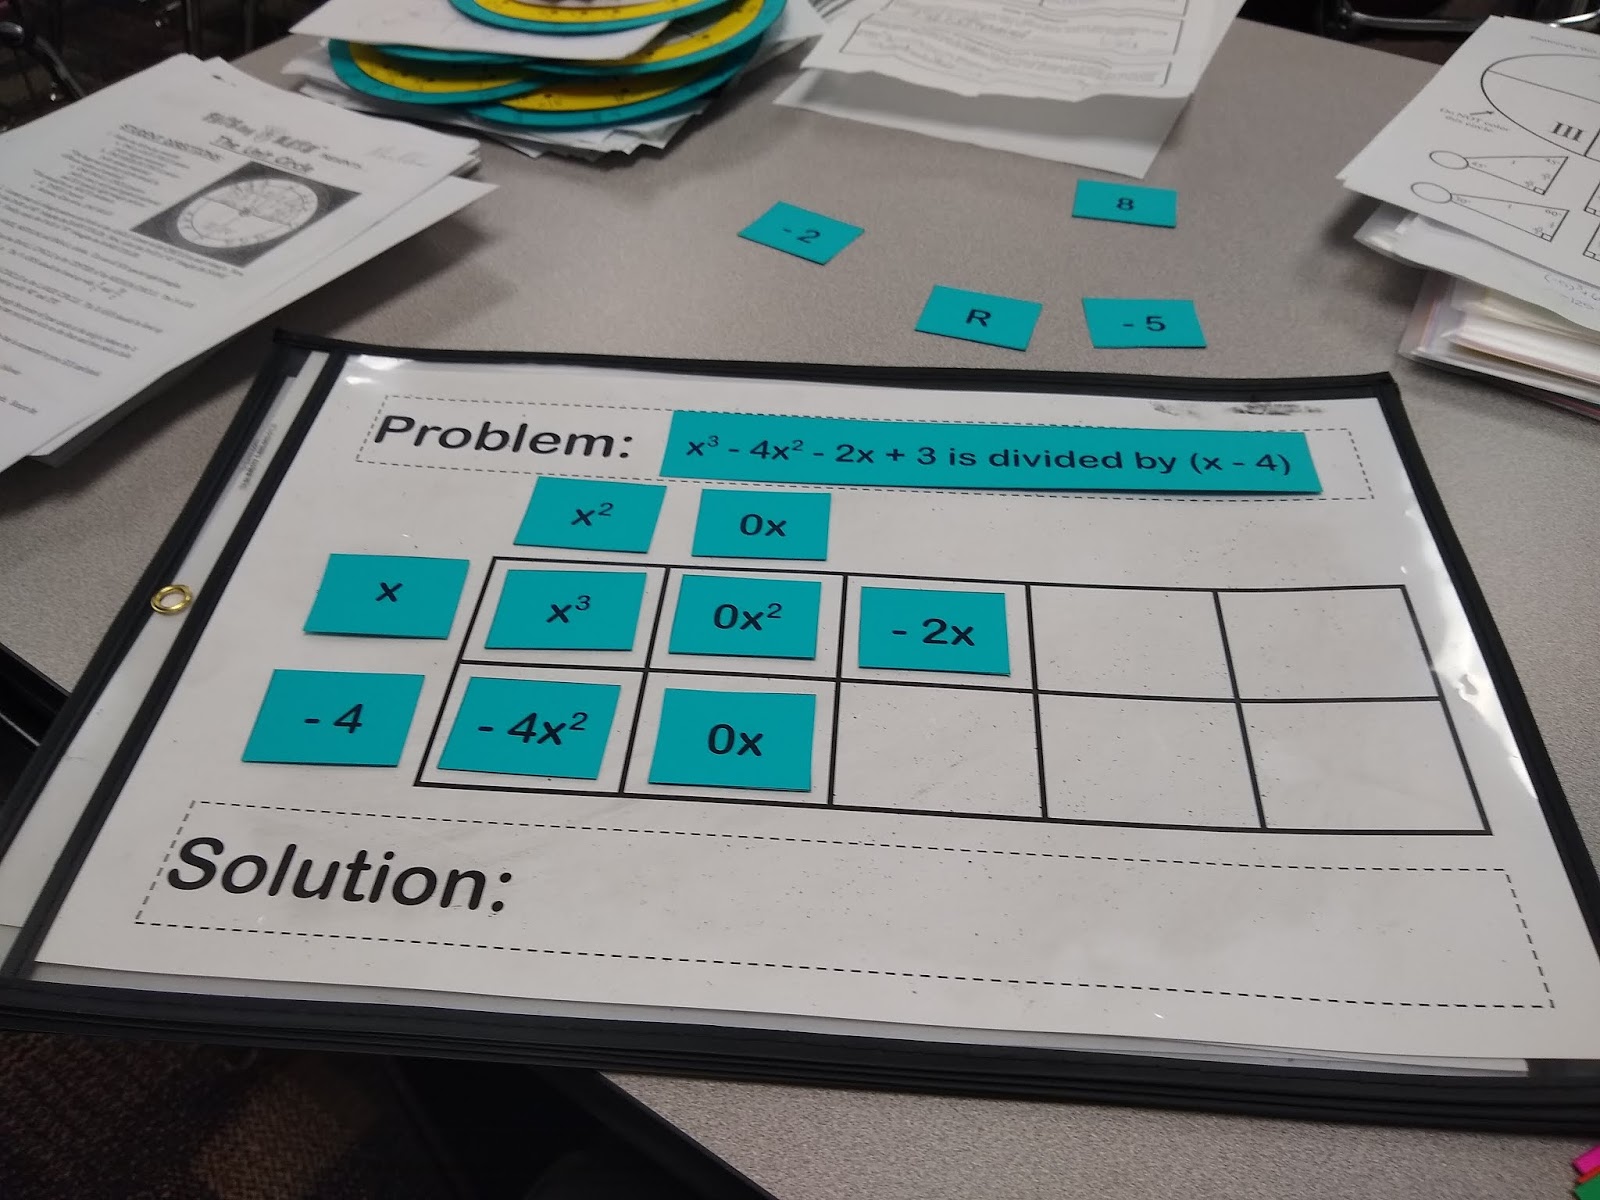
x times what equals -2x? -2, of course.
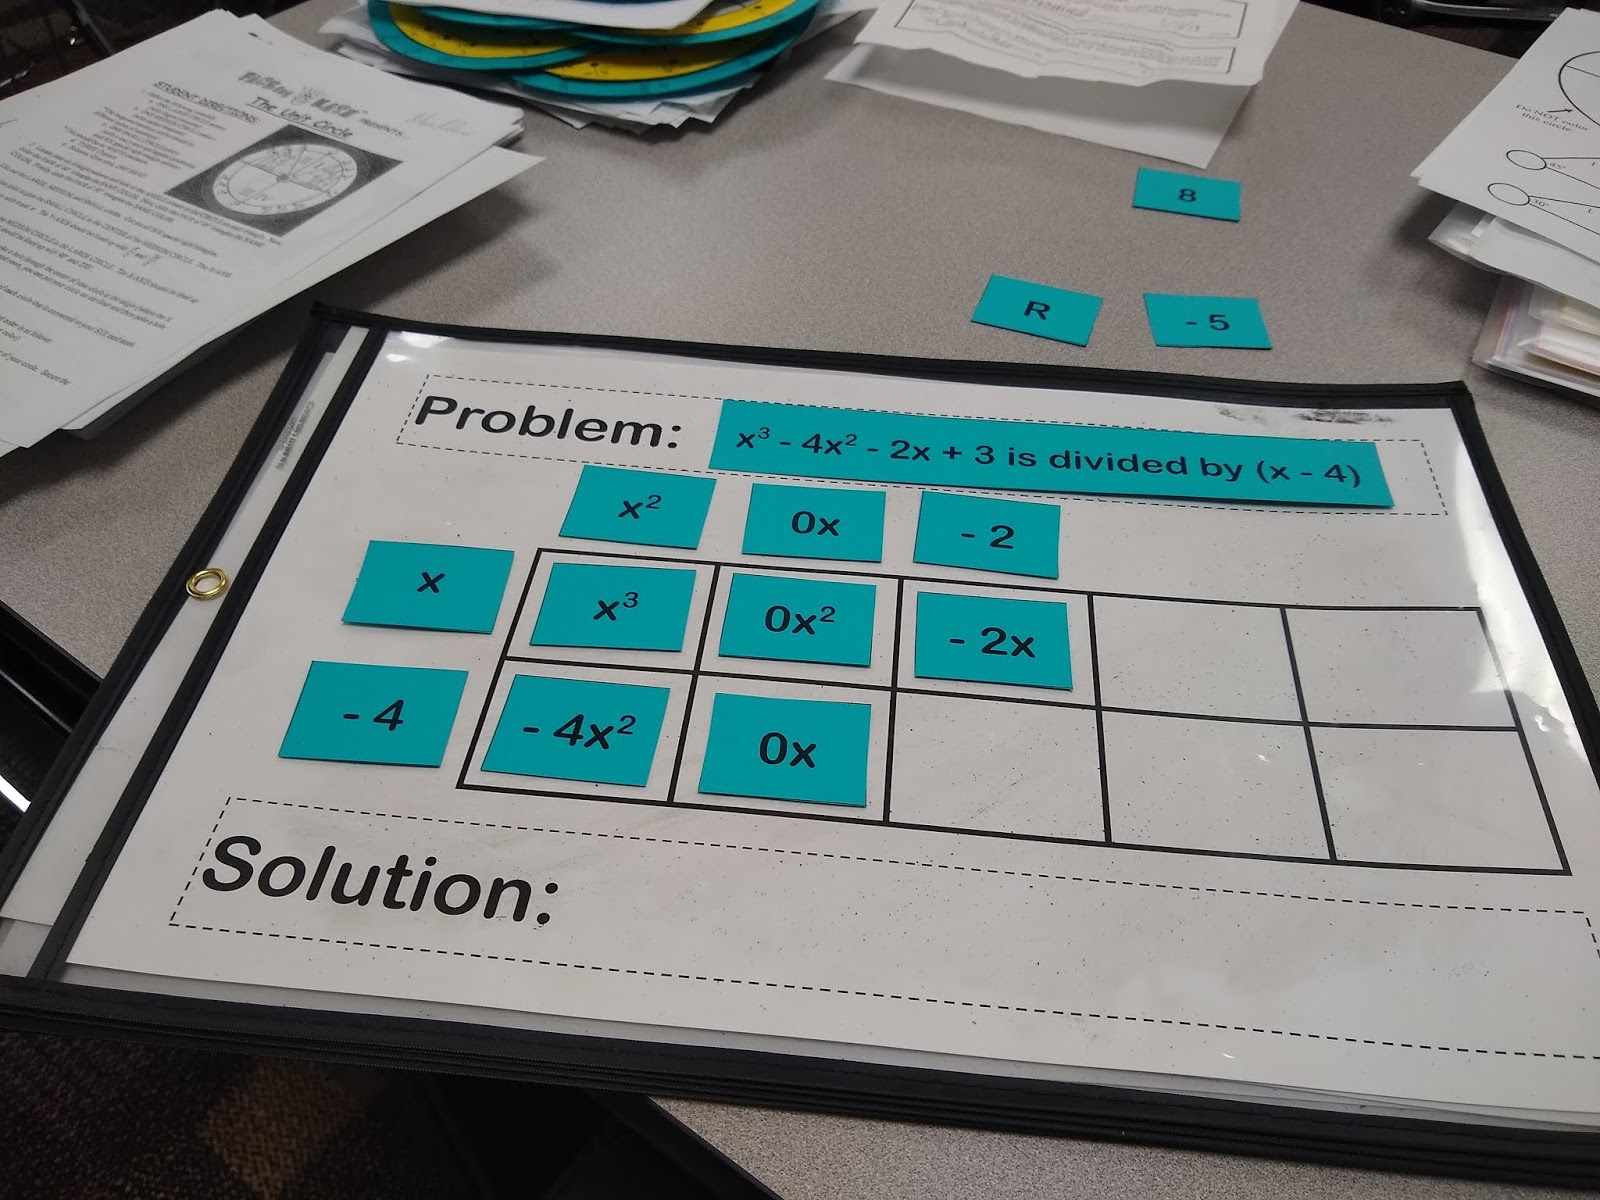
Now, what is -2 times -4? Positive 8.
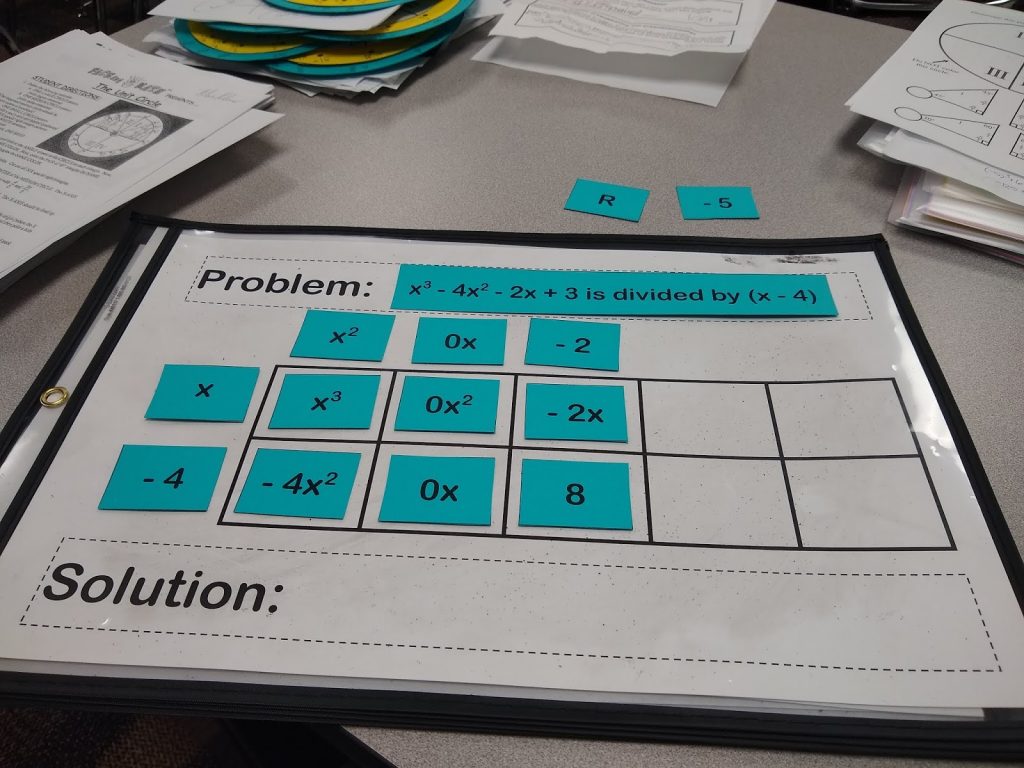
Do I actually want 8? No. I want 3. At this point, I can’t add any more terms to my solution, so I must resort to creating a remainder to get my 3. 8 – 5 is 3, so my remainder must be -5.
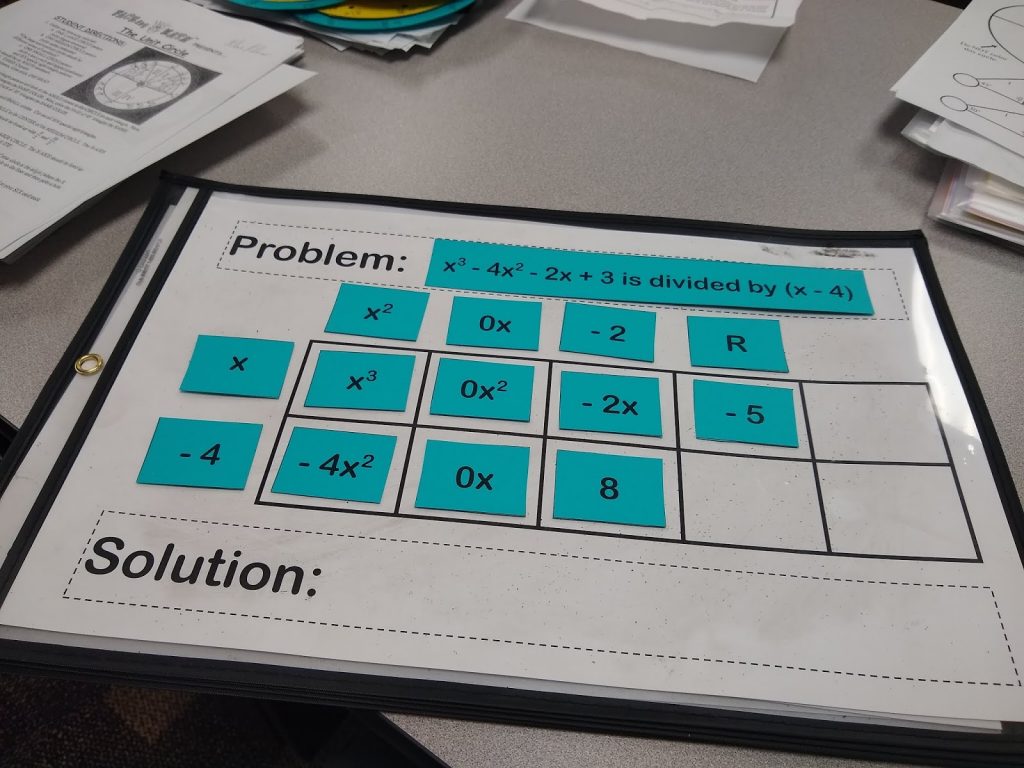
We can write this solution two different ways – using the R symbol for remainder or writing the remainder as a fraction. I normally let my students write the solution any way they wish, but I tell them that they need to recognize both ways of writing the solution and be able to switch between them depending on the context.
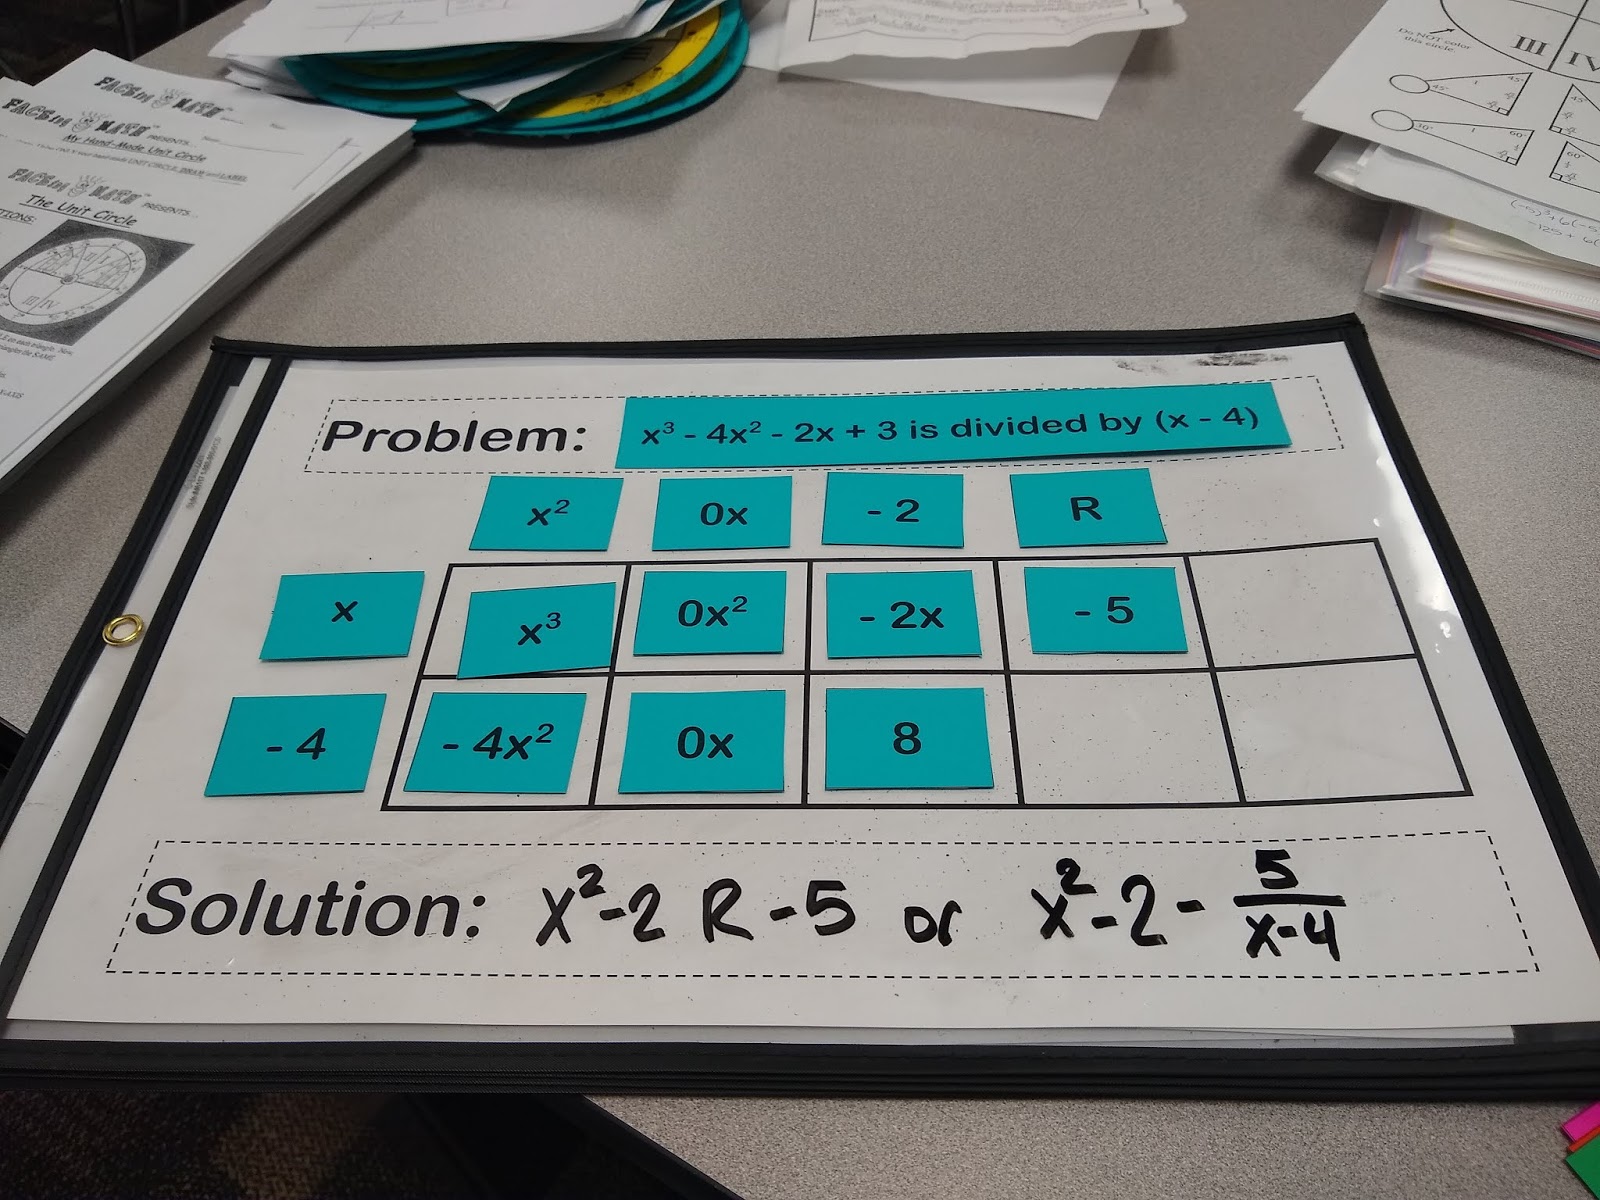
I ended up creating six of these polynomial division problems for my students to work through in groups. Each problem and its pieces were printed on a different color. These colors serve several purposes.
First, if a piece ends up on the floor, it’s super easy to reunite it with its set. Also, the colors allowed my students to keep track of which problems they had finished and which still remained to be done.
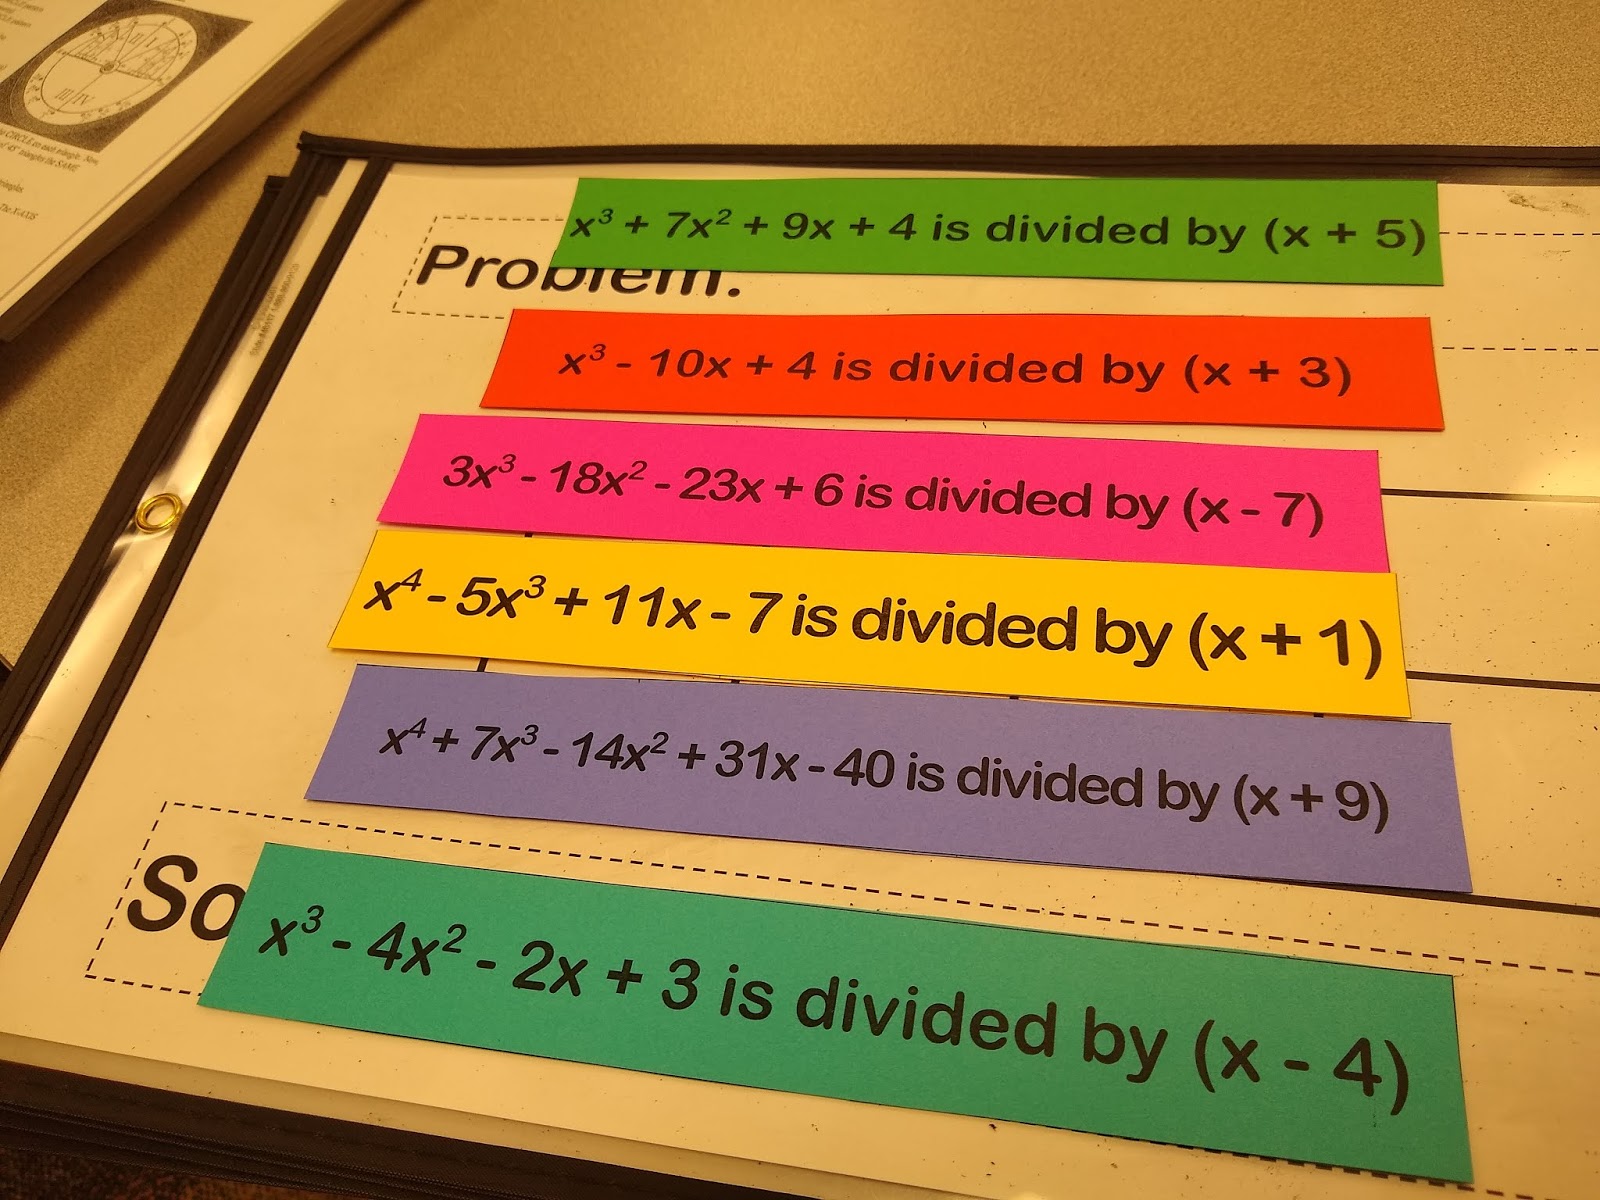
Running this activity with my Algebra 2 students four times over the course of one day allowed me to make some tweaks to my instructions/set-up AND think critically about changes to implement in the future.
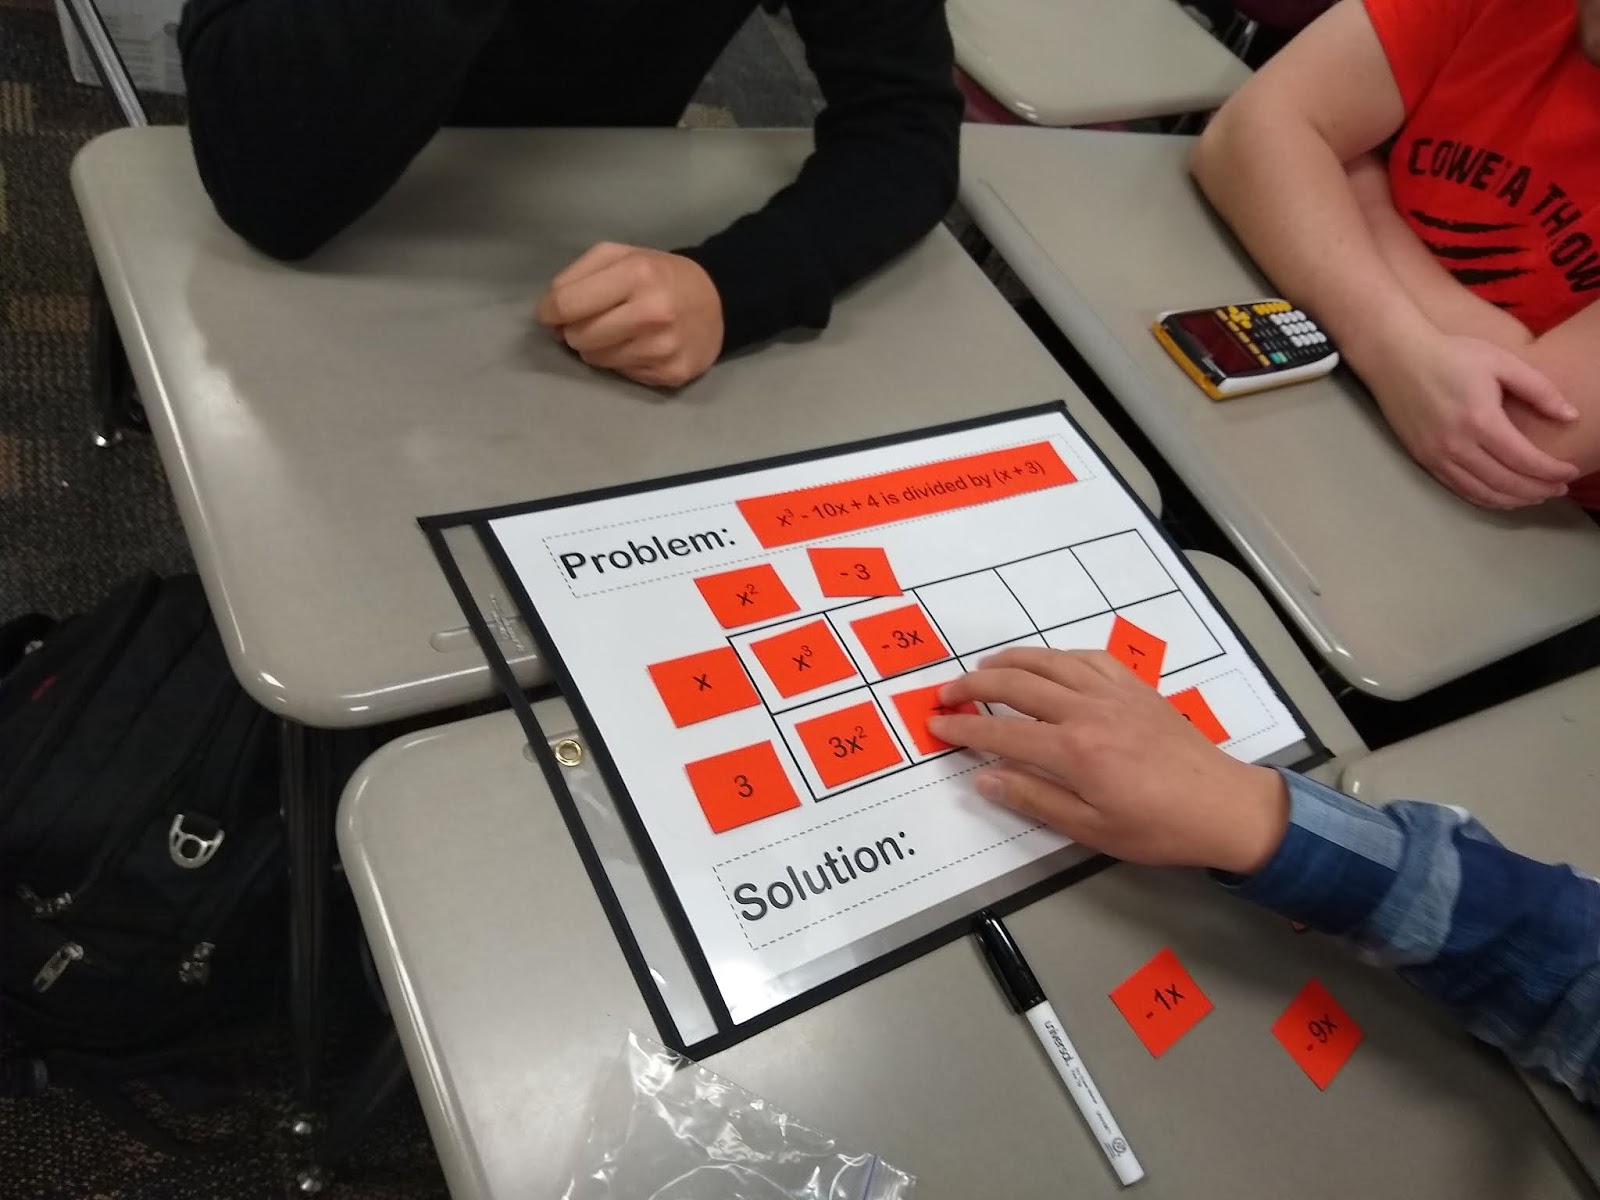
I kinda threw this activity together at the last minute (thank you first hour planning period), so I didn’t have time to make more than one copy of each problem. I had six problems and six groups.
This meant that if one group finished a problem before another group finished, they had to sit and wait. Students sitting idle is something you definitely want to avoid in the classroom if at all possible. Next time I do this, I will definitely print 2 or 3 sets of each problem.
Other times, another group did finish at the same time, but they had a color that the other group had already completed. If one group spent a long time on a single problem, it became an issue because all the other groups still needed that problem.
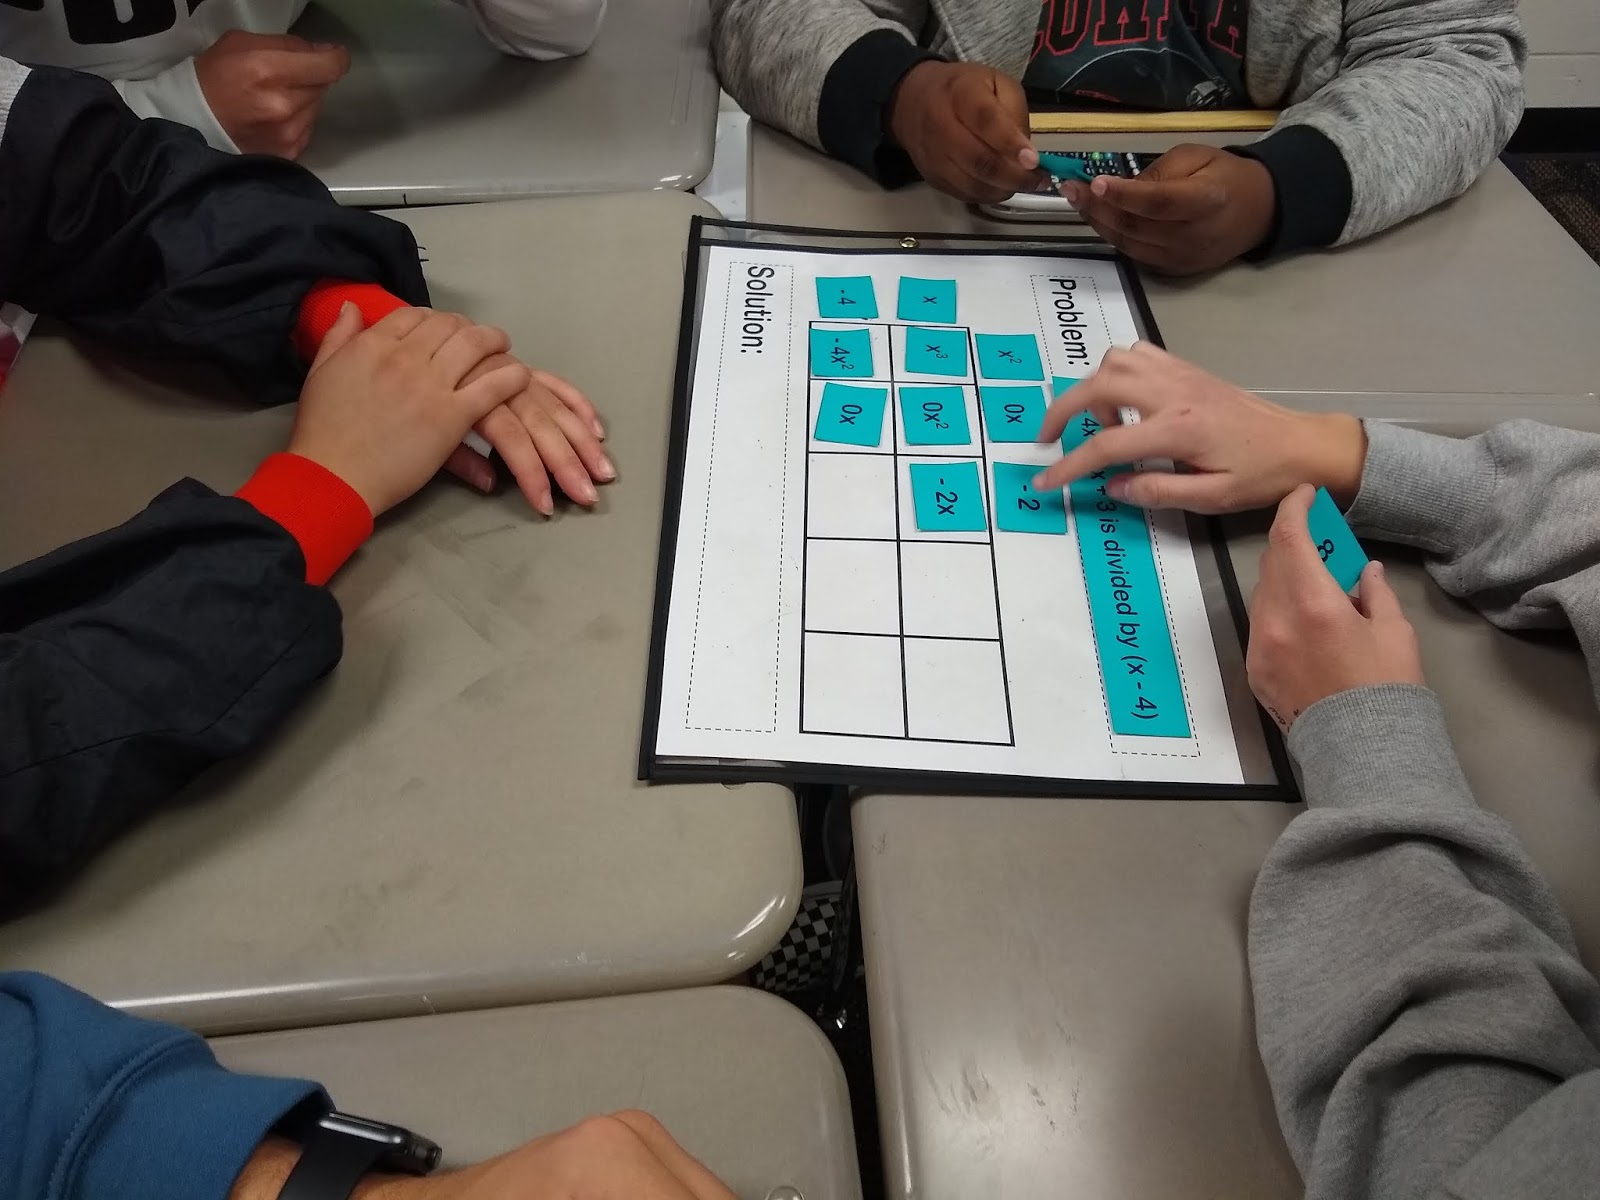
For my first class of the day, I asked them to simply work in groups to complete the division puzzle. I quickly noticed that one or two students tended to do most of the work. For my subsequent classes, I had students choose one person to handle the cards for each problem.
The other students were allowed to help as much as they wanted, but only the one designated student per problem should be manipulating the pieces.
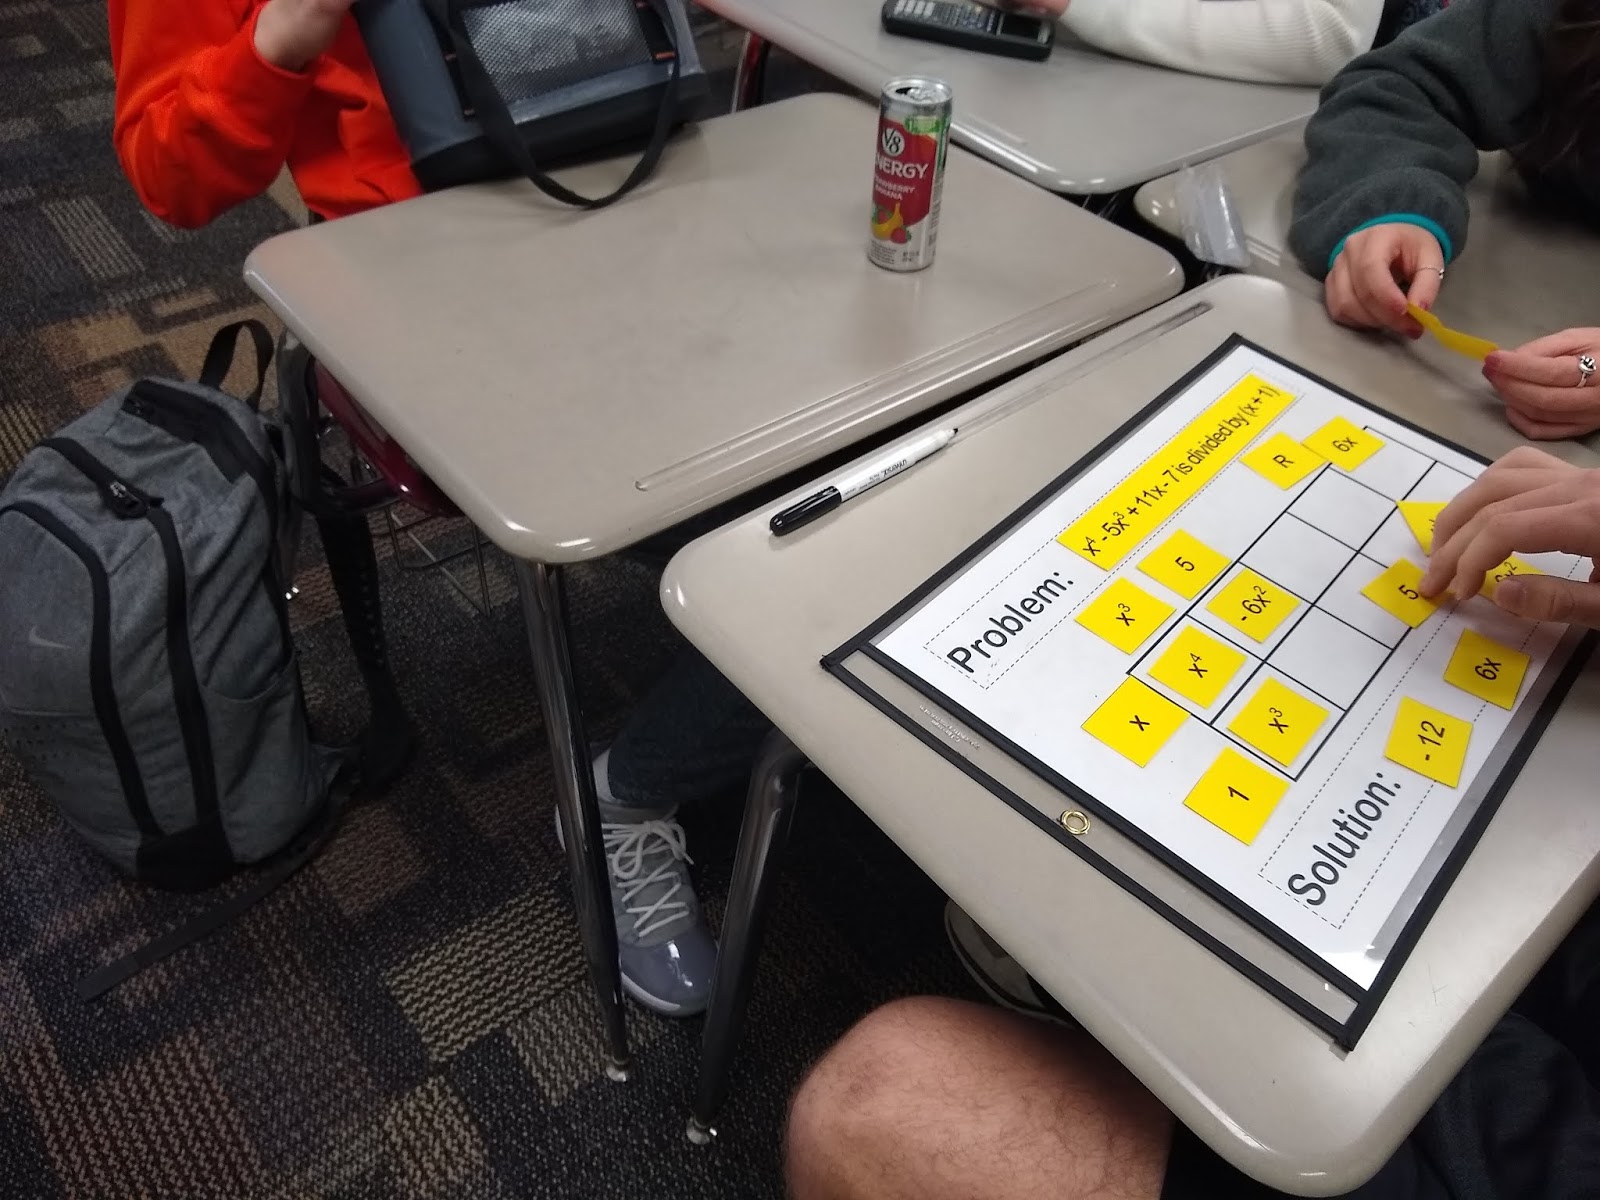
This made a HUGE difference. As I circulated, my students didn’t exactly follow my instructions of only one student touching the cards each problem, but I did find that all of my students tended to be more engaged in the activity since they knew their turn was coming soon.
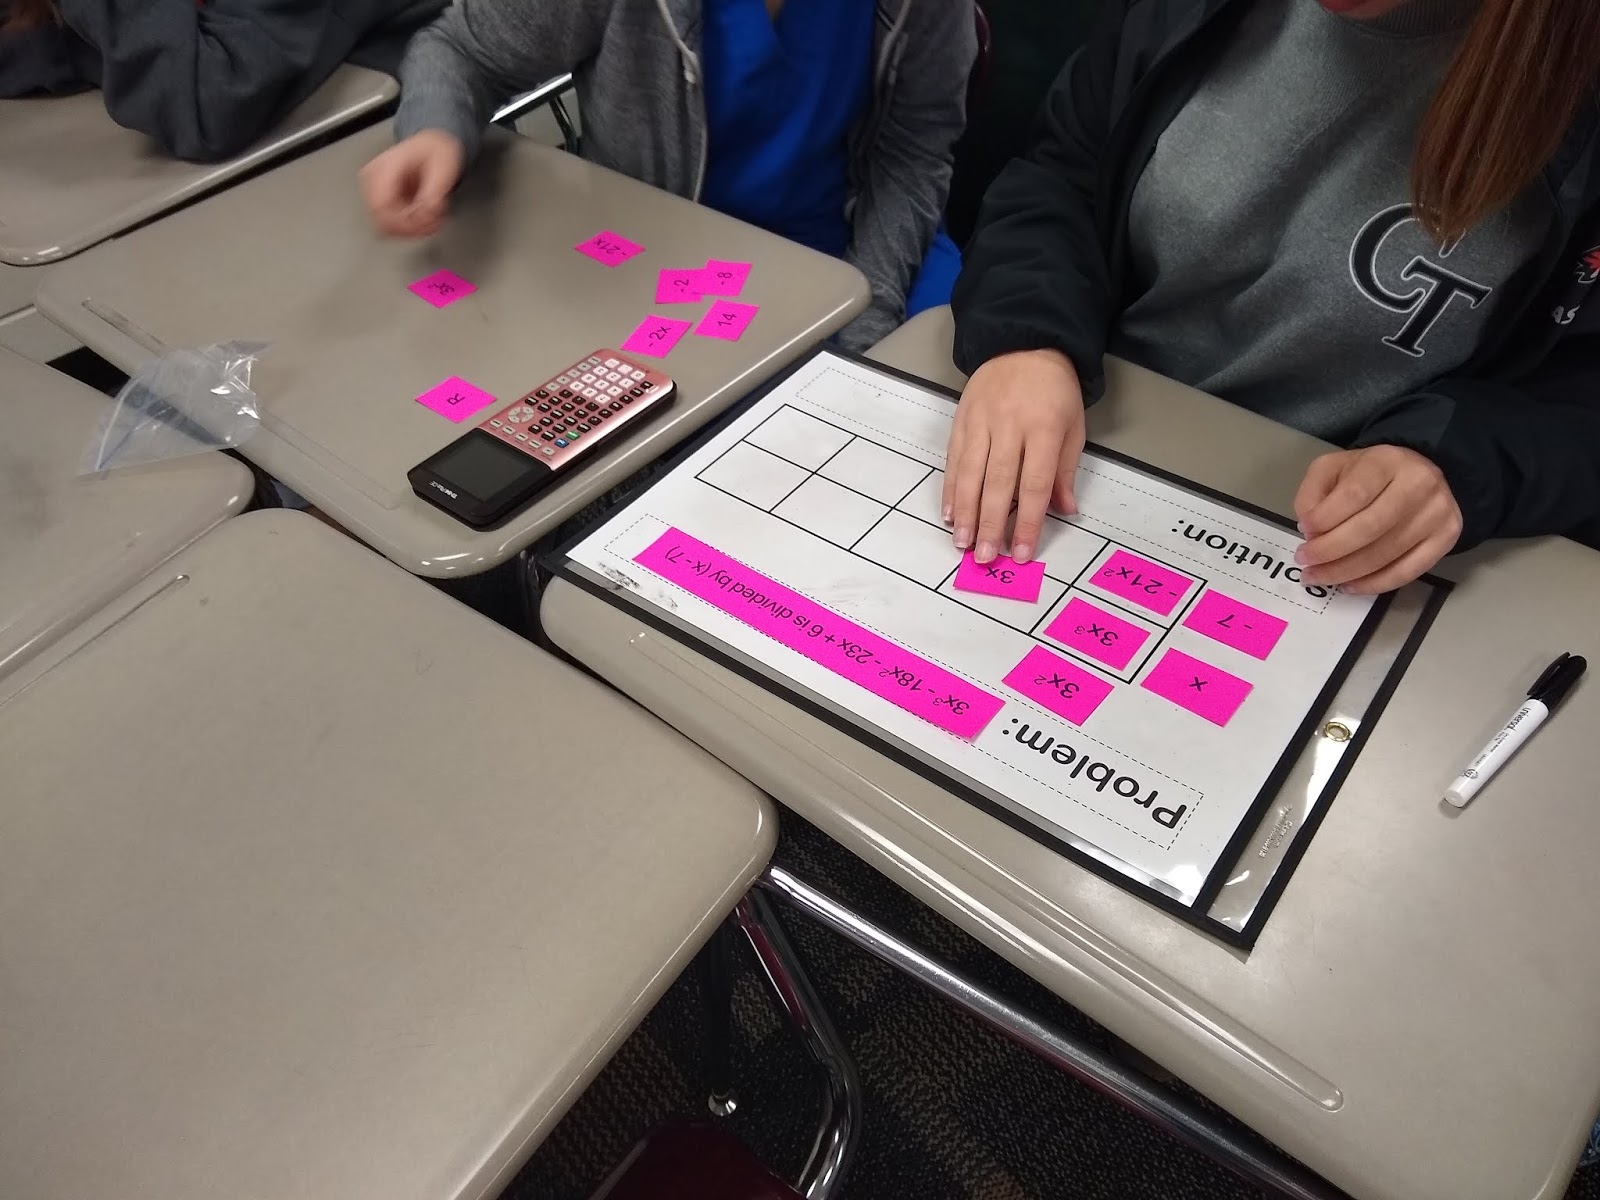
There was a lot more focus on HOW to solve the problem instead of rushing to finish.
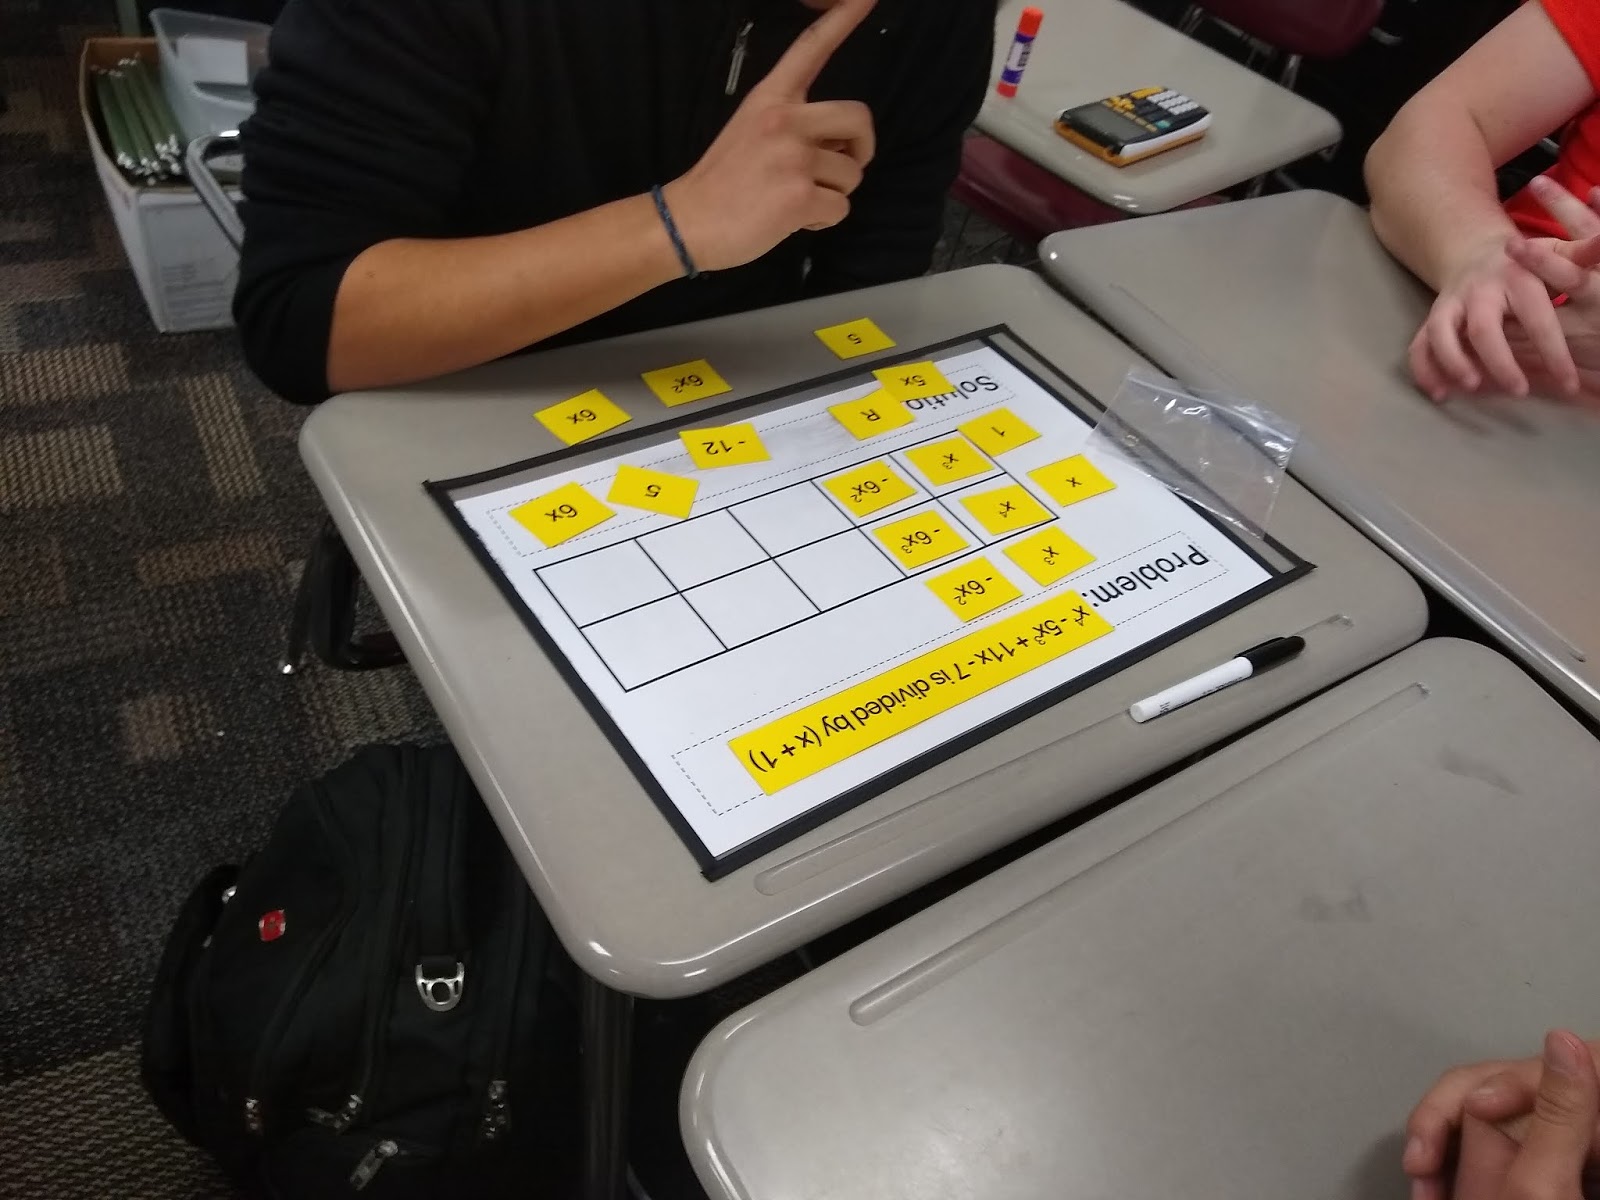
Even with the colors, I did find that after my students had finished 4 or 5 of the problems, they started to forget which colors they had not yet solved. So in the future, I think I will make a stamp sheet of sorts for groups to keep track of which colors of problems they have solved and which they haven’t.
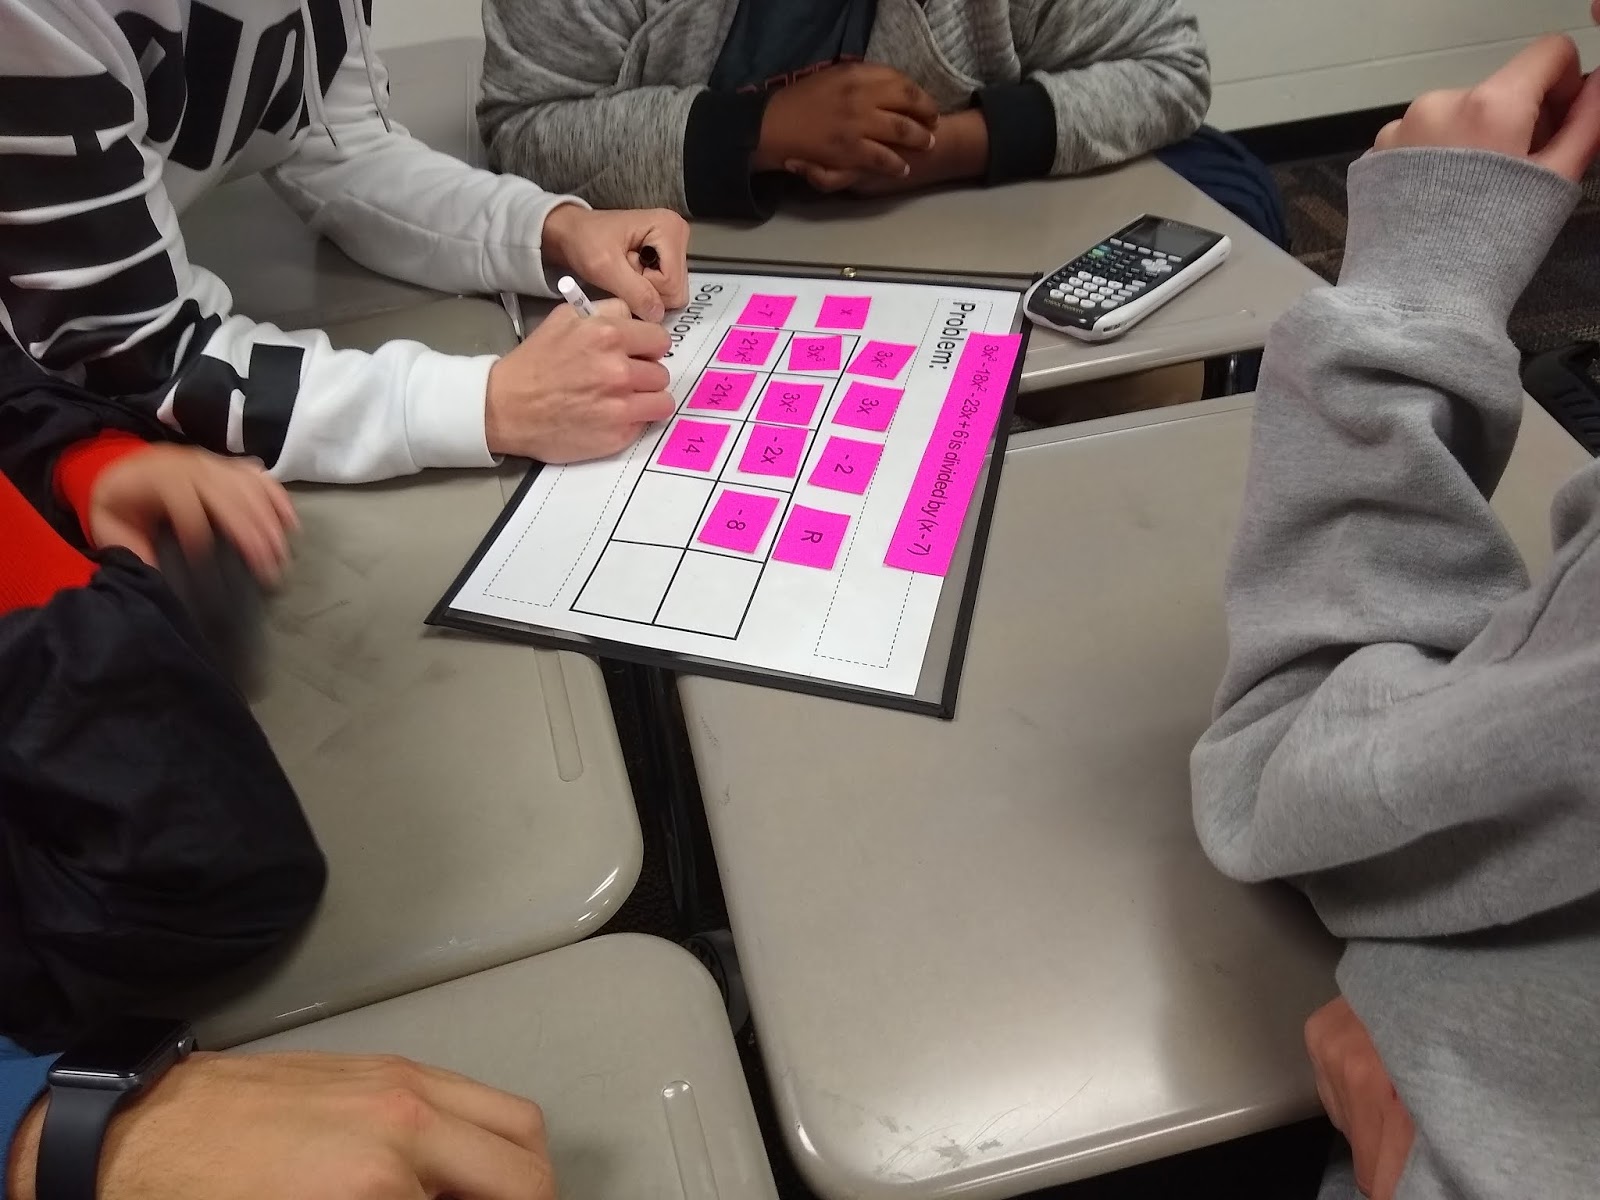
Because I was running short on time and because I still was afraid that my activity might have a few typos, I didn’t laminate these cards. They were a bit worse for the wear by the end of the day, so I will definitely be laminating any sets of these in the future for durability.
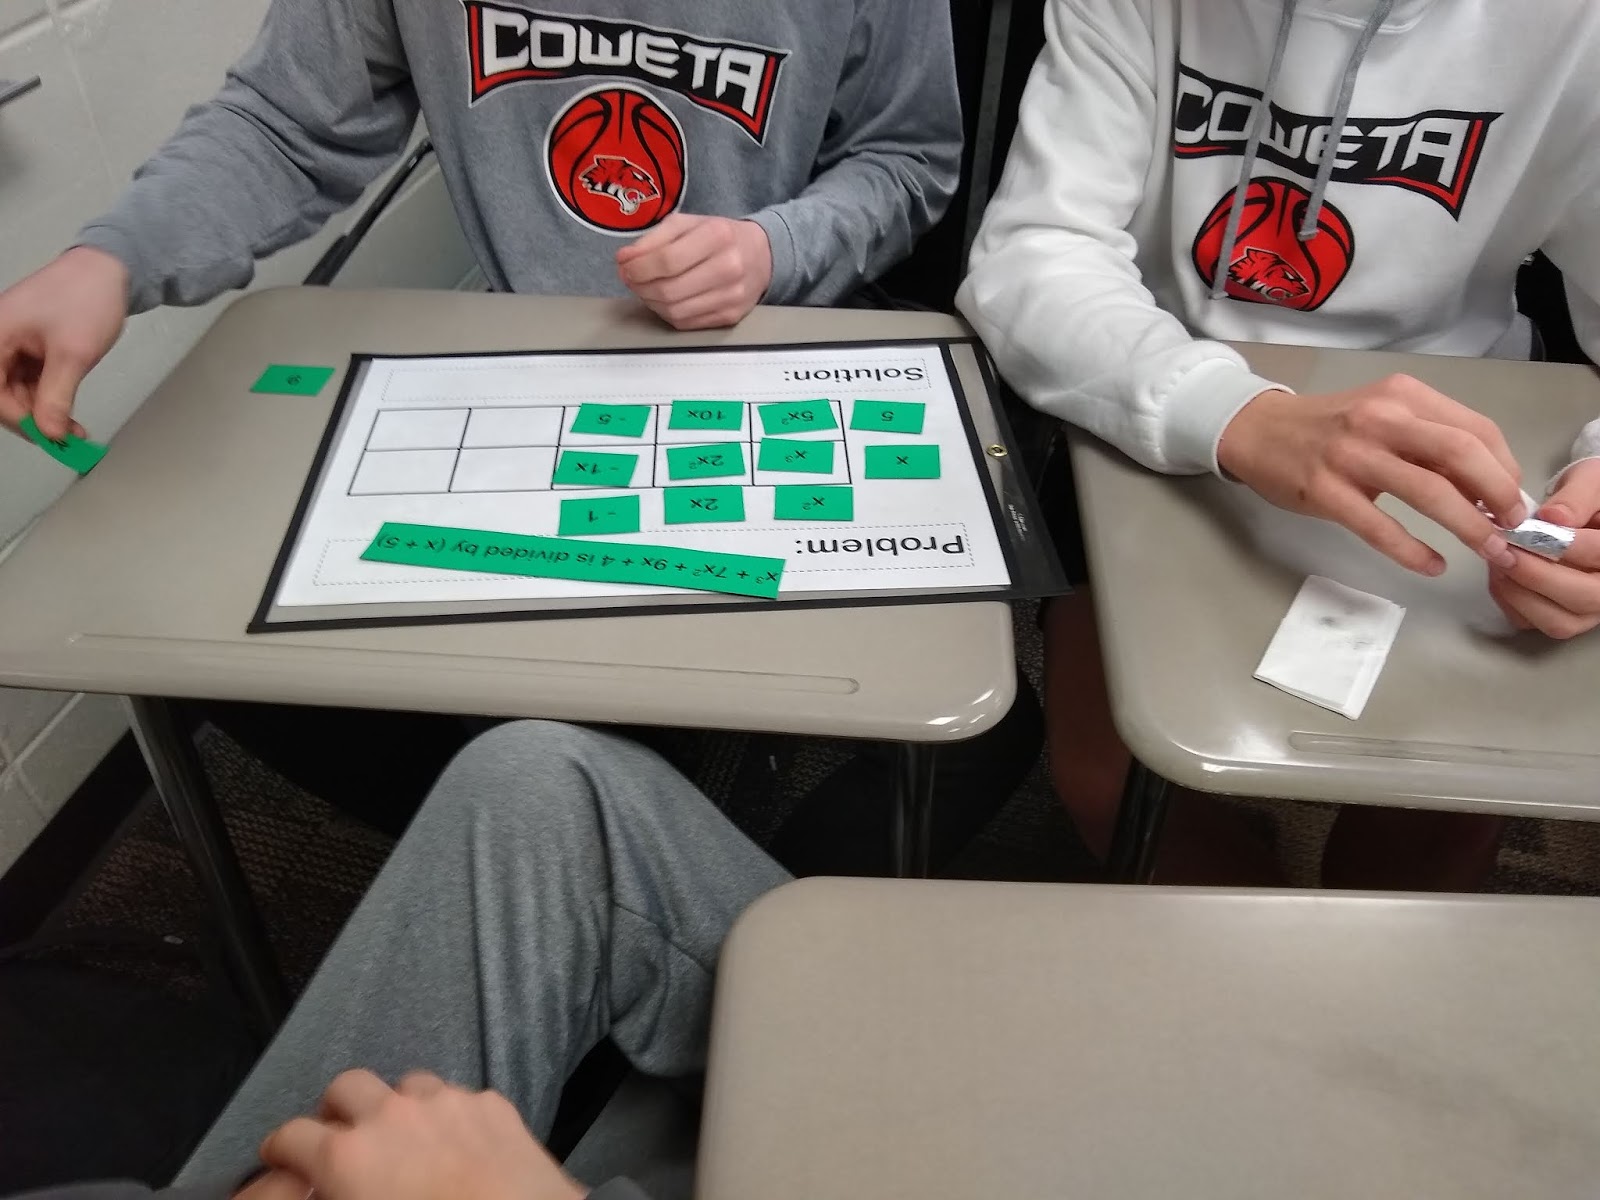
I would also like to expand the activity to feature division by a trinomial, but that will have to go on this summer’s to do list since we have finished and moved on from dividing polynomials.
Another possible modification for this activity would be to introduce some decoy cards that are not part of the solution process. As the activity is currently designed, every single card will be used for every single problem.
A slightly different twist that I have also considered would be to take several cards out of each bag that students must supply themselves via dry erase marker on the template.
I actually found that some of my groups were writing in what the terms should be in dry erase marker before they found the corresponding card to place on the template. To me, this seemed like they were just making more work for themselves, but I appreciated that they were thinking critically throughout the process.
I have also had thoughts of expanding this activity so every single student is working on their own. I think I could have done this successfully at my previous school, but I think with my current class sizes of 30 Algebra 2 students that I might go mad trying to check that many students’ work at once!
For this dividing polynomials using the box method activity, I printed my division templates on 11 x 17 cardstock.
This fits perfectly in my 11 x 17 dry erase pockets that are PERFECT for group activities. If you are looking to save a bit of money, you can also pick up a package of 11 x 17 sheet protectors for a much cheaper price! They won’t be quite as durable, but students can still write and erase with their dry erase markers.
MATH = LOVE RECOMMENDS…

I cannot imagine teaching math without my dry erase pockets! They instantly make any activity more engaging and save me countless hours at the copy machine since I can use the same class sets of copies year after year.
Here are my current go-to recommendations:
The colored cards are printed on regular letter sized cardstock. If you don’t have access to 11 x 17 cardstock or have the ability to print on it, just print both PDFs at approximately 63% scale. This will allow you to print on regular, letter sized paper. Of course, the activity will be much more appropriately sized then for individual work than group work.
I accidentally printed some of the work mat templates on letter sized paper, and my students ended up placing them in letter sized dry erase pockets and using them as templates to complete their Delta Math problems.
Students were very sad when they had to draw their own boxes to complete the division problems that involved dividing by a trinomial!
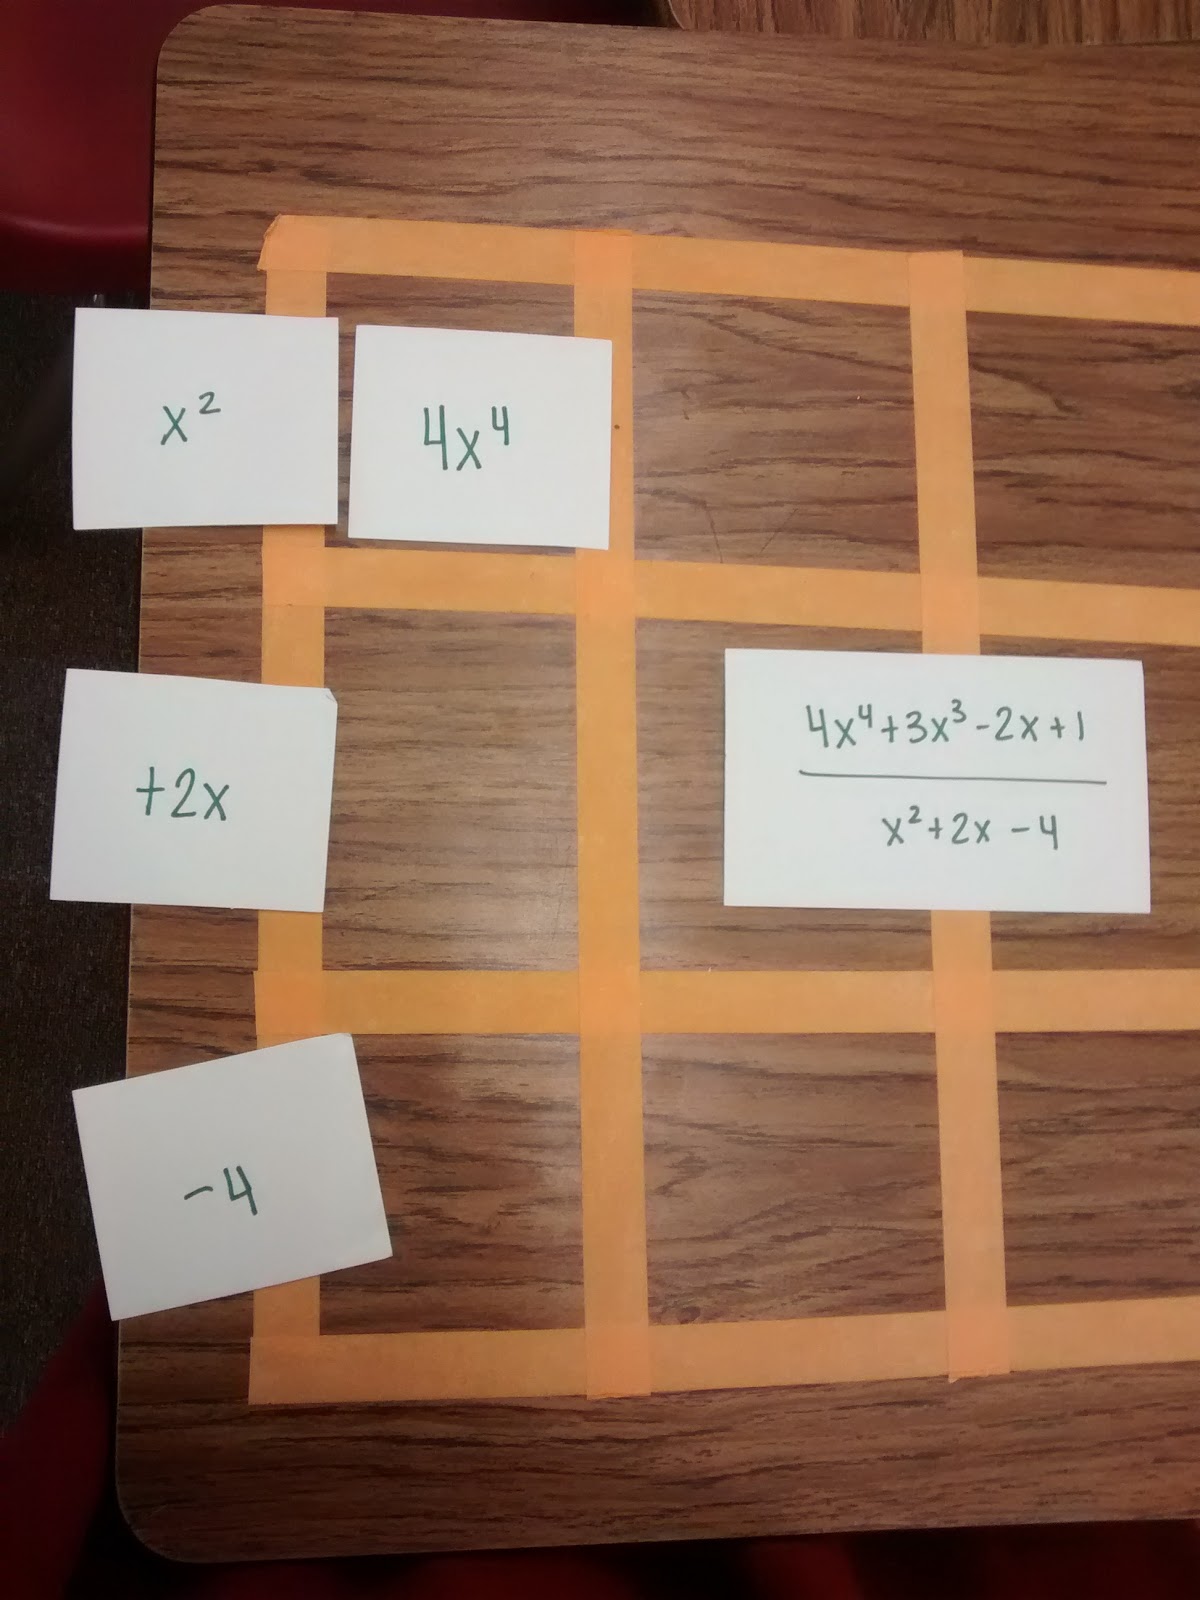
Want a little flashback to the past? Here’s my attempt at teaching the same lesson back in 2015. It was the same basic idea, but it involved handwritten index cards and a lot of time spent making boxes out of painters tape on our desks.
Before I share the files for this dividing polynomials using the box method puzzles, I do need to give some credit where it is due.
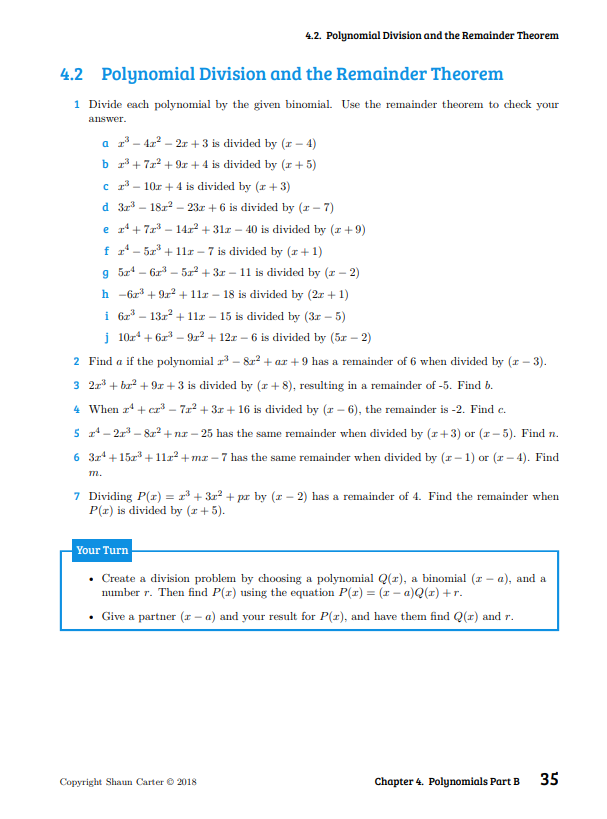
The problems that students were solving in this activity were not created by me but by my husband, Shaun Carter. They are featured in his work-in-progress Algebra 2 Practice Book.
So, thanks, dear husband, for making my teaching life easier as I made this activity to use with my students and share with other teachers.
Digital Version of Activity
Liz Mastalio has digitized this activity to help introduce students to the box method.
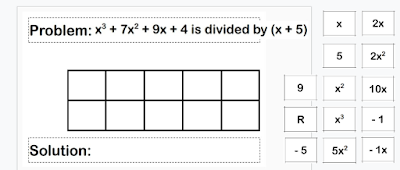
You can find Liz’s digital version here in Google Slides.
Dividing Polynomials Using the Box Method Puzzle Files
Click here to SAVE the file to your device.
Dividing Polynomials Puzzles (PDF)
2688 saves – 28.62 KB



Cool! I'm currently teaching my Alg 1 kids to factor trinomials with the box method- they love it and now I can say it will help them in Alg 2 some day!
Love it. Trying to spread the word on using this method. We call this the area model or length width model and can expand to length width height model for cubics and can model using base ten blocks as well.