Prime Factorization using the Birthday Cake Method
Today I want to share with you a new method I learned for teaching prime factorization called the birthday cake method.
Before I became a teacher, I sometimes battled fears that teaching could be boring. After all, once you’ve mastered high school math, there’s not much new to learn. Well, there might not be any new material to learn, but I am constantly learning new ways to approach and present concepts. And, it is anything but boring.
As a student, I learned to find the prime factorization of a number by creating a factor tree. This always worked perfectly fine for me. During my student teaching at the middle school level, there was an amazing math teacher next door who invited me to sit in her class one day to watch a specific lesson. The lesson was on simplifying square roots.
Different teachers approach simplifying square roots in different ways. Some teach their students to factor out all of the perfect squares. Other teachers ask their students to write out the prime factorization. Personally, I tend to use the first method for small numbers and the latter method for larger numbers.
Like I said earlier, I learned to write the prime factorization using a factor tree. I like factor trees. But, I’ve noticed that sometimes branches of the factor tree can get lost if students are not very careful. And, I have a lot of students who tend to rush and lose things along the way. Or, they write so sloppily that it’s near impossible to follow their work.
So, when I saw this middle school teacher teach the students a different way to organize their prime factorization, I got really excited. It’s called the birthday cake method. Instead of searching the sprawling branches for the prime factorization, the birthday cake method lines the prime factorization up in the same exact spot every time.
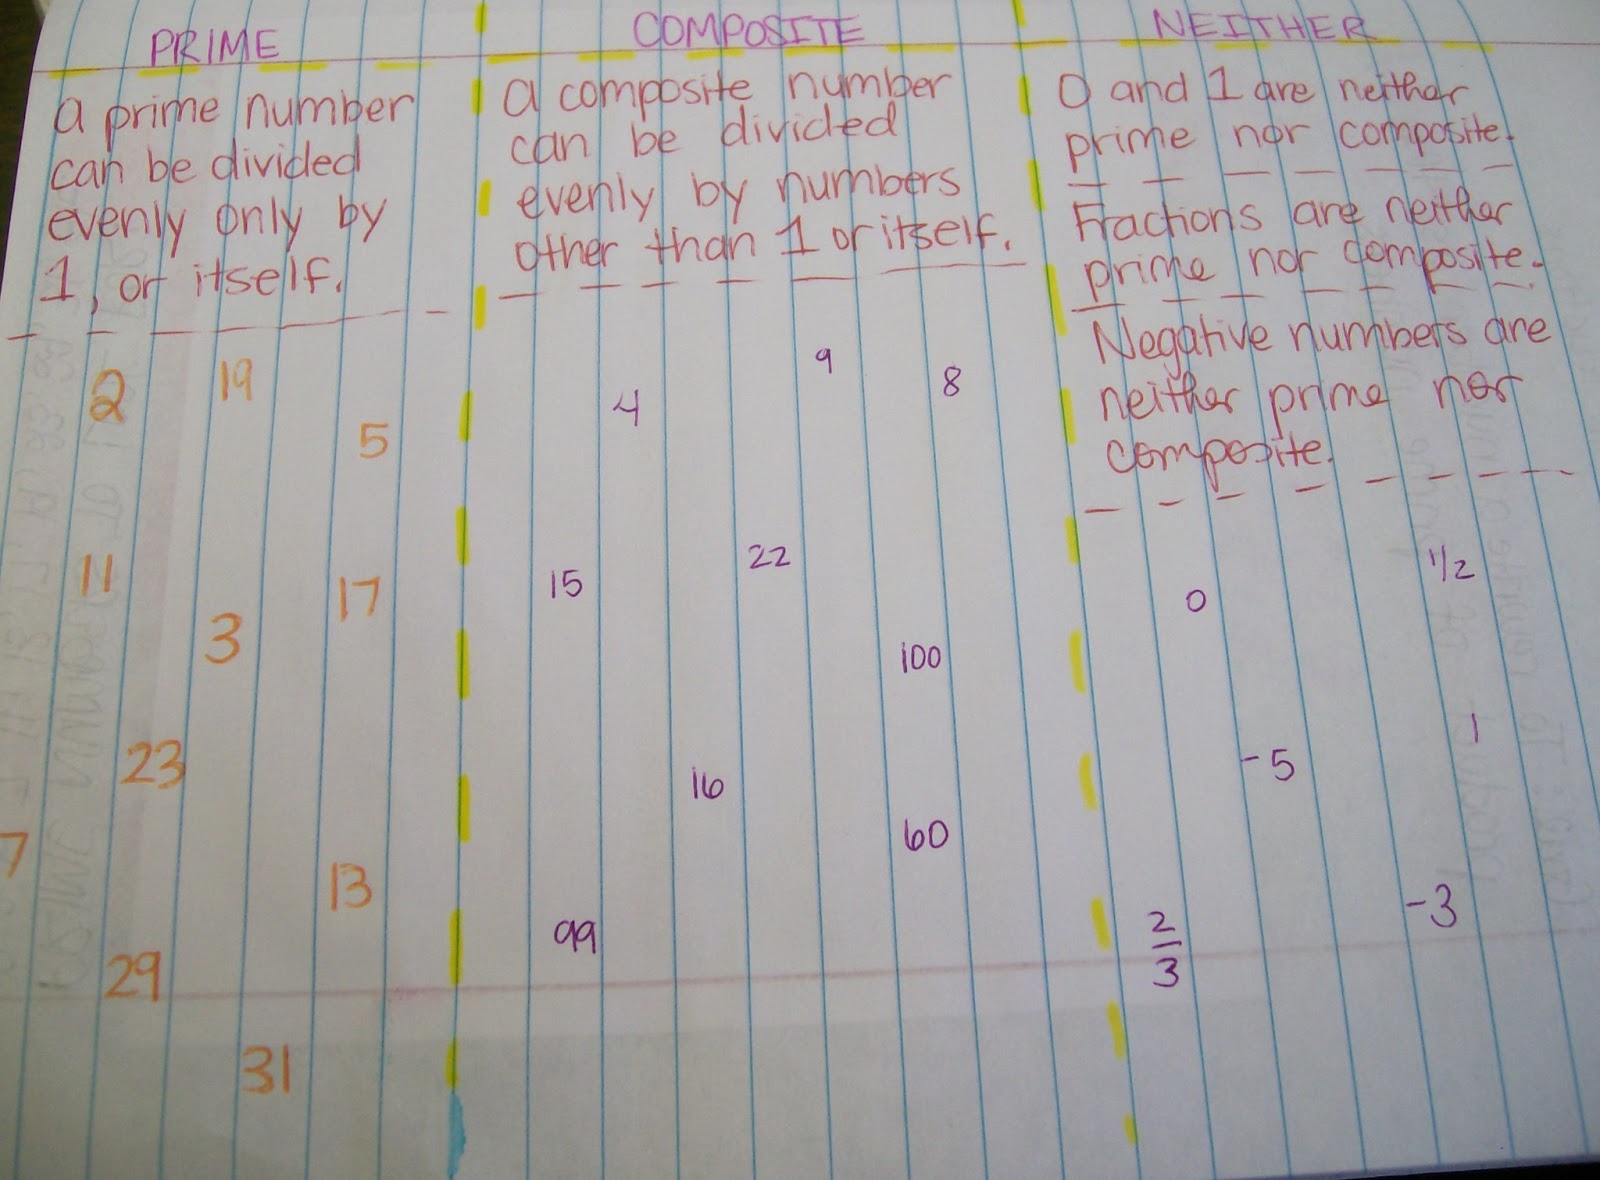
Students do need to be able to identify numbers as prime or composite before starting. To review and practice this, we created a chart in our interactive notebooks with the definition for prime numbers and composite numbers. Looking back, I wish I would have created a graphic organizer for this. Maybe next year…
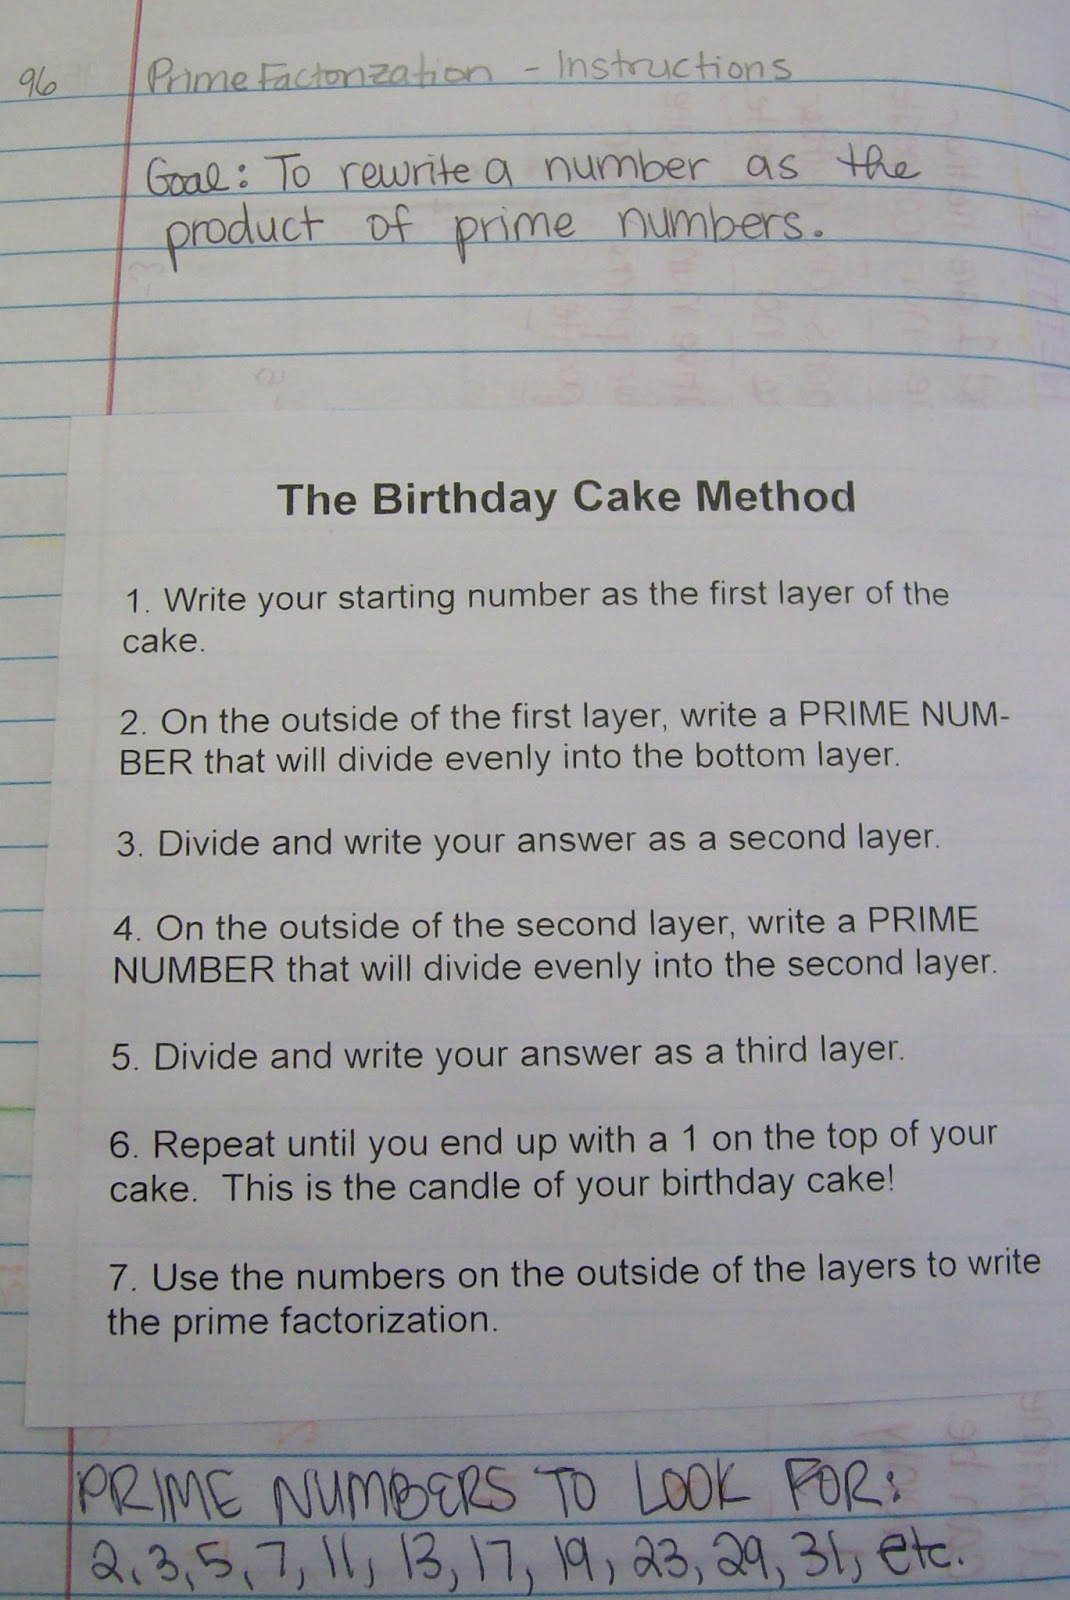
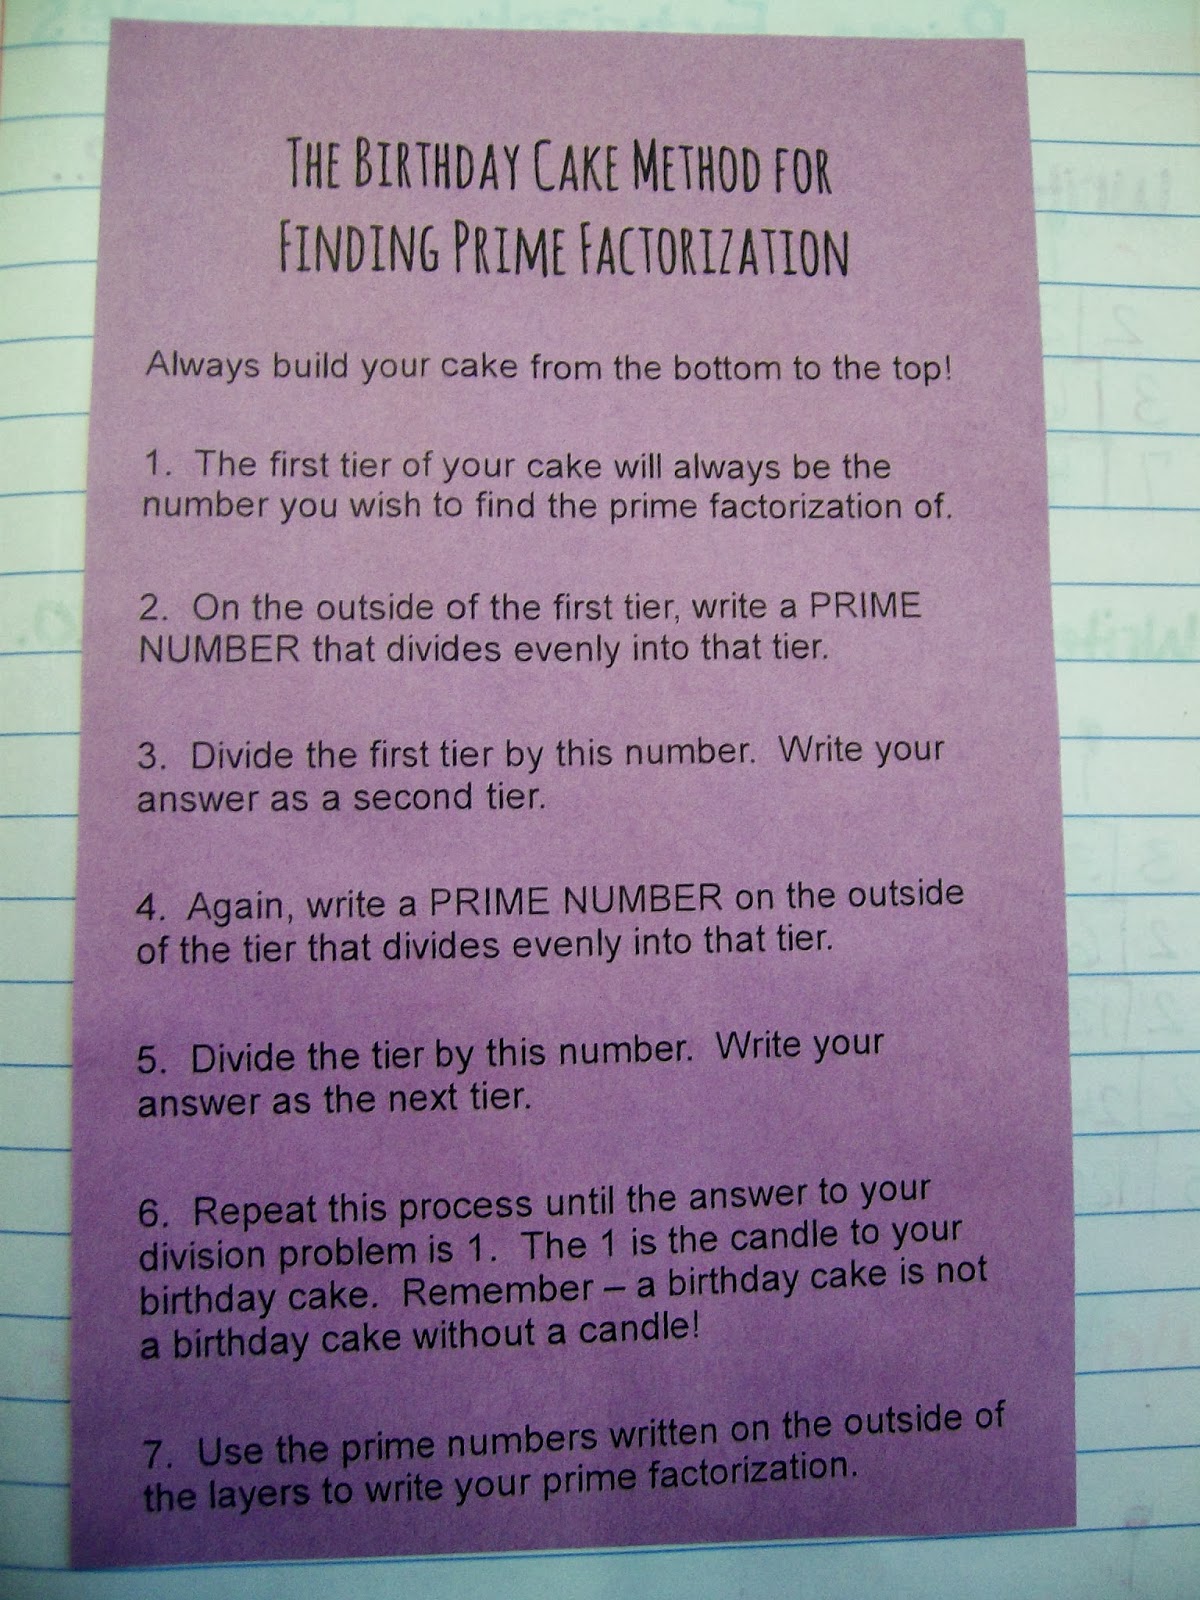
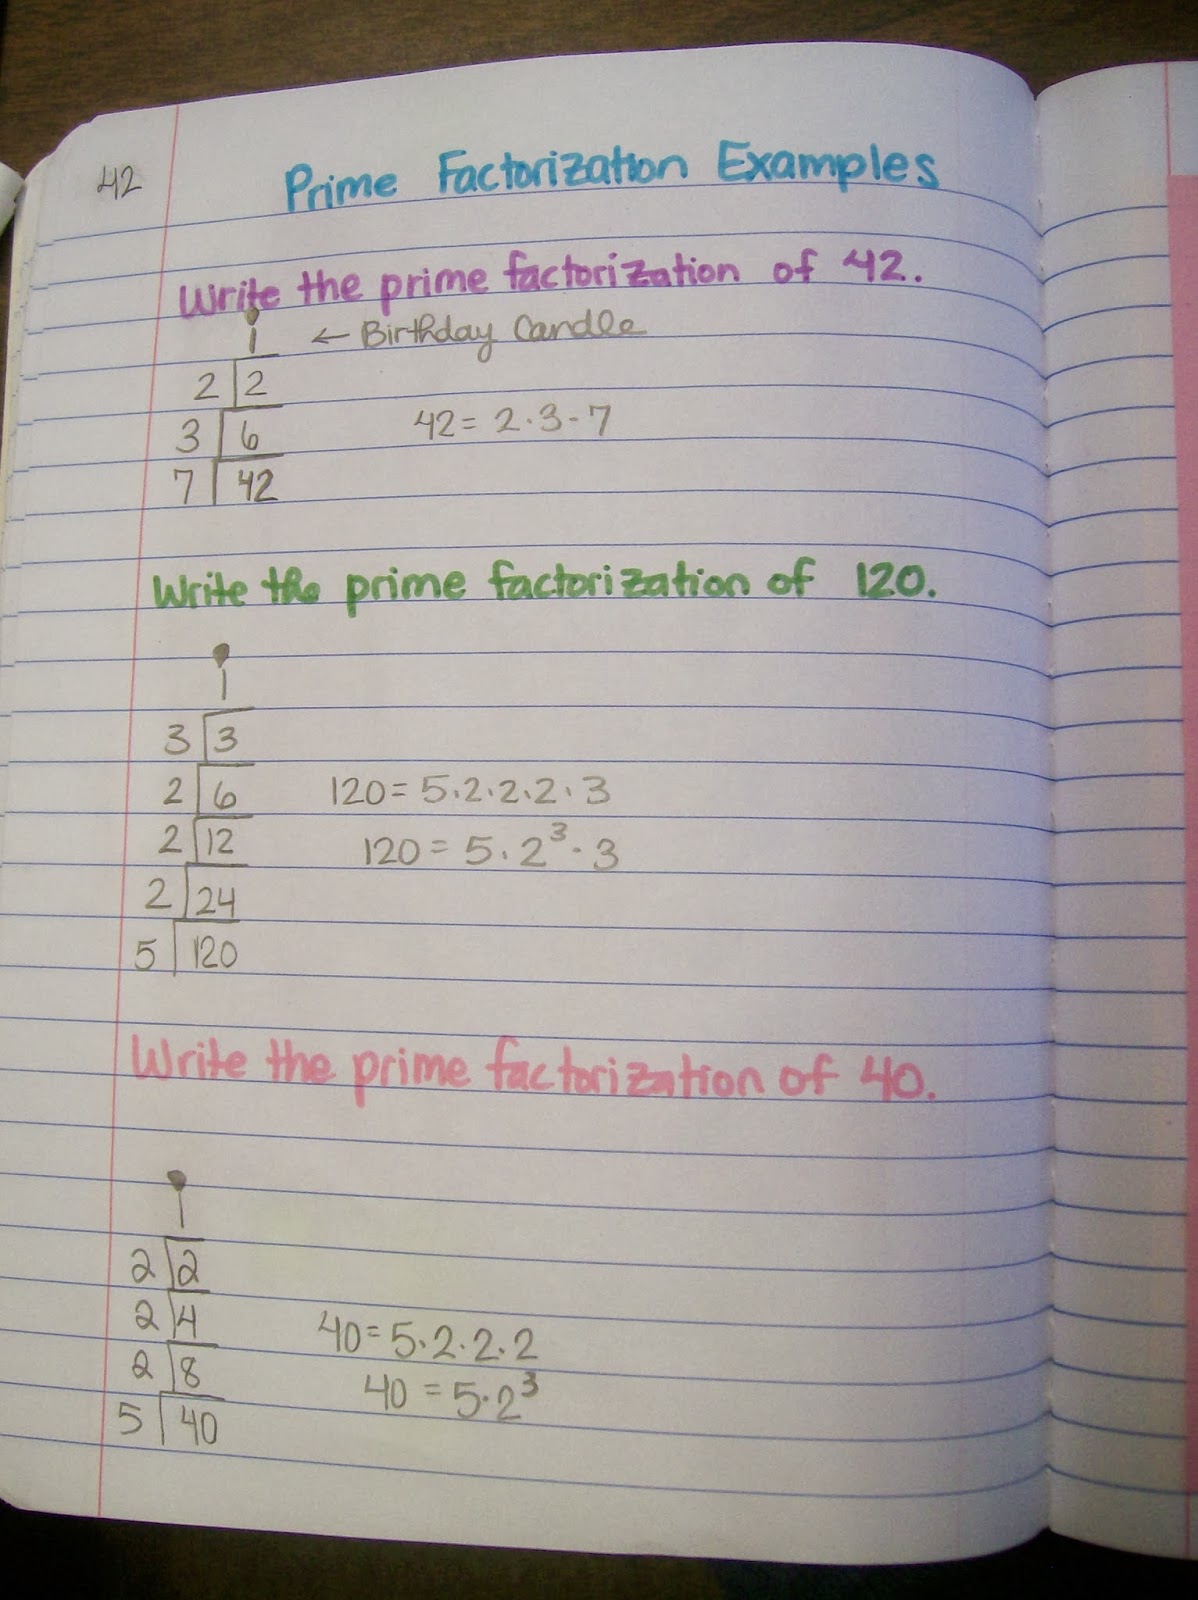
Once students could identify numbers as prime or composite, I taught them the Birthday Cake Method to find the prime factorization.
Birthday Cake Method for Prime Factorization
- Step 1: Write your starting number as the first layer of the cake.
- Step 2: On the outside of the first layer, write a PRIME NUMBER that will divide evenly into the bottom layer.
- Step 3: Divide and write your answer as a second layer.
- Step 4: On the outside of the second layer, write a PRIME NUMBER that will divide evenly into the second layer.
- Step 5: Divide and write your answer as a third layer.
- Step 6: Repeat until you end up with a 1 on the top of your cake. This is the candle of your birthday cake!
- Step 7: Use the numbers on the outsides of the layers to write your prime factorization.
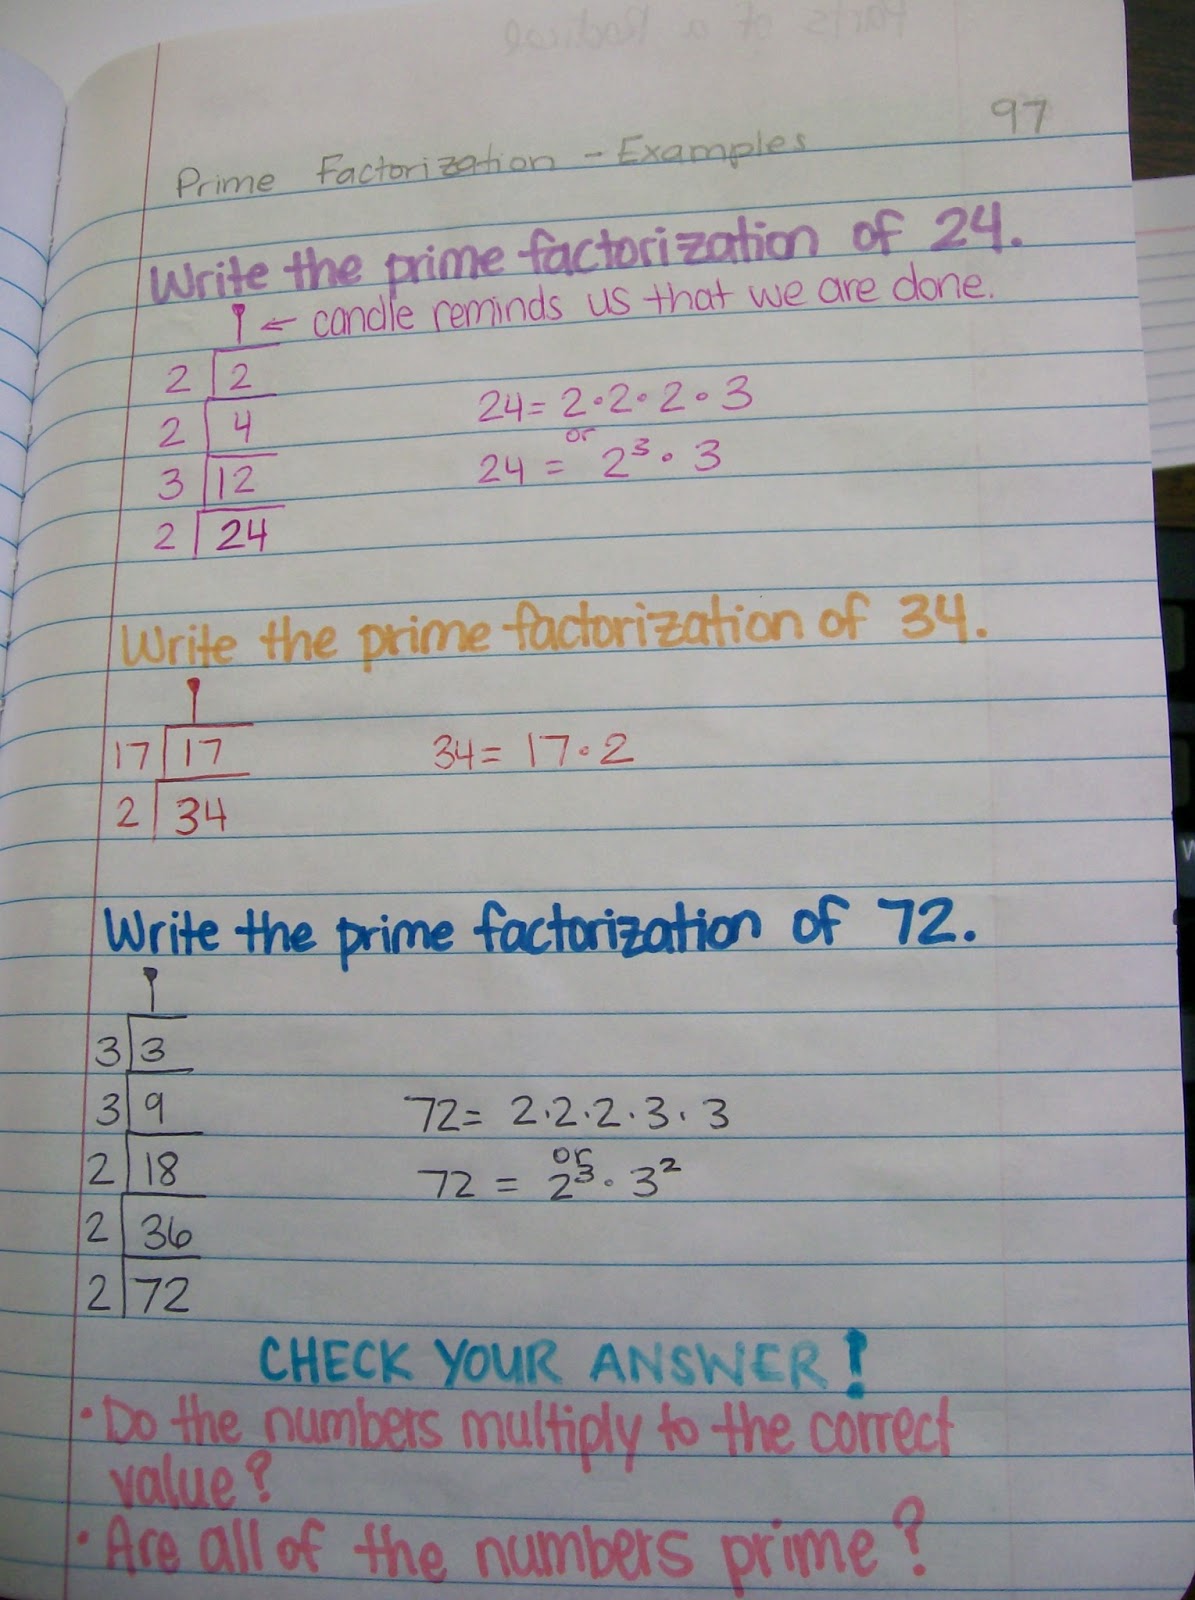
When I did this same lesson with my Algebra 1 students, I formatted things a bit differently.
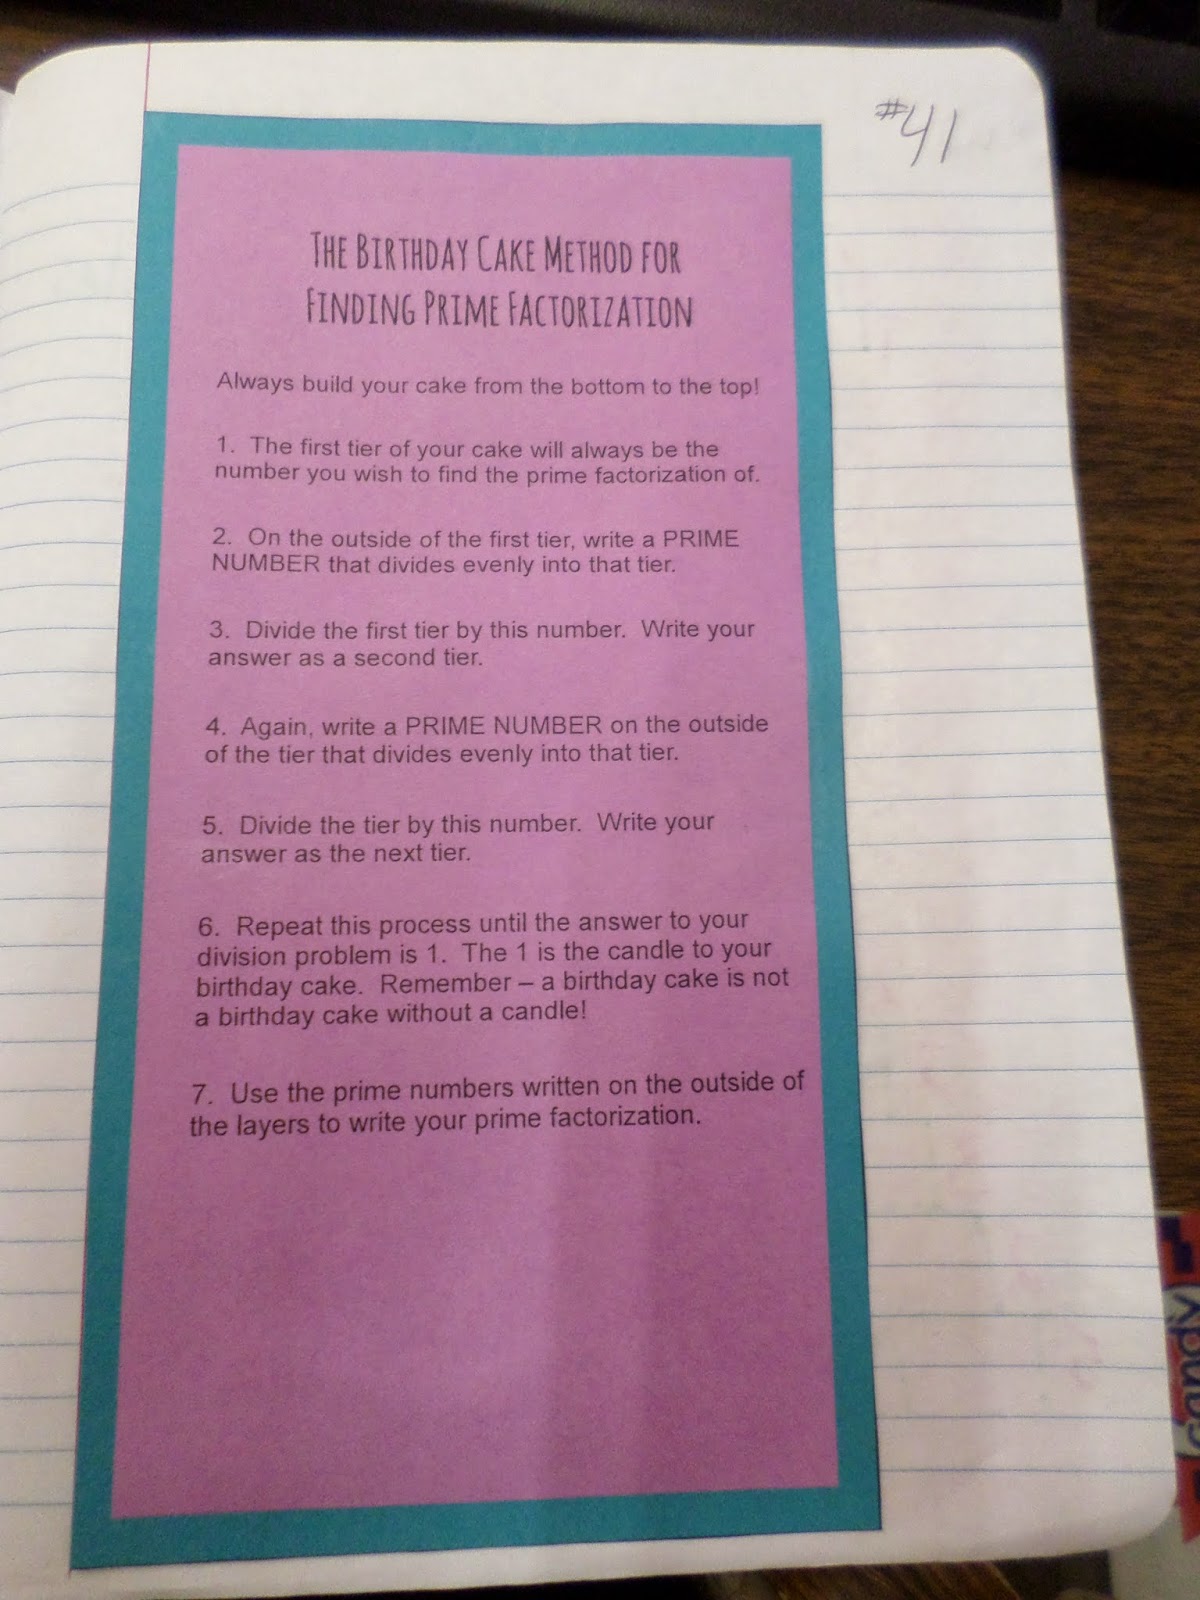
One of my students even “matted” her notes.





So glad I was up a little early this morning and exploring various math blogs. This is my lesson for today! And I had planned to do factor trees … but instead I will do the "birthday cake!" I have used the method before but not the cute name … which surprisingly makes all the difference in the world! Thanks for posting … I'll let you know how it goes.
I'm looking forward to hearing how it goes! Thanks for the comment!
I've done this before, but not with the candle 😉 I will call it the birthday cake now! Thanks!
Meredith
http://www.sanders6thgrade.blogspot.com
My students try to act like they are too cool to draw the candle, but they sure are quick to get on to me when I forget to make my 1 into a candle! So excited to discover a new (to me) blog! I just started looking through all of your posts, and I've already found a few ideas that I can't wait to modify for my high school students. Thanks for stopping by my blog!
Cool! I'd never seen that before – good to have more than one tool in the toolbox. Congratulations on finishing your first year of teaching!
I love finding new strategies from other blogs. So, I figured that since this strategy was new to me there had to other teachers who could benefit from it as well. Thanks for the congratulations. This year has definitely been an adventure. And, I can't wait to experience and blog about year two!
Sarah, I LOVE your blog! I've been telling everyone about it! I'm teaching Algebra 2 this year (after teaching 6th grade math for 4 years). I've done the birthday cake, which I love, but what about for GCF and LCM. Do you know of any tricks to help with 3 numbers?
Thank you!!
You can use the cake method for GCF and LCM! Put the original numbers that you're working with (2 or 3 or more) as the first layer of your "cake." Then, factor out prime numbers on the left hand side. I have students stop when there is no longer a prime factor that "goes in" to all the numbers. (No birthday candle "1", unfortunately.) All the prime numbers on the left are common factors, so their product is the greatest common factor. To get the LCM,multiply all of the prime numbers on the left multiplied by the "leftovers" on the top. The only challenge with this method is that students have to be able to be confident with finding common PRIME factors. It can work really well. Any ideas out there for fun activities for practicing these skills?
Thanks for sharing! This is a topic I've never taught before. Very interesting!
I was talking to the special ed teacher who mentioned seeing this method in the past – and sure enough, I am changing how I'm teaching this today.
It has really changed my teaching!
I love this method. It's different. Thanks!!