Conic Sections Foldable
This blog post contains Amazon affiliate links. As an Amazon Associate, I earn a small commission from qualifying purchases.
I want to share a conic sections foldable I created with you today. If you’ve been reading my blog lately, you probably can tell that I’m a conic section convert. I’m a conic section hater turned a conic section lover. Confession time. Before this school year, I didn’t really know why they were called conic sections. Maybe you’re thinking, “Duh, Sarah! It tells you in the name!” Or, maybe you’re like me and you never made the connection. Conic means “of or pertaining to a cone.” Every single conic section can be formed from a cone. How did I not see that before? I guess I never really questioned why they were called conic sections when I studied them in high school.
This isn’t the first obvious connection I’ve failed to make. A couple of weeks ago, I was in my car, driving to visit my parents. One of the roads that I grew up around in Broken Arrow is known as “County Line Road.” Well, technically, it’s 193rd E Ave, but everybody just calls it “County Line.” As I was driving down an entirely different road, I had an epiphany. It’s called County Line Road because it follows the county line between Wagoner County and Tulsa County. How in the world did it take me 24 years of my life to figure this out? It should have been obvious. I was so excited about the realization that I had to call my mom and tell her about my discovery. Instead of laughing or making fun of me for taking so long to realize this, she commented, “Well, I guess you’ve had more important things to think about than the names of roads.” Thanks, Mom! But, I still think I probably should have realized this sooner than I did. Apparently, my sister had realized this because she was less than impressed with my recent discovery. Her reaction was more along the lines of: “How in the world did you not know that?!?” It happens, okay?
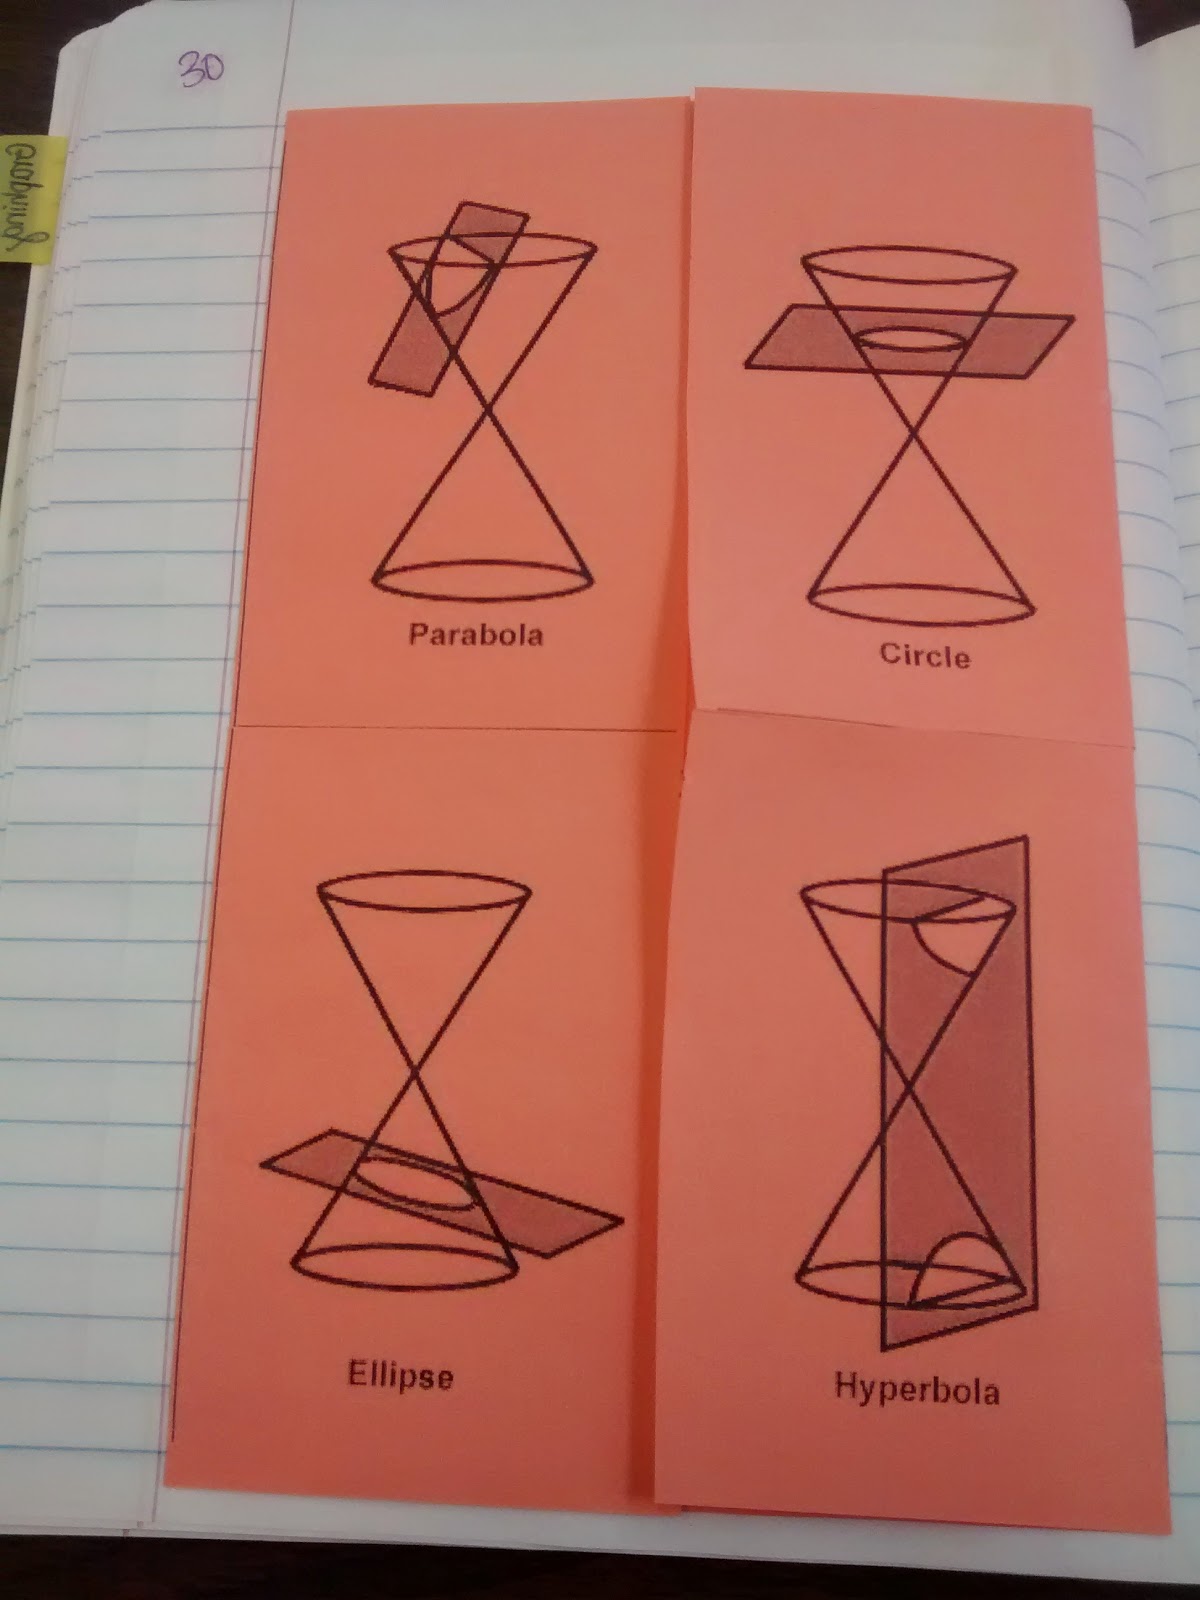
Since I didn’t want my students to be like me and go throughout high school, four years of college to get a math degree, and a year of teaching without realizing exactly what conic sections were, I designed this conic sections foldable to put in their interactive notebooks.
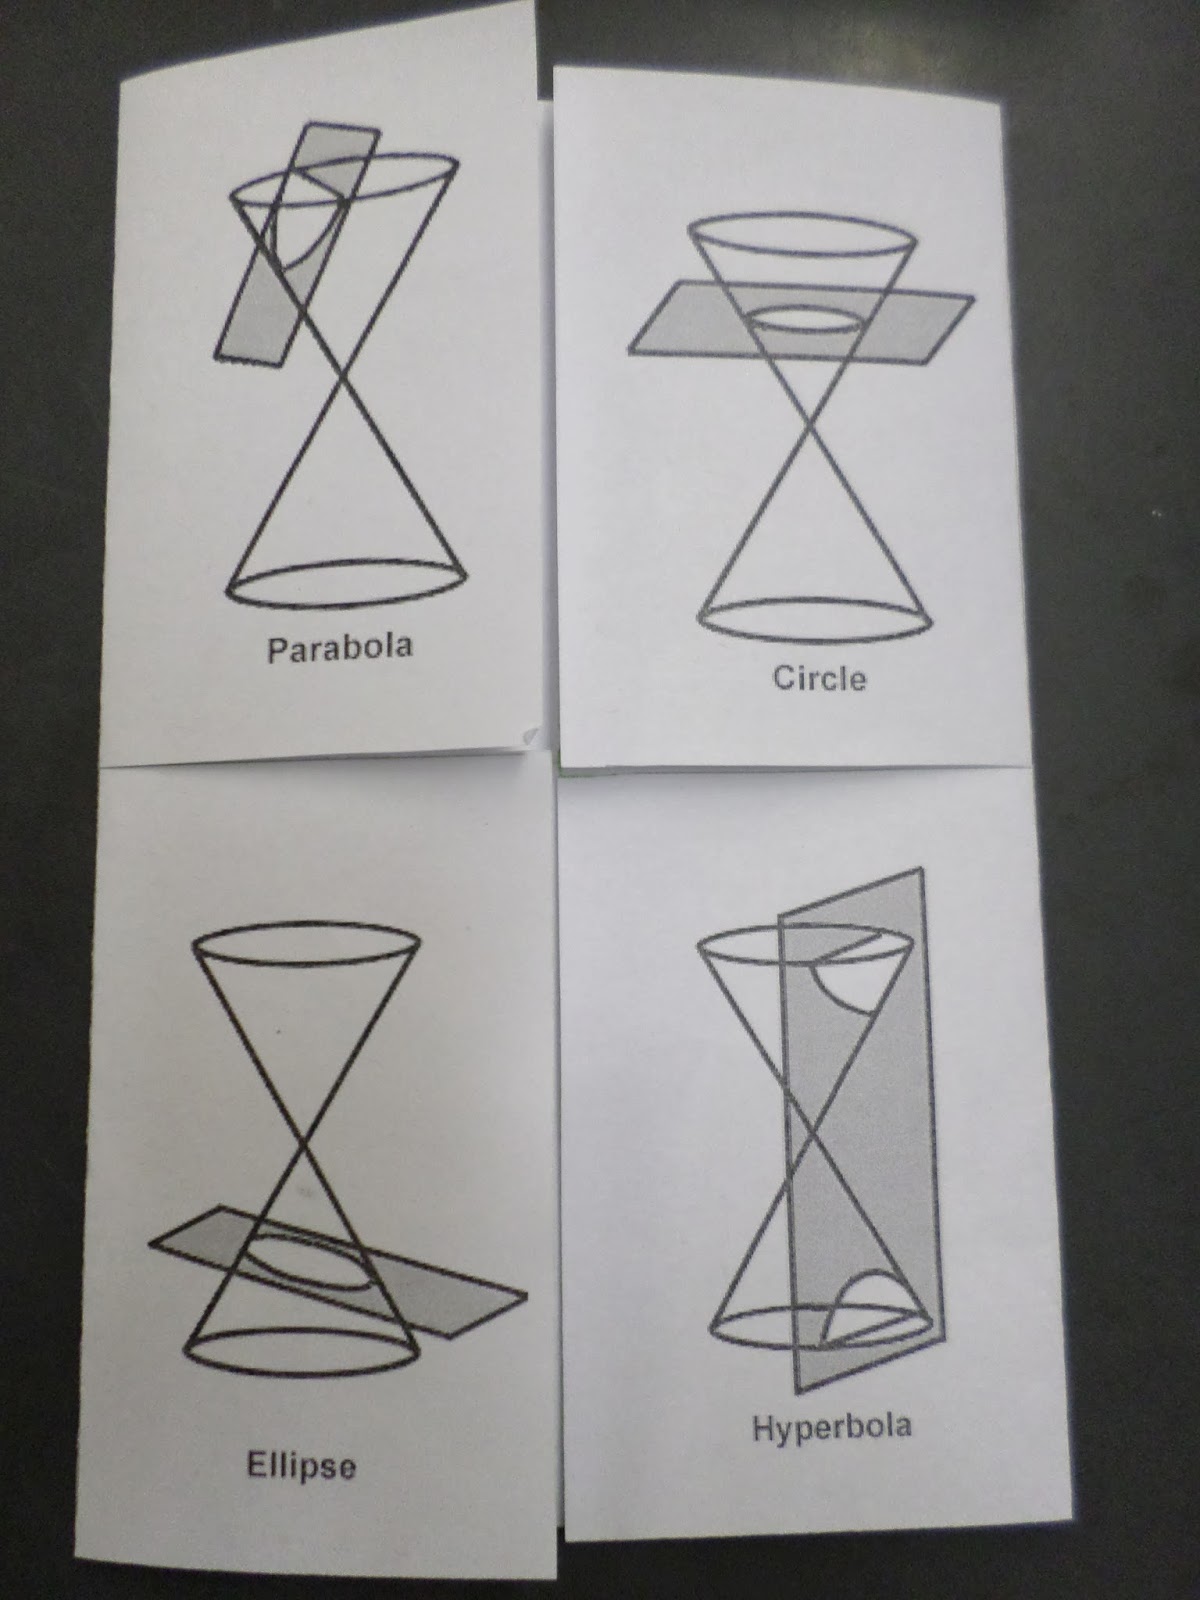
I stole some pictures from online that show how each conic section is created by taking the cross section of a cone. And, I put these on the outside flaps of the conic sections foldable.
On the inside, I decided to steal an idea I had seen online. Take paper cones (think snow cones), cut them to form the conic section, dip them in paint, and stamp the conic section. I was going to have students work together in groups of 4. Each student would be responsible for cutting one conic section. All the students would stamp the cut cone in the correct section inside their foldable to form the conic section.
Other people have done it. I read about it from Miss Ruldolph. And, I originally saw the idea on Walking In Mathland. Seriously, you need to follow these links and then come back here to read about my adventures. I promise. It’ll make a lot more sense if you do!
The day before I wanted to do this in class, I decided I needed to go to Wal-Mart and buy some paper cones. Did I mention this was back in late January? Either I was looking at the wrong place in the store OR it’s a seasonal item. All I know, is I couldn’t find the paper cones at two different Wal-Marts. Of course, in retrospect, maybe I should have looked in the sporting goods section where they sell water jugs and the like.
It’s okay, I thought, paper cones are just made out of paper. So, I printed off some cone templates on card stock, cut them out, and glued together several cones. So far, so good, or so I thought. Then, I went to cut them. I figured I would start with the circle because it looked to be the easiest. I squeezed the cone shut, made a straight cut, and opened the cone back up to find that I had most definitely NOT made a circle. I tried again. And, again, I ended up with something that was not a circle. I tried cutting an ellipse. It didn’t work any better. The parabola came out looking like a hybrid between a quadratic function and an absolute value function. And, let’s not even talk about the hyperbola.
Obviously, it can be done because I’ve seen it on other blogs. But, I couldn’t figure out how to cut the cones so they actually formed the conic sections. Needless to say, I ended up scrapping this idea and just jumping into the formulas for various conic sections. If anyone has some advice for how to actually cut the cones, I’d gladly take it. I feel like I must be overlooking something obvious. I think my problem is that I’m squeezing the cone shut before I cut it. But, I’m not sure how to cut the cone without squeezing it shut first. Help!
But, I thought I would go ahead and post the conic sections foldable I created in case it would be of use to anybody else. I planned on having my students stamp conic sections on the inside. But, I guess you could have your students write formulas or work out examples on the inside of the conic sections foldable.
In later years, I used this as a place for students to summarize what they had learned about each conic section.
Yes, yes, yes. I read one of the posts, bought a sleeve or two of the paper cones (they were water cooler cones) at a local store, and came home to try it. I made it through a few cones before I realized how futile the whole exercise was. I know if I can't do something cut/paste/fold related on the very first try, then it's not something I am going to frustrate my students with.
You should get a copy of Donald in Mathemagic land. (Yes, it's on YouTube, but the DVD is less than $10 on Amazon- totally worth it.) There's a clip within it about conic sections that shows the cone being dissected. It's an awesome 27 minute math video and despite its age, it's really intriguing for students, especially the billiards scene.
I remember watching Donald in Mathemagic Land in 9th Grade Geometry! I'm going to have to look it up again. As always, thanks for your helpful comment, Kathryn!
Don't feel bad about the conic section realisation – I never knew that until I started homeschooling my kids. Who knew that they were all about cross-sections? Certainly not me in high school!!
I thought when I started teaching algebra that there was nothing new to learn. I've been proved wrong so many times!
I also have been thinking about how to cut the various sections from a paper cone. My idea was to print a paper template, cut it out and roll it up into a cone, then mark the cut lines using a marker. I'd then unroll the cone, cut on my marks, then fasten the cone back together. I figured I'd need a separate set of cones for each of the conic sections, but if the templates were small enough to do 2 cones per sheet…
To make marking the cones easier, I thought about using a stack of books on the tabletop as a marker rest while rotating the cone (circle), resting the tip of the cone on another book until the cone side was parallel to the tabletop, then rolling the marker along the table to make the mark (parabola).
You, sir, are brilliant! I'm determined to figure this out this summer. And, I can't wait to try some of these ideas. I love the idea of the paper template with the cut line already marked!
Thanks, as always, for your insightful comments!
If you just want the stamp, you could try buying Styrofoam cones at a craft store and slicing them ahead of time instead of using paper so they can be dipped in the paint. Be careful with the paint though because some types shrink Styrofoam.
I like this idea, but I think the janitor might hate me. I can see little bits of Styrofoam everywhere! 🙂 I think I'm going to try it this summer to see how it works. Thanks for sharing!
I too tried this activity and failed. I saw a video on youtube with a flashlight that was pretty good. Good luck!
SO glad I'm not the only one! 🙂 I like the applet! And, I'll definitely check out the flashlight video on youtube. Thanks for sharing!
Thanks for your story on conic sections.. I have been an engineer for over 30 years…many kids learn about cones but don’t see how they apply in our world….planetary orbits, satellite motion in the sky, how light beams are designed in car headlights, mirrors and lenses in telescopes and microscopes, how sound travels in water, in air, GPS in our phones. A lot of the point and click functions in our smart phones make use of conic properties. Keep being fascinated about math. Its properties are found in everything we use!
Thanks for the comment! I didn't know how many things were influenced by conic sections. This will be great to share with my students next year when they complain about why we have to learn about conics!
I think the reason it didn't work is that you flatted the cone before slicing. Then, if you open the cone back up would the cut surface fit "flat" on your desk? If not, then you didn't truly cut across the plane. Just a guess?
I think you're probably right. I just can't figure out how to cut the cone without flattening it… 🙂
How about a solid cone made out of play-dough or clay? Students could use children's play-dough tools, plastic knives (maybe?!), or very heavy string or wire to cut thin slices?
I think I'm going to have to try this! Thanks for the suggestion!
Just saw this post! I tried it with play-doh before and it was pretty good! You just need a good enough knife so that when you cut, you don't actually squish the dough into another shape..
Thanks for sharing!
I did a similar activity with my students while student teaching using play dough- it worked well- granted we weren't stamping them so it was alright that each slice didn't come out looking exactly like a circle- just that it was more circle like than ellipse like.
Play-doh is a great idea!
One of the teachers in my building bakes cupcakes in those paper cups and has the kids cut those. I'm trying it next week! Also check out the Evil Mad Scientist's Sconic Sections, which is the same idea with a scone recipe instead of a cake mix. https://www.evilmadscientist.com/2013/sconic-sections/
Brilliant! Thanks for sharing!
Try modelling clay and cut with jewelery wire. I might try the cupcake idea for some fun.