Wax Paper Parabolas
This blog post contains Amazon affiliate links. As an Amazon Associate, I earn a small commission from qualifying purchases.
I’m excited to introduce you to wax paper parabolas!
This year, my Algebra 2 interactive notebooks are easily a hundred times better than last year’s Algebra 2 notebooks! I’m serious.
Last year, I did a pretty good job with Algebra 1. And, Algebra 2 sort of got the short end of the stick.
This year, I made a commitment to put in extra time to make sure our Algebra 2 notebooks were well thought out and comprehensive.
I feel like the way I am approaching my Algebra 2 class this year is also way better. Of course, there are a lot of things that I would like to change and do differently next time. I’m still not entirely satisfied with the ordering of my units.
They don’t exactly flow into one another the way I would like them to. Next year, when I teach to the CCSS (or Oklahoma Academic Standards – my state decided they needed a new name) for the first time, I will have plenty of opportunities to change things up! I’ll start stressing over that this summer.
As a high school student, I was smart. Really smart. I was valedictorian. I made it my goal to make the highest grade in every single class.
I even had teachers make bets with each other about whether I would earn the top score in every class that semester. And, I did. If I didn’t have a 100% in a class, it was a sign that I could be doing better.
I went to TU on a full-ride scholarship for National Merit. I don’t say this to brag. I say this to make a point. In high school, I was smart, but I wasn’t curious.
Whenever a teacher taught something, I didn’t question it. I cataloged it in my memory and accepted it. Teaching is changing that practice, however.
I have students who are incredibly curious. When I teach them something, they ask me why it works. And, I’m not talking about the students who ask questions in an attempt to get out of doing an assignment.
These students really want to know the why behind what I am teaching. For example, I’ve never questioned why the change of base formula for logarithms works. It just does. I’ve never really wondered why natural logarithms have a base of e.
They just do. The more I research the math behind their questions, the more I realize how much more I could/should be doing in my classroom.
I’ve started teaching my students things that I never learned in high school. And, I certainly never learned them in college. Last year, I skipped so many things because it wasn’t on the test.
But when I only teach to the test, I’m cheating my students. It’s taken me a while to realize this. Teaching this way takes more time, but I’m realizing it’s worth it.
Supplies
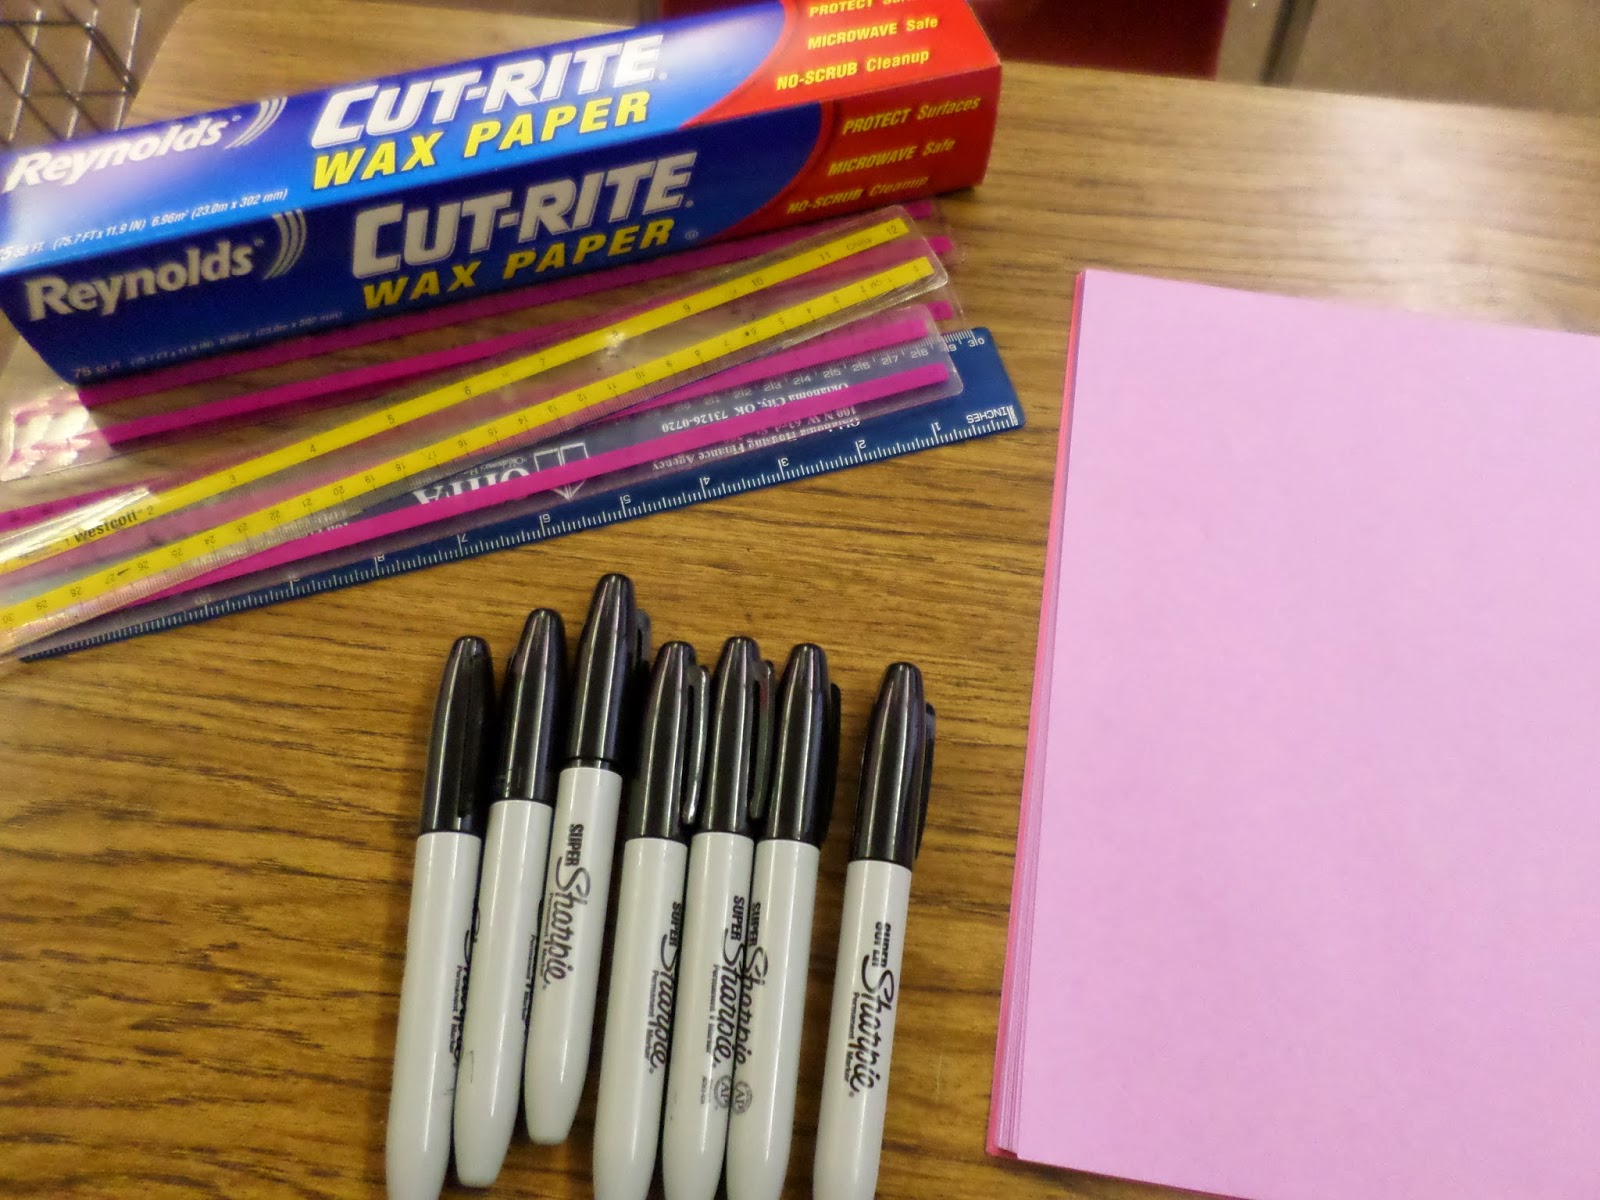
Here are the supplies we used in Algebra 2 earlier this week. Wax paper. Rulers. Colored Paper. Sharpies. Can you guess what unit we are in?
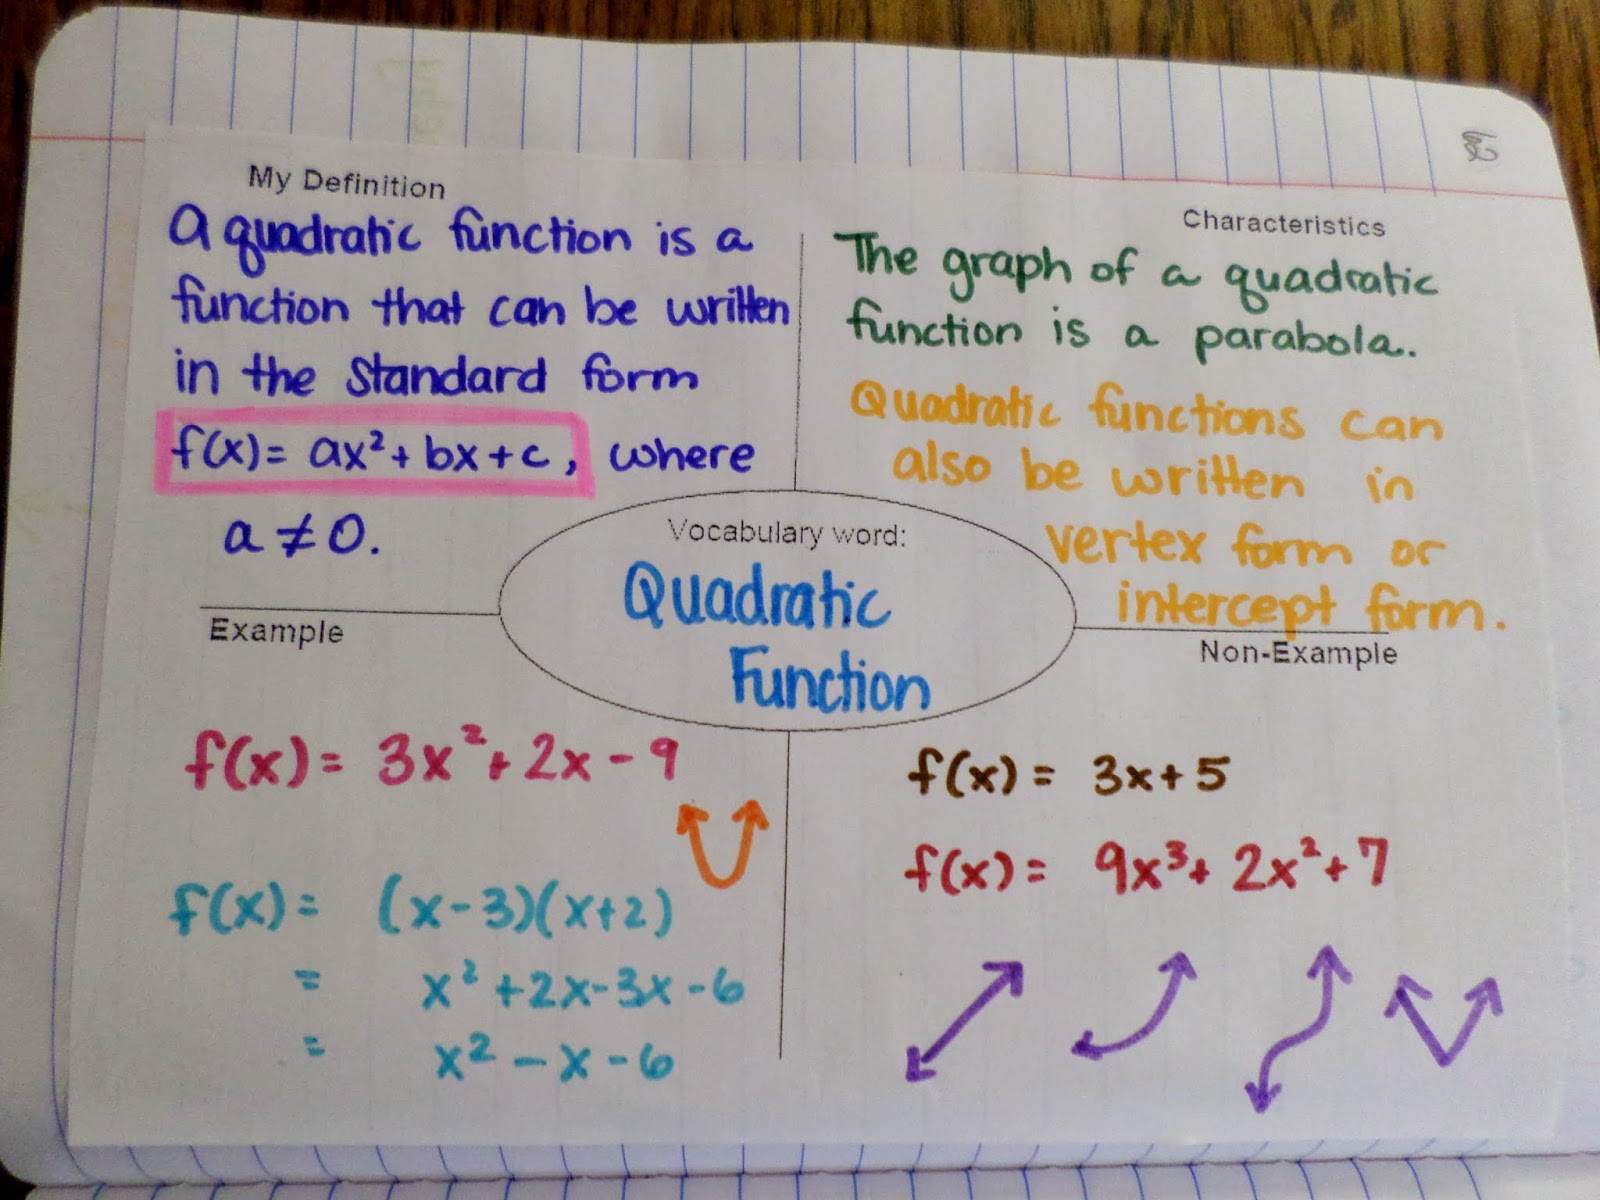
We just started quadratic functions. Last year, my students performed worse on the quadratic function questions than any other topic on the state test. They performed better on the conic section questions than any other topic.
This summer, I got the chance to build a parabola using a piece of paper at the common core workshop I attended (OGAP). I had never experienced anything like that, and I thought it was really cool.
Confession Time. A week ago, I didn’t know what a parabola was. Oh, I knew what they looked like. I could graph one. I could tell you if an equation belonged to a parabola. But, I didn’t really know what a parabola was.
Last year when my Algebra 2 students did Conic Cards, I had zero clue what a focus and a directrix were. I just knew it wasn’t going to be on the test. And, last year that was enough. But, not this year.
I tailored this project so that our wax paper parabolas could fit in our interactive notebooks. If you’re not doing interactive notebooks (or you want to display your parabolas), you could easily use a full sheet of paper and a larger sheet of wax paper for this activity.
Instructions for Constructing Wax Paper Parabolas
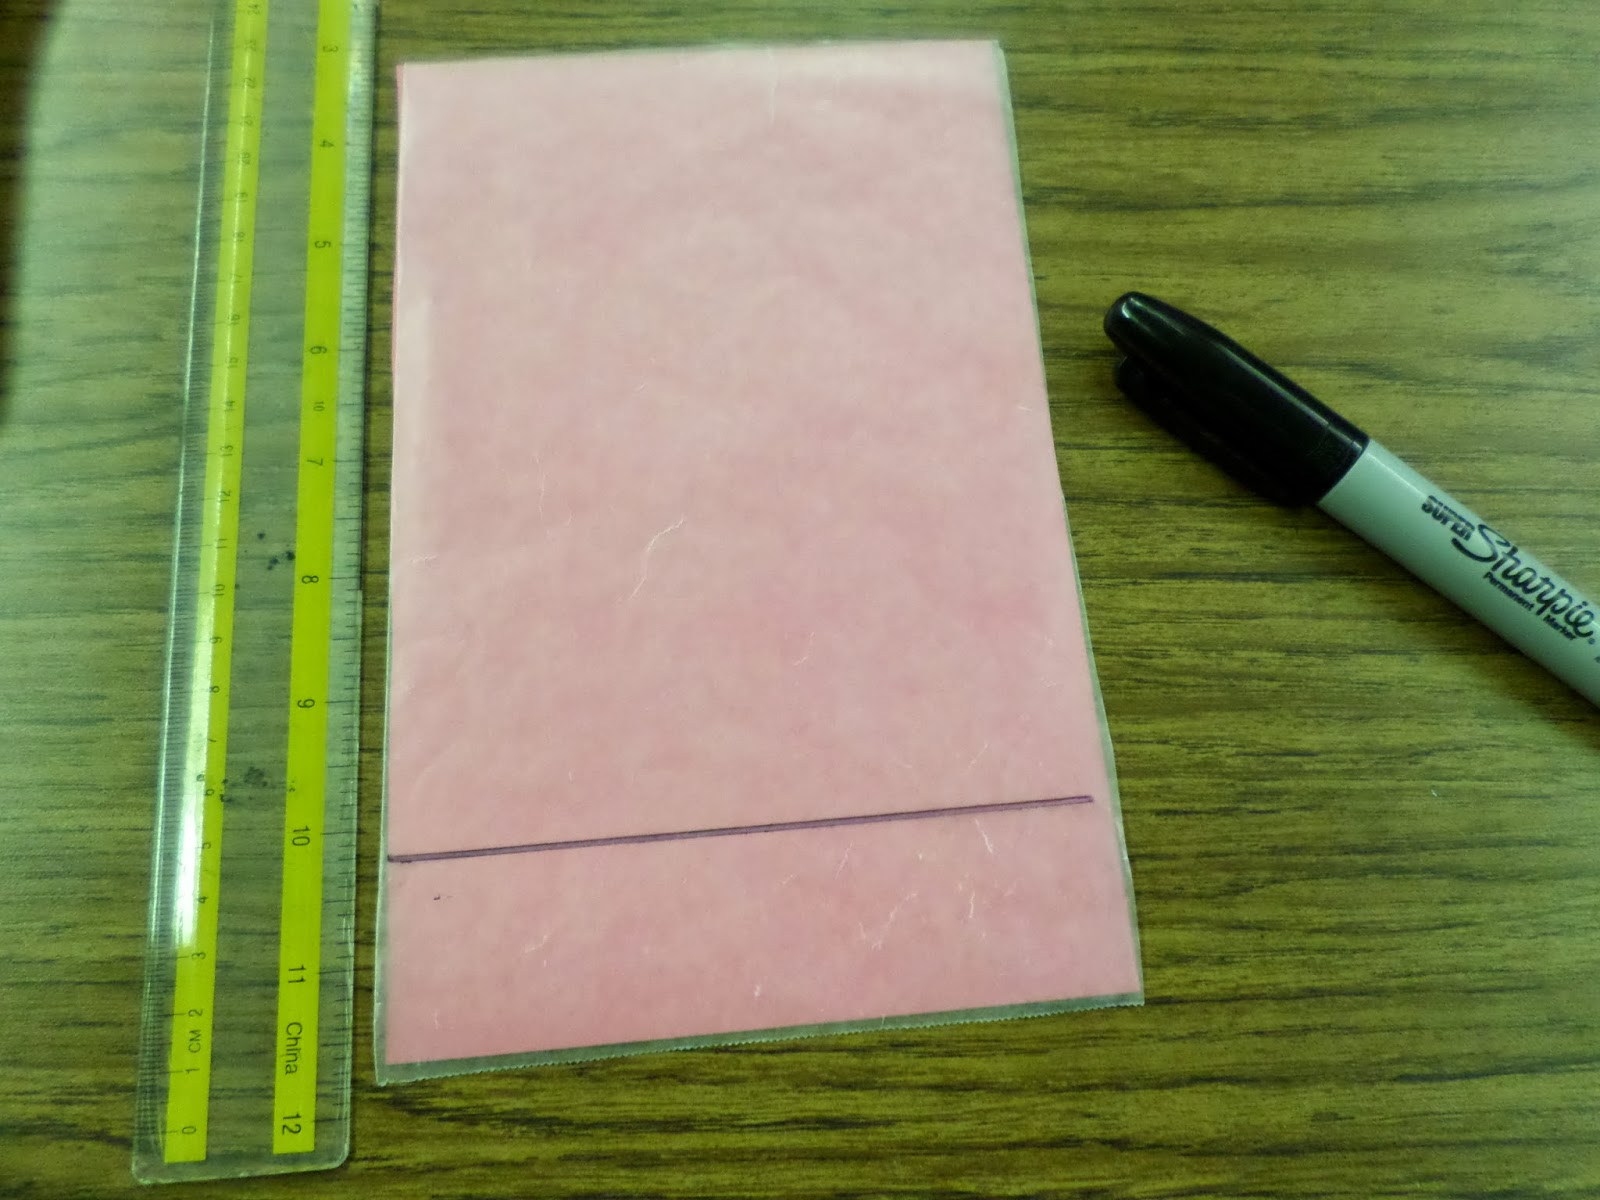
Start by trimming your wax paper to match the size you want your finished parabola to be. We used a half-sheet of letter sized paper.
I instructed pairs of students to grab a sheet of paper, cut it in half, and share it with their partner.
I tore the wax paper off so it was as close as possible to the size of a letter size sheet of paper. Less trimming equals less potential trash to be left in my room.
So, you’re probably wondering. Why the wax paper? Well, you can do this with paper, but it’s a hundred times harder.
Wax paper is perfect for folding a parabola. You can see through the paper, and that will make all the difference in this activity! Plus, wax paper is only $1.28 at Wal-Mart.
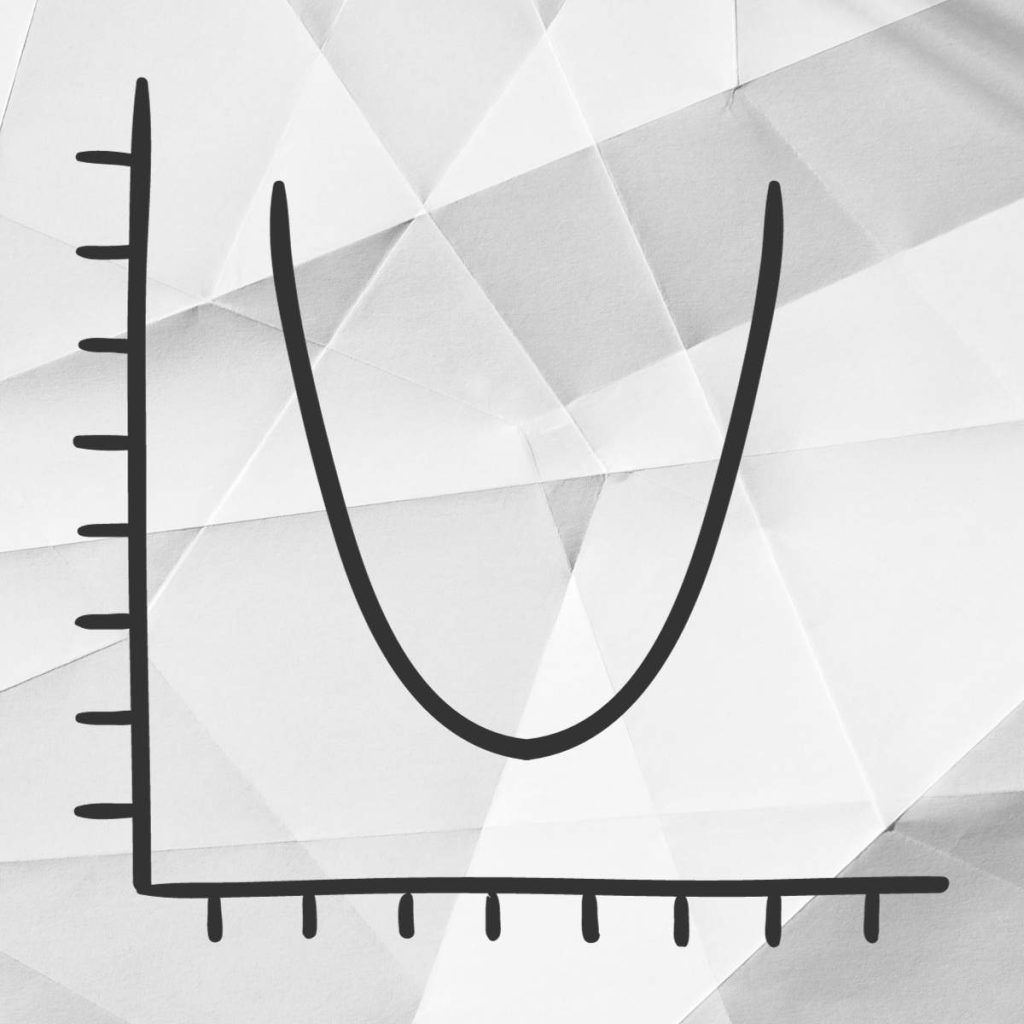
But, first, I think I might need to remind you about what a parabola is. I can’t be the only one who didn’t know the exact definition of a parabola.
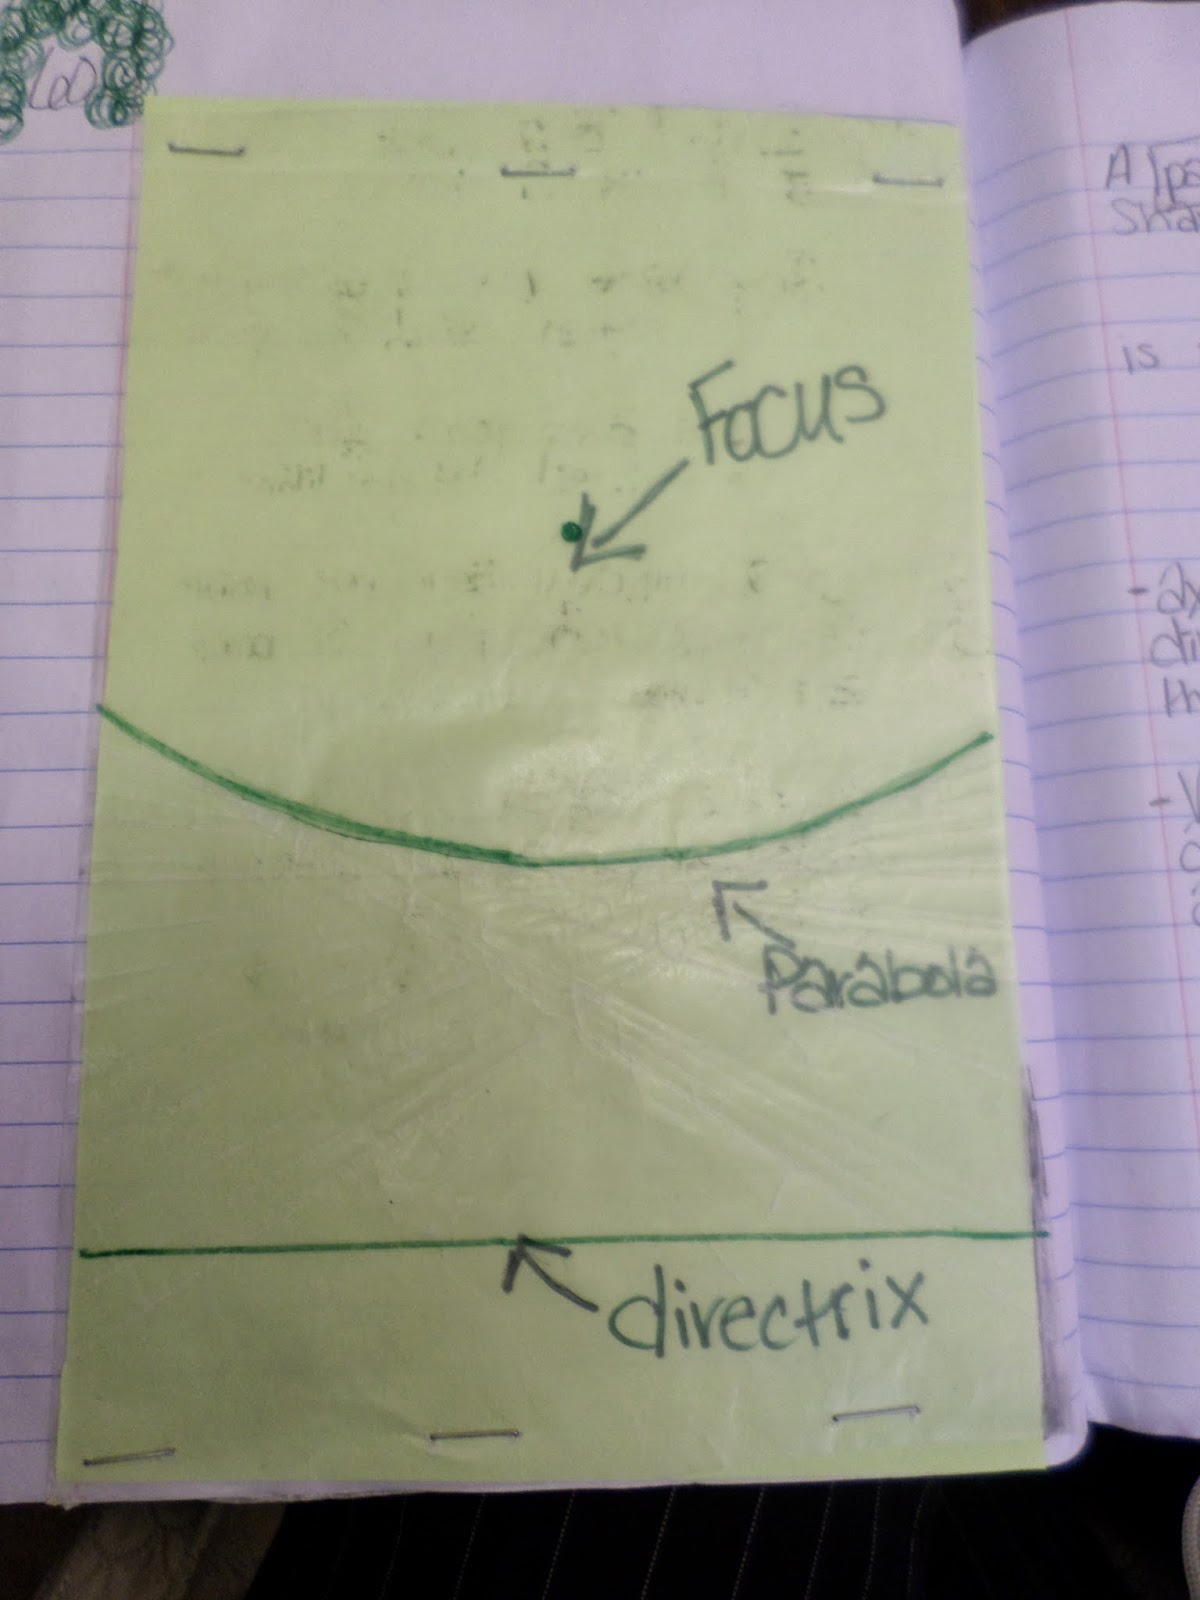
A parabola is a special arch-shaped curve. This is where my previous knowledge stopped. It’s not just any arch-shaped curve, though.
Each and every point on a parabola is at an equal distance from a fixed point (called the focus) and a fixed line (called the directrix.) Once I learned this, the conic cards from last year started to make more sense!
I promise. I really do have a bachelor’s degree in math.
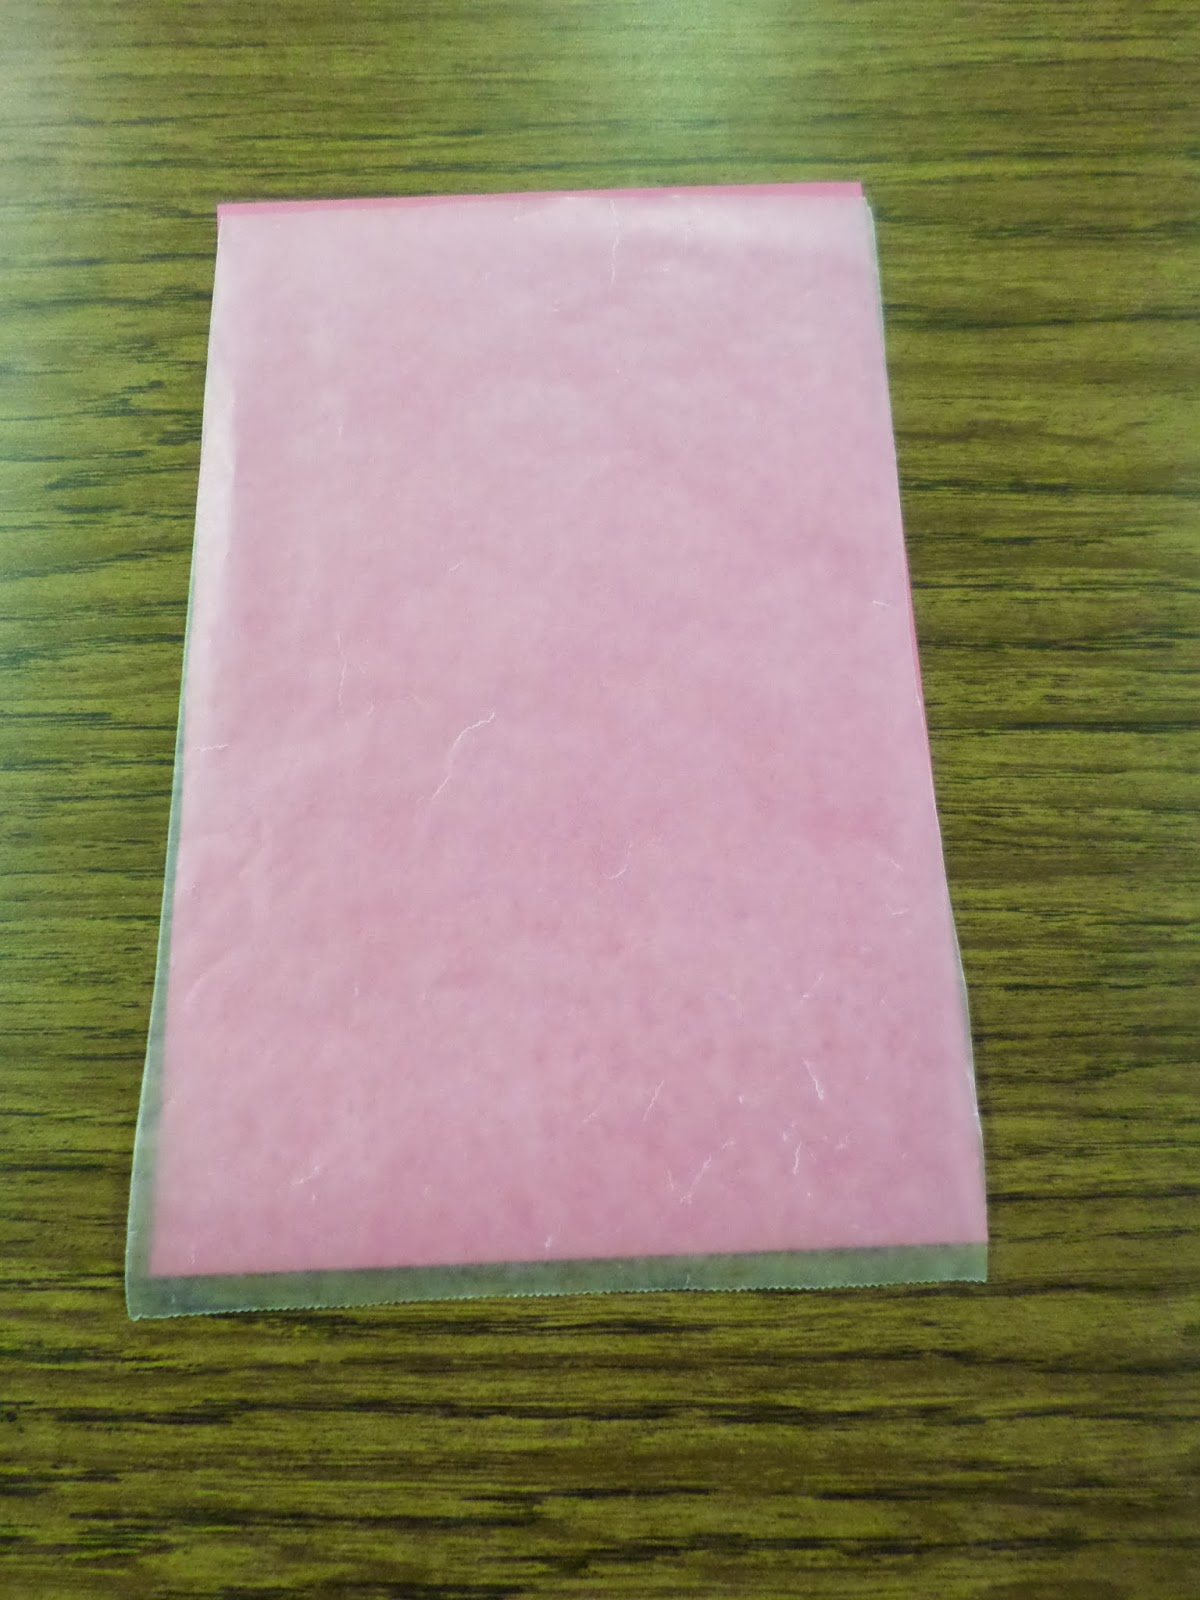
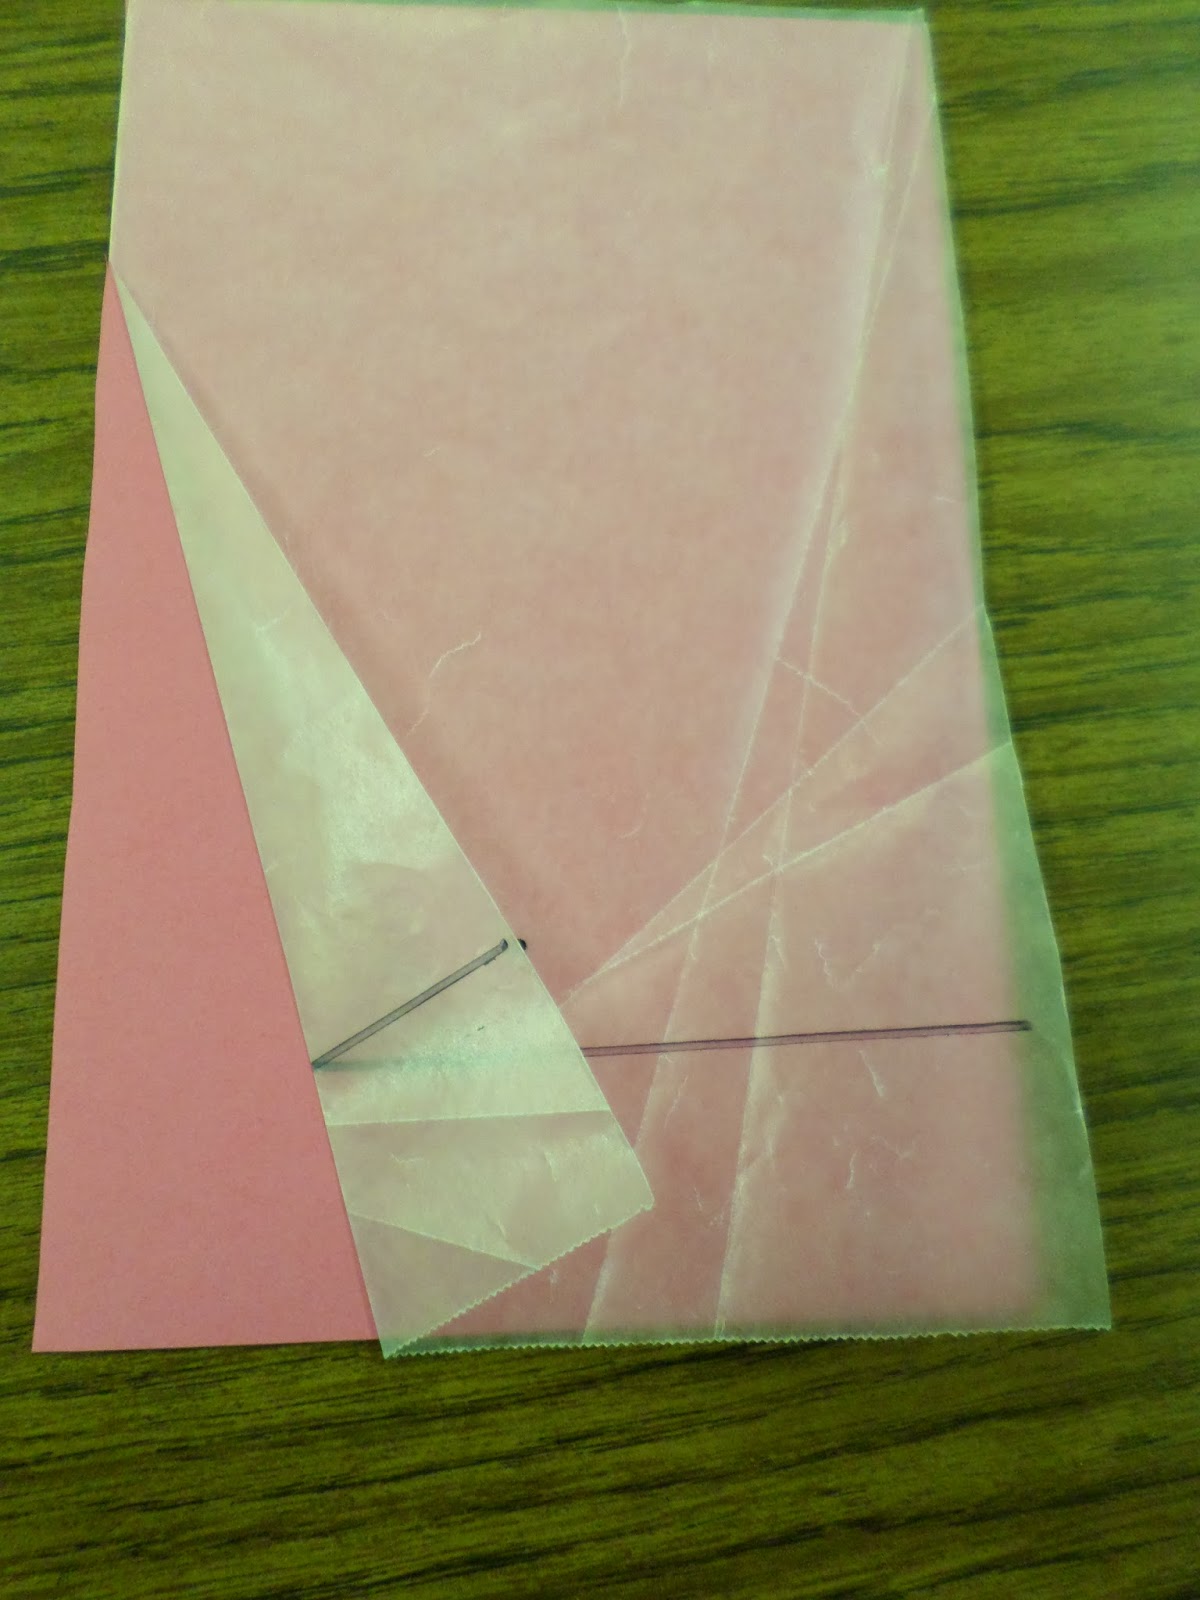
Lay the wax paper over the colored paper so you can see what you are doing easier.
I modeled these steps under my document camera. This allowed students to see exactly what I was doing and to follow along.
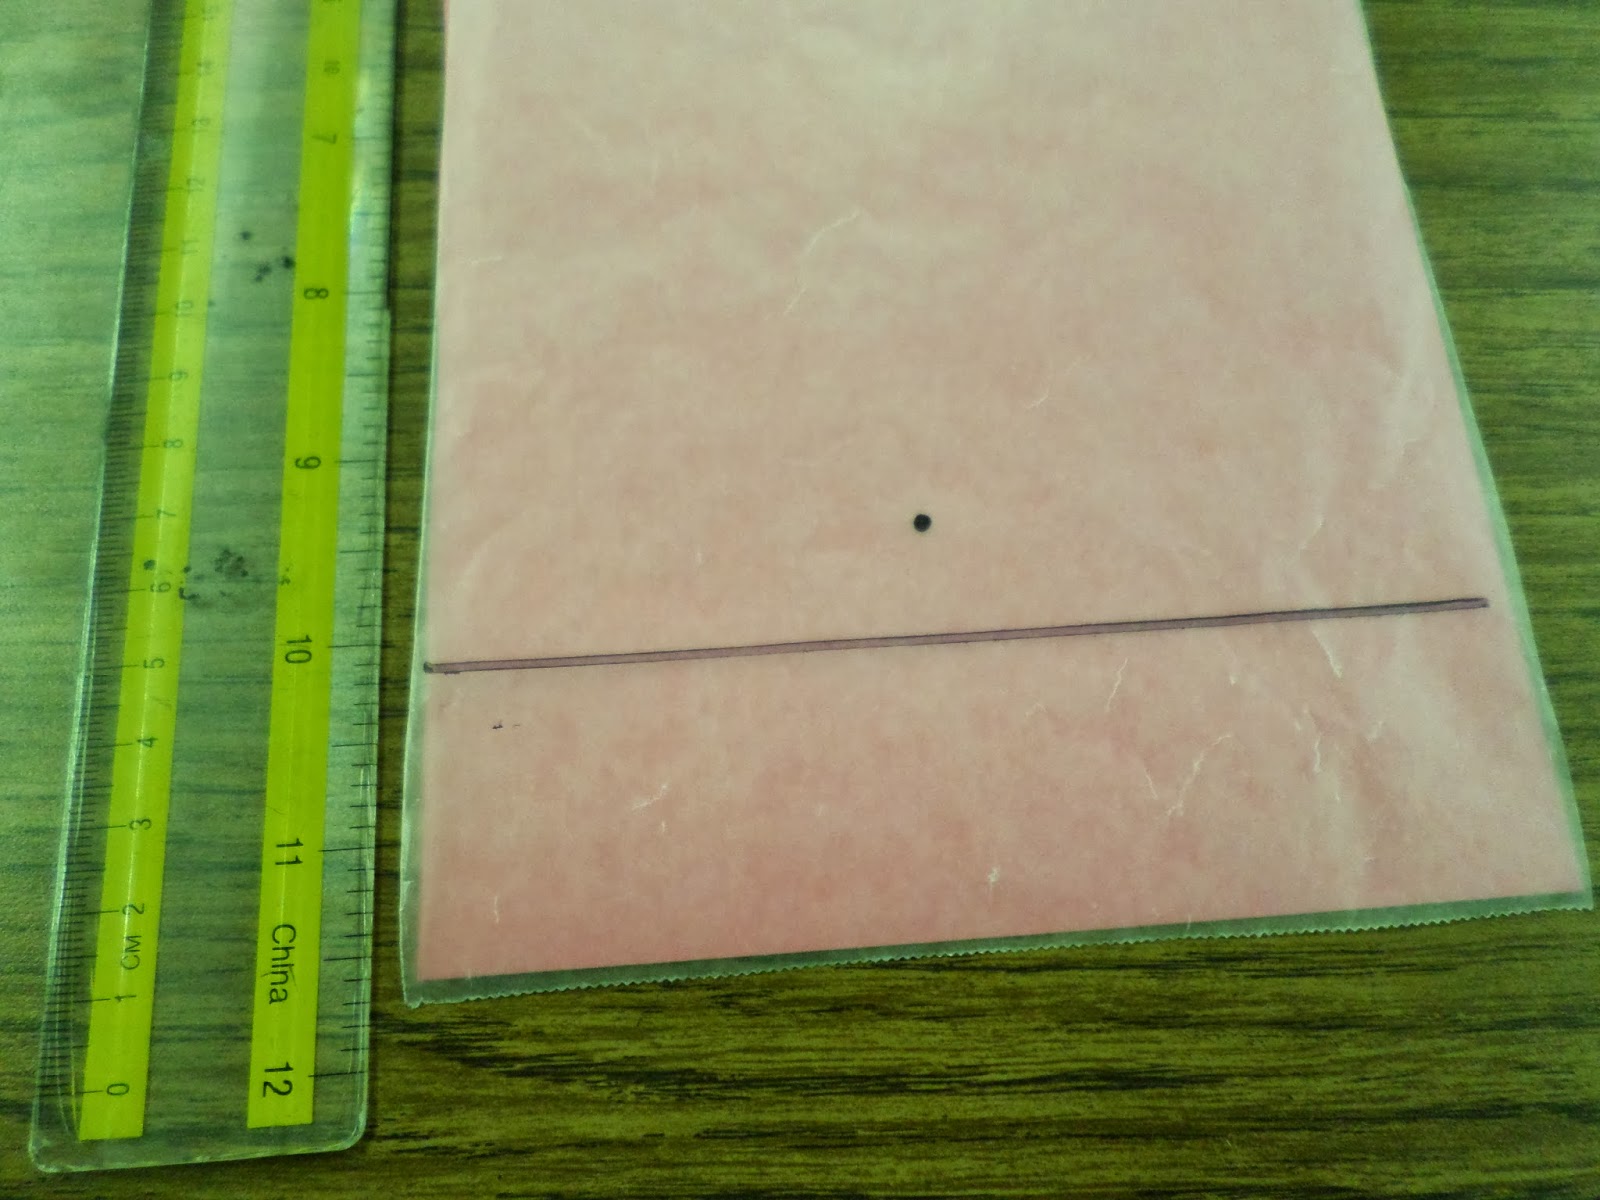
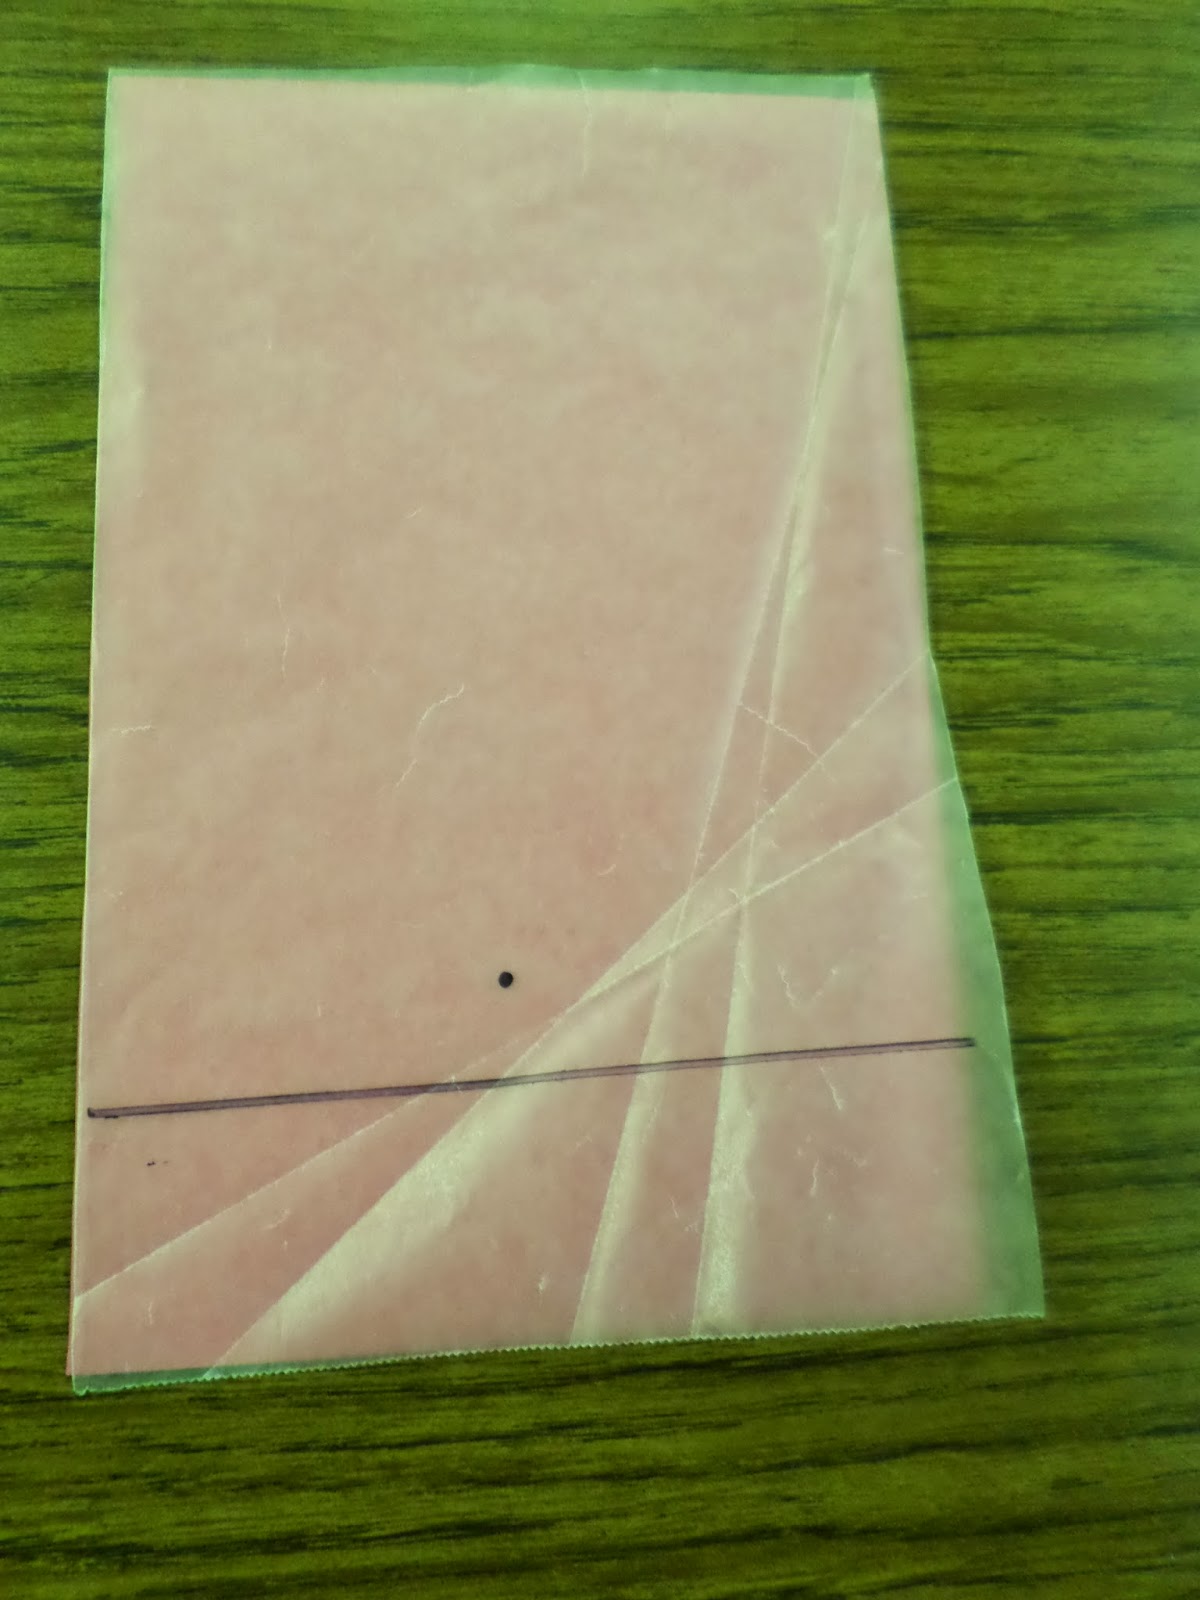
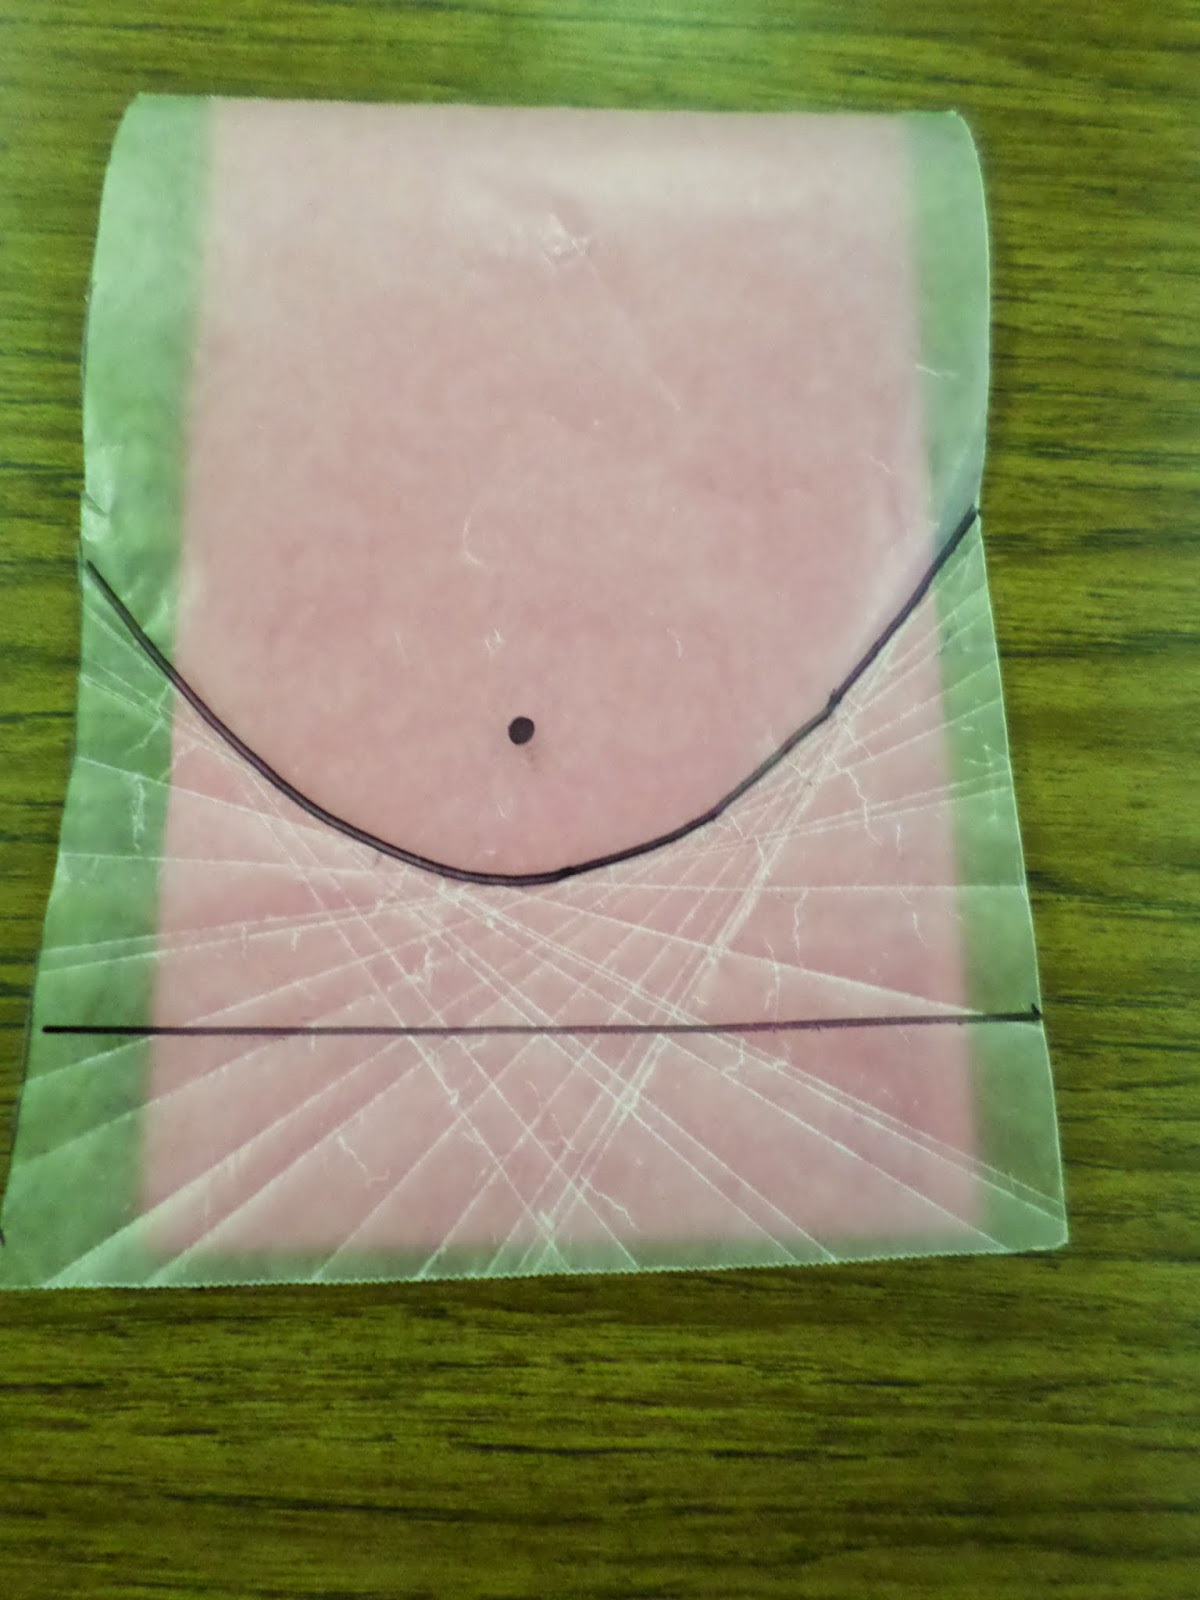
Draw a straight line on the wax paper using a permanent marker. I placed this line at the bottom of my wax paper, about a ruler’s width from the bottom.
This will be the directrix of your parabola.
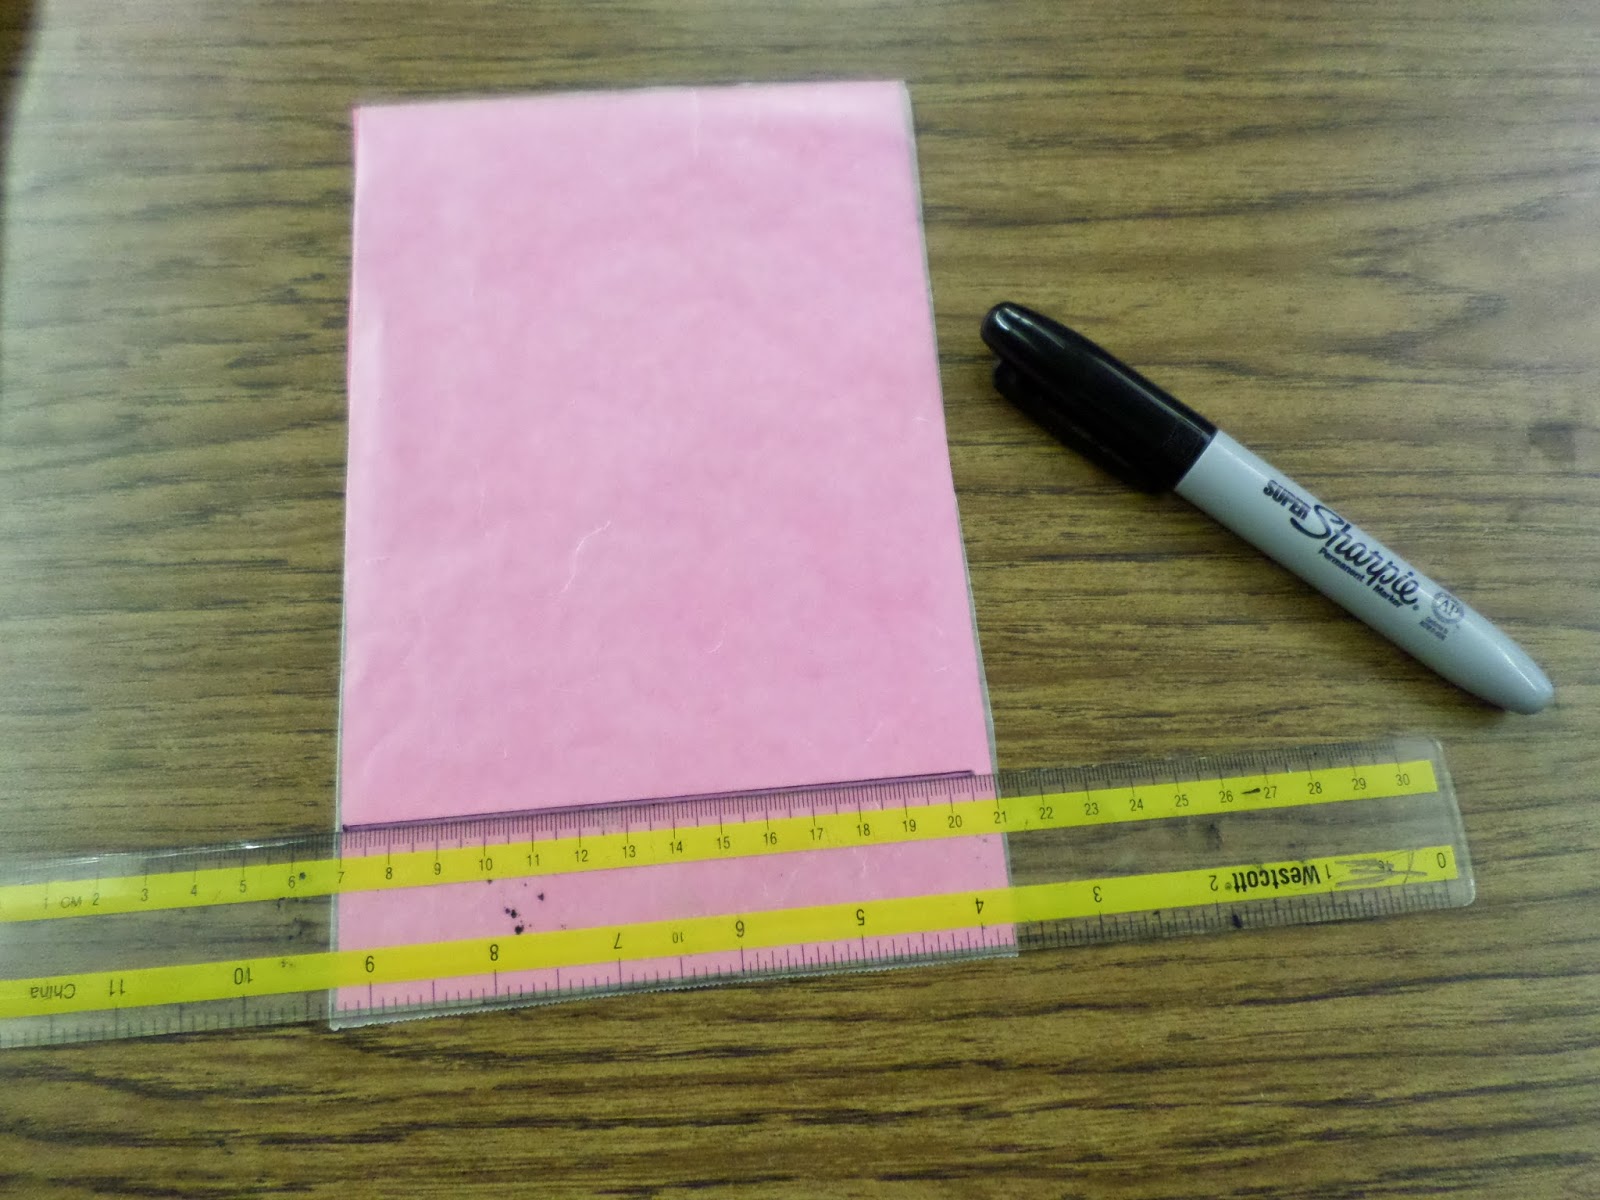
Be sure to let the line dry for at least 30 seconds or so before folding. Otherwise, the permanent marker will smudge and transfer during the folding process.
Next, we need to decide where the focus of our parabola will be. Instruct students to try to center their focus over the directrix. They are allowed, however, to place their focus as close to or as far away from the directrix as they choose.
It just needs to be centered. If it’s not perfectly centered, the world will not come to an end or anything. But, you will not end up with a centered parabola.
The placement of the focus will determine what the parabola will look like. I told students this, but I didn’t tell them how it would affect the parabola.
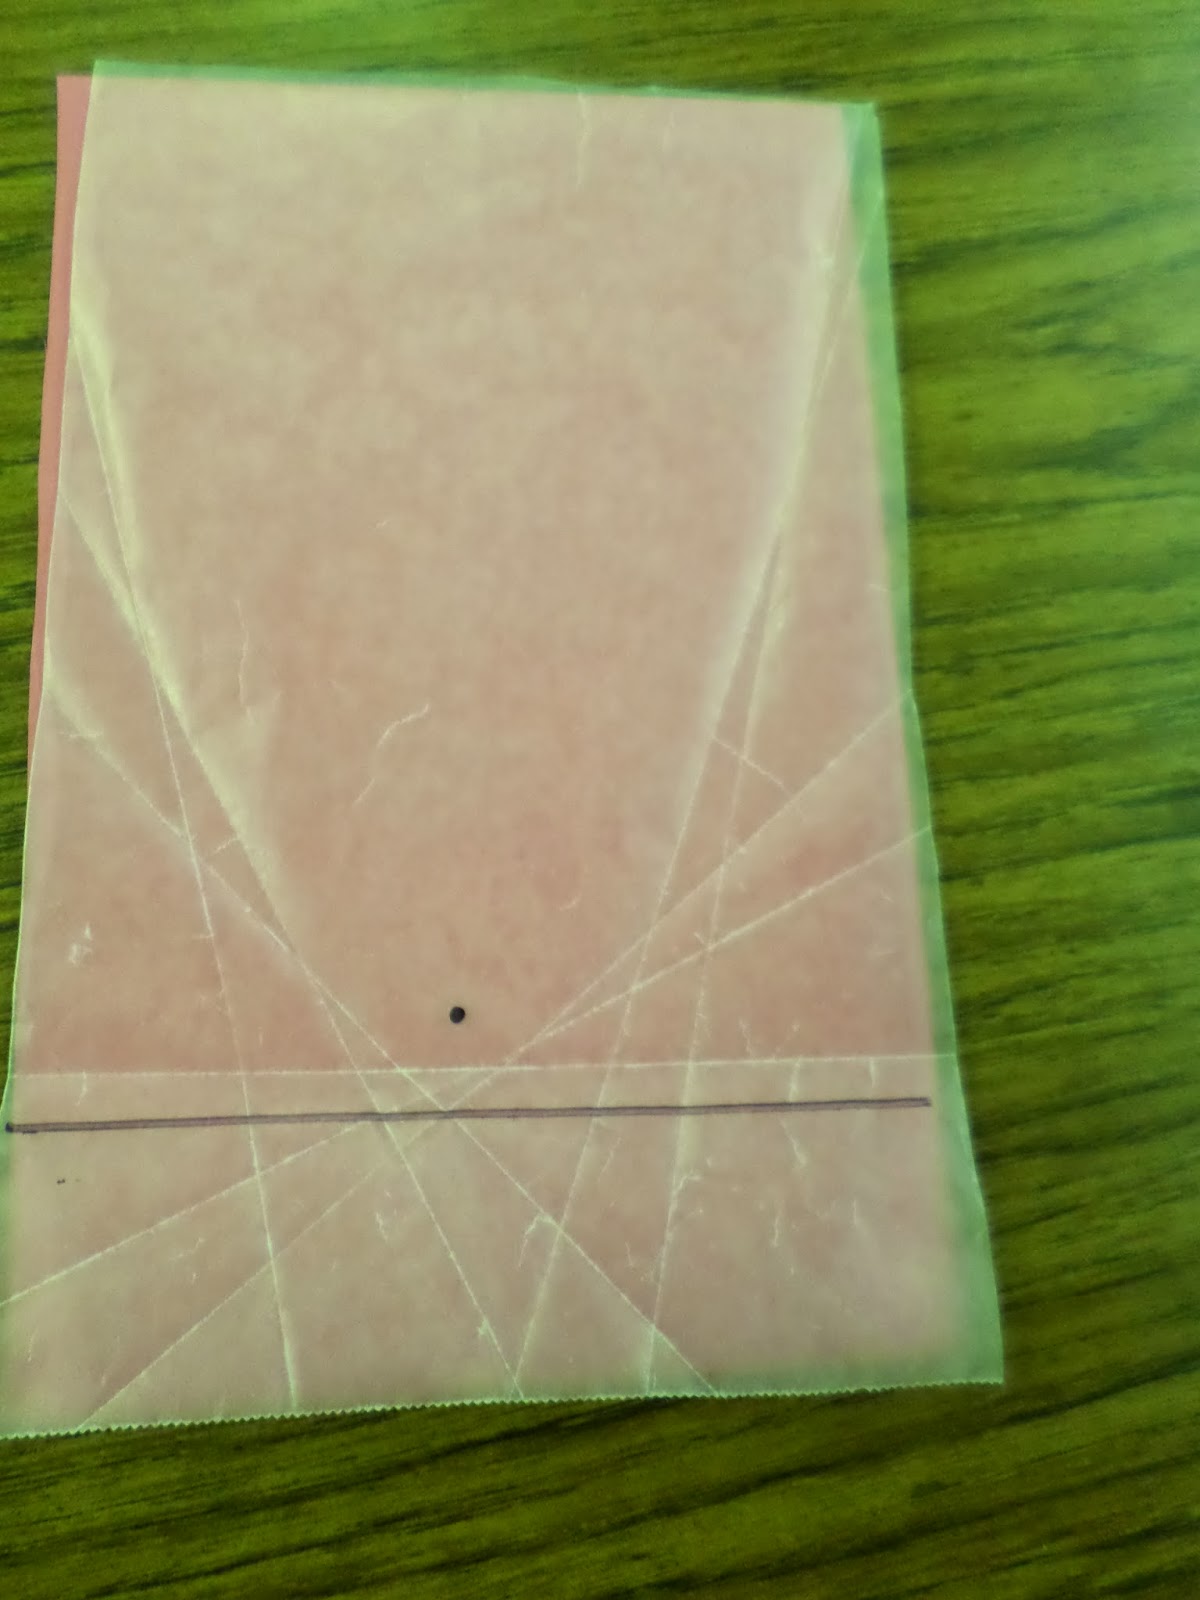
If every point on a parabola is at an equal distance from the focus and the directrix, we can find points on the graph by folding the wax paper so that the directrix and the focus intersect one another.
The crease will be half-way between the focus and the directrix. Thus, that point must be at an equal distance from both.
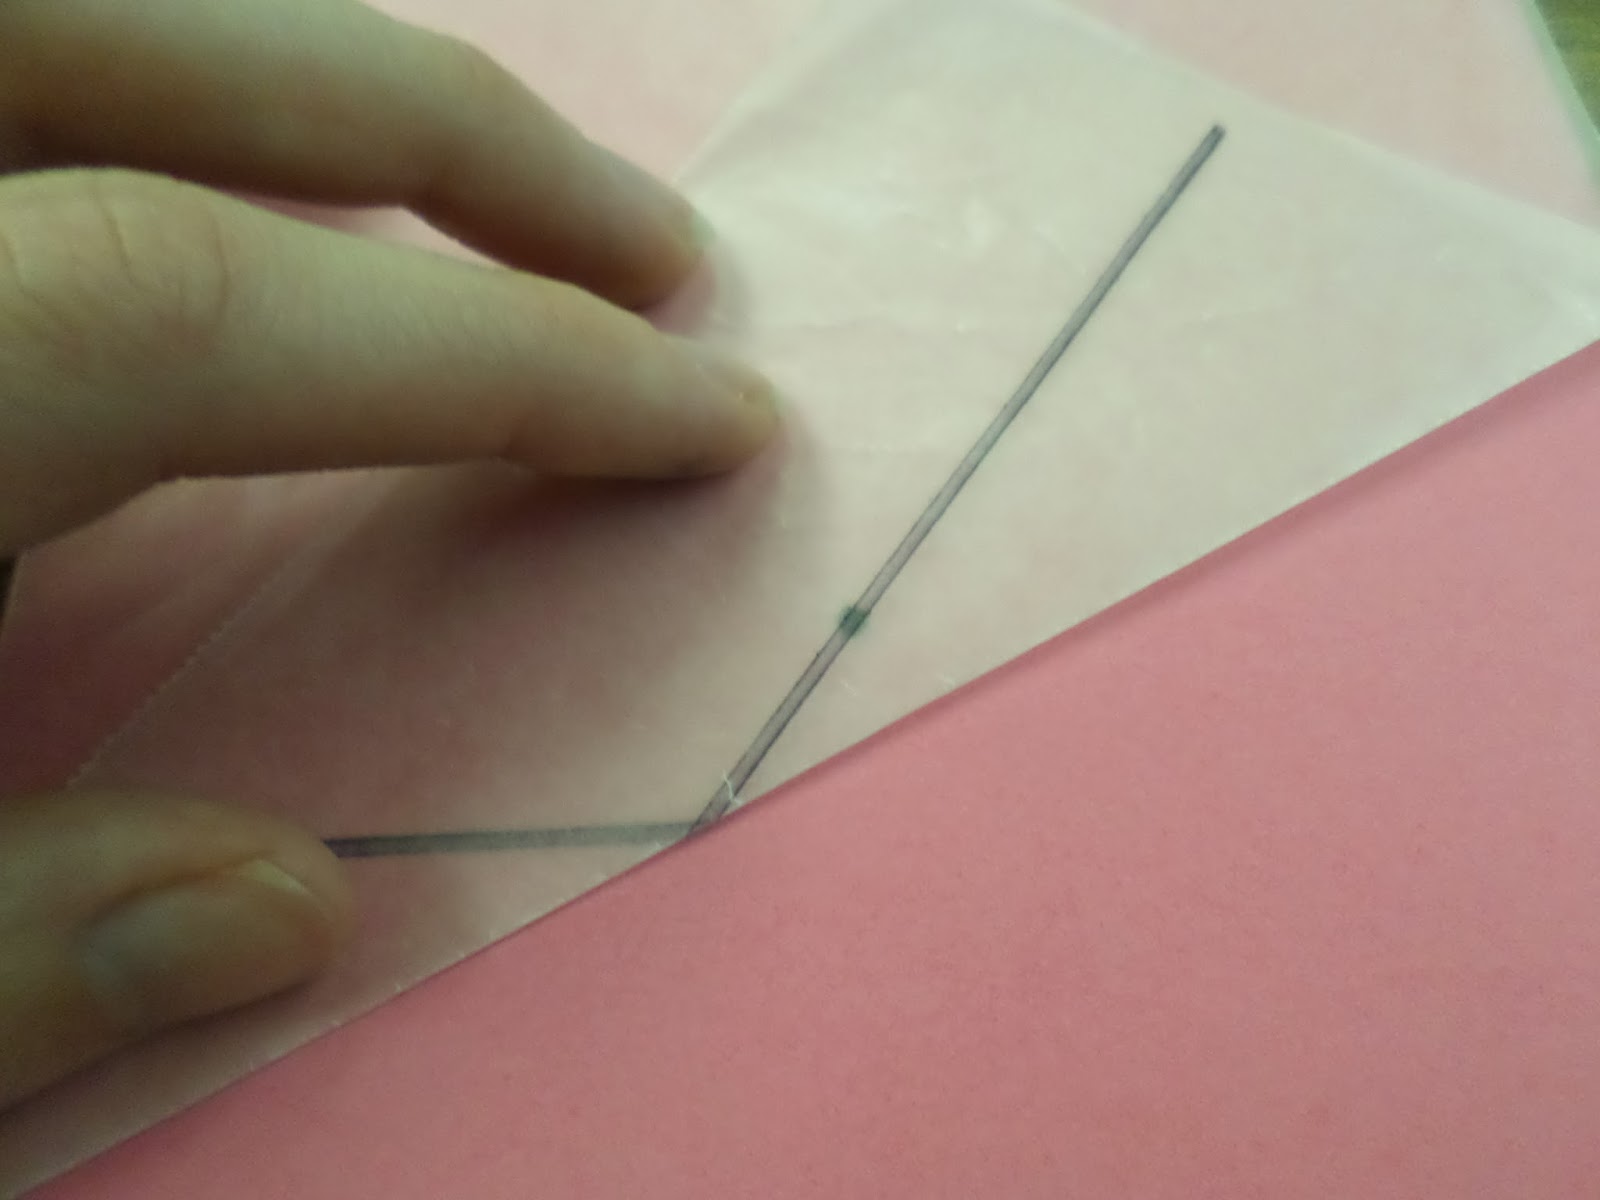
Repeat the process. Fold the wax paper a different way so that the focus and the directrix intersect.
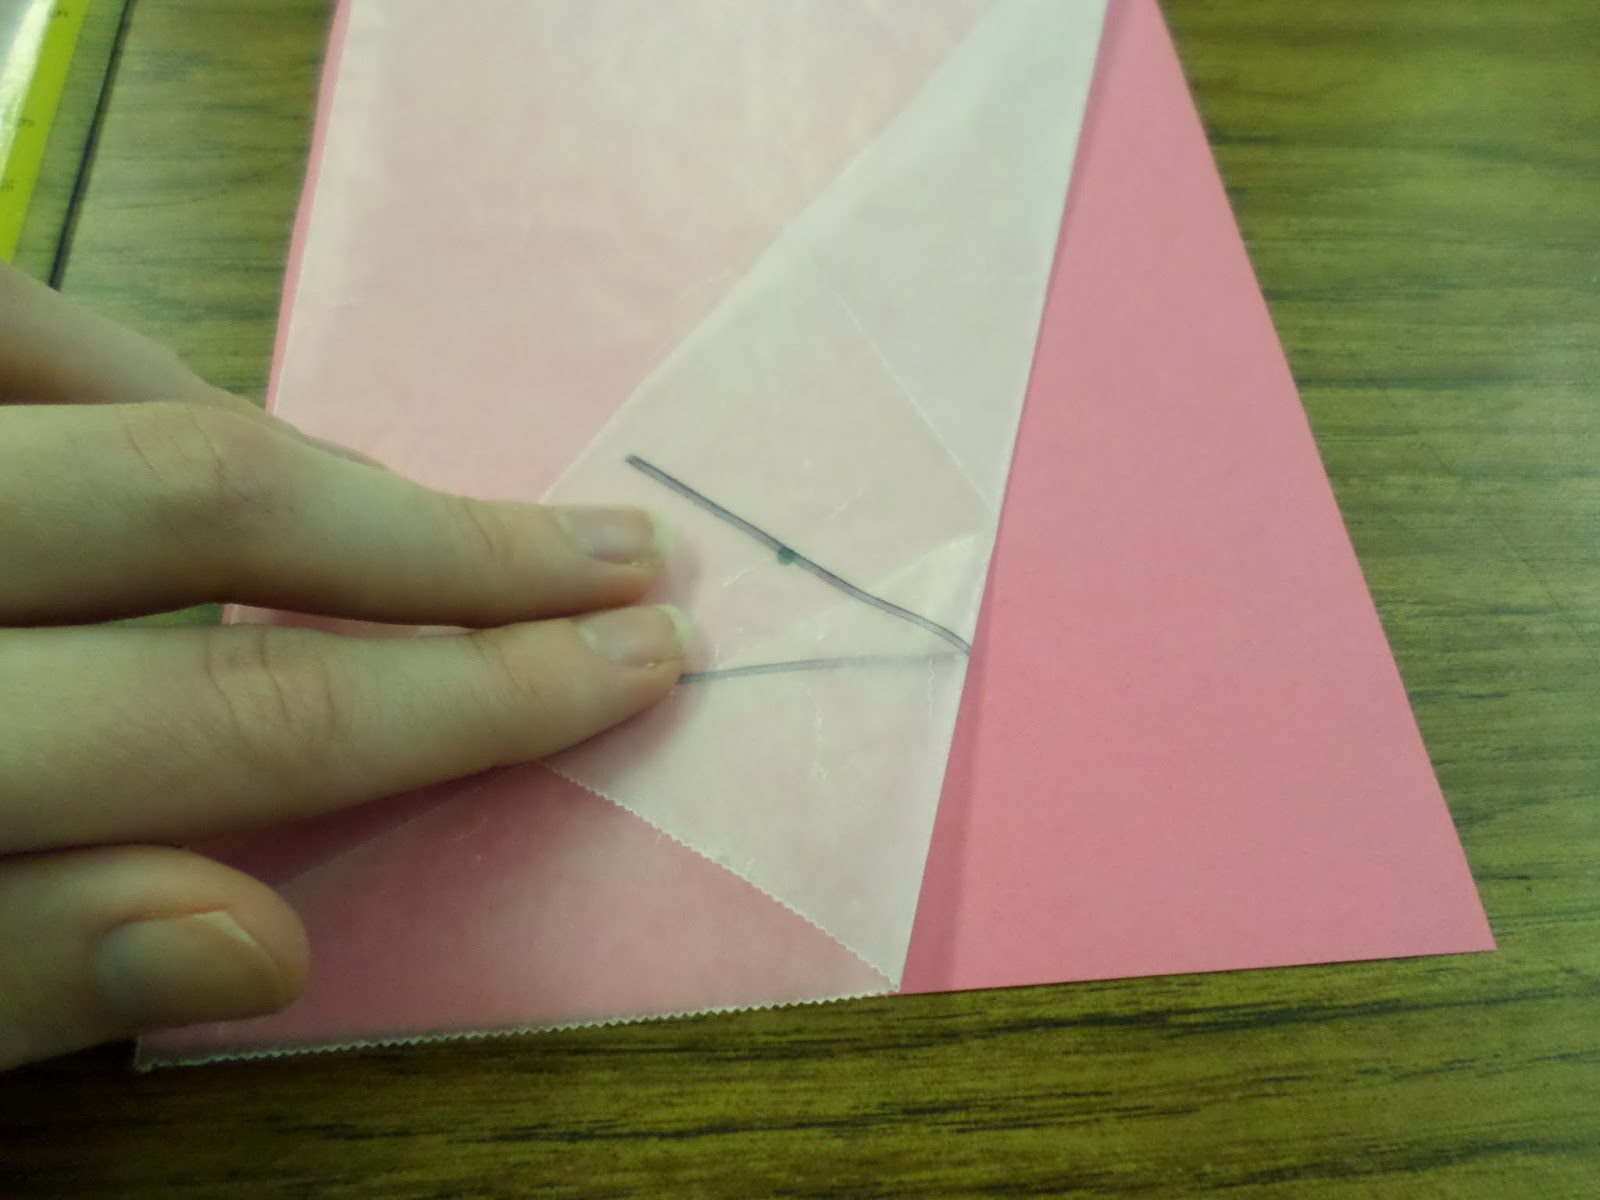
After making several folds, many students will start to think that they have run out of possible folds. I encouraged them to keep trying different folds.
Soon, a few students realized that we could make some folds on the other side of the focus/directrix.
The more folds you make, the more obvious the parabola will become. If students complain that their parabola looks jagged, encourage them to make more folds.
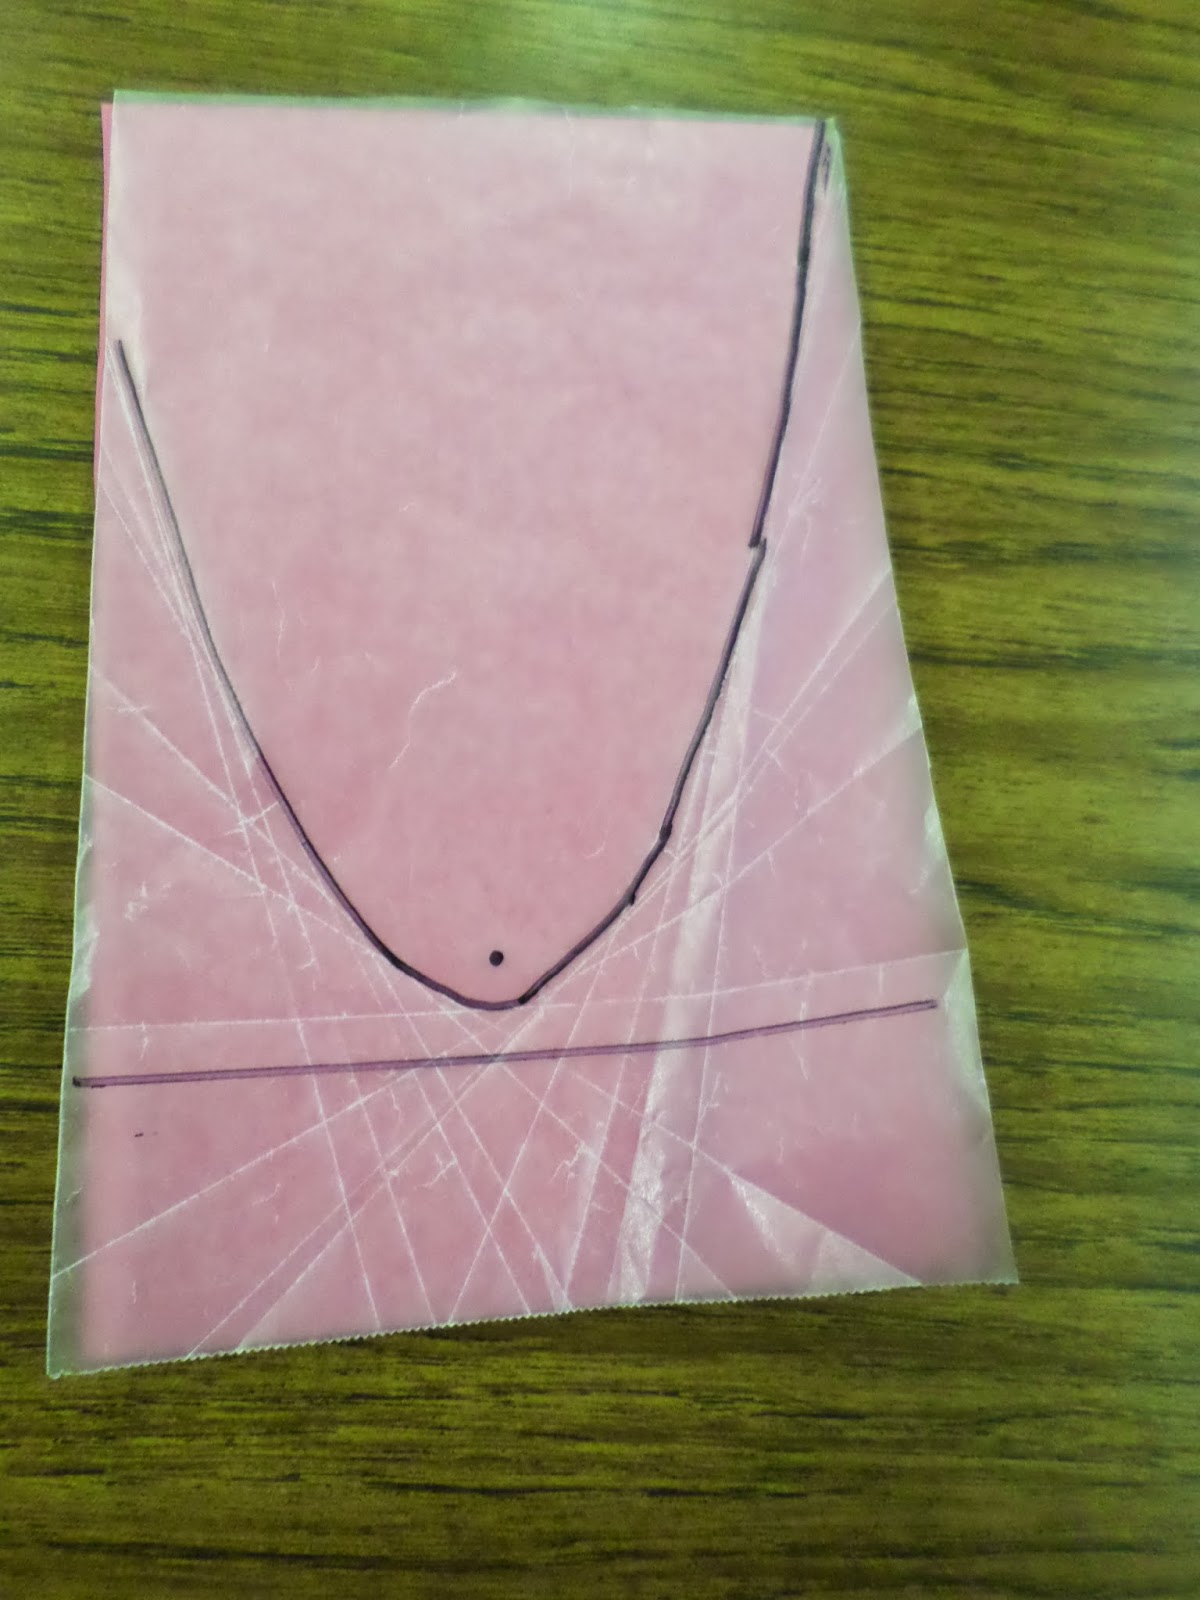
When you are satisfied with the curve formed by the folds, stop folding and use a permanent marker to trace over the parabola.

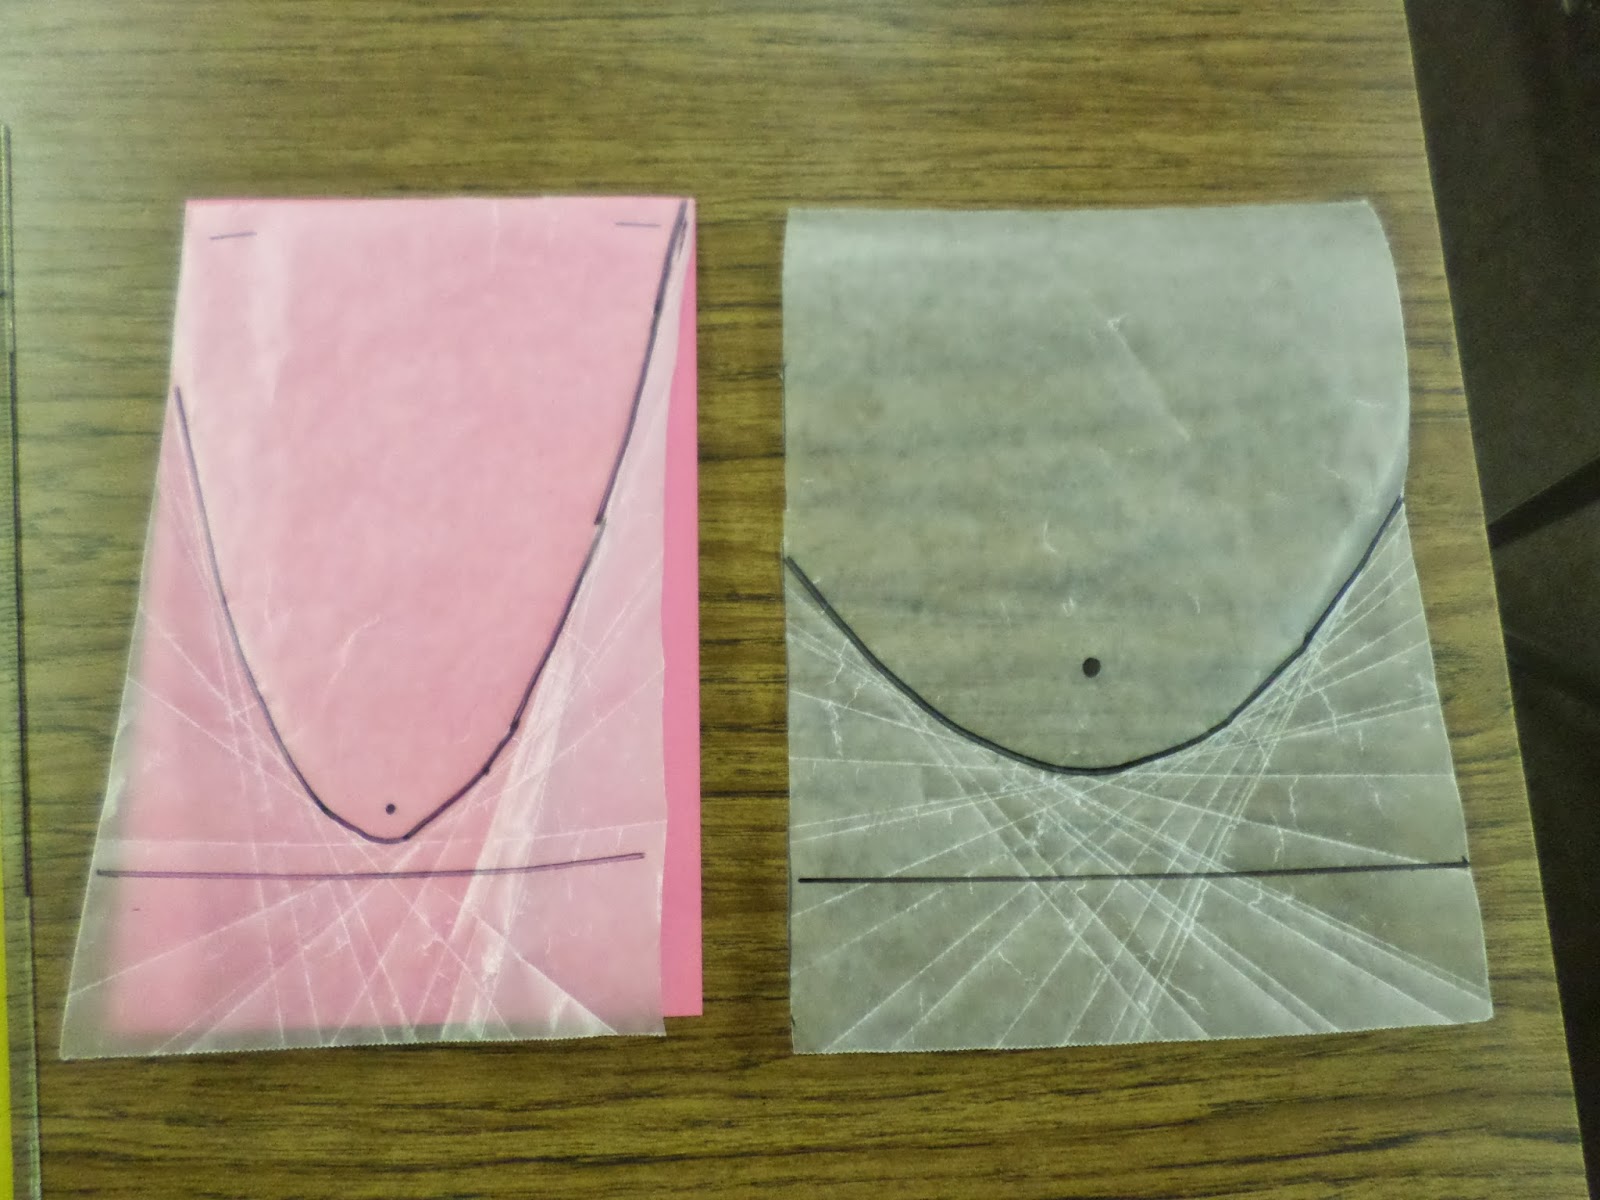
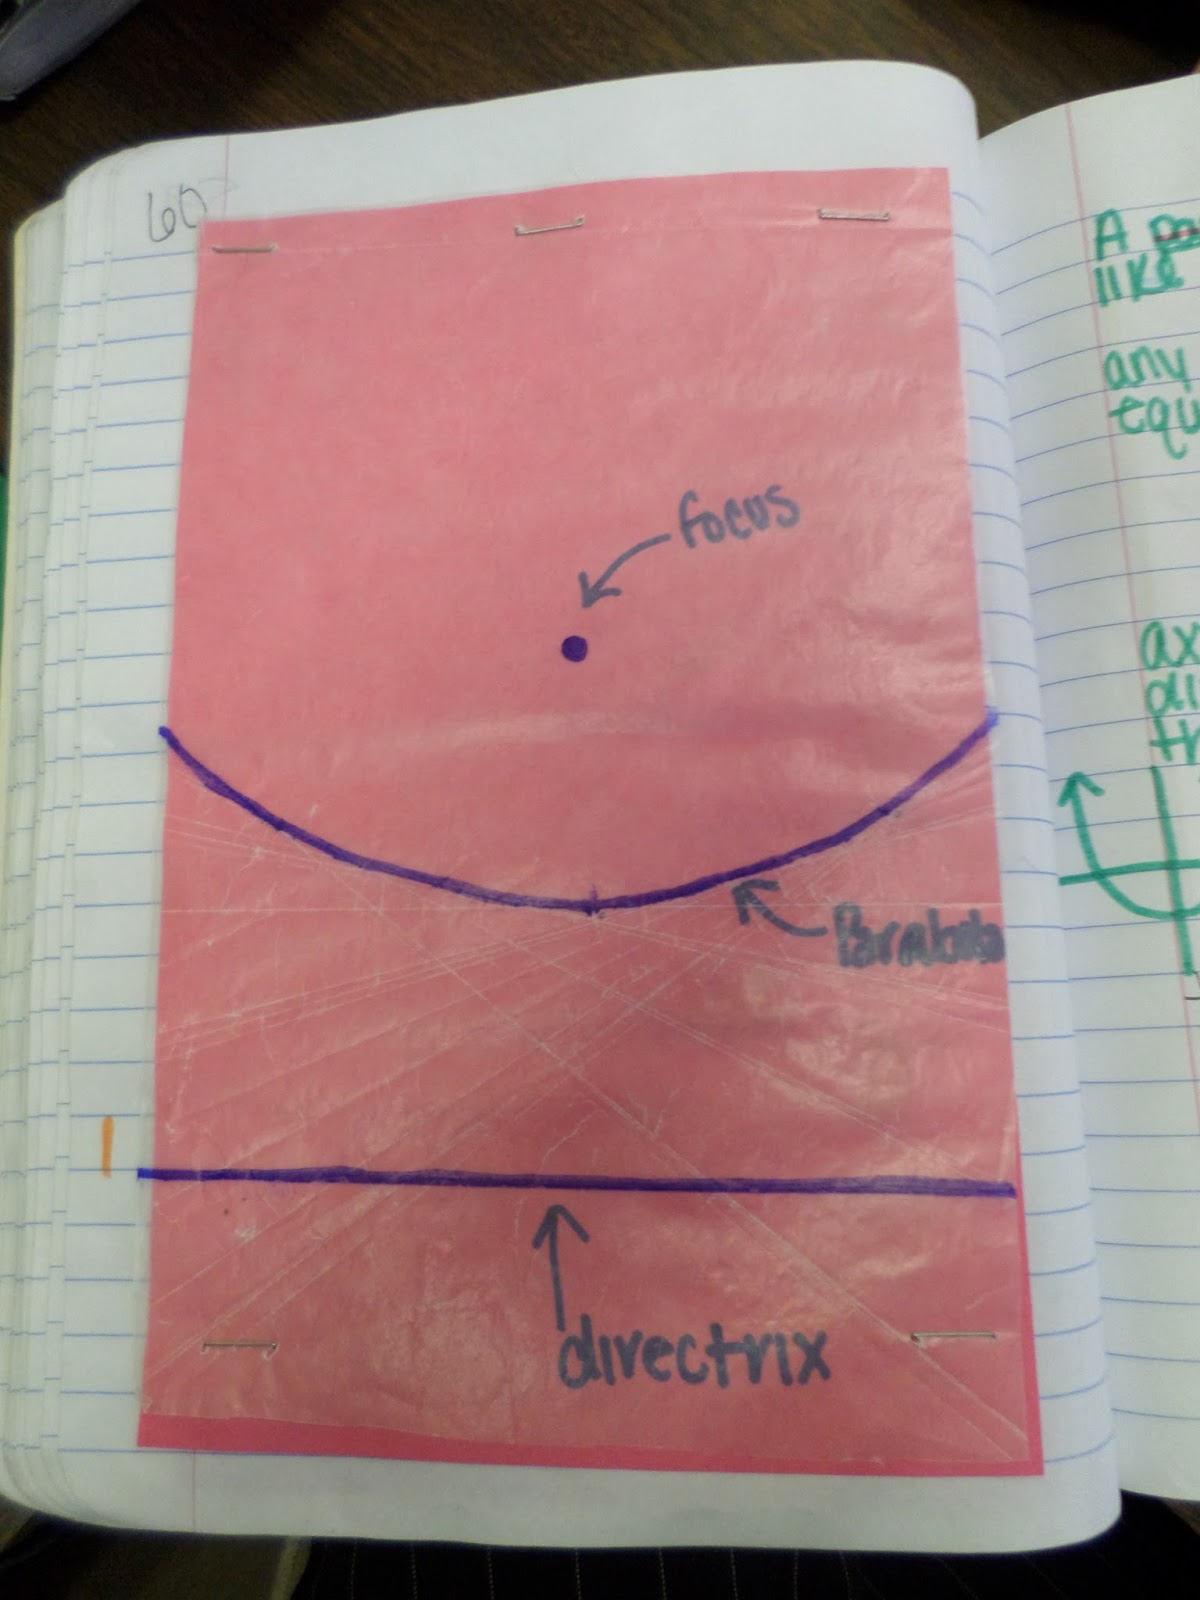
Here is one parabola I created.
In another class period, I created this beauty. Notice the difference made by changing the location of the focus! It is also quite obvious that I did not have my focus centered over the directrix. Oops.
To keep the wax paper from moving, I had students staple the top of their wax paper to the colored paper below.

Here are two of the wax paper parabolas I made, side by side. Next time I do this, I want to have students go through a see/notice/wonder activity where they look at everyone’s parabolas.
Or, maybe I should tell students how many inches above their directrix to place their focus. Then, we could have a class discussion regarding the difference made by the location of the focus.
On the colored paper (under the wax paper), we labeled the focus, directrix, and created parabola. Then, we stapled the bottom of the wax paper toour colored paper.
By stapling this to colored paper, we can see the parabola more easily. And, we are actually able to glue our creation in our notebook.
I couldn’t think of any other way to attach wax paper to our notebook.
Interactive Notebook Page with Wax Paper Parabolas
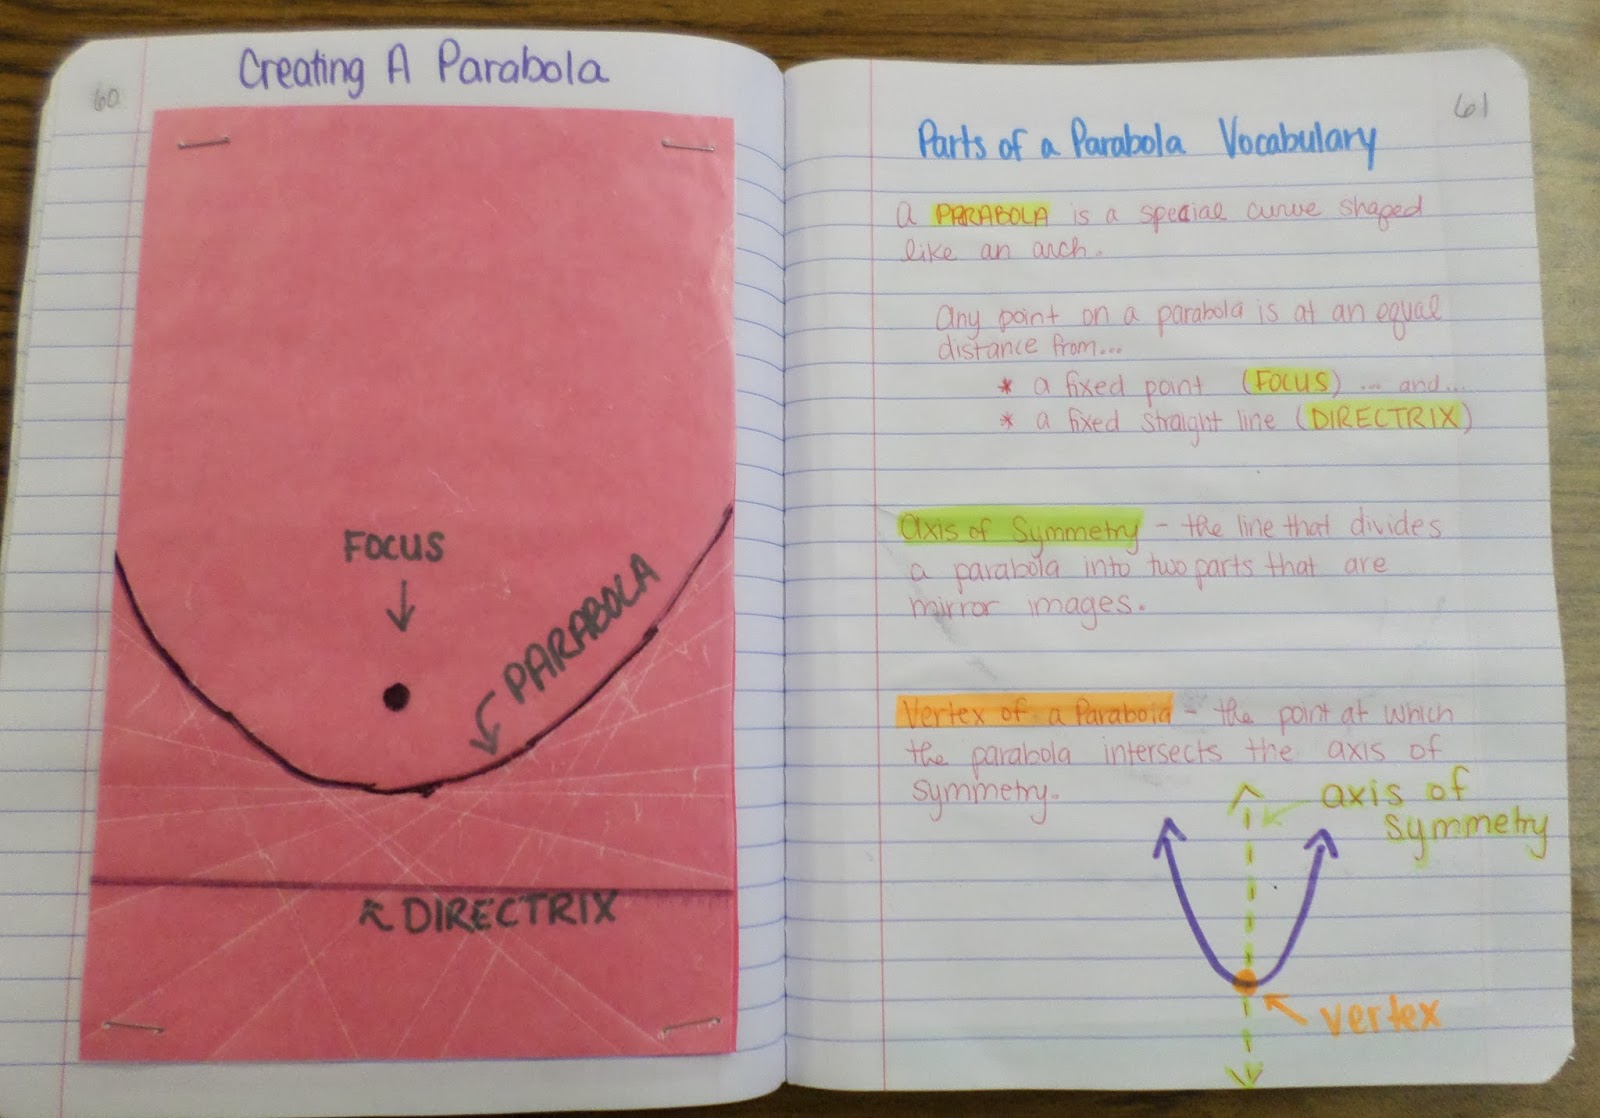
Here’s a close-up of the parabola I made that made it into my interactive notebook. (This one is different from the ones pictured above.)
One of my students got really creative with his labeling. He made the focus into the “o” in his label of focus. And, he made the word “parabola” exactly follow the curve of his parabola.
I was impressed! I certainly wasn’t that creative when labeling my own wax paper parabola.

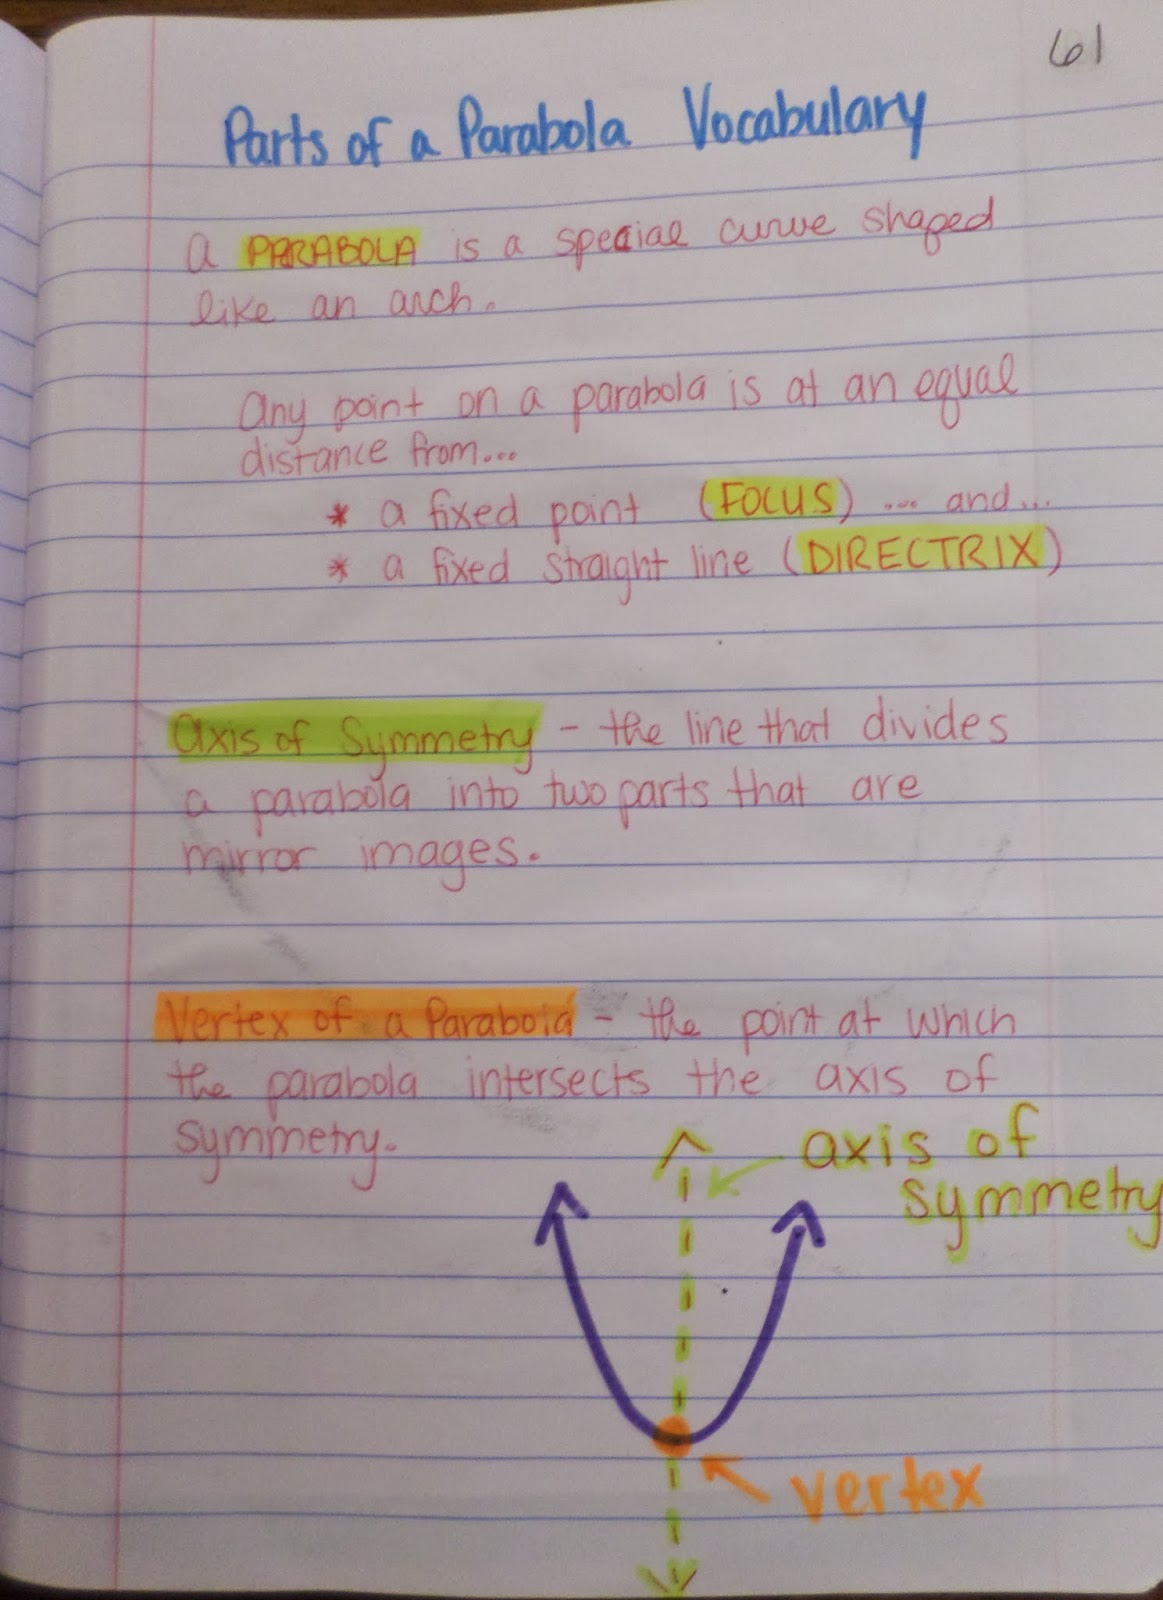
After creating our wax paper parabolas, we took notes over the parts of a parabola. Our notes covered the parabola, focus, directrix, axis of symmetry, and vertex.
On the day following this lesson, I finally introduced them to the term “quadratic function.” Now that we had learned what a parabola was, we were finally ready to learn what type of function produces a parabola when graphed.
We organized our notes on quadratic functions in a Frayer Model.
After having my students create their wax paper parabolas, I realized they weren’t quite as excited about the process as I had hoped they would have been.
The payoff came a day later, however. I have an Algebra 2 student who has made it pretty clear that she does not want to be in my class.
She does just enough work to get by. Many days, she is the epitome of disinterested. So, I’m pretty sure my jaw was on the floor when I overheard the conversation she was having with someone who had been gone the day before when we made the parabolas.
She was literally gushing about the activity we had done and how fun it was. She was trying to explain the process of making a parabola out of wax paper, and it was clearly going over the head of her classmate.
I looked at her in shock. “I didn’t think your class was too thrilled by the parabolas we made yesterday.” “Oh, I loved it! I love it when we do hands-on things like that in class.”
After some quick research, I have found tutorials for making all of the conic sections out of wax paper. I think I know what we’ll be doing in the next unit!
Example of Student Work
This is SO cool!
Thanks! I'm in LOVE with this activity!
Did this today – huge success!!!! Thanks for sharing!
Yay! So happy to hear this!
You have great pictures–may I use them for the investigation I am writing. I will share the investigation with you as well. I have done this activity for a number of years. A hint for pulling in some geometry and keeping the parabola centered on the paper is to have them construct(fold) the perpendicular bisector of the line(directrix). You can later facilitate the discussion of axis of symmetry. Another extension is to have them use the actual wax paper as they are graphing their own parabolas from directrix/focus information–helps them get the left/right information correct. Also, you can have the students geometrically prove the length of the latus rectum(or at least, the connection) by using the rectangle created. Don't feel bad about not knowing all of the connections–that was how it has been taught for years–don't question what the teacher says, just memorize it. It is so exciting to see the connections. Been teaching 22 years and I'm still finding them. Did you know all parabolas are similar–geometrically so. Just figured that one out recently. Good luck this year!
Thanks for the great advice Debora! I love the idea of having them construct the perpendicular bisector!
Oh, and feel free to use the pictures in your investigation!
I want to try this in my analytic geometry class. I wonder if this can also be appreciated by college students… Thanks! You're such an inspiration!
This is fantastic!! I was a little stressed about introducing focus and directrix to my students. I think that they will love this activity
Hope your students enjoyed it!
Also you can have your school order your squares of parchment paper you can use those too! They are perfectly sized for INBs! https://www.bakedeco.com/detail.asp?id=11638&trng=fgle&gclid=CjwKEAjw-ZqrBRDt_KjhjcbzhhISJAAlRGvlJgygJi3k_RszuIeq-4sMzIuXIVsMIxhNazUDuigCohoCD1fw_wcB
Thanks for the link!
This is AWESOME! What a great interactive activity! Can't wait to try it.
Let me know how it goes!
ever do projective geometry?
No, I haven't. Have any links to great introductions to projective geometry to share?
What an excellent way for students to understand what a focus and directrix is… I can't wait to use this on MOnday!
This is awesome! I am totally doing this with my students!